Holly Nilsson is the creator of Spend With Pennies, where she creates easy, comforting recipes made for real life. With a passion for nostalgic flavors and simplified techniques, Holly helps busy home cooks create delicious meals that always work. She is also the author of “Everyday Comfort,” which promises to inspire even more hearty, home-cooked meals. See more posts by Holly
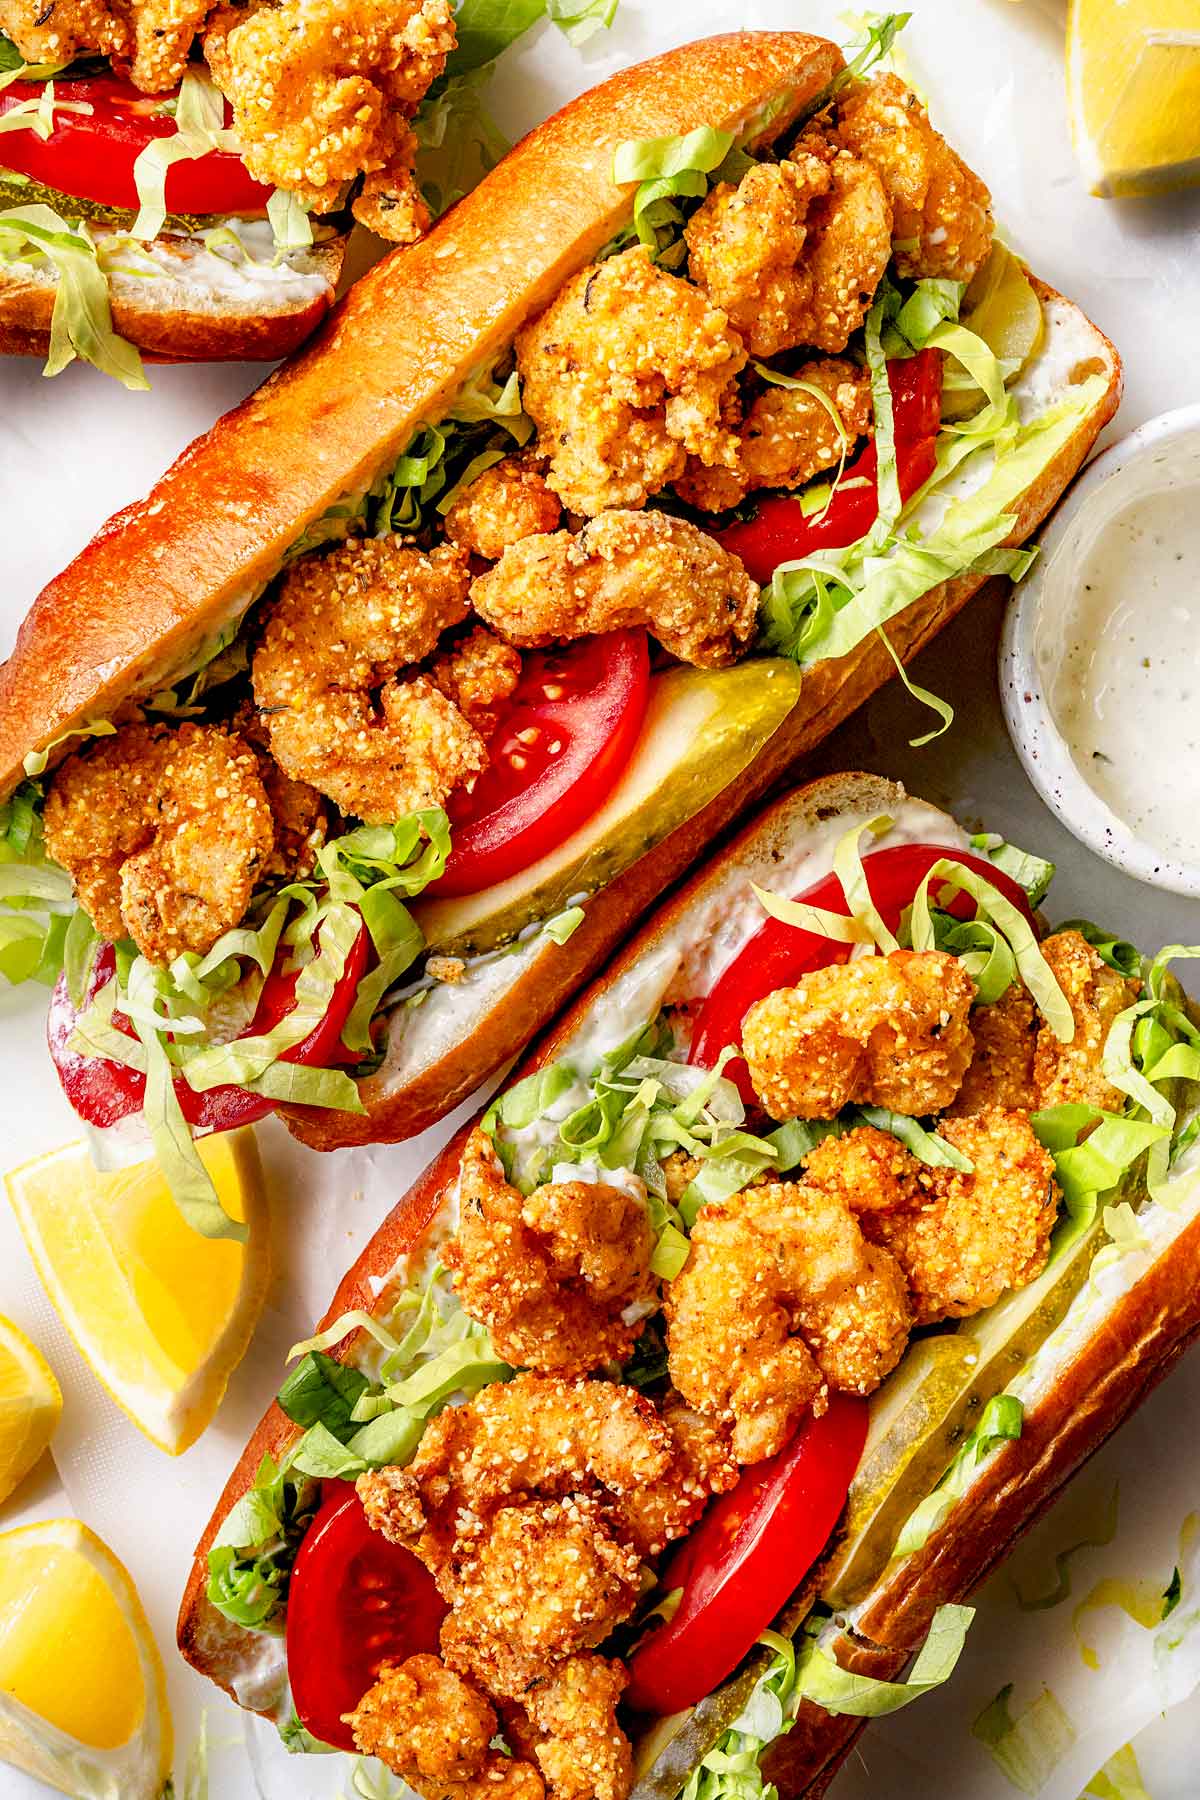
Juicy fried shrimp is loaded into crusty French bread rolls and piled high with lettuce, tomato, and pickles. Slather on some tartar sauce, and you’ve got the shrimp po boy sandwich of your dreams.
Eating deep fried shrimp po boys aren’t for the faint of heart (or high of blood pressure).
New Orleans’ legend has it that the sandwich was created to feed streetcar workers during a 1920s strike. The restaurant owner behind this cheap and cheerful sandwich would call out “here comes another poor boy!” whenever someone stopped by for a meal — and the name stuck.
A shrimp po boy is made by stuffing crusty French bread with succulent seasoned fried shrimp, lettuce, pickles, and tomato. A generous amount of tartar sauce is the rich and creamy glue that holds everything together.
I know you’d rather be sipping a Hurricane in The Big Easy right now, but until you can book that plane ticket this deep fried shrimp po boy will have to tide you over.
Heidi’s tips for recipe success
Season the shrimp well for maximum Cajun flavor. I use a homemade blend of paprika, basil, thyme, garlic, and cayenne but you can use a store-bought blend if you prefer.
Bread all of the shrimp and have them ready to go before you start frying. They take just a few minutes to cook perfectly golden and crispy on the outside, while staying tender and juicy on the inside.
Make assembly quick and easy by preparing the tartar sauce and toppings in advance then keep the shrimp warm in a 200°F oven until ready to serve.
What’s in This Recipe?
The full recipe, with amounts, can be found in the recipe card below.
Shrimp — choose medium-sized shrimp, which have 41 to 60 shrimp per pound
Yellow cornmeal — the secret ingredient to creating that crispy, crackly deep fried coating around the shrimp
All-purpose flour — browns beautifully in the oil and helps the cornmeal stick to the shrimp
Dried herbs and spices — the fried shrimp is loaded with Cajun flavor by using a combo of sweet paprika, basil, thyme, garlic, cayenne pepper, salt, and black pepper
Eggs — coat the shrimp in beaten egg before dredging in the seasoned flour mixture
Oil — choose a neutral oil with a high smoke point, otherwise it will burn and your shrimp will be no bueno (I always use canola oil)
French rolls — crusty on the outside, pillowy soft on the inside
Tartar sauce — instead of the more traditional remoulade, I slather the rolls with creamy homemade tartar sauce
Toppings — keep it simple with crunchy iceberg lettuce, sliced tomato, and dill pickles
Ingredient Swaps and Substitutions
Flour — a gluten-free all-purpose flour should work if you need to keep the shrimp gluten-free
French rolls — swap with a loaf of actual French bread (NOT a baguette)
Tartar sauce — use your favorite homemade or store-bought remoulade for a more traditional taste of New Orleans
Yellow cornmeal — can be substituted with white cornmeal, but the corn flavor won’t be as pronounced
How to Make Fried Shrimp Po Boys
Prep the shrimp. Shell, devein, and rinse the shrimp. Pat dry with paper towels to remove any excess moisture.
Prep the dipping stations. In one bowl, beat the eggs. In another bowl, combine the flour, cornmeal, and seasonings.
Preheat the frying oil. Pour about 3 inches of oil into a large Dutch oven. Turn the heat to medium-high and be patient while the oil warms up.
Heidi’s Tip: Shrimp can become tough and dry if overcooked. To avoid this, you need to fry them briefly at a high heat (350ºF).
Bread the shrimp. Working with just five or six shrimp at a time, dip them in the beaten egg and then dredge through the flour mixture. Place on a parchment-lined baking sheet, then repeat until the shrimp have all been breaded.
Deep fry until golden. Again, working with just a few shrimp at a time, slide them gently into the hot oil. Fry until golden brown, flipping only once. This should only take about 2 minutes total.
Heidi’s Tip: I like to transfer the fried shrimp to a 200ºF oven to keep them warm while I continue deep frying in small batches. This keeps them crispy without overcooking them.
Assemble and dig in. Pile the fried shrimp into toasted French bread rolls slathered with tartar sauce. Layer with as much lettuce, tomato, and pickle as you like.
Recipe Tips
Prep the tartar sauce and toppings in advance. To make assembly easier day-of, whisk together the tartar sauce a day or two ahead of time. Slice the tomato and lettuce and refrigerate in separate containers until ready to use.
Choose larg(er) shrimp. Medium shrimp are perfect for po boy sandwiches because they’re not so large that they take forever to fry, but they’re also not so small that they overcook easily.
Use a cooking thermometer. Without one, you run the risk of frying the shrimp in oil that’s too cold (the breading would soak up the oil and become gummy rather than crispy) or too hot (the breading would likely burn and the shrimp might overcook).
Deep fry and eat ASAP. Fried shrimp po boys are best straight from the hot oil. Over time, the shrimp lose their crispiness and it’s tough to revive that crunch later on.
Storage Tips
Store the po boy fixings and shrimp in separate containers. The shrimp will last up to 5 days in the fridge, but they’ll lose their crispy texture fairly quickly.
What to Serve With Shrimp Po Boys
If you make this recipe, please let me know! Leave a ⭐️⭐️⭐️⭐️⭐️ rating below, leave a comment to tell us what you think, and tag me on Instagram @foodiecrush.
Shrimp Po Boys
Juicy fried shrimp is loaded into crusty French bread rolls and piled high with lettuce, tomato, and pickles. Slather on some tartar sauce, and you’ve got the shrimp po boy sandwich of your dreams.
Rinse the shrimp and pat dry. In a medium bowl, mix the cornmeal, flour, sait, paprika, basil, thyme, garlic, cayenne pepper, and black pepper. in another bowl, whisk the eggs until blended.
In a large Dutch oven or heavy saucepan, pour the oil to 3 inches deep and heat over medium-high until oil registers 350°F with a cooking thermometer.
Preheat the oven to 200°F. Line a rimmed baking sheet with parchment paper and place a large wire rack on another baking sheet and set next to the stove. Dip 5-6 shrimp into the eggs, then toss in the flour mixture, shaking off the excess. Place on the prepared baking sheet. Repeat with the remaining shrimp.
In batches to avoid crowding, slide the shrimp into the hot oil and deep-fry until golden brown, turning once, about 2 minutes. Use a wire skimmer to fish the fried shrimp from the oil, place them on the baking sheet lined rack, and place in the oven to keep warm. Repeat with the remaining shrimp.
Remove the shrimp from the oven and toast the rolls, split side up, 1-2 minutes. Spread the cut side of each roll half with tartar sauce. Layer the roll with lettuce, tomato, shrimp, pickles, and serve.
More Popular Southern Recipes
We send good emails. Subscribe to FoodieCrush and have each post plus exclusive content only for our subscribers delivered straight to your e-mail box.
As always, thank you for reading and supporting companies I partner with, which allows me to create more unique content and recipes for you. There may be affiliate links in this post of which I receive a small commission. All opinions are always my own.
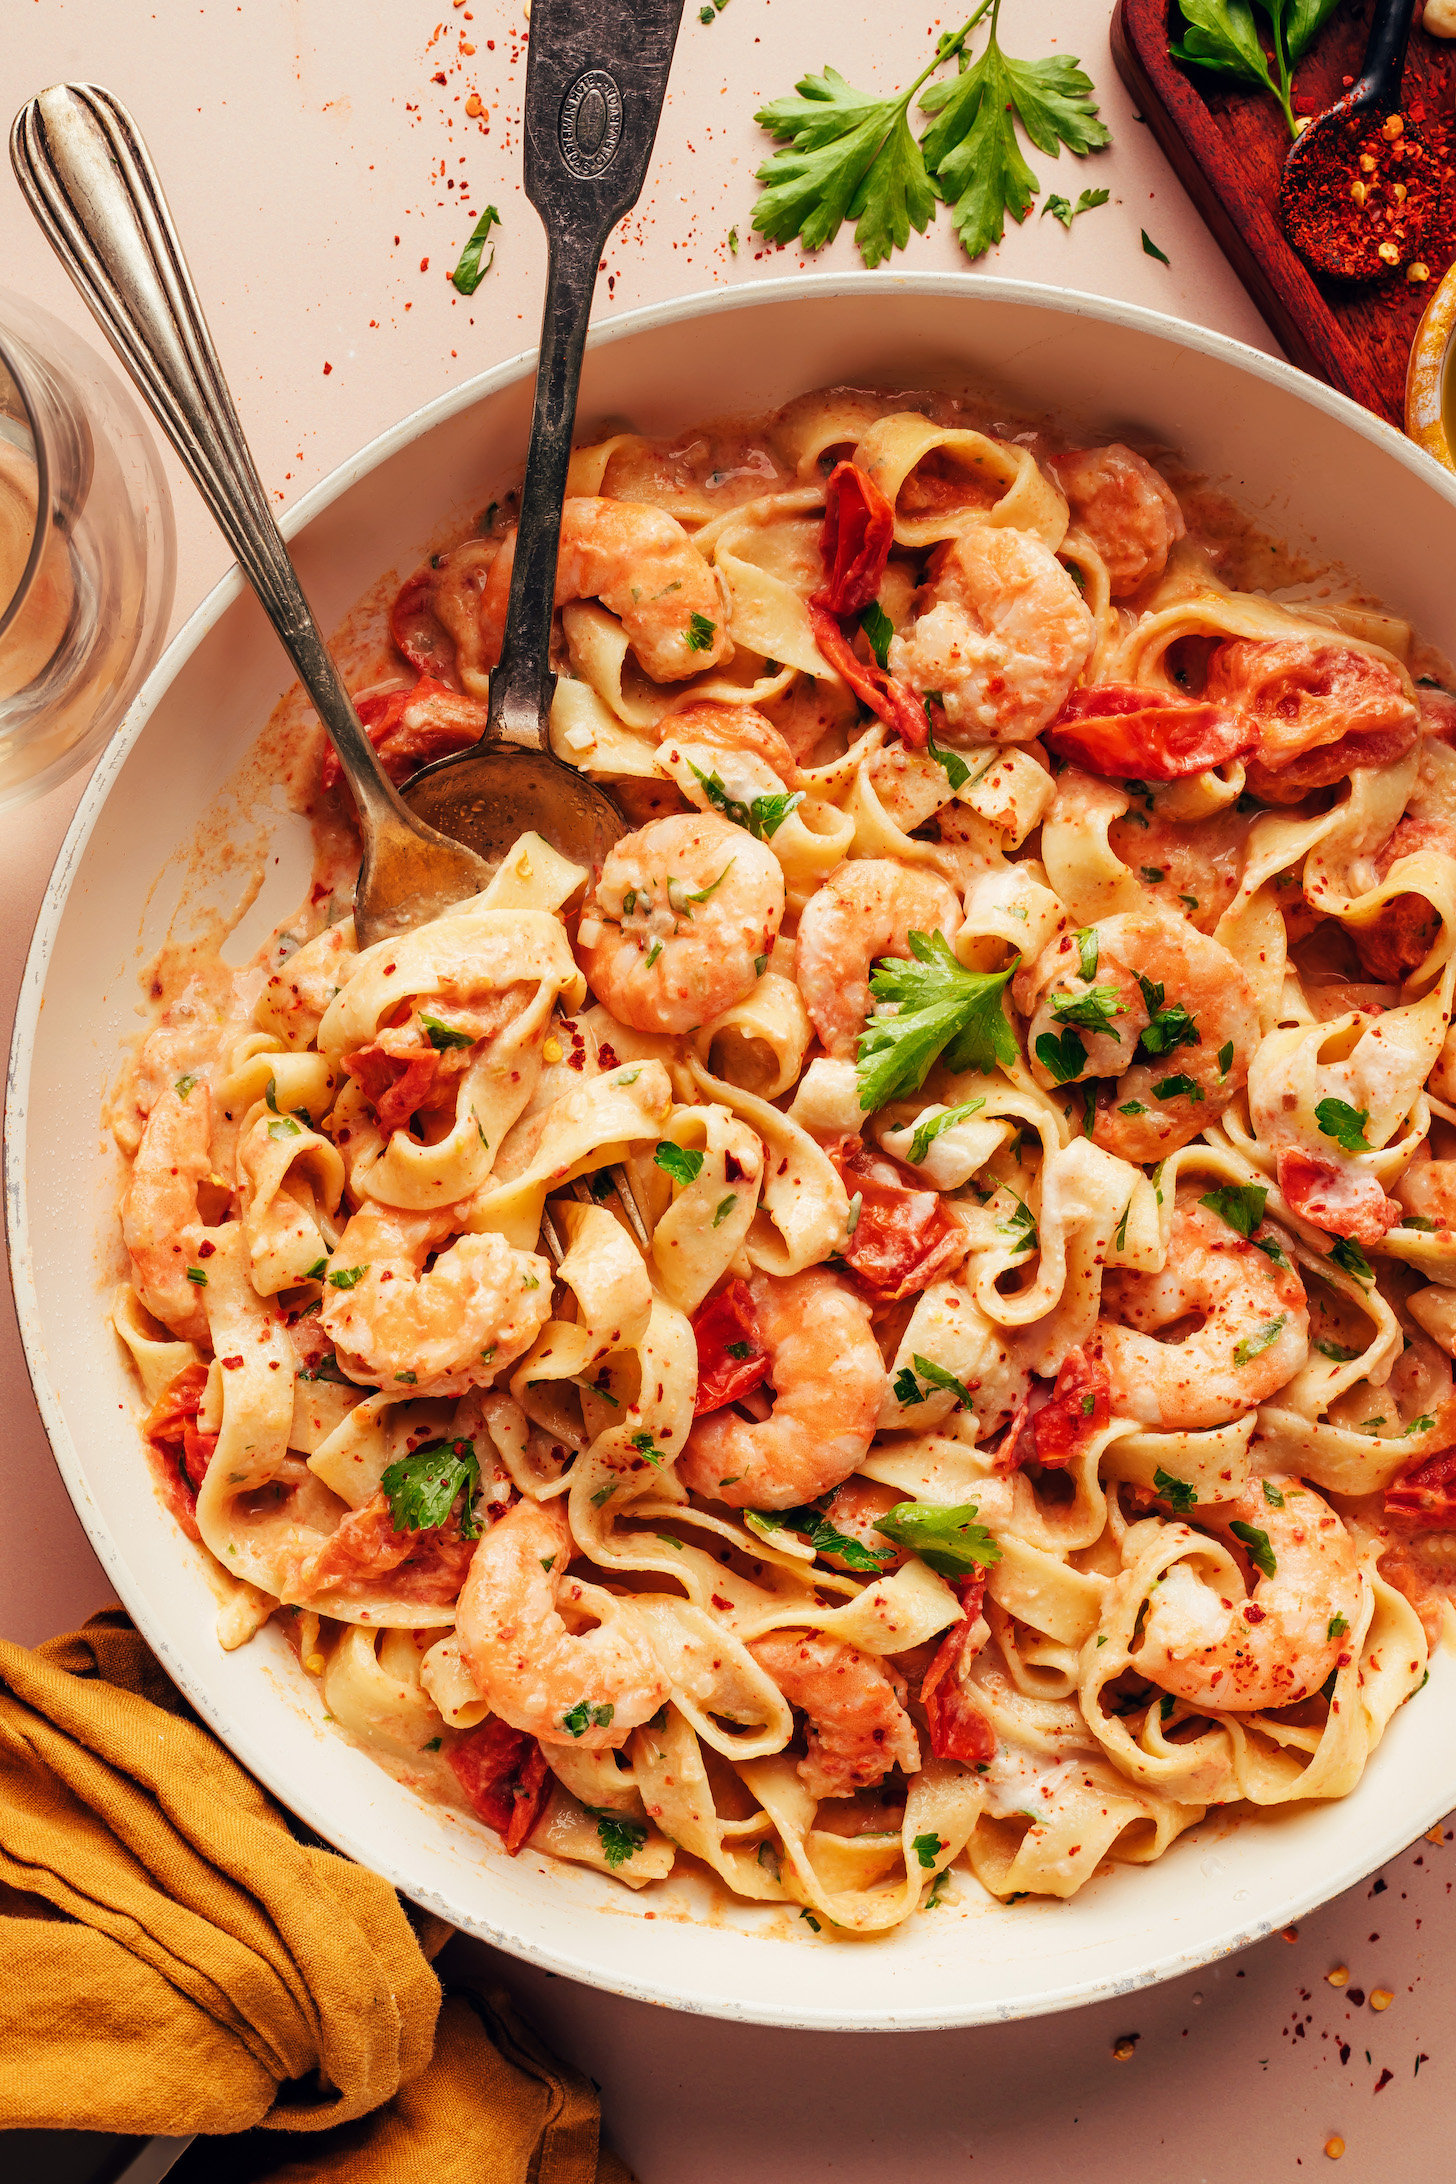
Weekend flavor meets weeknight ease: 30-minute Tuscan-style shrimp pasta! This CREAMY, dairy-free dish is rich, garlicky, and bursting with bright tomato flavor.
It’s impressive enough to wow any guests but simple enough that you’ll want to make it again and again! Let us show you how it’s done!
How to Make Dairy-Free Shrimp Pasta
This EASY shrimp pasta starts with cooking your favorite pasta (we like gluten-free fettuccine) and soaking some cashews for dairy-free creaminess.
Next come the perfectly cooked shrimp! The trick is to sauté shallots, garlic, and red pepper flakes for flavor, then add raw shrimp and cook until pink and slightly curled up. The timing will depend on the size of the shrimp and other factors, but we find 2 minutes per side is usually the magic number for shrimp that’s tender, fully cooked, and not rubbery.
Then it’s on to the bright, creamy tomato sauce! Inspired by our fan-favorite Creamy Italian White Bean Skillet Meal, cherry tomatoes cook with white wine, red pepper flakes, and salt until the tomatoes are soft and burst open.
Then we add homemade cashew cream and the sauce becomes creamy and develops a thick, luxurious texture!
Lastly, add in your cooked pasta, garnish with fresh parsley or basil, and dinner is served!
We can’t wait for you to try this shrimp pasta! It’s:
Creamy Bright Saucy Rich Flavorful Comforting & Easy to make!
1(8 oz.) box fettuccine or spaghetti(we like Jovial fettuccine // ensure gluten-free as needed)
1lbraw shrimp*, peeled and deveined with tails removed(thaw and pat dry if frozen*)
2Tbspolive oil
2mediumshallots, minced(2 shallots yield ~80 g or 1/2 cup)
6-8medium clovesgarlic, minced(6-8 cloves garlic yield ~1/4 cup or 50 g)
3/4-1tspred pepper flakes
5cupscherry tomatoes, left whole
3/4cupdry white wine(we like a lighter white like Sauvignon Blanc // or sub water)
3/4-1tspsea salt(plus more to taste)
1/2cupchopped fresh parsley (or basil)
Add cashews to a heatproof bowl and cover with hot water by at least 1-2 inches. Let them soak while you get started on everything else. Soaking makes the cashew cream neutral-flavored and extra creamy, but (in a pinch) you can skip this step if using a powerful blender such as a NutriBullet or Vitamix.
Bring a large pot of water to a boil. Once boiling, add your pasta and cook according to the package directions.
If using frozen shrimp, see notes for defrosting instructions.
Meanwhile, heat a large skillet over medium heat. Once hot, add olive oil, shallots, and garlic and cook for 3-4 minutes until softened. Add the red pepper flakes and cook until fragrant (~1 minute). Add the shrimp and cook for 1-3 minutes on each side — until they turn pink and curl up (2 minutes per side is usually perfect!). They will cook quickly and cook time will depend on how hot your pan is. We like to let them curl up completely on the first side, then flip and cook until the underside is pink. To avoid under cooking, you want them to have a vibrant pink color (not translucent) and feel firm when pierced with a fork, but avoid overcooking or they will get rubbery! Remove the shrimp from the pan, place them on a plate, and set aside.
Add the cherry tomatoes, white wine, and salt to the same (relatively empty) pan (it’s okay if the sautéed shallots and garlic remain). Cover and cook on medium-high heat for 5-10 minutes or until the tomatoes have burst.
Meanwhile, make the cashew cream. Drain the cashews and add them to a high-speed blender with the water. Blend on high until smooth and creamy.
Remove the lid from the tomatoes and use the back of your spoon or spatula to further break them down. Turn the heat to medium-low and stir in the cashew cream. Let the sauce cook down for about 2 more minutes. Taste and adjust flavor as needed, adding more salt for overall flavor or red pepper flakes for heat. Add the shrimp back into the mixture and stir to coat. Turn off the heat and stir in the chopped parsley (or basil) and cooked pasta (keep separate if preparing in advance).
Serve immediately garnished with dairy-free parmesan cheese, red pepper flakes, or extra parsley and/or basil (all optional). Best served fresh but can be stored in an airtight container in the refrigerator for up to 2-3 days. Not freezer friendly.
*We prefer using raw (vs. cooked) shrimp because it absorbs the flavors of the garlic and shallots while cooking. If using pre-cooked shrimp, we suggest adding it in step 3 very briefly (~20-30 seconds), then remove from the heat and proceed. *To quickly defrost frozen shrimp, place in a colander and run cold water over it for ~3 minutes, until no longer frozen. If it’s not defrosted (soft) after 3 minutes, allow to soak in cold water for up to 20-30 minutes, checking it and replacing the water after 5-10 minutes. Once thawed, drain and pat dry with a paper towel. *This dish pairs well with roasted broccoli, red bell pepper, and onion. To prepare the veggies, cut 1 head of broccoli into florets, 1/2 red bell pepper into 2-inch pieces, and 1/4 onion into 1/2-inch slices. Add to a parchment-lined baking sheet and toss with 1 Tbsp olive oil. Sprinkle generously with garlic powder, salt, and black pepper. Bake at 400 F (204 C) for ~15 minutes, until the veggies are tender and browned on the edges. *Inspired by our Creamy Italian White Bean Skillet Meal. *Nutrition information is a rough estimate calculated with Jovial brown rice fettuccine, the lesser amount of red pepper flakes, and without optional ingredients.