Holly Nilsson is the creator of Spend With Pennies, where she creates easy, comforting recipes made for real life. With a passion for nostalgic flavors and simplified techniques, Holly helps busy home cooks create delicious meals that always work. She is also the author of “Everyday Comfort,” which promises to inspire even more hearty, home-cooked meals. See more posts by Holly
Published: · Modified: by Lucy · This post may contain affiliate links · 1 Comment
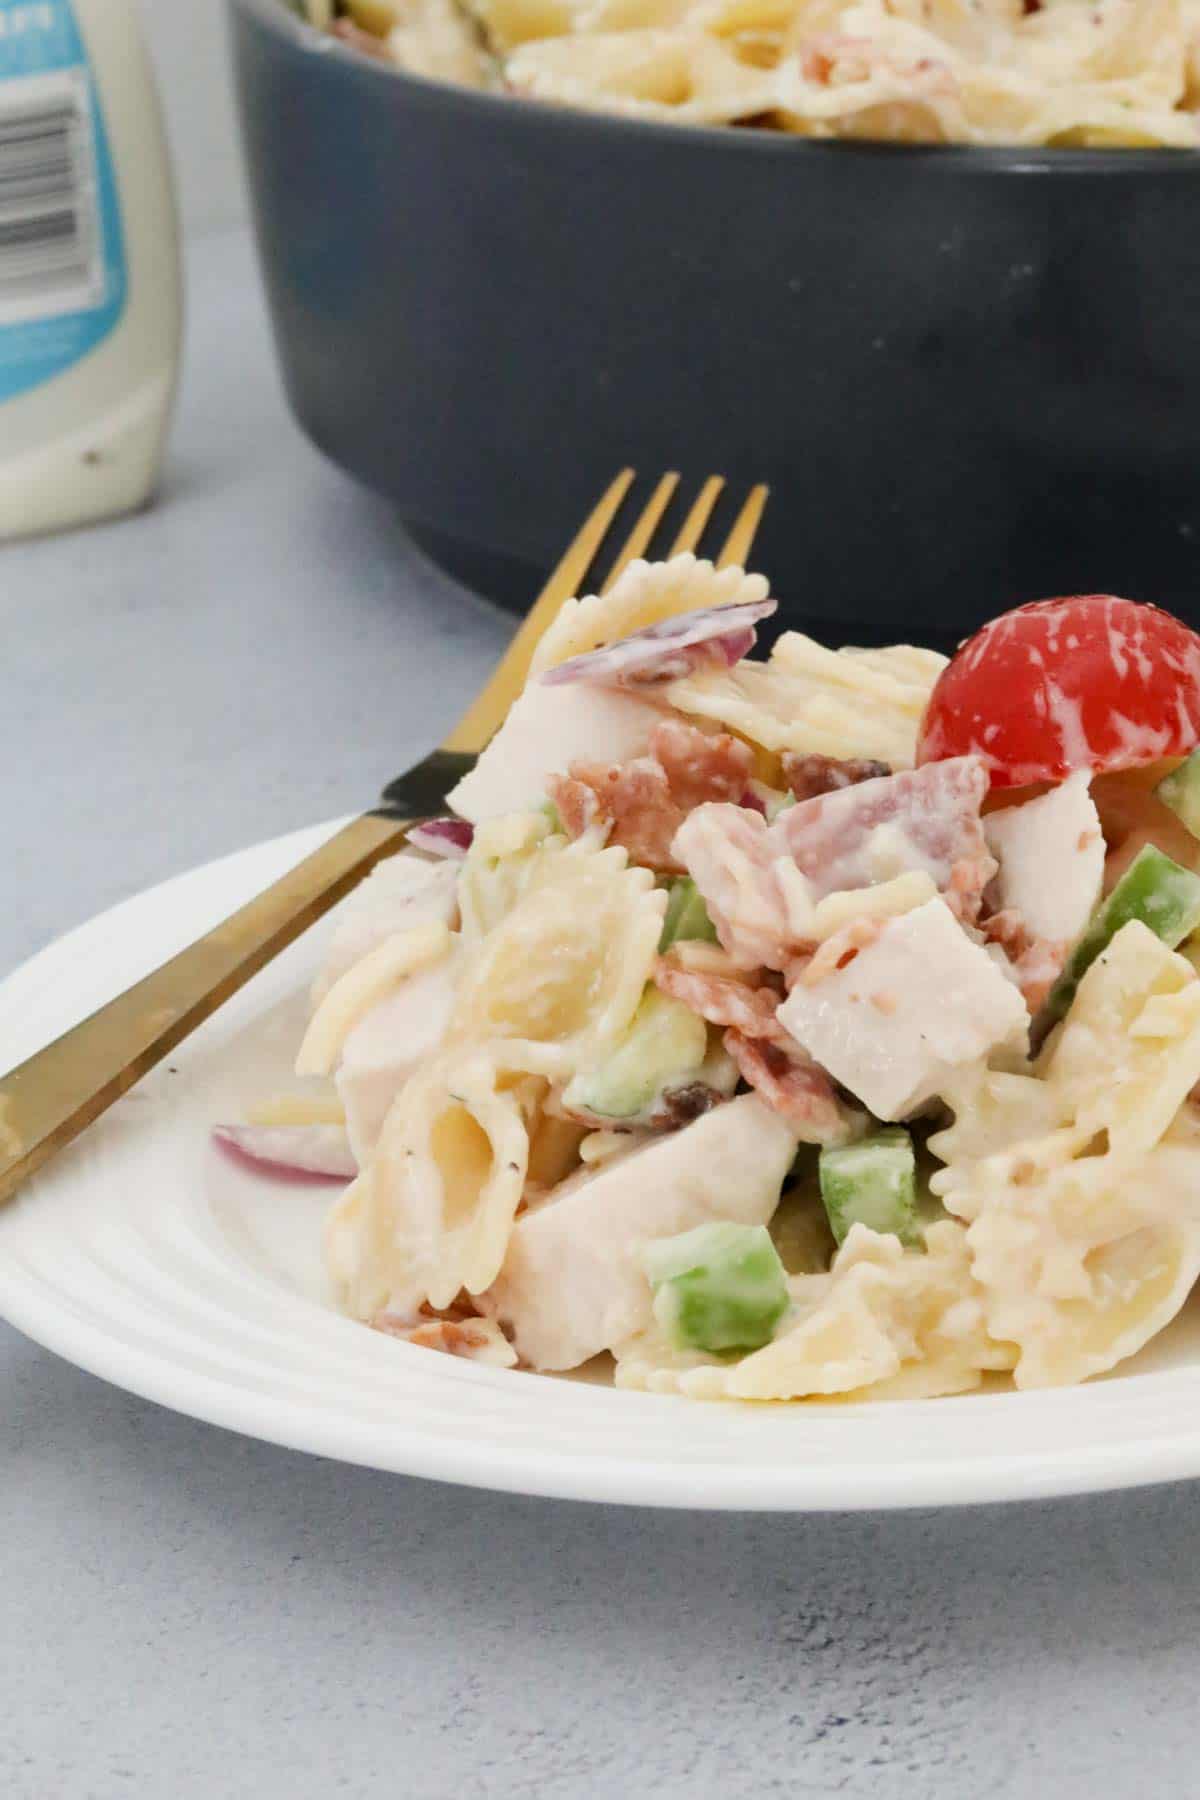
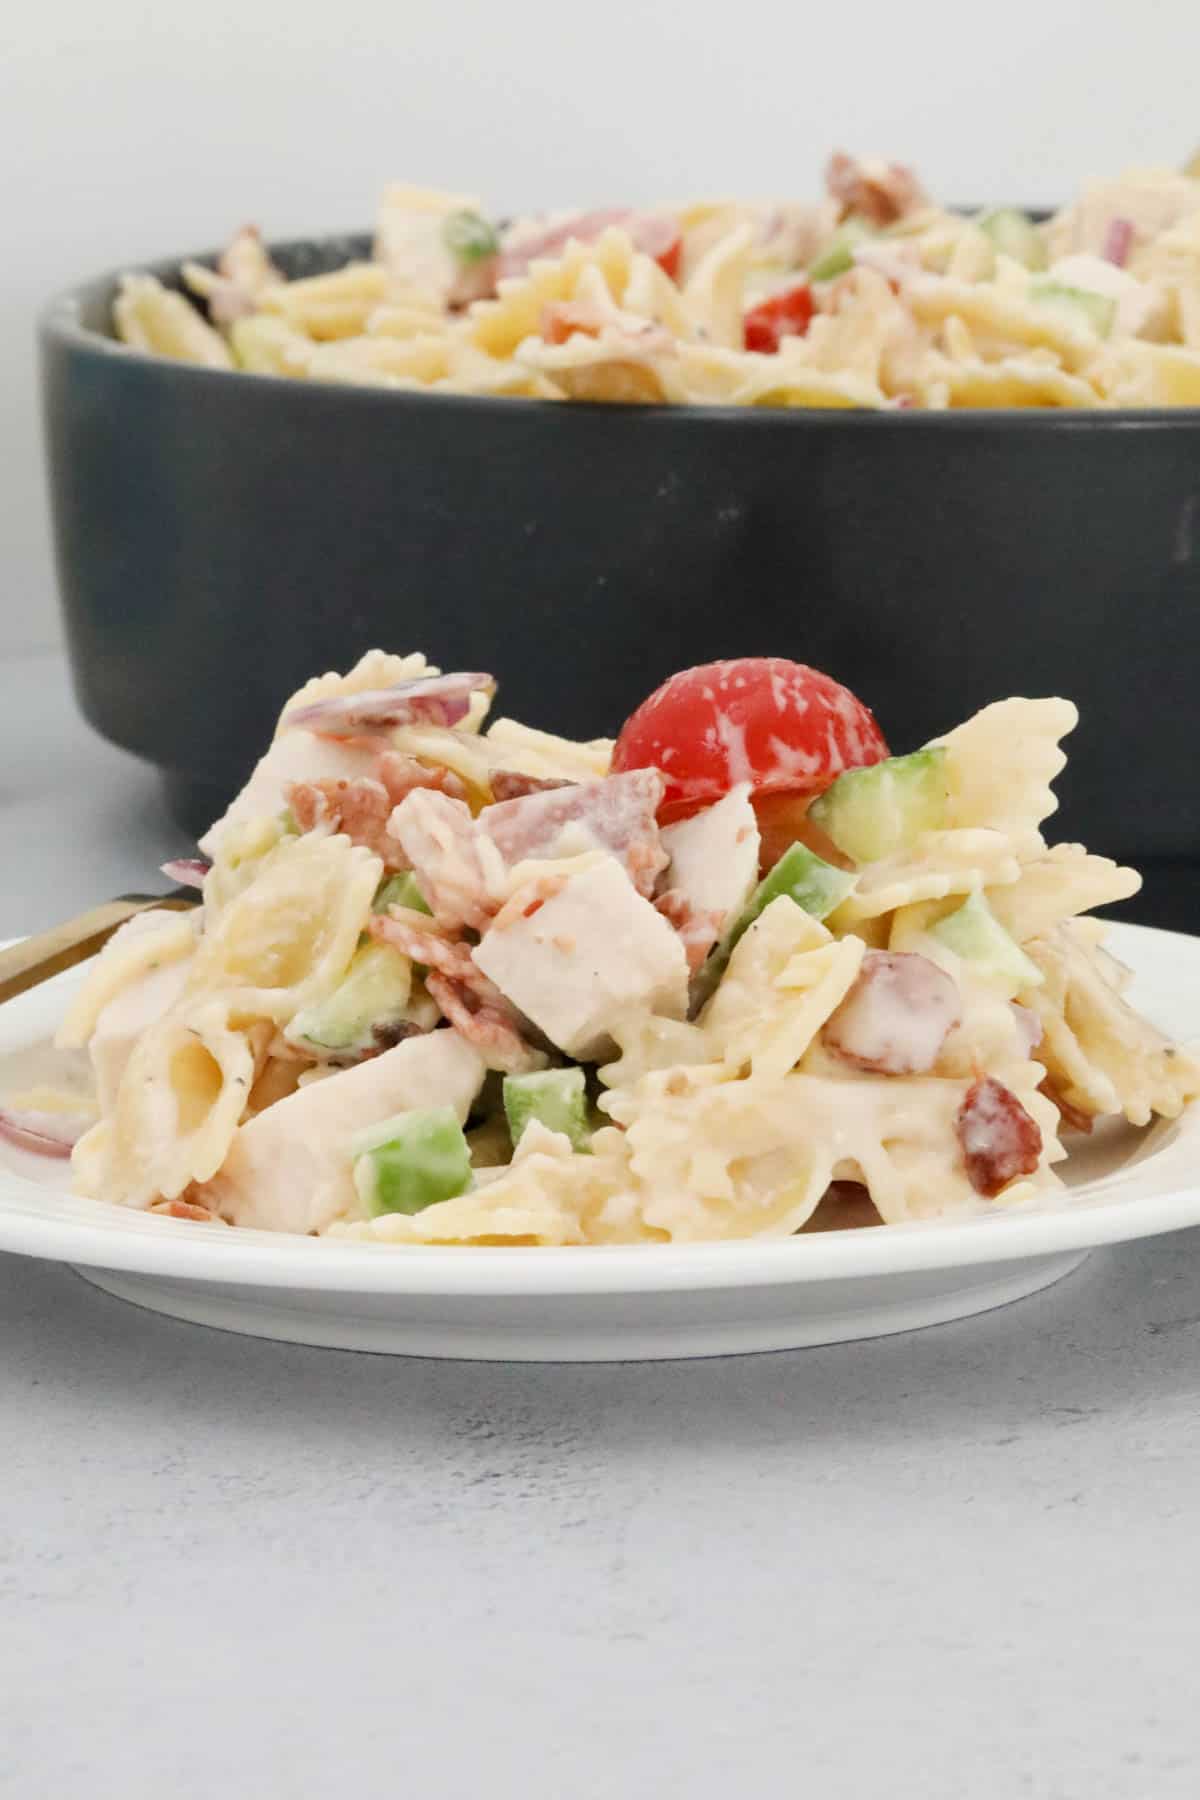
A delicious and creamy Chicken Bacon Ranch Pasta Salad packed full of flavour! This easy-to-make recipe is a perfect side dish for BBQs, family gatherings, or a quick midweek meal.
It’s a guaranteed crowd-pleaser, loaded with tender chicken, crispy bacon, fresh vegetables, and a creamy ranch dressing.
The beauty of this pasta salad recipe is that you can prepare many of the ingredients ahead of time. Then, you can simply combine the salad and dress it prior to serving.
Quick & Easy – Ready in just 25 minutes, this easy pasta salad recipe is a great option for those busy days when you need something tasty but fuss-free.
Full of Flavour – The smoky bacon, juicy chicken, and creamy ranch dressing make every bite a delight.
Great for Meal Prep – Make it ahead of time and store it in the fridge for an easy grab-and-go meal.
Versatile – Easily adaptable to suit your preferences with different veggies or protein options.
What You Need
Note: Scroll to the recipe card at the bottom for the ingredients quantities and full detailed method.
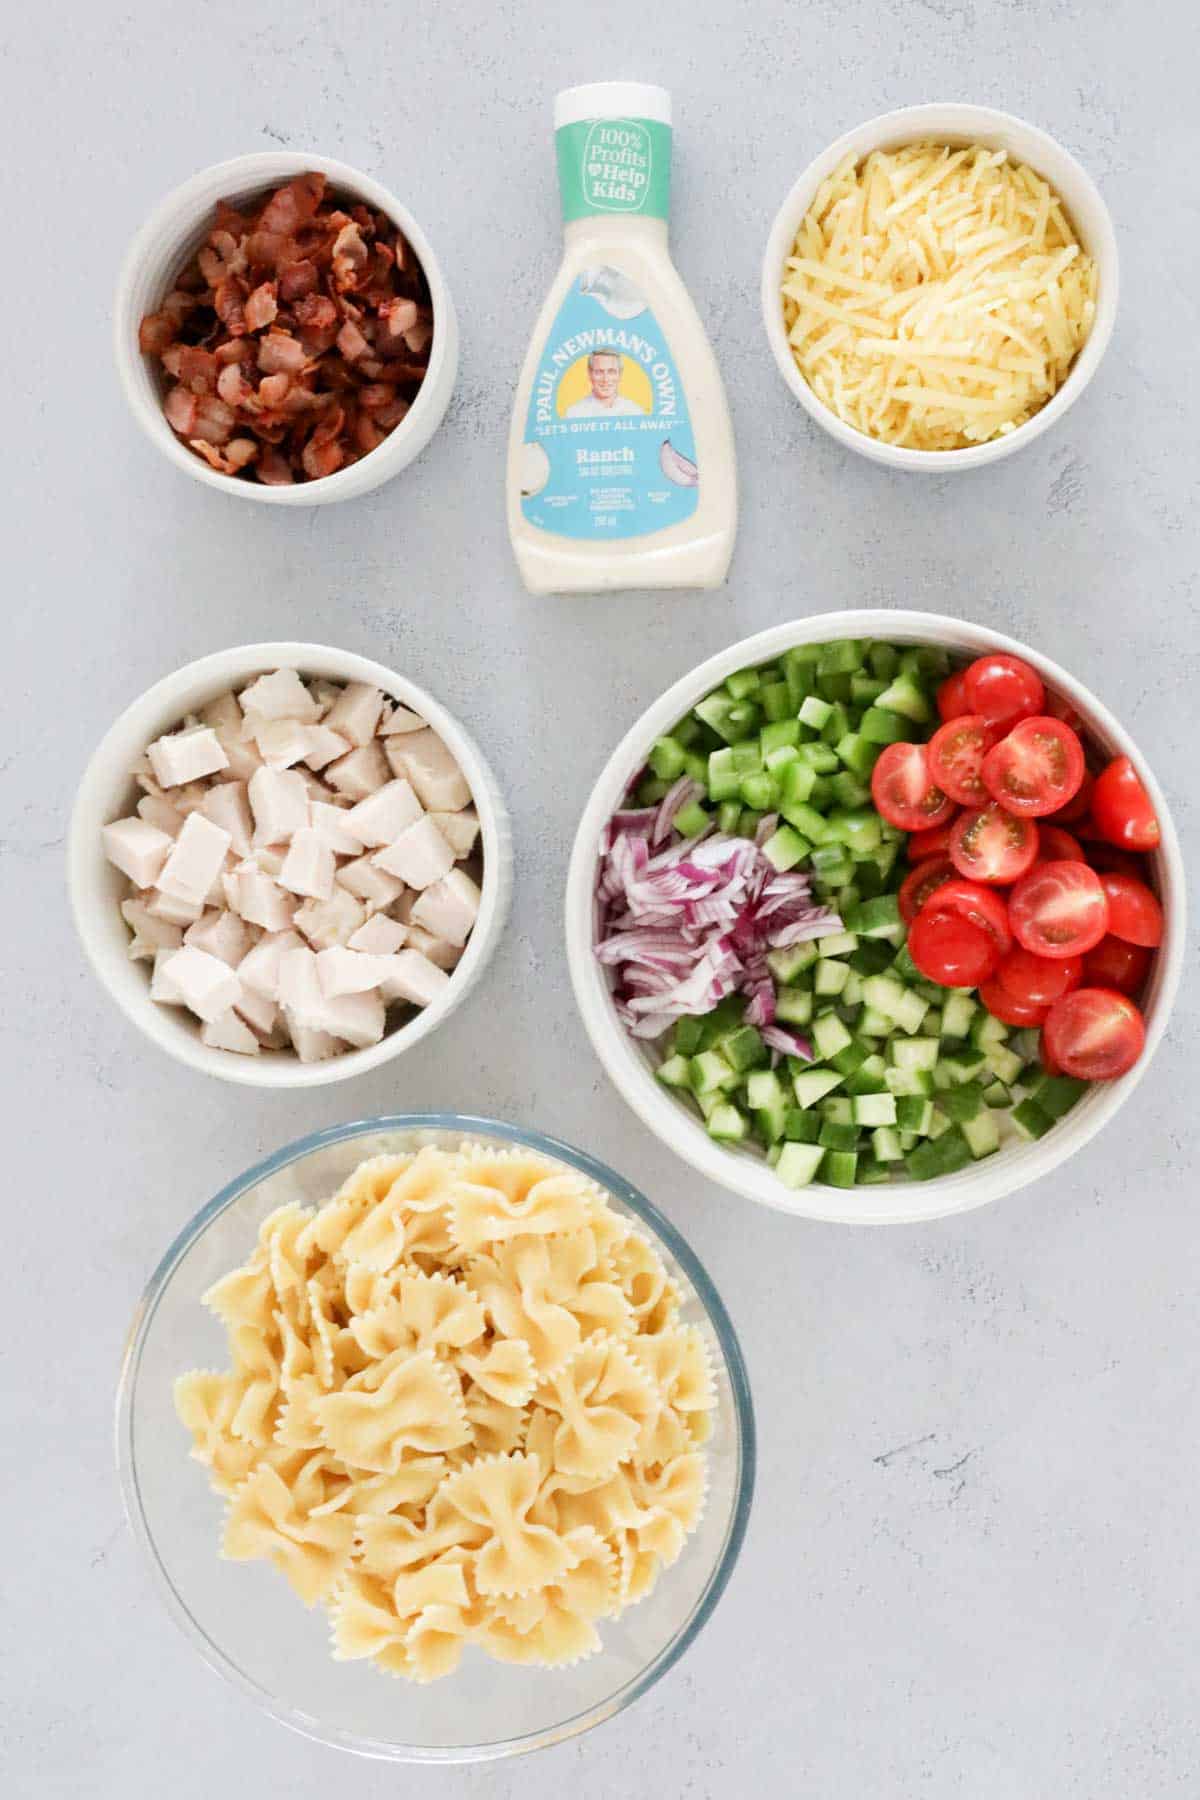
Ingredients
Uncooked pasta – Bow-tie or spirals work best as they hold the dressing well and add a great texture.
Streaky bacon – Crispy bacon adds a delicious smoky, savoury crunch to the salad.
Cooked chicken breast or thigh – A great way to use leftover chicken or BBQ rotisserie chicken for extra convenience.
Red onion – Adds a mild bite and a touch of colour to the salad. You could substitute with spring onions / green onions too.
Cherry tomatoes – These juicy, sweet tomatoes balance out the savoury elements perfectly.
Cucumber – Fresh and crunchy, cucumber helps to keep the salad light and refreshing.
Green capsicum – Adds a subtle sweetness and crisp texture. Capsicums are also known as bell peppers in the US.
Grated cheddar or tasty cheese – A rich and creamy element that ties the dish together.
Ranch dressing—The star of the dish, store-bought ranch dressing adds creaminess and flavour to every bite. Alternatively, you could make your own ranch dressing using sour cream, mayonnaise, herbs, and seasonings.
Salt and pepper – To taste, season, and enhance all the flavours.
Equipment Required
To make this recipe, you’ll need:
A large pot for cooking the pasta
A colander for draining the pasta
A frying pan for cooking the bacon
A sharp knife and chopping board for prepping the ingredients
A large bowl for combining everything
A spoon or spatula for mixing the salad.
Step-by-Step Instructions
Note: Scroll to the recipe card at the bottom for the ingredients quantities and full detailed method.
Step 1: Prepare The Pasta
Start by bringing a large pot of salted water to a boil. Cook the pasta according to the packet instructions until it’s just al dente. Drain the cooked pasta and rinse it under cold water to cool it down and prevent sticking. Set aside.
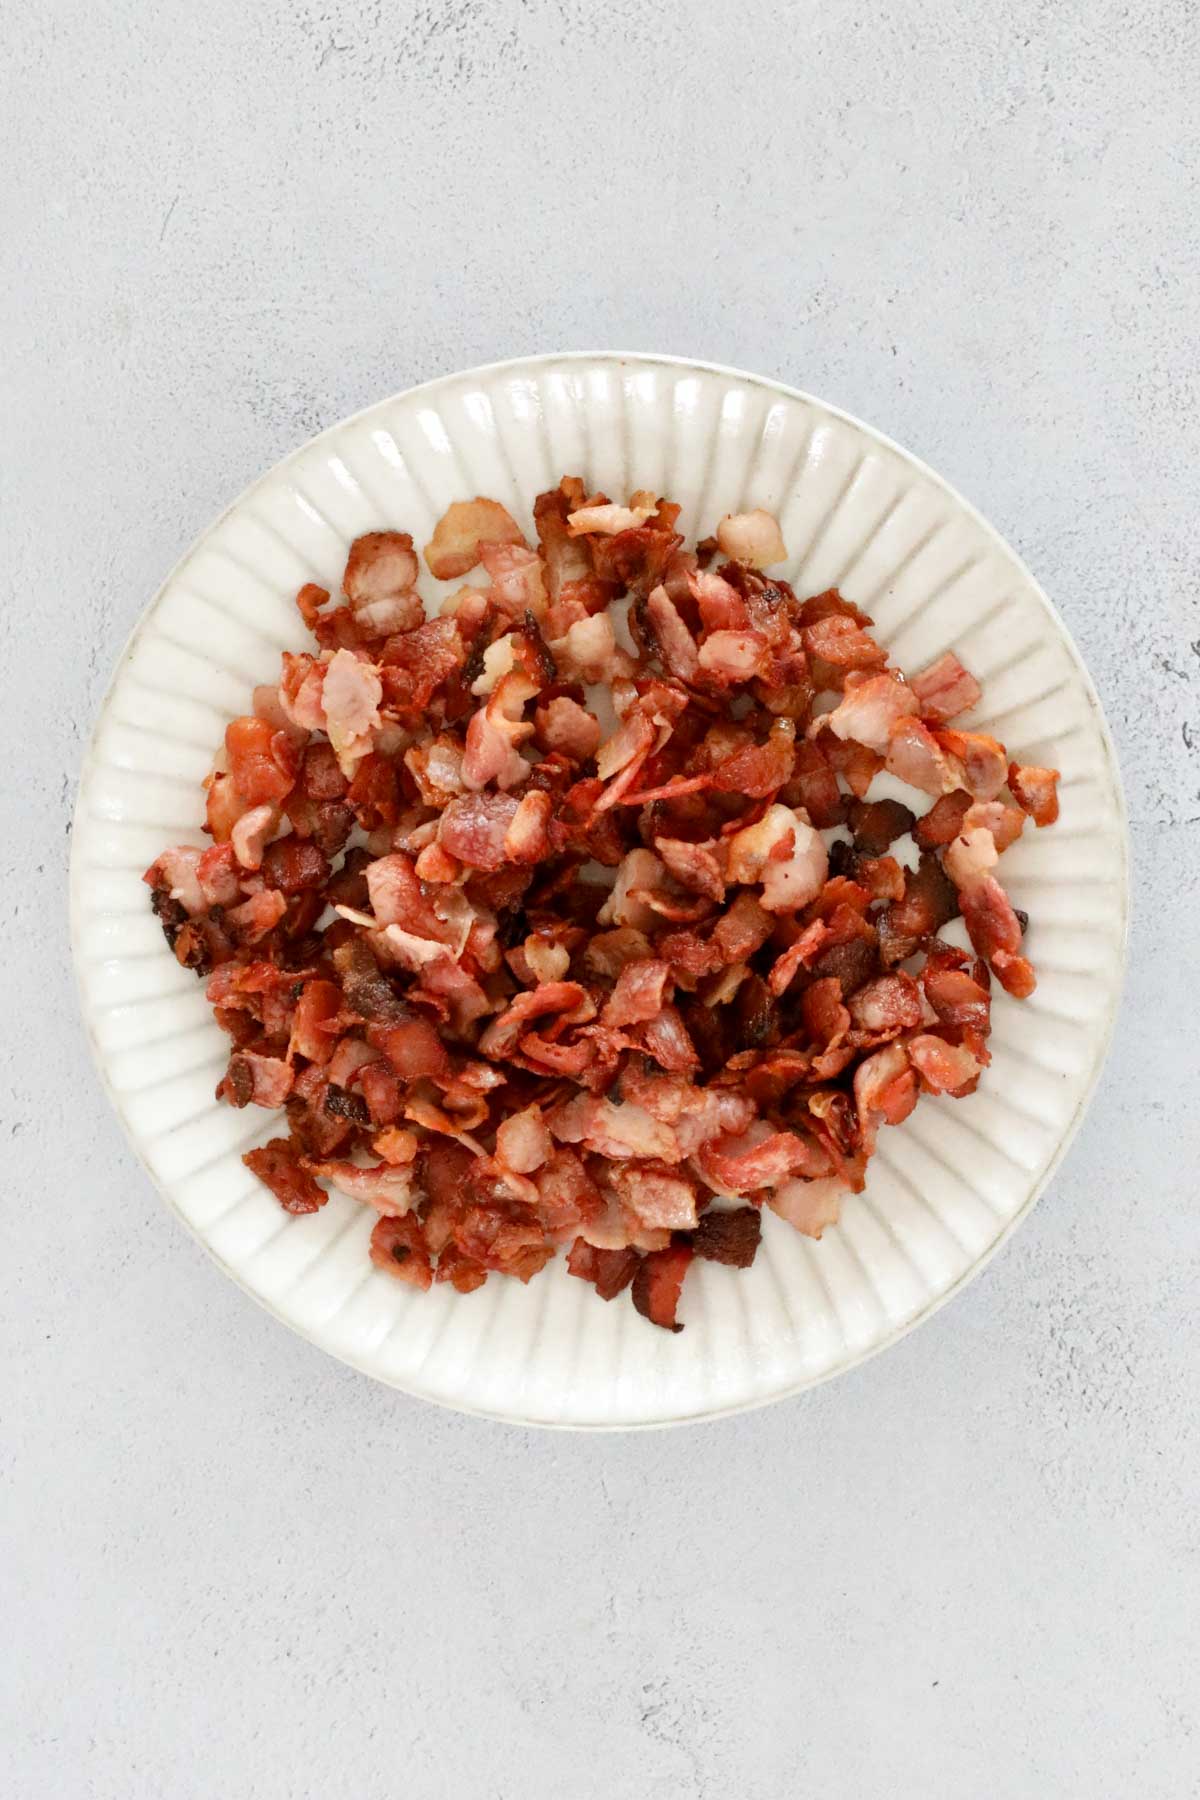
Step 2: Cook The Bacon
Heat a frying pan over medium heat and add the diced bacon. Cook until crispy and golden brown, stirring occasionally to ensure even cooking. Once done, transfer the bacon to a plate lined with paper towels to drain any excess oil.
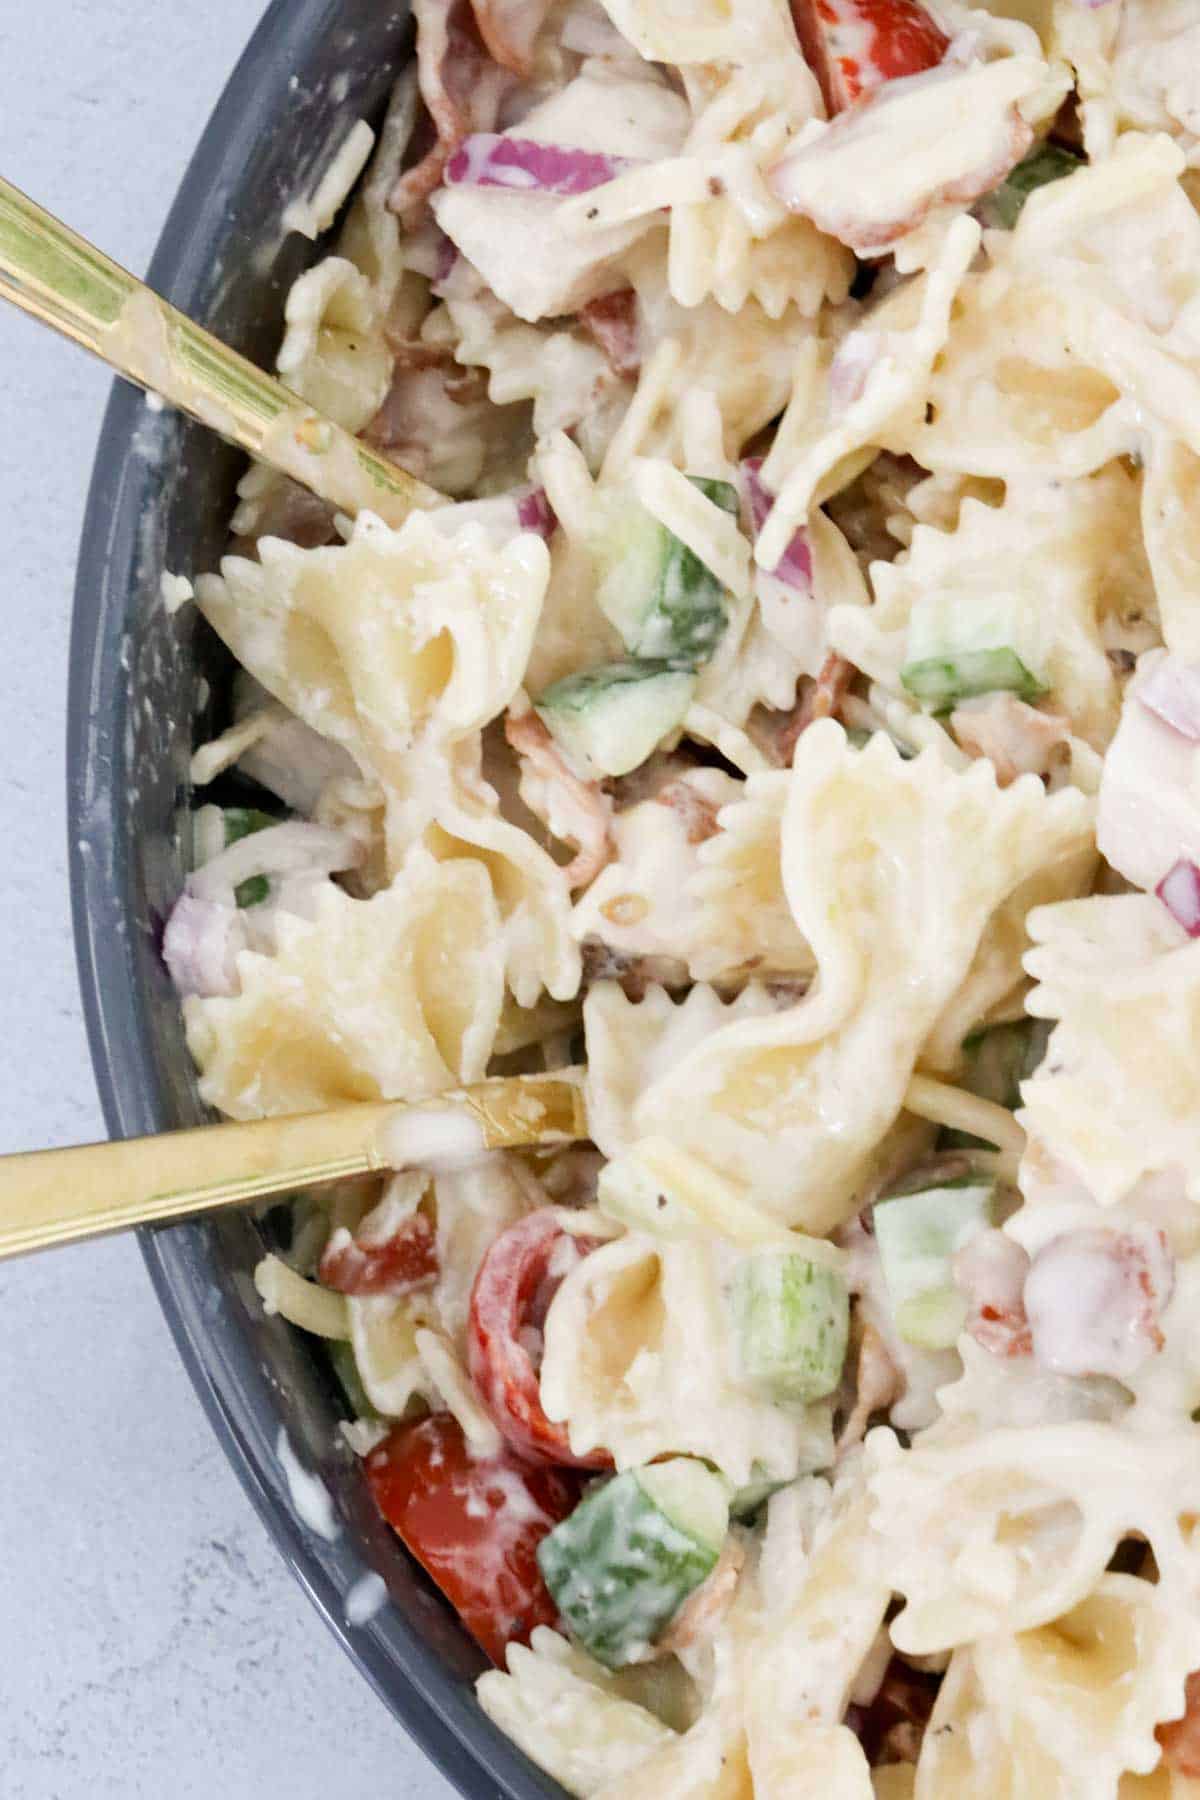
Step 3: Mix The Ingredients
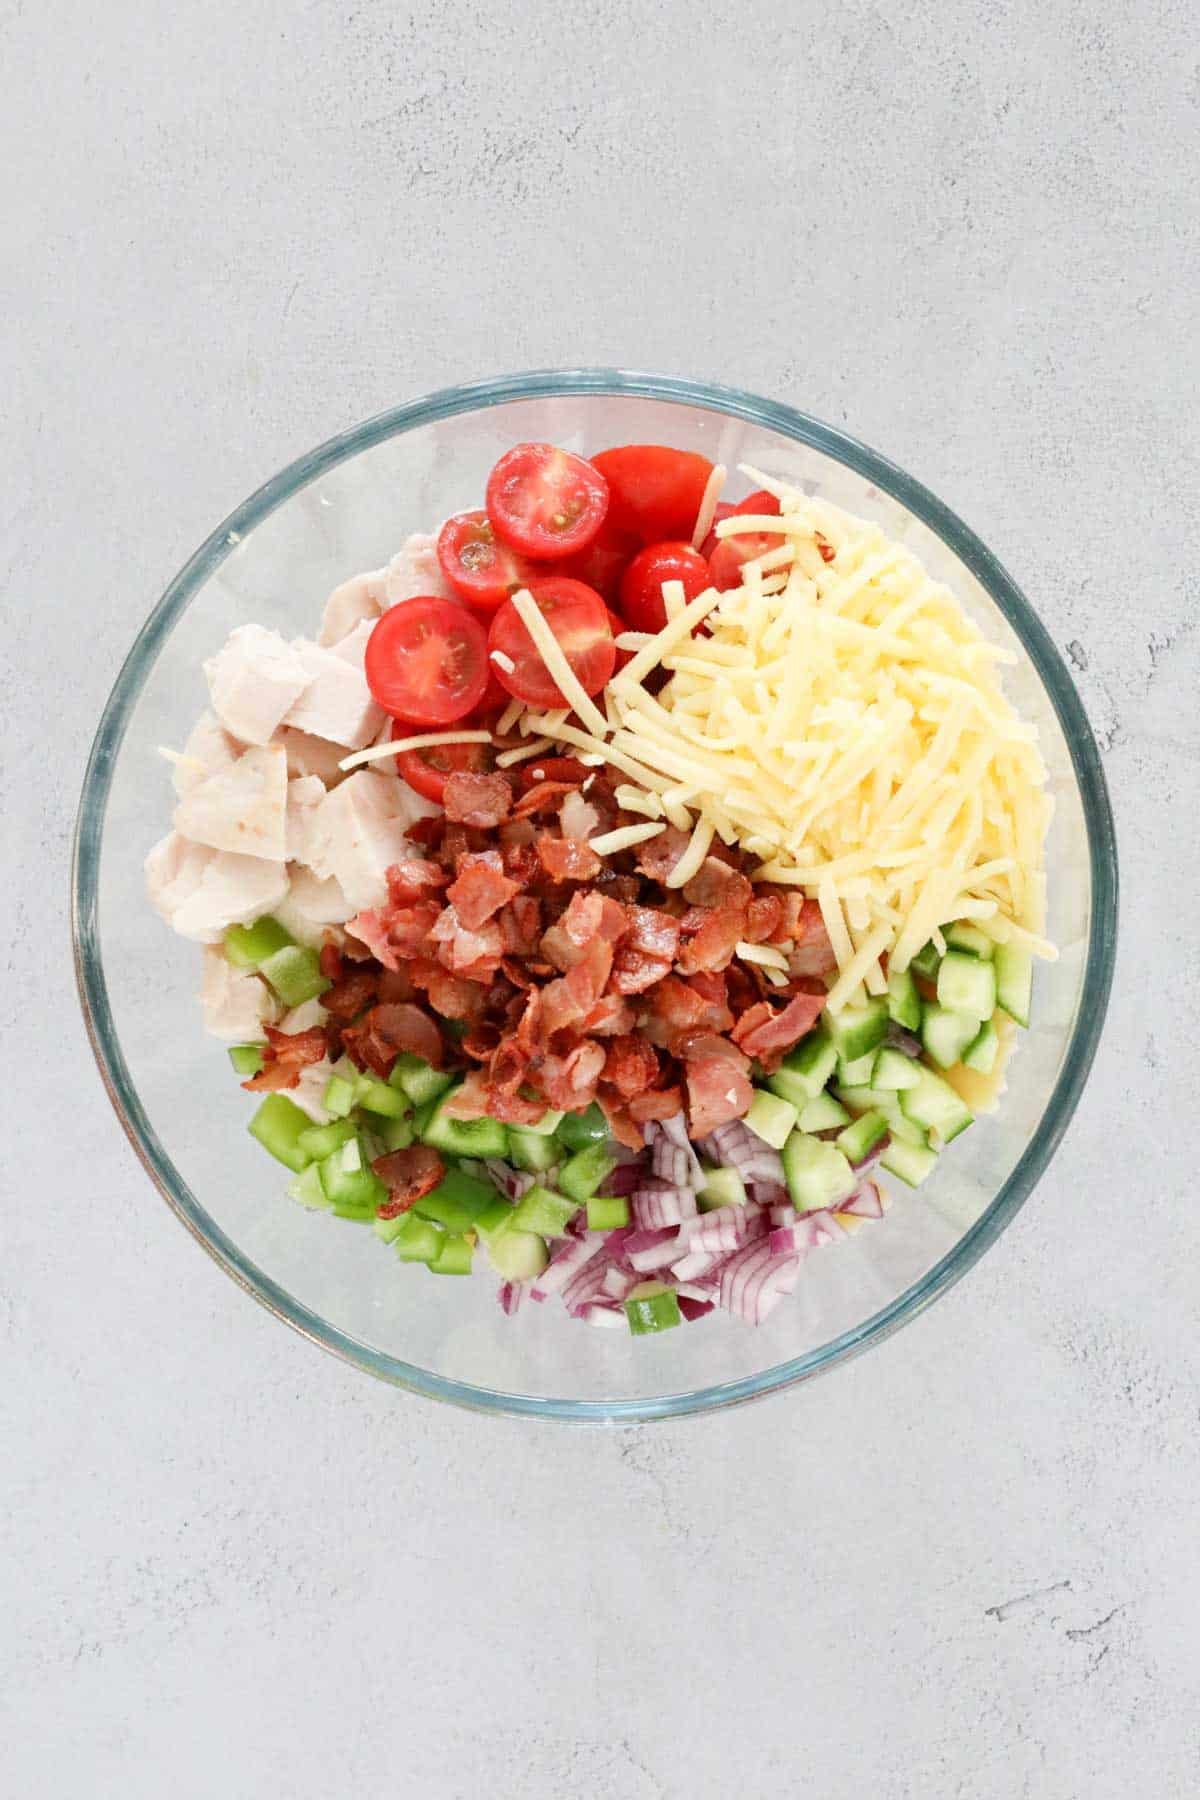
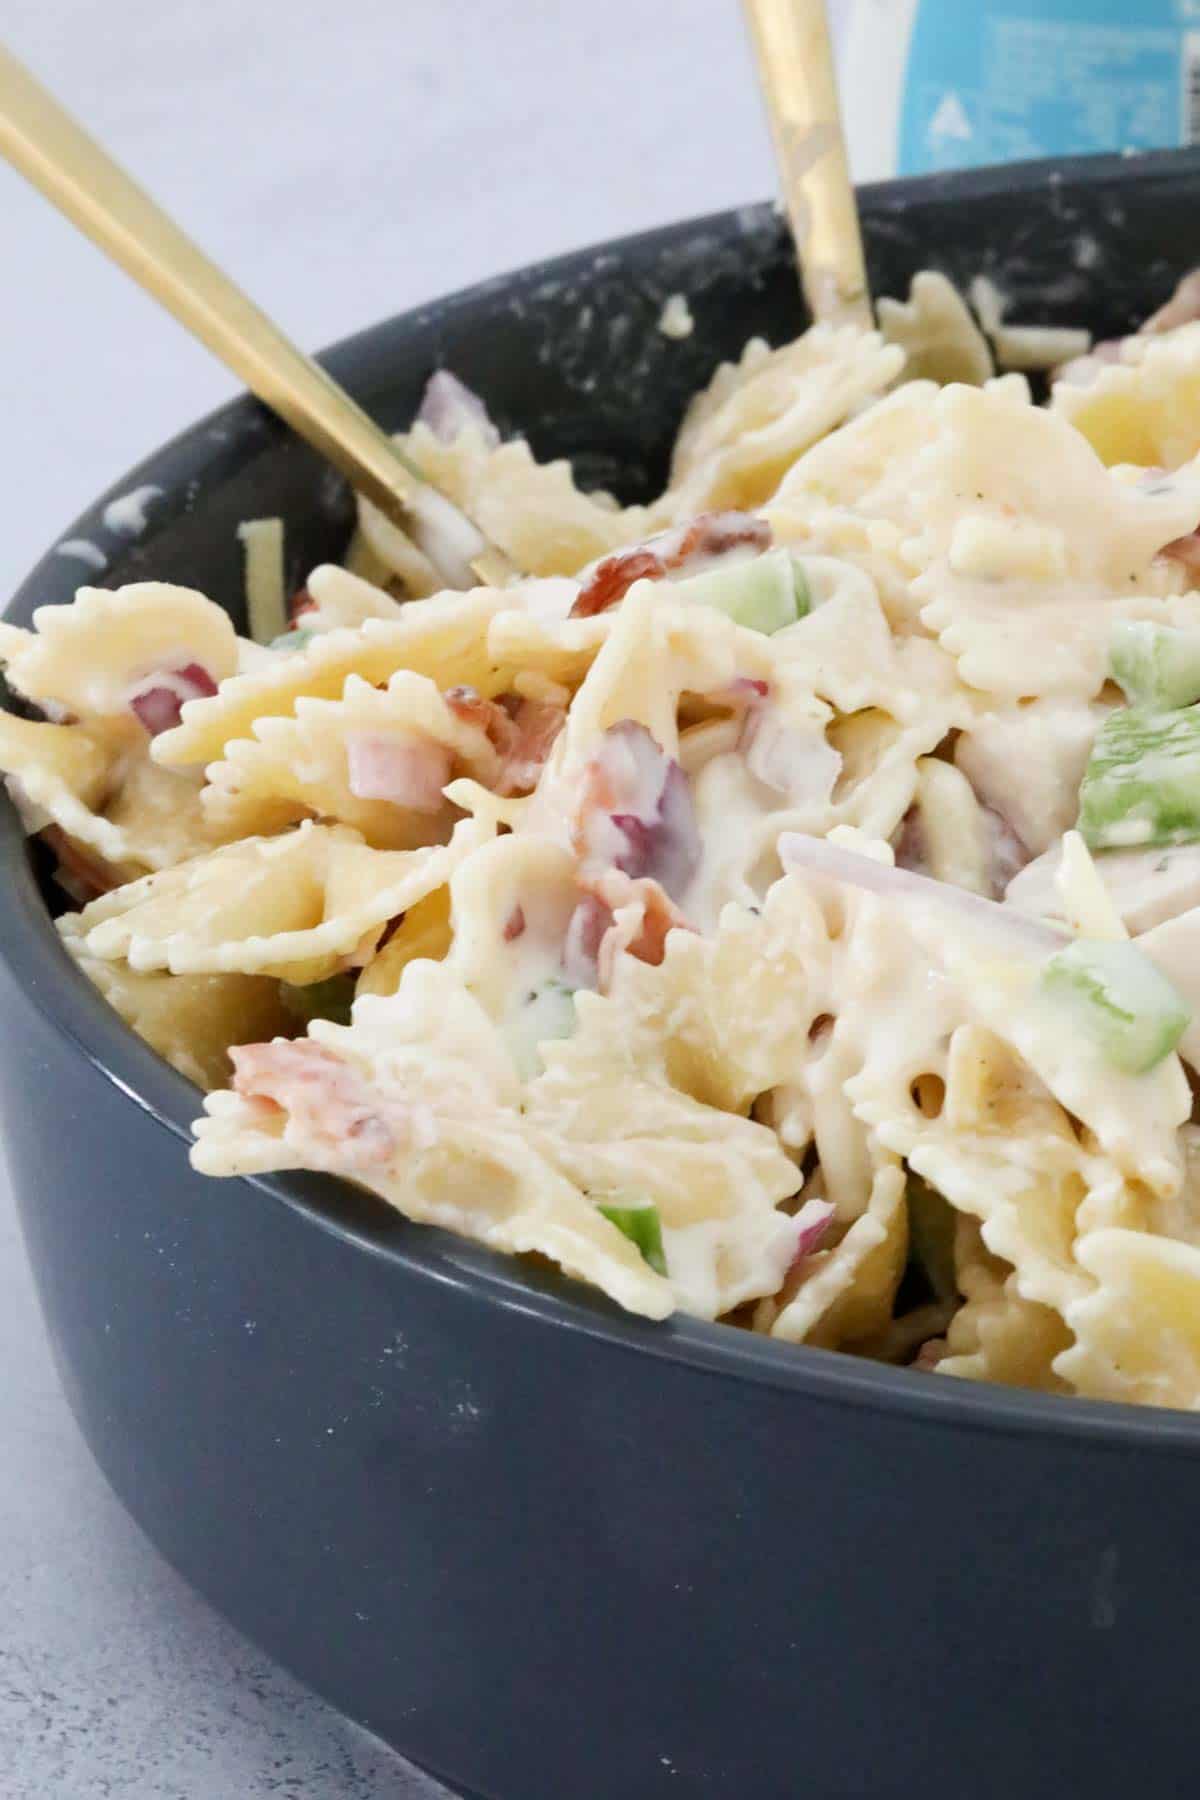
In a large mixing bowl, combine the cooled pasta with the crispy bacon, diced chicken, red onion, cherry tomatoes, cucumber, green capsicum, and grated cheese.
Toss all ingredients to evenly distribute, reserving a little cooked bacon and grated cheese to sprinkle over the top.
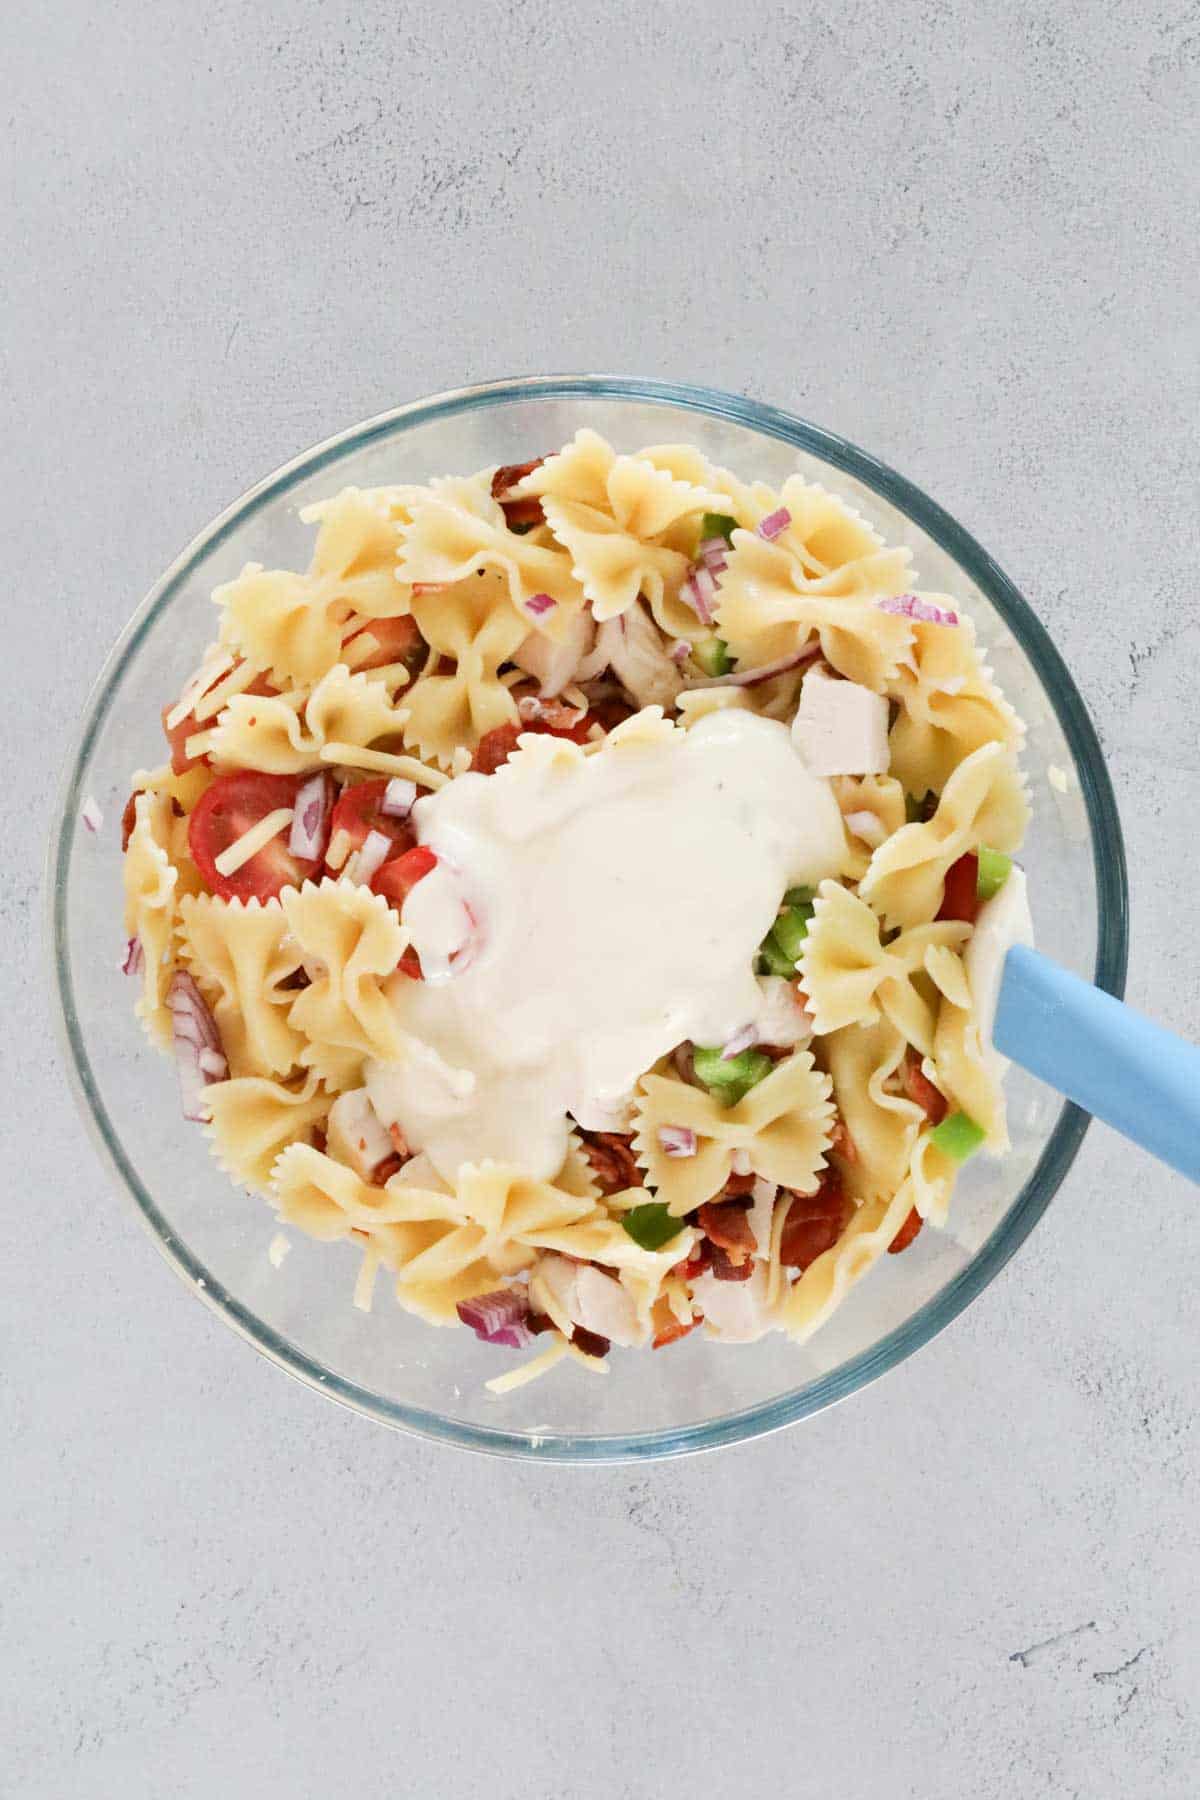
Step 4: Add Dressing
Drizzle three-quarters of the ranch dressing over the salad and gently mix until everything is well coated.
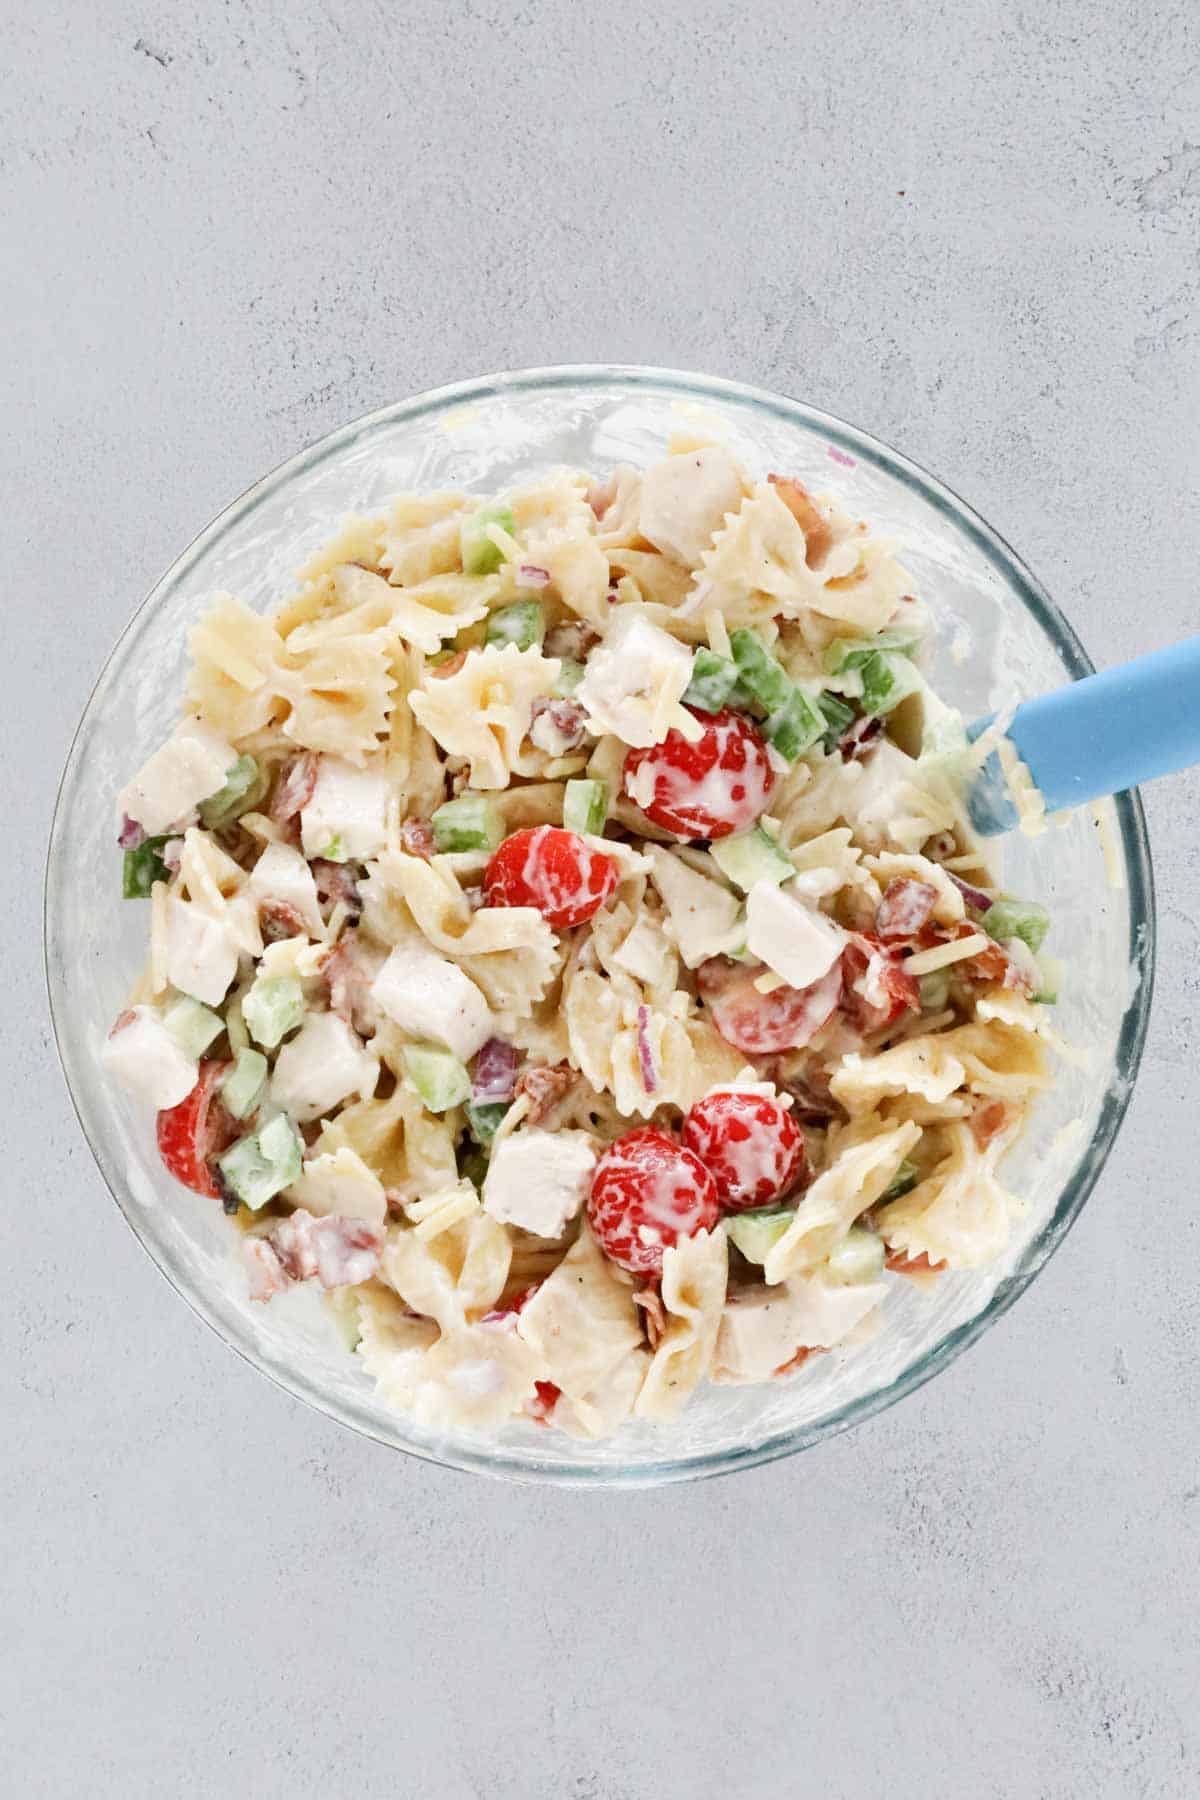
Taste and add extra dressing if needed. Season your chicken pasta salad with salt and pepper to your liking.
Finally, sprinkle the reserved bacon and cheese on top.
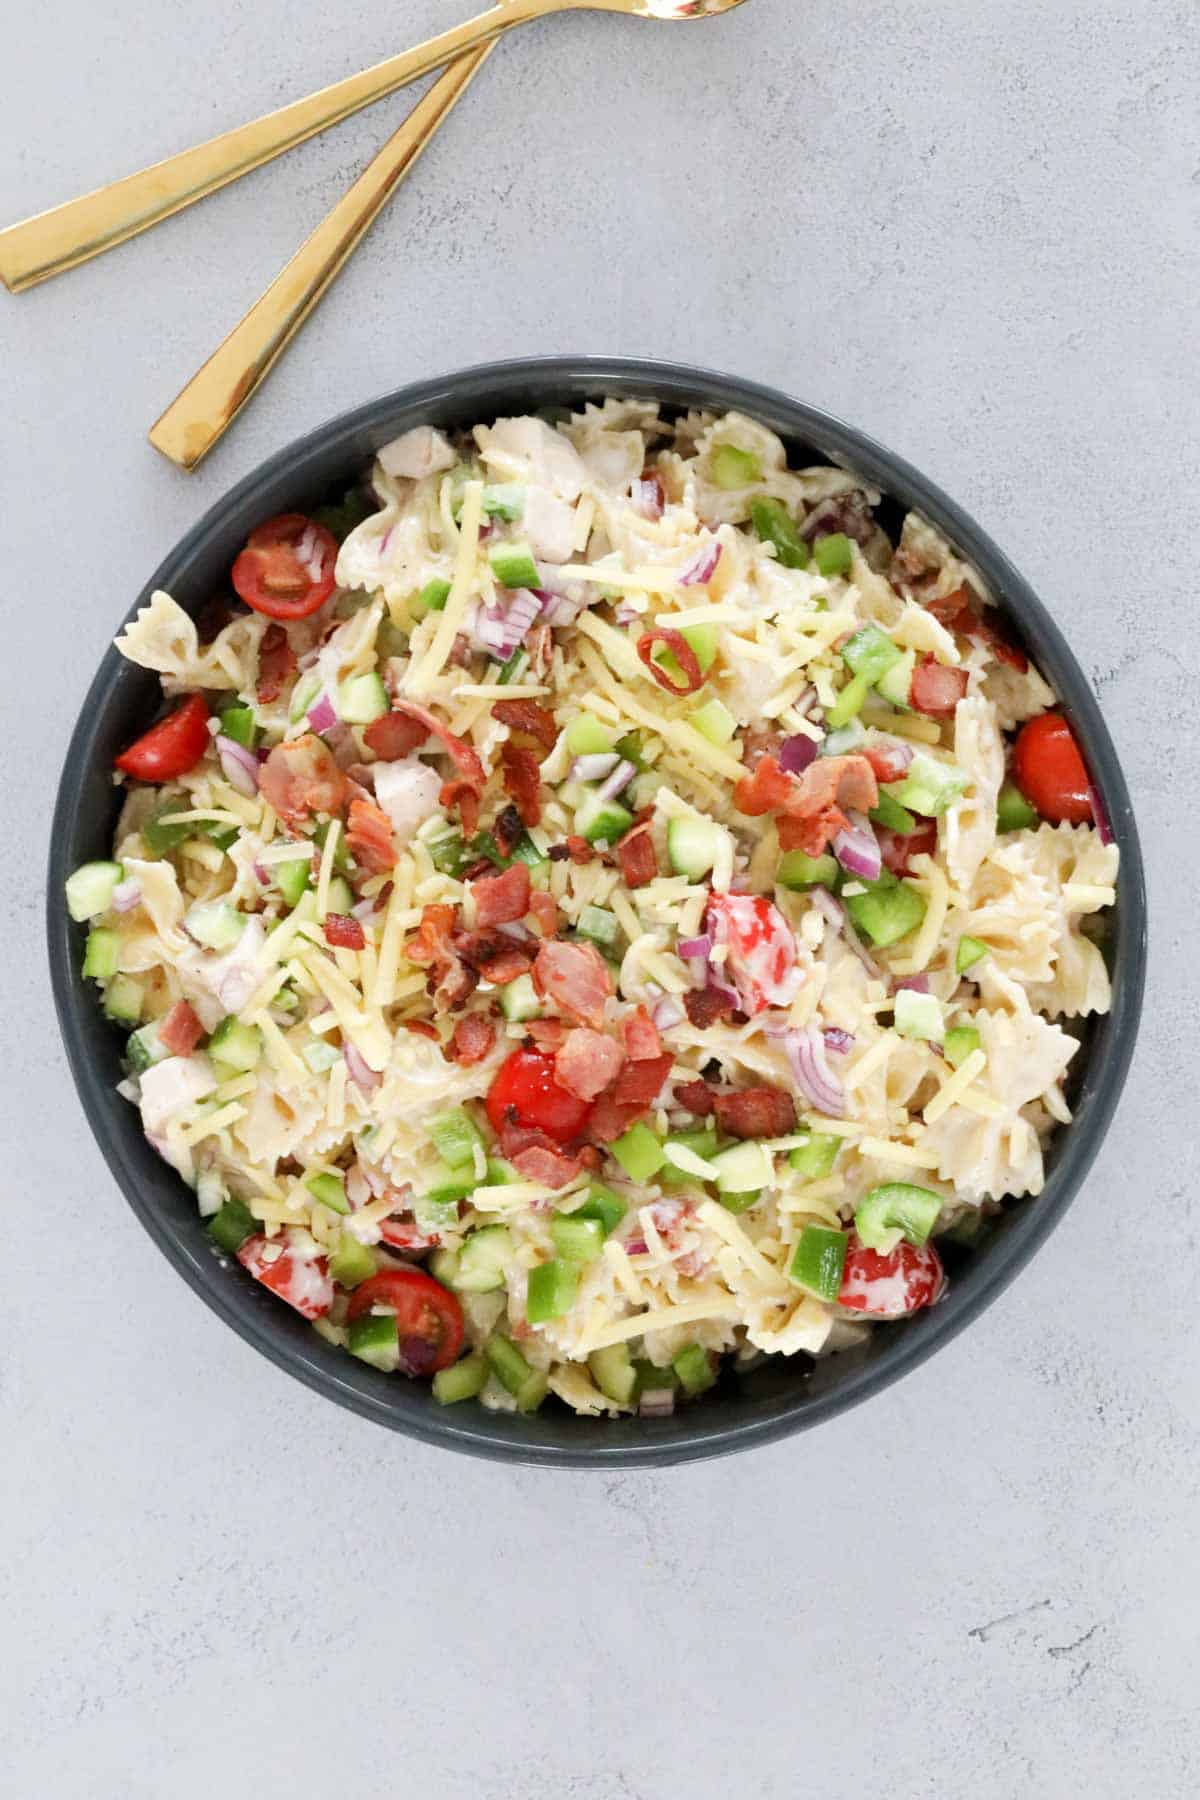
Step 5: Serve And Enjoy
This delicious pasta salad is best enjoyed at room temperature for the best flavour and texture. If you’ve prepared it beforehand, allow it to sit out for a few minutes before serving.
Recipe Tips & Variations
Type of Pasta: Bow-tie (farfalle) or spirals work well, but penne or macaroni are great alternatives. Be sure not to overcook the pasta to keep it tender yet firm.
Chicken Options: Use leftover roast chicken, rotisserie chicken, or quickly pan-fry some chicken breasts or chicken strips for this recipe.
Extra Add-Ins: For extra flavour and texture, try adding avocado, black olives, shredded lettuce, or even corn.
Make It Lighter: Swap out the full-fat ranch for a light version, or mix half ranch and half Greek yogurt for a healthier dressing or for personal preference.
Cheese Options: Swap cheddar for mozzarella, parmesan cheese, or feta for a different flavour twist.
FAQs
Can I make chicken bacon ranch pasta salad ahead of time?
Yes! You can prepare all the ingredients in advance and store them separately in the fridge. Mix everything together with the dressing just before serving to keep it fresh.
How long does this pasta salad last in the fridge?
This salad can be stored in an airtight container in the fridge for up to 2 days. Just stir it the next day before serving.
Can I use a different dressing instead of ranch?
Absolutely! Caesar dressing, honey mustard, or a simple homemade vinaigrette are great alternatives if you want to switch things up.
What other vegetables can I add?
You can mix in whatever veggies you like! Add diced avocado, shredded carrots, corn, or even spinach or rocket for extra colour and nutrition.
Can I serve chicken bacon pasta salad warm?
Yes, while it’s traditionally served at room temperature or chilled, you can serve it slightly warm if preferred. Just add the pasta salad dressing last to keep the flavours balanced.
Storage & Meal Prep
Refrigeration: Store leftovers in an airtight container in the fridge for up to 2 days.
Freezing: Not suitable for freezing as the texture of the pasta and dressing changes.
Make Ahead: Prepare everything ahead, but add the dressing just before serving for the best texture.
Serving Suggestions
Serve as a standalone main course for lunch or dinner.
Pair with a crusty bread roll for a more substantial meal.
Enjoy as a side dish at your next BBQ, picnic, or family gathering.
This Chicken Bacon Ranch Pasta Salad is guaranteed to be a huge hit with the whole family! Creamy and savoury, with tender pasta and full of fresh ingredients, this easy pasta salad recipe is the ultimate meal that everyone will love. Enjoy!
For more easy salad recipes, check out these tasty summer salads, which are always popular. Any leftover pasta salad makes a fabulous lunch the next day, too!
Cook the pasta according to the packet directions until just al dente. Run the pasta under cold water and strain well.
Cook the bacon in a frying pan until crispy. Set aside on paper towel to remove any excess oil.
Place the pasta into a large mixing bowl.
Add the crispy bacon, diced chicken, red onion, cherry tomatoes, cucumber, green capsicum and grated cheese. Mix until well combined.
Pour over ¾ cup of the ranch dressing and mix to combine.Taste the salad and add the remaining dressing if desired.Season with salt and pepper.
Notes
RECIPE NOTES & TIPS
Pasta – I like to use bow-tie pasta. However, spirals or penne also work well. Cook the pasta until just al dente (do not overcook).
Chicken – This recipe is a great way to use up leftover cooked chicken! Alternatively, you can use a cooked rotisserie chicken or pre-cooked chicken breast.
Versatile – Mix and match with your favourite vegetables! Try substituting the red onion with spring onion, add some diced avocado, shredded lettuce or black olives, or use a different coloured capsicum (peppers).
Make it look even more impressive by reserving a small amount of bacon, cheese, tomatoes, cucumber and red onion to sprinkle over the top!
Serve at room temperature – This salad is best served at room temperature as the dressing remains creamy. If storing in the fridge, bring the salad to room temperature before serving.
Store – Store the salad in an airtight container in the fridge for up to two days.
Freezing – This salad is not suitable for freezing.
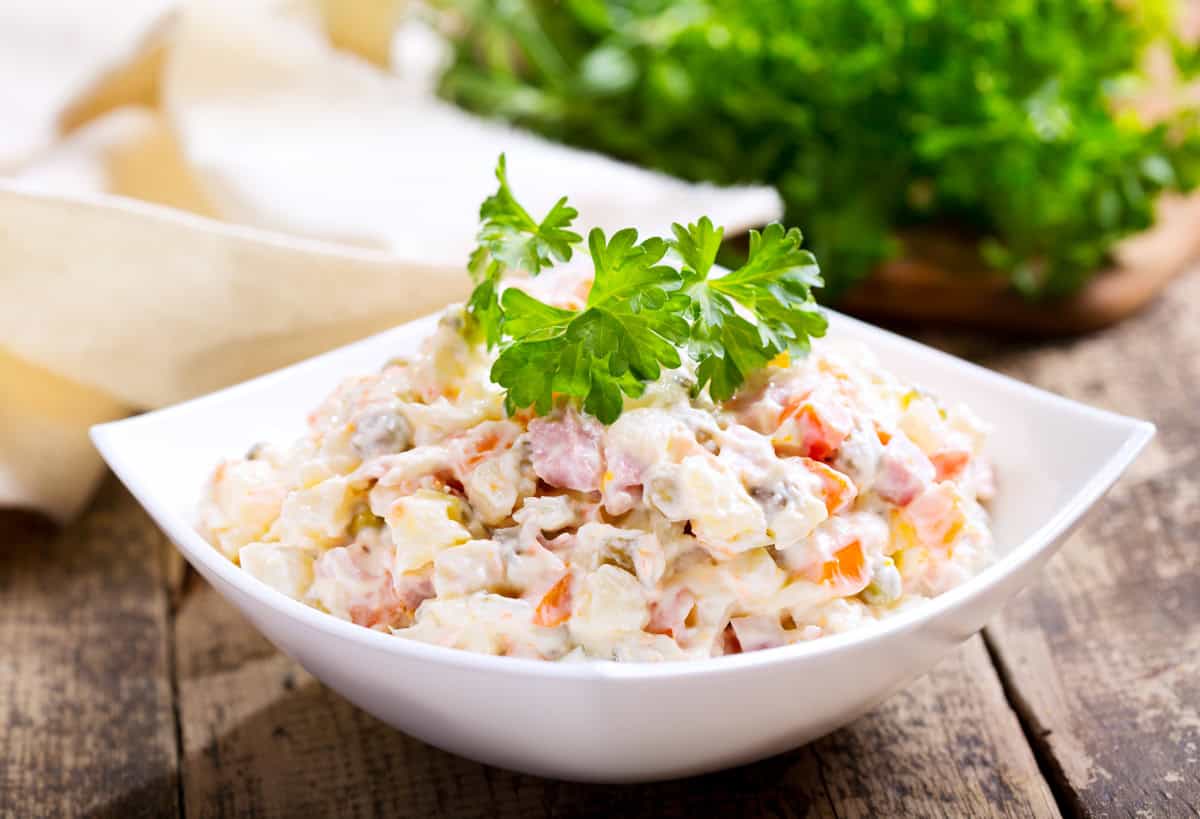
A favorite throughout Eastern Europe and beyond for more than 150 years, this Olivier Salad recipe, also known as Russian Salad, features the most delicious combination of flavors and textures for a winning salad that is perfect for everything from a casual picnic to an elegant dinner party!
Russian Salad
While reading Amor Towles’ A Gentleman in Moscow, I couldn’t help but be drawn in by the descriptions of the lavish dinner parties of the pre-revolution Russian aristocracy. As both an ardent foodie and a food history geek, I start to get excited when authors describe food scenes and various dishes of the eras, whether set in guilded age America, the golden age of Paris or, in this case, the era of the Russian tsars. My curiosity always leads to further exploration and research of the classic dishes from those times and settings, and this time it led me to a dish once considered a pinnacle of Russian high society gastronomy. No, it’s not borscht, beef stroganoff or chicken stroganoff (though they are fabulous). It’s something called the Olivier Salad.
What is Olivier Salad?
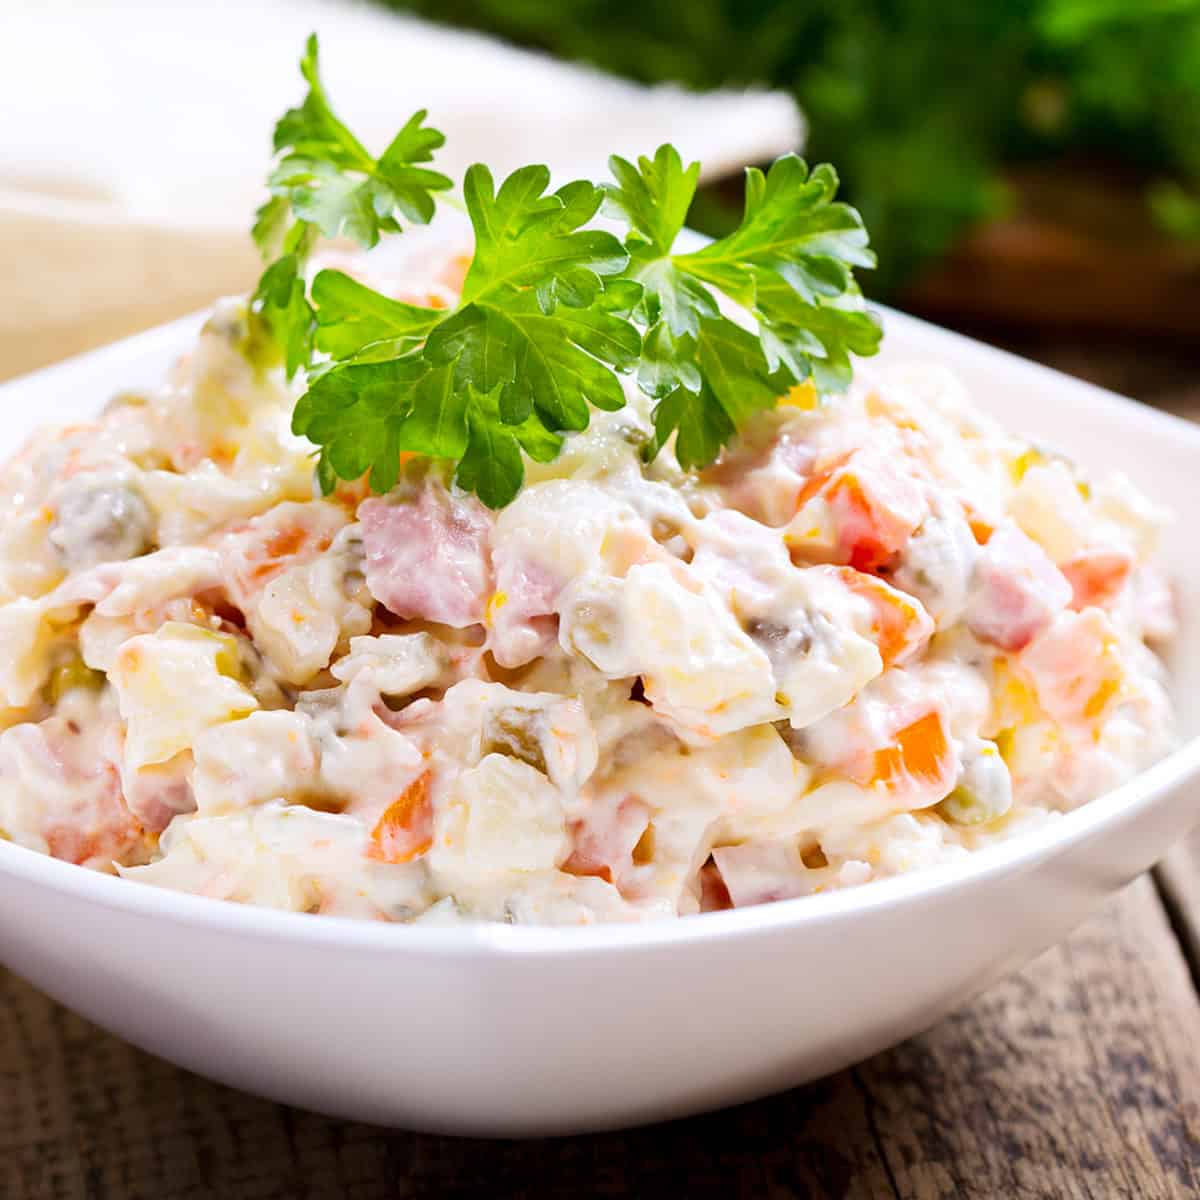
Dating back more than 150 years, Olivier Salad is a nostalgic dish with a long history. In its heyday you would find it served at the most prestigious restaurants and hotels in Moscow and at the center of upscale dinner parties and celebrations. In its simplest form, which is how it’s known today, it is a creamy mayonnaise-based salad of diced potatoes, vegetables, pickles, eggs and ham. But traditionally it was far more opulent. Let’s take a look at its intriguing history.
The time was the 1860’s and the setting the Hermitage restaurant in Moscow where the French chef Lucien Olivier created what would become the restaurant’s signature dish. His creation was a carefully guarded secret (competing restaurant chefs in the city would go on to attempt to replicate it and capitalize on the fame) but originally included hazel grouse (of the grouse bird family), veal tongue, caviar, crayfish tails, aspic, lettuce, potatoes, capers and olives in a creamy mayonnaise-based sauce.
The other local restaurant chefs who tried replicating Lucien Olivier’s famous Russian salad couldn’t quite get the sauce right, noting that something was missing. It was later revealed that the original sauce included something very similar to Worcestershire sauce which gave the dressing a rich and flavorful umami component. (And it’s definitely included in my recipe!)
Over time many of these ingredients either fell out of popularity, were just too expensive or became difficult to source, and so over time were replaced by more accessible substitutes. Eventually ham or chicken chicken replaced the grouse, boiled eggs replaced the crayfish, and the capers and olives were replaced by green peas and pickled cucumbers.
Olivier Salad remains a popular dish throughout much of Eastern Europe where parties and holidays are incomplete without it and where each household has a slightly different take on it. Different countries also have their own variations of the dish, for example in Croatia diced apples are commonly added, Romania often uses chopped beef, in Bulgaria salami is a popular choice, in Turkey pickled beets are commonly included, and variations in Poland often include pickled herring. It’s even popular in Iran where it’s usually made with chicken and in Spain where it’s called ensaladilla rusa (Russian salad) where it’s often made with tuna.
Olivier Salad Ingredients
As mentioned earlier, there is no “one way” to make Olivier salad. Every household and every country where it’s served has their own variation. And none of them match the original version from the 1860’s (see the discussion above about its history). But the ingredients I’m using to make my Russian salad are pretty standard for how you’ll find it served in many places along with a couple of additional touches to enhance flavor and texture as well some ingredients that usually no longer included in most recipes but that hearken back to the flavor notes of the original recipe (e.g., capers and Worcestershire sauce).
Salad Ingredients
Potatoes – tome recipes call for starchy potatoes like Russets, but unless you want more of a mashed potato salad I strongly recommend using a firm yellow potato variety like Yukon Gold. Yellow potatoes hold their shape after cooking, making them ideal for salads like this.
Carrots – this adds sweetness and color.
Diced Ham – whether you’re using leftover ham or dicing up ham steaks, I love the flavor of smoked ham in this salad. Alternatively you can use chicken (rotisserie chicken is convenient and flavorful) or European bologna (which is similar in texture and flavor to mortadella), You can add any cooked, chopped chicken breast you have on hand; rotisserie chicken or a canned chicken work well. Some variations in other countries use diced beef, sausage, pickled herring or tuna. If you’re going for a vegetarian Olivier salad, omit the meat.
Sweet Peas – you can use canned (rinse and drain), frozen (thaw and drain) or fresh (be sure to cook first).
Hard-Boiled Eggs – these add a key creaminess and flavor.
Onion – I like to use yellow onion for some of that mild contrasting sharpness, but you can use sweet onion if you prefer and can also reduce the amount of the added sugar in the dressing.
Dill Pickles – these add a wonderful flavor and crunch. For the best flavor I strongly recommend using European pickles, e.g. German pickles (they’re ridiculously expensive on Amazon but you can find them at World Market and I’ve seen them in some Walmart locations that have a Euro section). They are milder and sweeter than American dill pickles but not nearly as sweet as bread and butter pickles and with a different flavor profile.
Optional Add-Ins: Diced English cucumber for added crunch, sweet corn or yellow bell pepper for a splash of color, added texture and sweetness. Diced apple is used in some countries for added sweetness and crunch. Olives were included in the original 1860’s version for their briney flavor and can likewise be added.
Dressing Ingredients
Not to be confused with Russian dressing (an American creation popularly used on the Reuben sandwich), the dressing for Russian salad or Olivier salad is very different. Here’s what you’ll need:
Mayonnaise – the creamy base ingredient of the dressing.
Sour Cream – this adds a bit of tanginess to cut through the mayonnaise and adds balance and a touch of freshness. I like the texture and flavor of sour cream in this salad but you can substitute Greek yogurt if you prefer.
Dijon Mustard – this adds a ton of flavor depth and a welcome hint of sharpness.
Worcestershire Sauce – The earliest published recipe from 1894 in a Russian magazine said that the original recipe contained something called mogul or kabul sauce, which is similar to Worcestershire sauce. It’s a key ingredient that adds depth of flavor. Like music that’s all treble without the bass, food lacking in umami is rather bland. Worcestershire sauce provides some of that much needed bass.
Green Onions / Scallions – these add a mild peppery flavor note and a pop up of color.
Fresh Dill – this adds that fresh herbaceous touch. I love dill and grow lots of it every year in my garden, but I know that not everyone is a fan of it and you can substitute parsley if you prefer.
Salt, Black Pepperand Sugar – To tie everything together.
Olivier Salad Recipe
This salad is easy to make, it just requires a good amount of chopping and dicing. To make this popular Russian potato salad you’ll follow these steps:
Cook the diced potatoes and carrots until tender, then drain and let cool while you prepare the other ingredients.
Prepare the dressing by stirring all of the ingredients together in a bowl until combined.
Place all of the salad ingredients in a large bowl, pour over the dressing, and stir to thoroughly combine. Cover and chill in the fridge for at least an hour before serving.
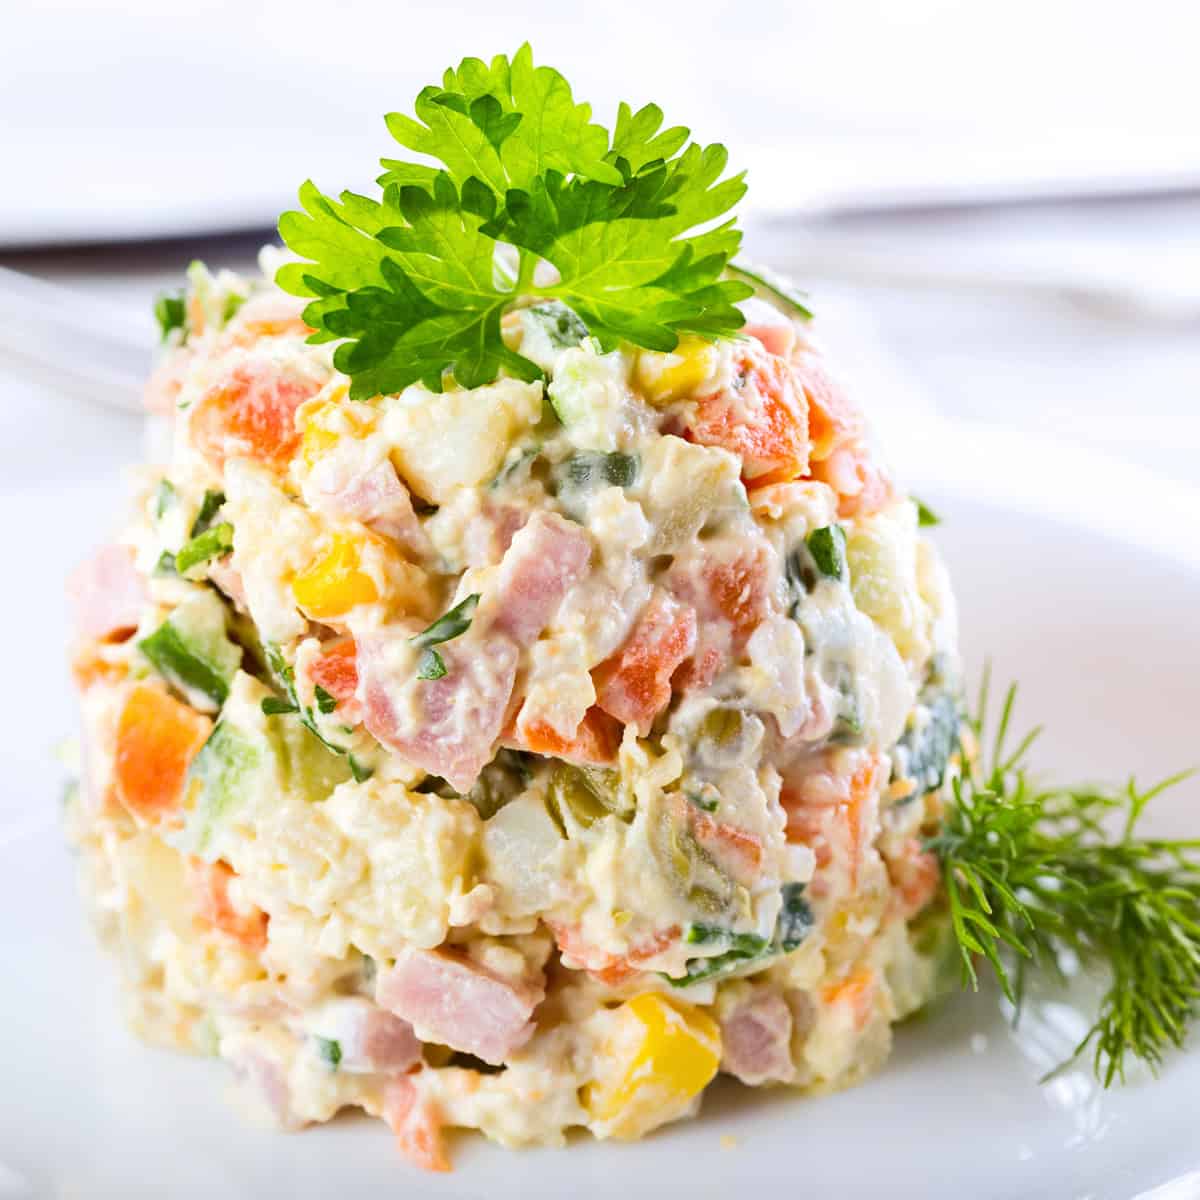
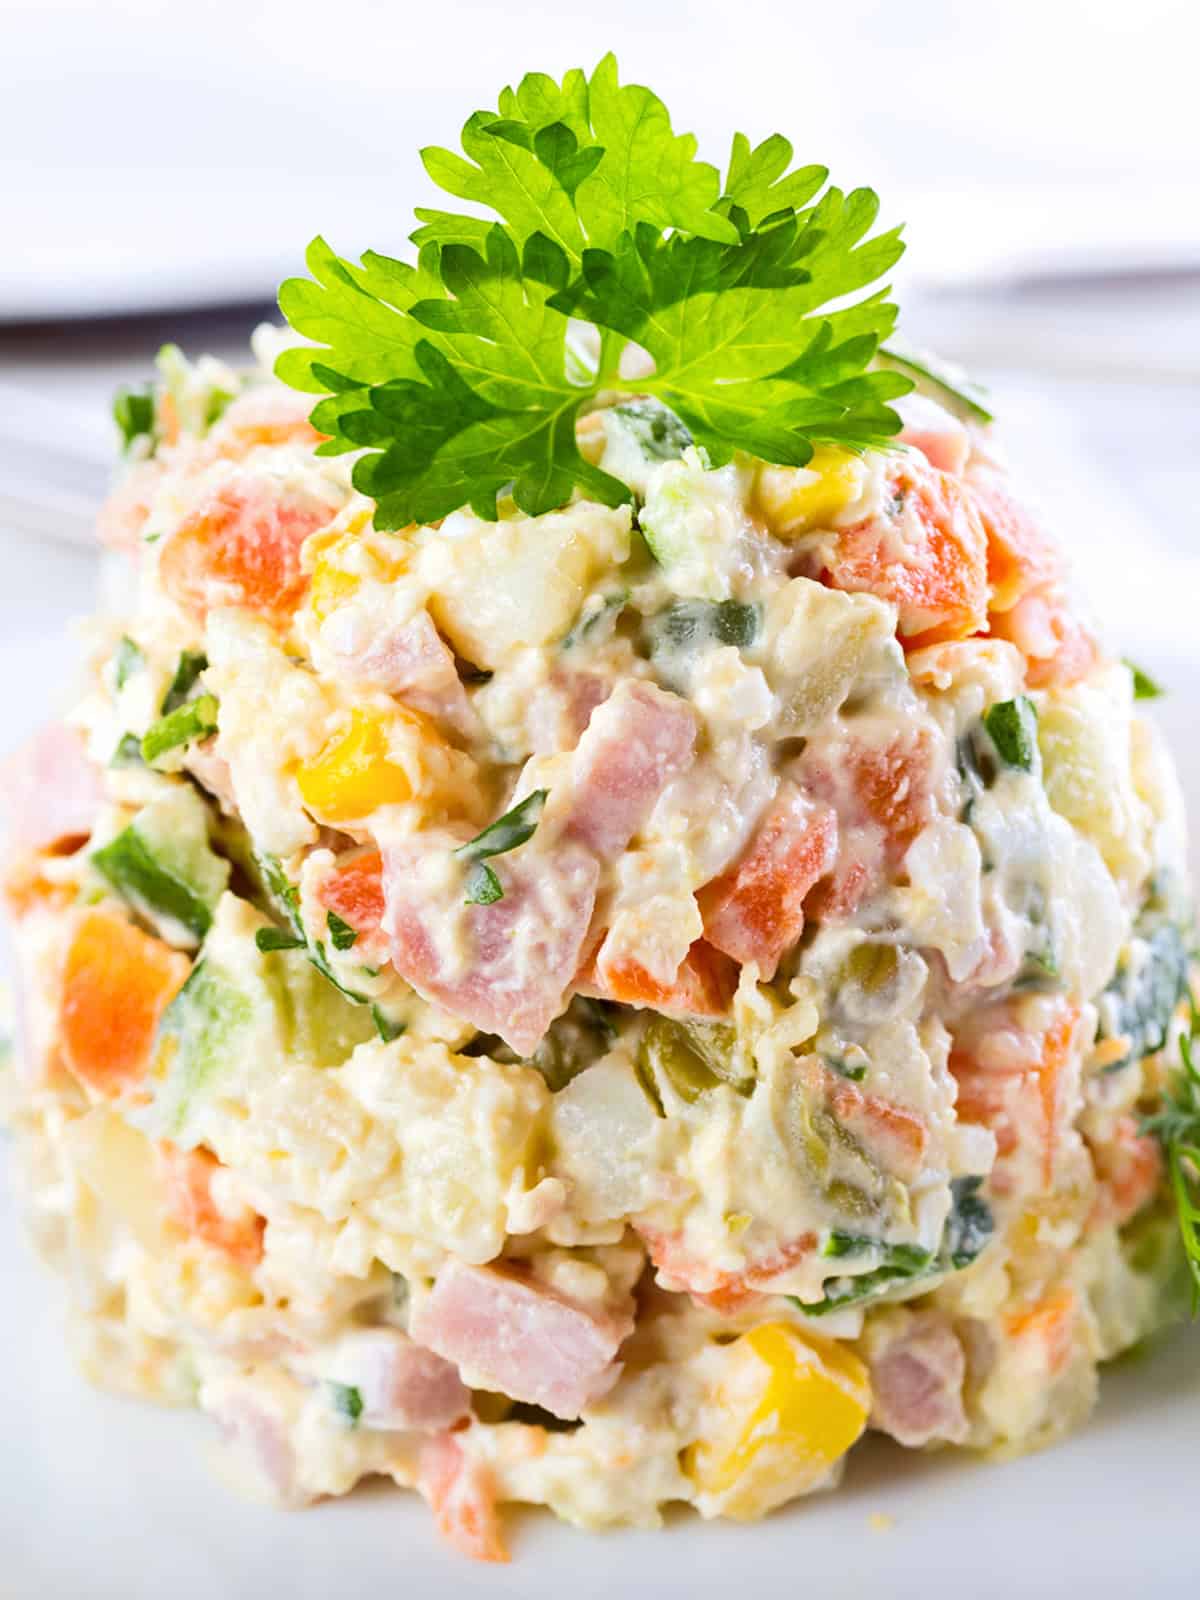
This can be served as a side dish in a bowl or on a plate, or it can be served molded for a fancier presentation as a starter. So that it holds together better you may need to use slightly less mayonnaise (this all depends on the variety of potato used, how long the salad sits before serving and how much of the excess liquid the potatoes absorb, how well drained some of the ingredients were, etc). To mold the salad you can lightly spray the inside of a measuring cup or dedicated mold with oil, press the salad into the mold, then invert onto the serving plate. You can garnish it with a sprig of dill or parsley.
Make Ahead and Storage
The ingredients can all be prepped a day in advance but if you’re making this ahead of time, ideally wait until a couple of hours or so before serving to add the dressing to the salad. Leftover Olivier Salad will keep in the fridge for 3-4 days.
For more delicious salad recipe from around the world try my:
Olivier Salad
A favorite throughout Eastern Europe and beyond for more than 150 years, Olivier Salad is a winning combination of flavors and textures and is perfect for everything from a casual picnic to an elegant dinner party!
Prep Time 20 minutesmins
Cook Time 5 minutesmins
Total Time 25 minutesmins
Course Appetizer, Salad, Side Dish
Cuisine Eastern European, Russian
Servings 10
Calories 344kcal
For the Salad:
2poundsYukon Gold potatoes, or other yellow potato variety (these hold their shape and won’t become mushy like Russets)
3large carrots
1small yellow onion, can use sweet onion if preferred
1 1/2cupspeas, canned (15 ounces, rinsed and drained), frozen (thawed and drained) or fresh (cooked)
1poundsmoked ham, cut into 1/2 inch cubes (can substitute rotisserie chicken or European bologna if preferred)
4-5hard-boiled eggs, diced
2/3cupdiced dill pickles (about 3-4 pickles), for best flavor strongly recommend using European/German pickles (check World Market, some Walmart locations)
Peel and dice the potatoes into 1/2 inch cubes. Peel and dice the carrots into 1/4 inch cubes. Boil them together until cooked and tender but not mushy, 3-5 minutes. Drain and let cool.
Combine the dressing ingredients in a bowl and stir to combine. Add more salt, pepper and sugar to taste.
Place all of the salad ingredients in a large bowl, pour over the dressing, and stir to thoroughly combine. Cover and chill for at least an hour before serving.Olivier Salad will keep in the fridge for 3-4 days.
Make Ahead: The ingredients can all be prepped a day in advance but if you’re making this ahead of time, ideally wait until a couple of hours or so before serving to add the dressing to the salad.
Hi, I’m Kimberly Killebrew and welcome to Daring Gourmet where you’ll find delicious originals, revitalized classics, and simply downright good eats from around the world! Originally from Germany, later raised in England, world-traveled, and now living in the U.S., from my globally-influenced kitchen I invite you to tour the world through your taste buds!
This Korean cucumber salad tastes spicy, sweet, and fresh with each crisp and crunchy bite. It takes just 5 minutes to make and is delicious to eat as a simple side dish or tangy salad.
My cucumber-obsessed husband makes this spicy Korean Cucumber Salad recipe (Oi Muchim) at least once a week. We were introduced to it years ago when eating Korean BBQ when each tangy bite with a bit of heat turned us into instant fans. It’s a typical part of the banchan (small side dishes) served with the main Korean meal and is so good that we always ask for more.
This cucumber salad recipe takes 5 minutes to make and is ready to eat in just 30 minutes or can be refrigerated for hours before serving. In our recipe, thin-skinned cucumbers are mixed with rice vinegar, sesame oil, garlic, and ginger. For the spicy kick, we use either chili crisp or gochugaru (Korean chili flakes) to deliver the heat.
Salting the cucumbers draws out moisture, keeping them snappy and crisp. As the salad sits, the released water mixes with the seasoned vinegar to create a spunky, perfectly balanced dressing that mellows the heat of the chili’s spice. These babies are addicting!
Heidi’s Tips for Recipe Success
Salt the cucumbers, toss them well, then rest for 5-10 minutes before rinsing and adding the rest of the ingredients. This trick coaxes out their moisture, giving the Korean pickled cucumbers a fresh and snappy bite that won’t go soggy.
Prepare the salad at least 30 minutes to 1 hour before serving for the flavors to meld and infuse.
Use Persian, Korean, or English cucumbers. They have fewer seeds and thinner skin so there’s no peeling involved.
Korean Cucumber Salad Ingredients
The full recipe, with amounts, can be found in the recipe card below.
Thin-skinned cucumbers — look for Persian cucumbers, English cucumbers, or Korean cucumbers with minimal seeds and no need to peel!
Kosher salt — the larger crystals pull moisture from the cucumbers, providing a quick, brined cure to keep them crisp
Seasoned rice vinegar — this slightly sweet Japanese vinegar adds tangy notes that aren’t too acidic
Toasted sesame oil — adds a nutty, savory note
Garlic — pressed smooth, it imparts another zesty layer of flavor
Ginger — grate fine to add a peppery pop
Chili crisp or gochugaru — use one or the other (or try a combo of both) to provide the warming chili flavor that’s distinct to this dish
Ingredient Swaps and Substitutions
Cucumbers — if using a regular garden variety, peel, slice in half lengthwise, and remove the seeds before chopping
Chili crisp or gochugaru — we use them interchangeably or try this salad using a combo of both, just be sure to taste test for spiciness! Gochugaru paste, gochujang, or sambal olek also provide a spice kick.
Seasoned rice vinegar — try apple cider vinegar or plain rice vinegar with 1 teaspoon granulated sugar
Heidi’s Add-ins: Feel free to add chopped green onion, slivered carrot, or chopped cilantro for more fresh flavor. For a nutty crunch, sprinkle with toasted sesame seeds. And while not authentic, a generous dose of everything bagel seasoning is pretty tasty, too.
How to Make Spicy Korean Cucumbers
Salt the cucumbers. Cut into ¼-inch coins then add half to a bowl. Season with ½ teaspoon kosher salt. Add the rest of the cucumbers and season with the remaining salt. Let sit for 5-10 minutes.
Rinse the cucumbers. Rinse the salt from the cucumbers under cold water. Pat dry with a paper towel (or tea towel) and return to the bowl.
Add the seasonings. Add the chili crisp (or gochugaru), sesame oil, garlic, and ginger.
Heidi’s Tip: I like to mix this salad the old-school way, in a bowl with a spoon. However, my husband adds the ingredients to a container with a fitted lid, covers it tight, and shakes it to combine — a useful tactic to let it all out after a hard day :)
Drizzle with the seasoned rice vinegar and mix. Fold the ingredients together until well coated.
Let it rest. Refrigerate the salad for 30 minutes (up to 6 hours) before serving. This allows the flavors to mingle and infuse their spiced tang.
FAQ
Can I use regular cucumbers in this salad?
Thin-skinned, seedless cucumbers are best in this salad for texture, size, and color—the green skin really adds to the dish! However, if using garden-variety cucumbers, peel them first, cut in half lenghtwise, and remove the seeds before slicing.
Can I use table salt instead of kosher salt to crisp the cucumbers?
In my book, no. Kosher salt’s larger, flakier crystals draw moisture out of cucumbers better than the fine grains of table salt that dissolve too quickly. Iodized table salt also gives a metallic aftertaste that can overpower the cucumber flavor.
What’s the difference between chili crisp and gochugaru
• Chili crisp is a savory, oil-based condiment with crunchy bits of fried chili, garlic, onions, and other ingredients • Gochugaru is a powder or flakes made from dried Korean red peppers that’s less hot than many other chili flakes
Storage Tips
This Korean cucumber salad will last in an airtight container in the fridge for 2-3 days, but it’s at its crispest within 1-2 days. We keep a batch in the fridge for as long as they’ll last without getting eaten — up to a week. Just know the cucumbers become softer as the days go by.
Heidi’s Tip: The cucumbers let off more water the longer they sit, creating a tangy dressing. I like to drizzle it on my lunch time salads as a dressing or over white rice served with my Chili Crisp Salmon.
What to Serve With Korean Cucumber Salad
If you make this recipe, please let me know! Leave a ⭐️⭐️⭐️⭐️⭐️ rating below, leave a comment to tell us what you think, and tag me on Instagram @foodiecrush.
Easy Korean Cucumber Salad (Oi Muchim)
This easy Korean cucumber salad tastes spicy, sweet, tangy, and fresh. It takes just 5 minutes to make, or can be refrigerated for up to 6 hours (or more) before serving.
1poundPersian cucumbers,English cucumbers, or Korean cucumbers
1teaspoonkosher salt
3tablespoonschili crisp, or 1-2 teaspoons gochugaru to taste
2tablespoonstoasted sesame oil
2teaspoons pressed garlic, or grated or finely minced
1 teaspoongrated ginger
¾cupseasoned rice vinegar
Instructions
Slice the cucumbers into ¼-inch coins, discarding the ends. Add half the cucumbers to a medium bowl and sprinkle with ½ teaspoon kosher salt. Add the remaining cucumbers and sprinkle with the rest of the salt. Toss well so all of the cucumbers are coated with salt. Set aside for 5-10 minutes.
Transfer the cucumbers to a colander and rinse them well. Drain, pat dry with paper towels or a tea towel, then add them back to the bowl. Add the chili crisp (or gochugaru if using), sesame oil, garlic, and ginger. Add the rice vinegar and toss well, thoroughly coating the cucumbers. Cover with plastic wrap or a lid and refrigerate for 30 minutes to 6 hours. Toss and taste for seasoning before serving.
Notes
This cucumber salad will last in an airtight container in the fridge for 2-3 days, but it’s at its crispest within 1-2 days.
We send good emails. Subscribe to FoodieCrush and have each post plus exclusive content only for our subscribers delivered straight to your e-mail box.
As always, thank you for reading and supporting companies I partner with, which allows me to create more unique content and recipes for you. There may be affiliate links in this post of which I receive a small commission. All opinions are always my own.