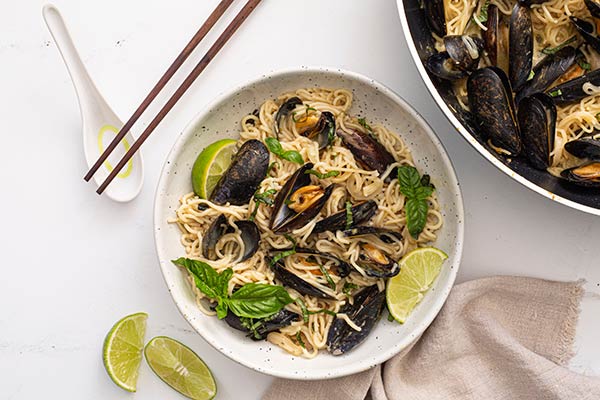
Need a gluten-free recipe for dinner that’s both effortless and impressive? Look no further than this Thai Green Curry Mussels and Noodles dish. Not only does it come together in under 30 minutes, but it also feels like something you’d order at your favorite upscale Thai restaurant. It’s quick enough for a weeknight meal, yet elegant enough to serve guests.
What makes this even better is how budget-friendly it is. Mussels are one of the most affordable seafood options, and when combined with just a few pantry staples, they transform into a dish that’s comforting, exciting, and just a little bit exotic. Even better, it’s incredibly flexible—you can add more spice, swap in shrimp, or toss in some extra veggies depending on your preferences.
¼ cup fresh basil or Thai basil, chopped (plus more for garnish)
Lime wedges, for serving
This dish hits all the right notes—fragrant, creamy, tangy, and just the right amount of spicy. In fact, the noodles soak up the curry-infused coconut broth perfectly, while the mussels add elegance and briny depth. For best results, don’t forget the extra lime and fresh basil on top—it really takes the whole dish to the next level.
Because this recipe is naturally gluten free, it’s a fantastic way to treat yourself without worrying about substitutions. Whether you’re cooking to impress guests or simply want a new favorite weeknight meal, this flavorful Thai-inspired dinner brings the wow factor—without the extra work.
Thai Green Curry Mussels and Noodles
Prep Time20 minutesmins
Cook Time15 minutesmins
Servings: 4
Calories: 136kcal
Author: Gluten Free & More
Cook the noodles for one minute less than the package directions. Drain and rinse with cold water. Set aside.
In a large skillet or braiser, heat the oil over medium-high heat. Add shallots, garlic, and ginger. Cook, stirring for 1 – 2 minutes. Add lemongrass paste, lime zest, and curry paste. Cook for another 2 minutes or until fragrant. Stir in lime juice, coconut cream, fish sauce, and sugar. Bring to a boil. Add the mussels, cover the pan, and cook for 4 – 5 minutes or until the mussels have opened. Discard any mussels that do not open. Add the noodles and chopped basil leaves, toss gently and cook for another minute or until everything is warmed through.
Serve with additional basil leaves and lime wedges.
Nutrition Facts
Thai Green Curry Mussels and Noodles
Amount Per Serving
Calories 136 Calories from Fat 54
% Daily Value*
Fat 6g9%
Saturated Fat 1g5%
Polyunsaturated Fat 1g
Monounsaturated Fat 3g
Cholesterol 24mg8%
Sodium 781mg33%
Potassium 404mg12%
Carbohydrates 11g4%
Fiber 1g4%
Sugar 3g3%
Protein 11g22%
Vitamin A 228IU5%
Vitamin C 14mg17%
Calcium 45mg5%
Iron 4mg22%
* Percent Daily Values are based on a 2000 calorie diet.
Disclaimer: All nutrition facts on Gluten Free & More are meant only as a guide and may differ depending on product brands used or ingredient substitutions. Some errors may occur, so you are encouraged to confirm the recipe’s ingredient and nutrition suitability for your own diet.
Have you tried this recipe? Give it a star rating and let us know your thoughts in the Ratings & Reviews section below.
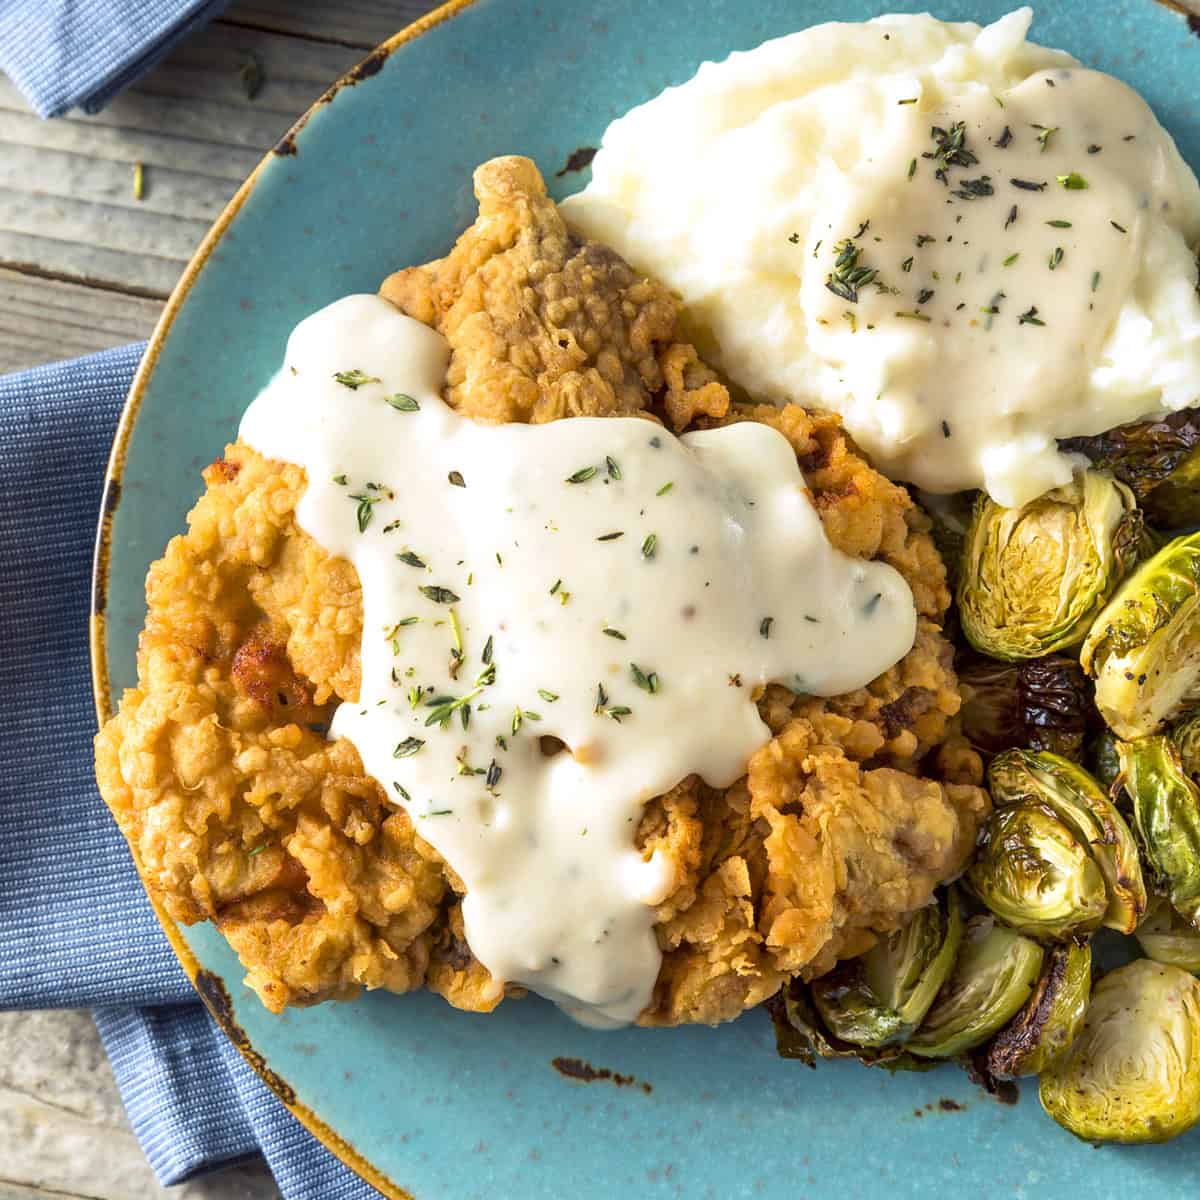
A Southern classic, this homemade white gravy recipe is a true taste of down-home comfort cooking. It’s a creamy béchamel-style American gravy that’s delicious served with everything from mashed potatoes and biscuits to pork chops and fried chicken! Made from scratch and ready in less than 10 minutes!
Why You’ll Love It
It’s quick and easy. This white gravy recipe comes together in less than 10 minutes and it uses just a handful of ingredients, all of which are pantry staples.
It’s deliciously versatile. Wonderfully creamy, it pairs beautifully with everything from mashed potatoes and steamed or grilled vegetables to chicken fried steak and pork chops.
White Gravy vs Country Gravy vs Sausage Gravy
White gravy and country gravy are the same thing and the names are used interchangeably depending on the geographic region and family tradition. Sometimes the name country gravy is used to specifically denote the use of bacon grease instead of butter for the roux, though that isn’t always the case and white gravy can likewise use either. It’s also sometimes referred to as American gravy. A variation called sawmill gravy adds a little cornmeal for a gritty texture. Sausage gravy is white/country gravy that includes sausage and is classically served over buttermilk biscuits.
Homemade White Gravy Ingredients
This homemade white gravy recipe uses just a handful of staple ingredients. And the bacon grease is easy to make simply by frying up or baking some bacon and pouring the drippings in the bowl to save for when you’re ready to use it. Here’s what you’ll need:
Bacon Grease or Butter: My personal preference is bacon grease hands down. It adds so much flavor. Where do you get bacon grease? Next time you make bacon, pour the grease into a bowl, cover and refrigerate until you need it to make this gravy. It will keep for up to 3 months and can be frozen even longer. If you prefer you can use butter and this will also make it vegetarian-friendly. I always use unsalted because it gives me full control over the salt content. You can always add more salt if needed but it’s very difficult to fix something that’s over-salted.
All-Purpose Flour: Whether using bacon grease or butter you’ll use equal parts of fat and flour to make the roux.
Milk: I use and recommend whole milk but you can use 2% if you prefer.
Heavy Cream: This adds incredible flavor and richness. But if you’re trying to cut down on calories, you can use milk only. I’ve tried it both ways and I can tell you that whole milk and cream make all the difference in flavor and texture.
Seasonings: Salt, pepper and a dash of cayenne are all you need. I use kosher salt and freshly ground black pepper. If you prefer a spicier gravy feel free to add more cayenne.
How to Make White Gravy
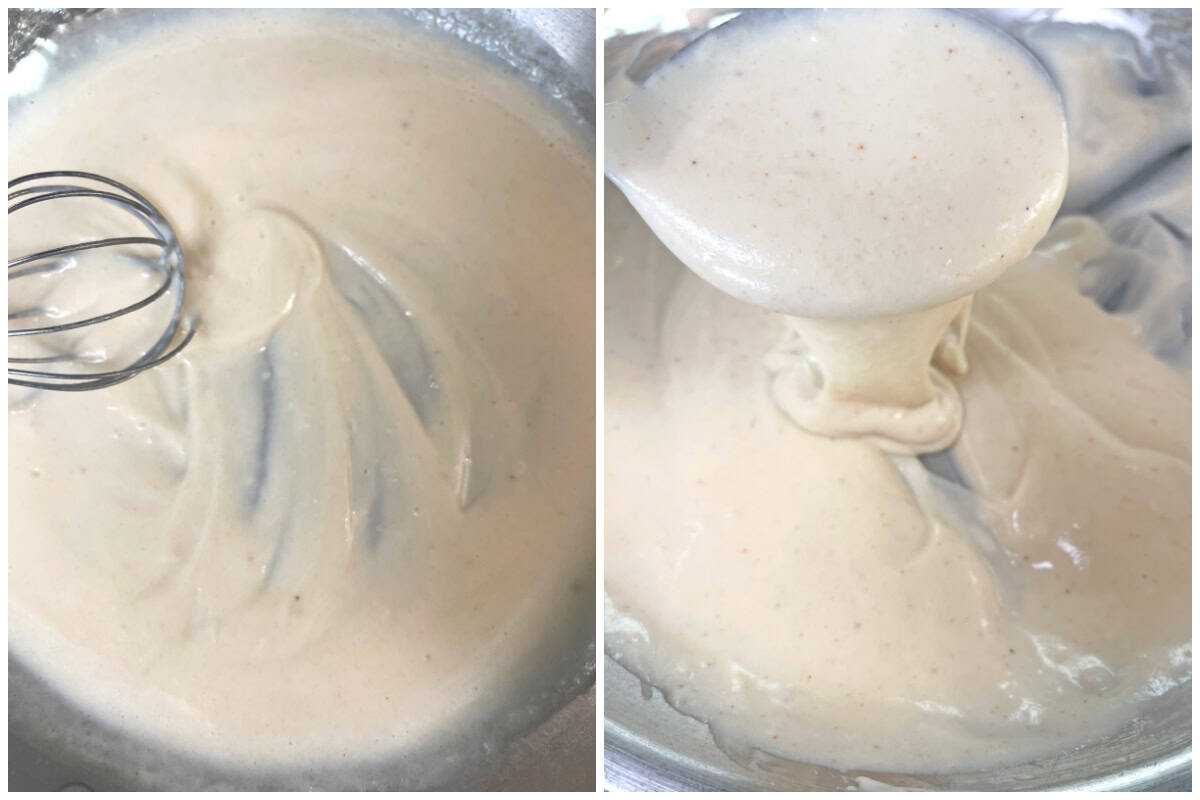
The process of making homemade white gravy is as simple as its ingredients. As with a traditional bechamel sauce, it starts by making a roux, which is a flour that is whisked into melted butter or bacon grease until smooth and allowed to cook for a few minutes to both cook off the flour flavor and to deepen the flavor of the gravy. Milk and cream are then whisked into the roux until smooth and thickened and then seasoned. The consistency of the gravy be made thicker by increasing the flour and butter when making the roux or made thinner by adding more milk or cream.
Country Gravy Recipe Preparation Tips
This is a very simple and easy gravy to make but here are a few tips for making the best tasting gravy, some storage and reheating tips, as well as some tips on how to avoid common problems:
For maximum flavor I recommend using bacon grease. You’ll need one tablespoon for every tablespoon of flour.
Why does my gravy taste like flour? The roux (which is the fat and flour mixture) wasn’t cooked long enough. Be sure to cook it, whisking frequently to prevent burning, until it turns a golden color. This not only cooks off the raw flour taste but it’s what gives your country gravy a rich flavor.
Use cold milk and cold heavy cream when adding it to the hot roux to ensure a perfectly smooth, lump-free gravy. Adding cold milk and cream gives you enough time to quickly whisk the ingredients together to dissolve before they begin to warm up and thicken.
If you like your gravy spicy, use extra cayenne pepper.
When reheating the white gravy, if it’s too thick stir in a little milk or cream to thin it out to the desired consistency. Start with less and add more as needed.
This country gravy can be made well in advance and will keep in the fridge for up to 4 days.
It can also be frozen for up to 3 months. Let it thaw in the fridge. Reheat on the stovetop over low heat or in the microwave on reduced power.
White Gravy Recipe
Let’s get started!
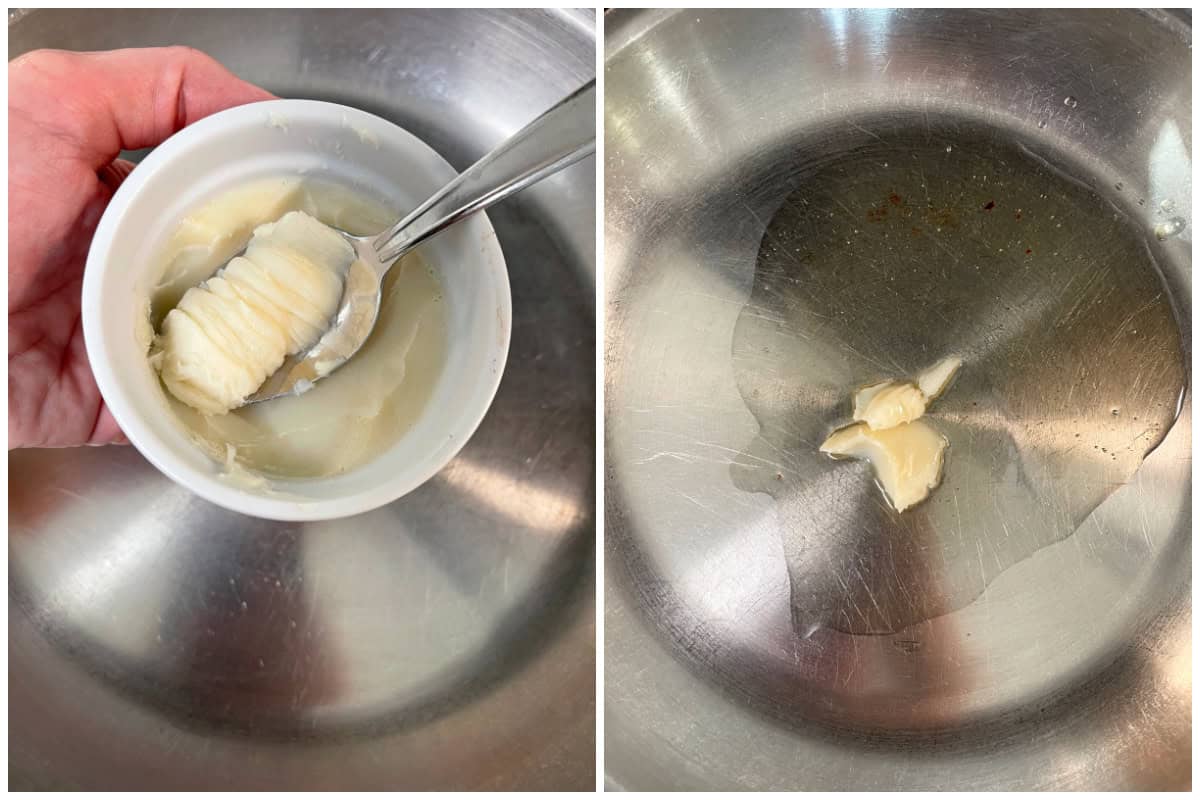
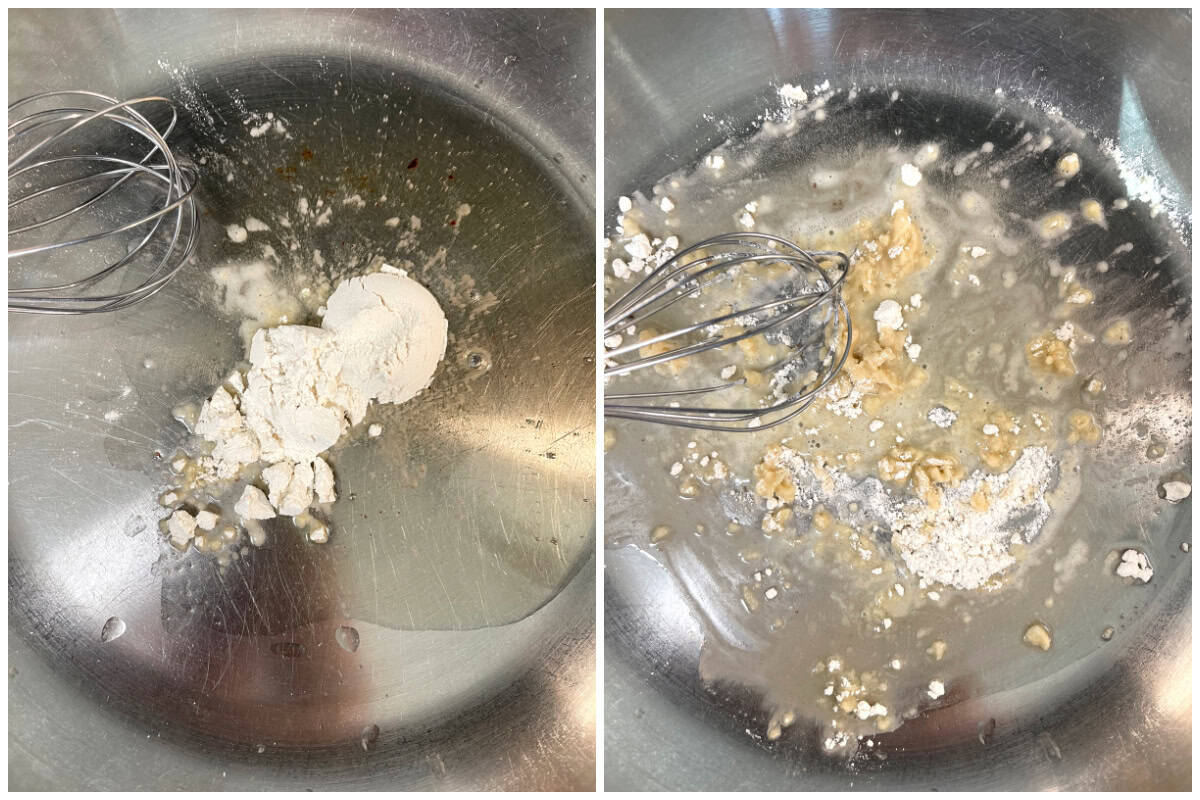
Melt the bacon grease in a skillet over medium heat.
Add the flour and whisk continually until it is dissolved.
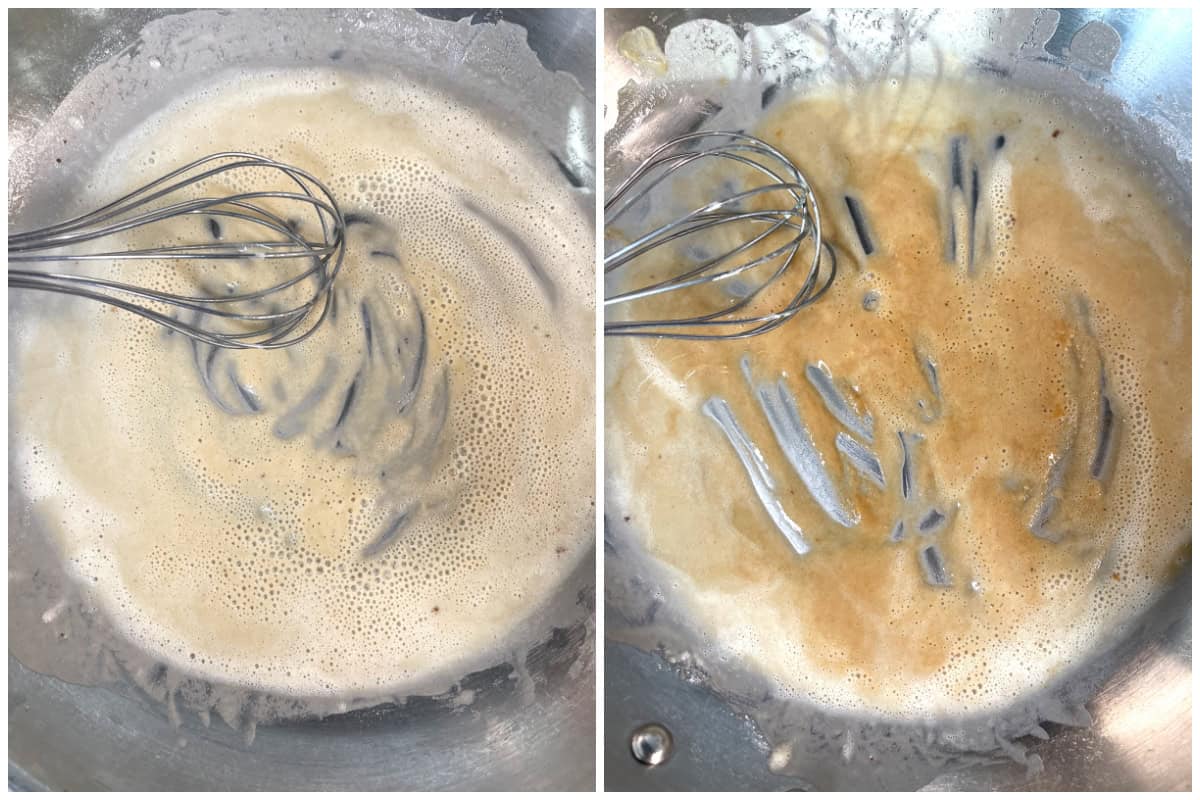
Continue whisking until the mixture has turned a rich golden color, about 3 minutes. Be sure to whisk constantly to prevent the mixture from burning.
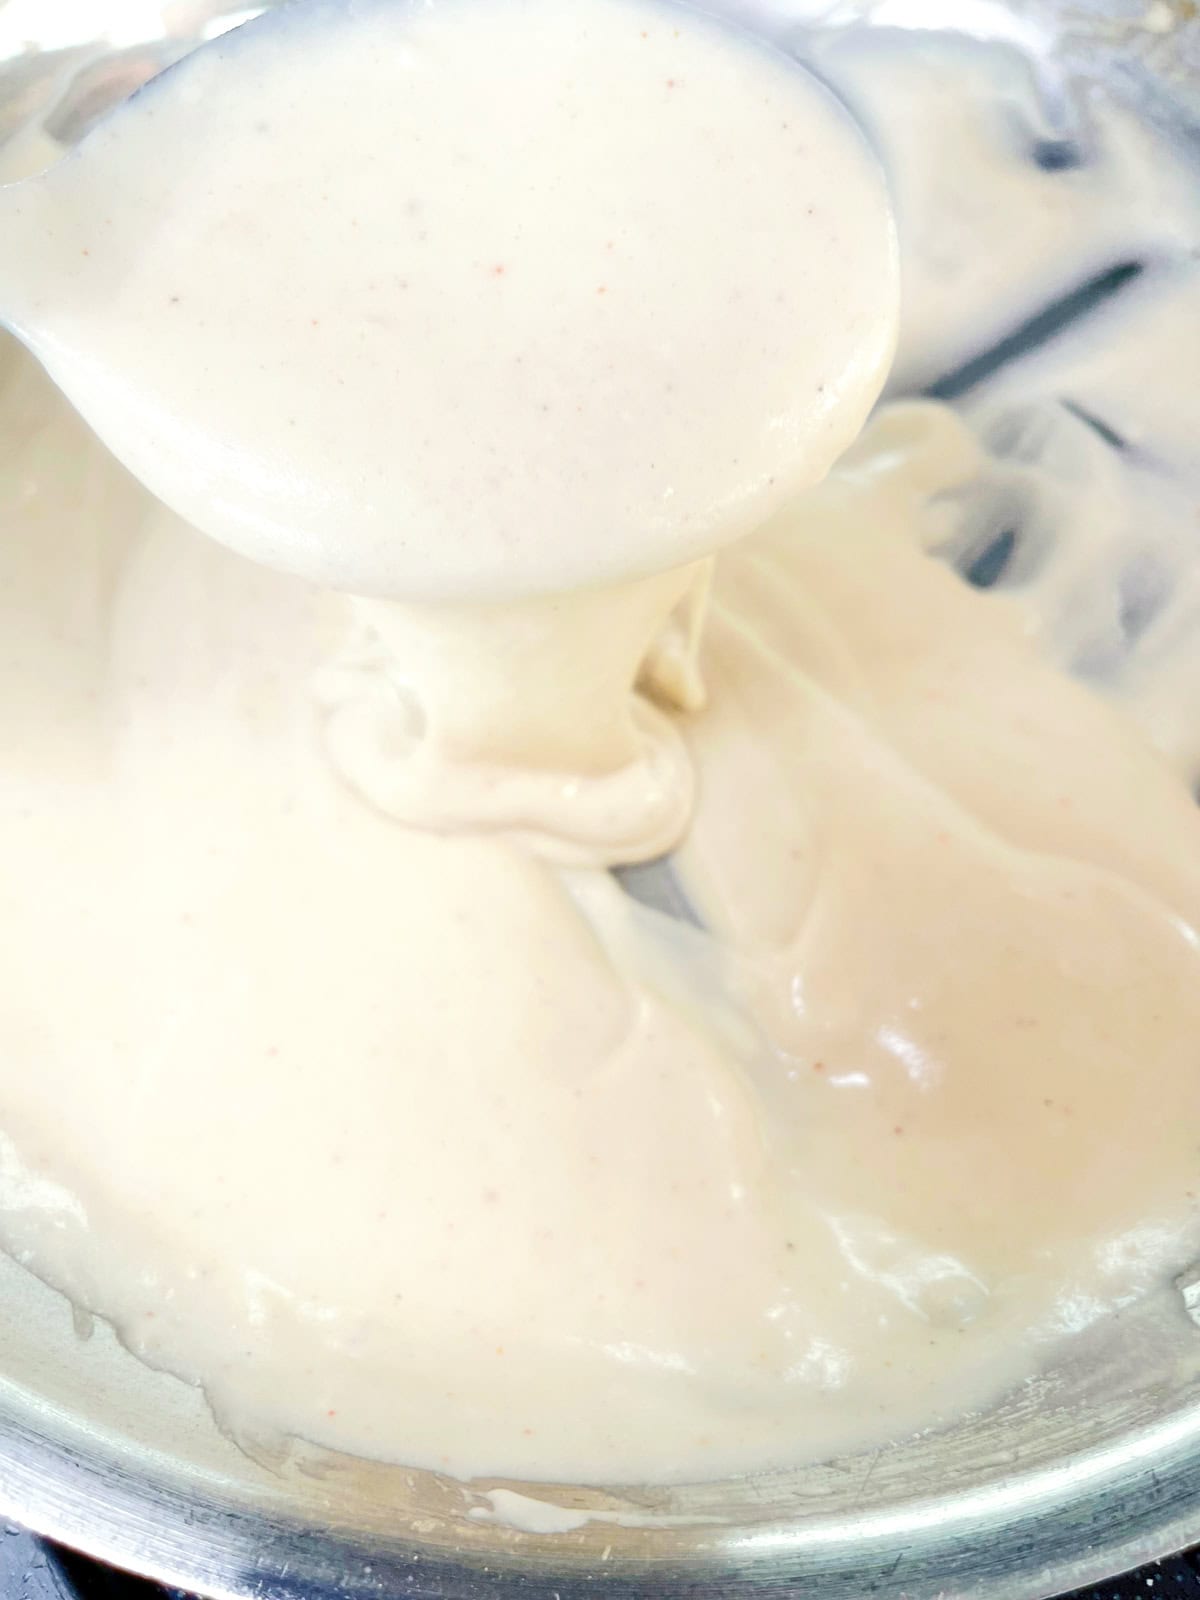
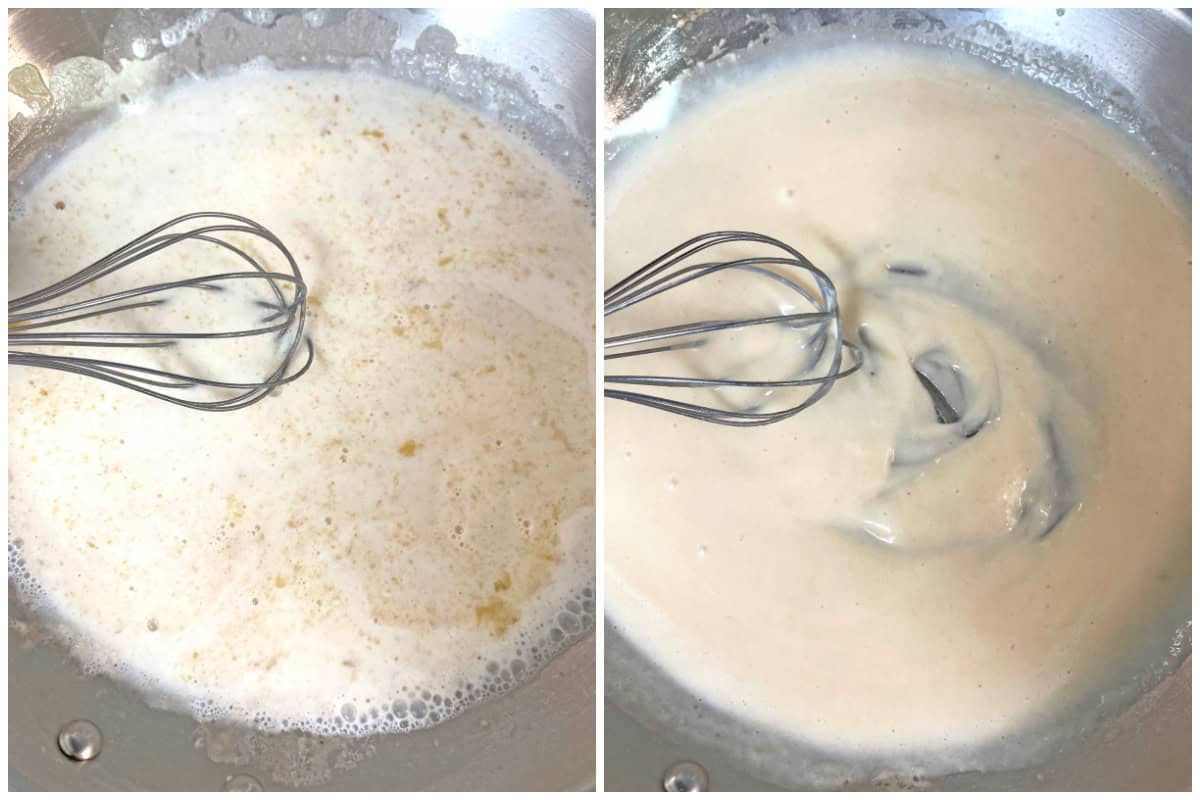
Add the milk and whisk until the mixture is smooth and thickened.
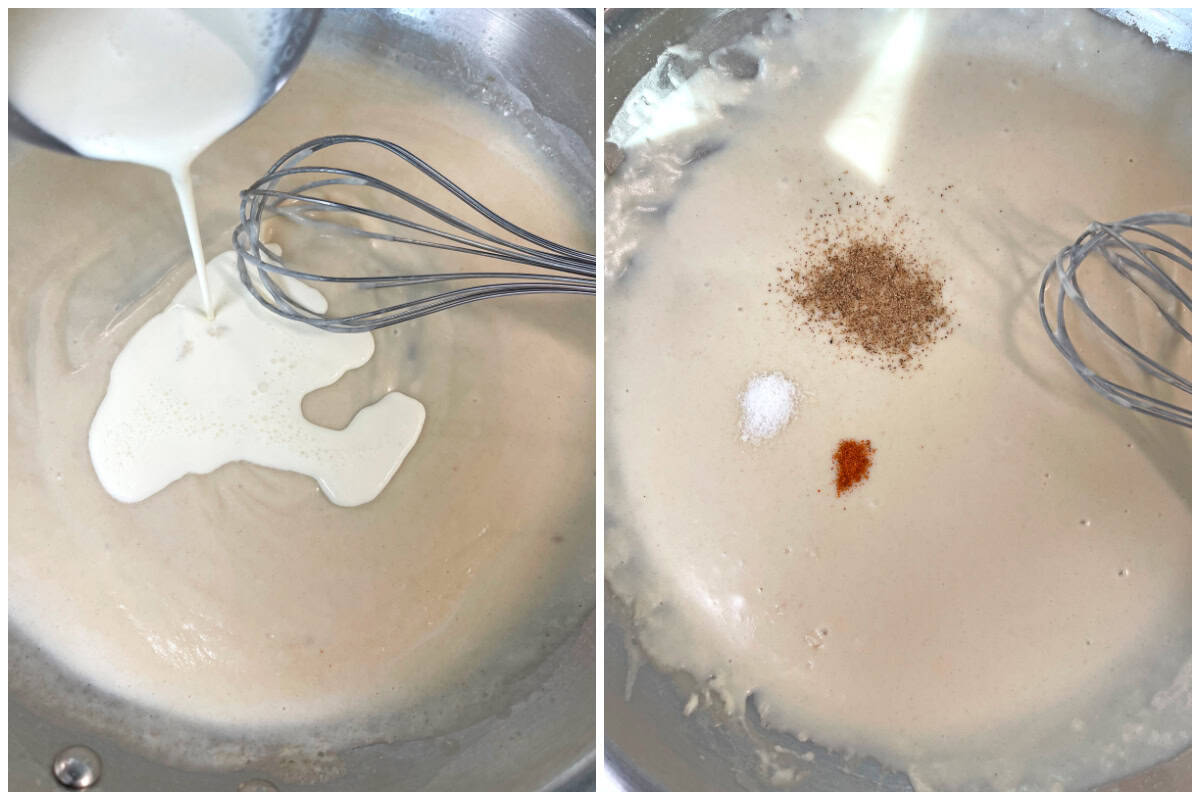
Add the heavy cream and whisk until incorporated.
Add the salt, pepper and cayenne.
Let the gravy simmer for another minute.
Add more salt and pepper to taste.
Storage and Freezing
White gravy can be made in advance and will keep in the fridge for up to 4 days. It can be reheated over low heat on the stovetop or at reduce power in the microwave. If the gravy is too thick simply stir in a little milk or cream when you reheat it (start with less and add more as needed). White gravy can also be frozen for up to 3 months. Let it thaw slowly in the refrigerator and then reheat.
What to Serve with White Gravy
White gravy has a flavor profile that makes it very versatile. Here are just a few ways you can use it to get you started:
Enjoy!
For more delicious homemade gravy recipes try my:
White Gravy Recipe (Country Gravy)
A Southern classic, this homemade white gravy is a true taste of down-home comfort cooking! It’s ready in less than 10 minutes and is deliciously versatile.
Cook Time 10 minutesmins
Total Time 10 minutesmins
Course condiment
Cuisine American, Southern
Servings 4
Calories 230kcal
3tablespoonsbacon grease, recommended for best flavor (see note); can substitute butter (vegetarian-friendly)
1/8teaspooncayenne pepper, or more according to heat preference
Melt the bacon grease in a skillet over medium heat. Add the flour and whisk continually until it is dissolved. Continue whisking until the mixture has turned a rich golden color, about 3 minutes. Add the milk and whisk until the mixture is smooth and thickened. Add the heavy cream and whisk until incorporated. Add the salt, pepper and cayenne and let the gravy simmer for another minute. Add more salt and pepper to taste. Makes about 2 1/4 cups white gravy.
Next time you make bacon, pour the grease into a bowl, cover and refrigerate until you need it to make this gravy. It will keep for up to 3 months and can be frozen even longer. For the creamiest and most flavorful results I recommend using whole milk and heavy cream. If you’d like to make a lower calorie version, you can substitute 2% milk and use half and half, or use all milk. If you like you can add a teaspoon of a finely chopped fresh herb of your choice along with the other seasonings (I like fresh thyme).
Hi, I’m Kimberly Killebrew and welcome to Daring Gourmet where you’ll find delicious originals, revitalized classics, and simply downright good eats from around the world! Originally from Germany, later raised in England, world-traveled, and now living in the U.S., from my globally-influenced kitchen I invite you to tour the world through your taste buds!
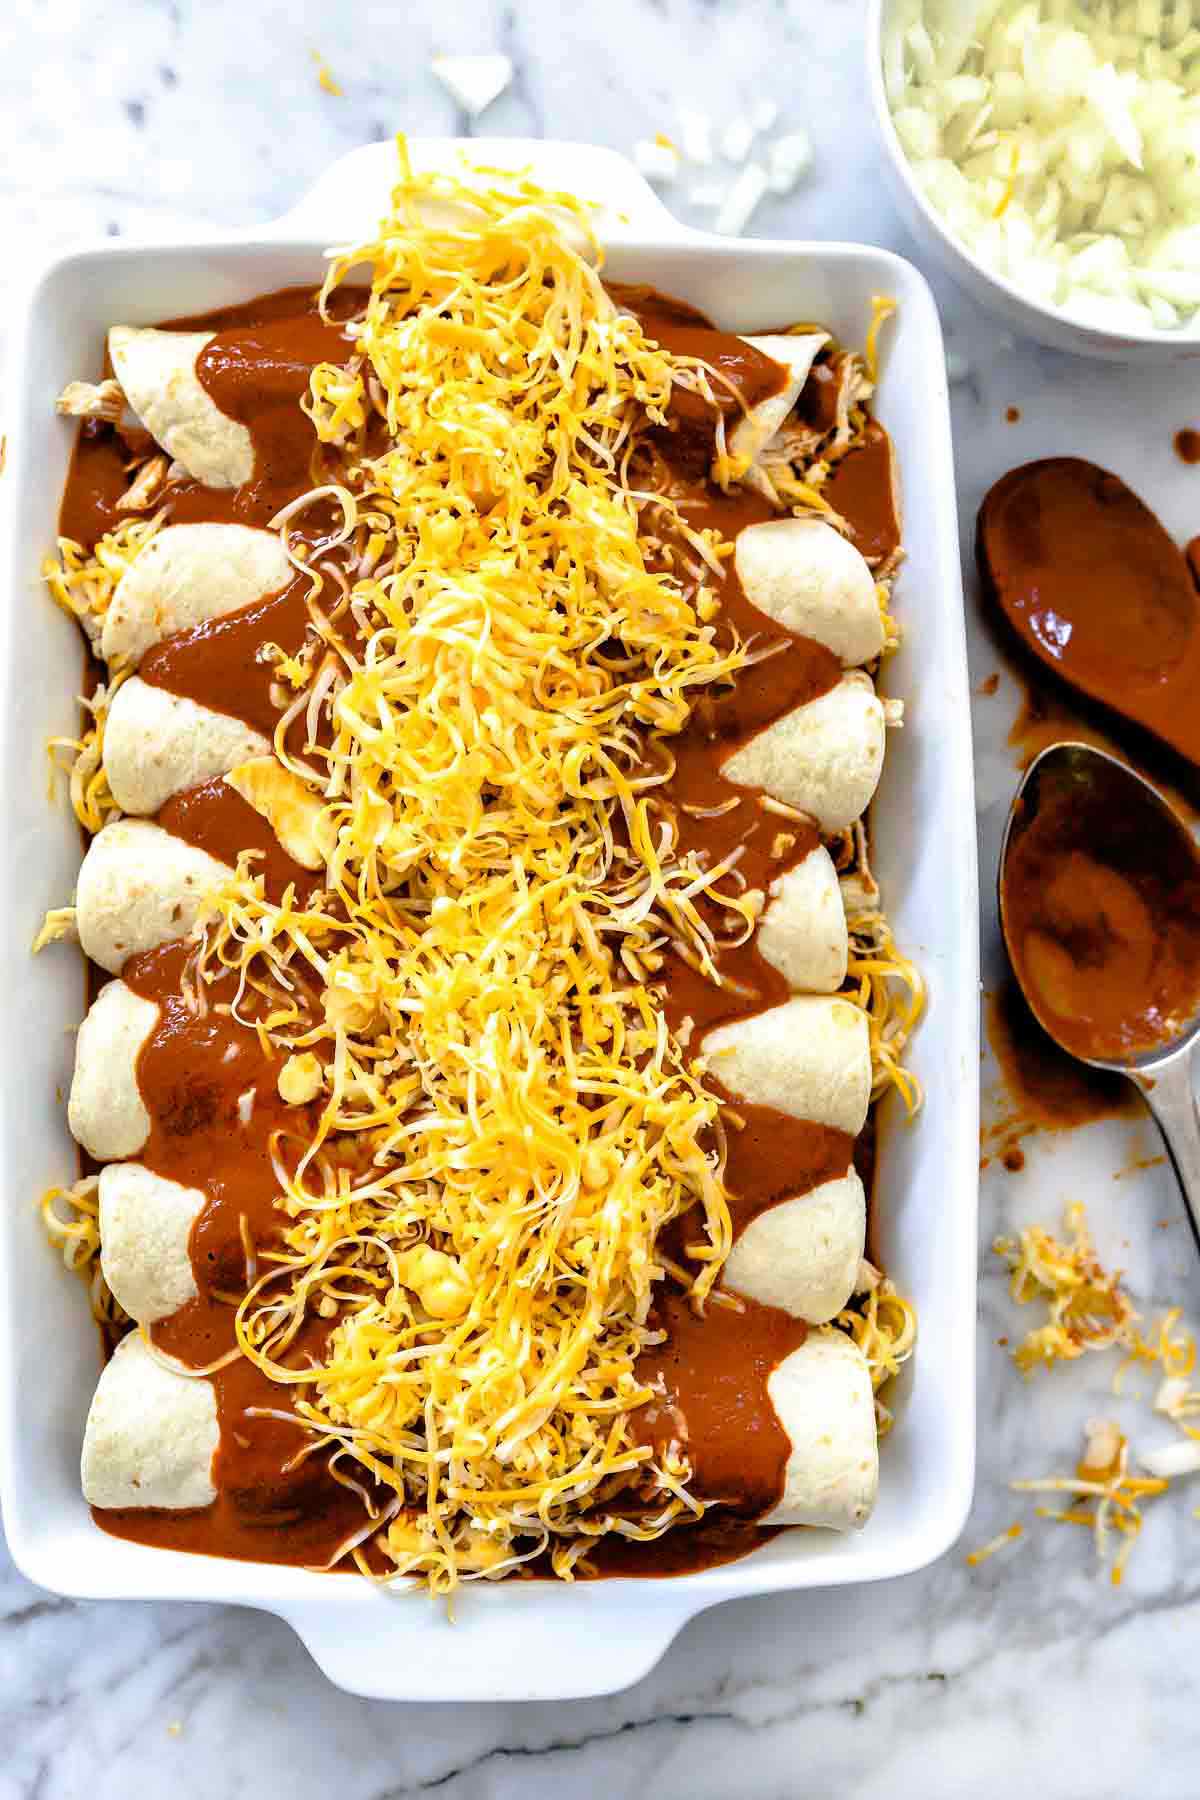
Juicy shredded chicken is rolled up in flour tortillas and topped with the creamiest cilantro lime sauce to make the best-ever green chicken enchiladas.
These chicken enchiladas doused in green sauce are fast, easy, and oh so flavorful.
The sauce comes together in 5 minutes with the help of your trusty blender and is made extra creamy thanks to the addition of ripe avocados and heavy cream.
To keep this recipe extra easy breezy, a store-bought rotisserie chicken is shredded and used for filling the tortillas. Any pre-cooked chicken will do, but why make life harder than you have to?
Green chicken enchiladas are hearty and filling, yet bursting with the fresh flavors of cilantro, lime, and green onion. Mexican food is truly the best.
Heidi’s Tips for Recipe Success
I prefer using flour tortillas in this recipe because I love the way they nearly melt into the cheese. If you’re looking for something a little heftier, go ahead and give white corn tortillas a try.
Store-bought rotisserie chicken is the easiest to shred, and I typically go at the bird using just two forks and some willpower.
Unlike traditional enchilada sauce, the green sauce in this recipe isn’t cooked and is bursting with fresh ingredients. Because of that, it’s best prepared and used right away.
What’s in This Recipe?
The full recipe, with amounts, can be found in the recipe card below.
Canned hatch chiles — The distinct fruity, smoky flavor of the hatch chiles really takes the filling to the next level. They’re not too spicy, but they definitely pack in some heat.
Onion — Dice it finely so you don’t crunch down on big bites in the filling.
Shredded Mexican cheese blend — Feel free to swap in another favorite cheese, like Monterrey Jack or cotija.
Flour tortillas — Flour tortillas almost melt into the filling. If you’re a corn tortilla purist, fry them quickly in canola oil (about 10 seconds) to make them pliable and easy to roll.
Heavy whipping cream — Makes for a creamy sauce and balances out any spiciness from the hatch chiles.
Avocados — Lends the sauce even more creamy richness without making it taste heavy.
Chicken broth — Thins out the sauce without making it taste watery.
Fresh cilantro — Since the green enchilada sauce gets blitzed in the blender, you can use both the stems and leaves.
Lime juice — Brightens up the sauce and cuts through the heavy cream.
Spices — A little ground cumin, garlic salt, and kosher salt are all you need to finish the sauce.
How to Make Green Chicken Enchiladas
Blend up the sauce. It’s as easy as adding everything to a blender and mixing until smooth.
Make the filling. Stir together the shredded chicken, onion, and hatch chiles.
Sauce them up. Add part of the green sauce to inject the filling with flavor and keep it moist.
Roll ’em up. Add a little of the chicken mixture and shredded cheese to each tortilla, then roll the enchiladas. Place them seam-side down in your baking dish to avoid leakage in the oven.
Heidi’s Tip: I like to spoon a little sauce into the bottom of the baking dish to prevent the enchiladas from sticking and flavor them from the bottom-up.
Sprinkle with cheese and bake. Finish the enchiladas with a final layer of sauce and a hearty sprinkling of cheese before baking until browned and bubbling. Cover the pan with foil to seal in the moisture and encourage even cooking before removing so the cheese can brown in the final few minutes.
FAQs
Can enchiladas be frozen?
Enchiladas are a fantastic freezer meal to have on hand. Assemble the enchiladas, then cover tightly with plastic wrap and foil before freezing.
Bake the enchiladas from frozen (remove the plastic wrap first!) for 45 minutes, covered, then a final 10 minutes uncovered.
Can I use a different enchilada sauce?
If you’re not in the mood for green enchiladas, swap out the cilantro lime sauce with classic red enchilada sauce or mole sauce.
Should I cover enchiladas when baking them?
Pop the enchiladas into the oven covered, then after about 20 minutes remove the foil. This ensures the enchiladas will be heated through with a golden layer of cheese on top without the danger of drying them out.
Storage Tips
Leftover enchiladas will last up to 5 days in the fridge, noting that the tortillas will continue to soften as they sit in the sauce. Reheat enchiladas for 30-second bursts in the microwave or covered in a 350ºF oven.
What to Serve With Green Chicken Enchiladas
If you make this recipe, please let me know! Leave a ⭐️⭐️⭐️⭐️⭐️ rating below, leave a comment to tell us what you think, and tag me on Instagram @foodiecrush.
Green Chicken Enchiladas Recipe
Chicken enchiladas are topped with the creamiest homemade avocado cilantro sauce for an easy dinner the whole family will gobble up.
To prepare the sauce: Mix whipping cream, chicken broth, 2 avocados, cilantro leaves and stems, cumin, garlic salt, lime juice and ½ teaspoon kosher salt in a blender and mix well to combine. Season with more salt if needed.
In a large bowl mix together chicken, chiles and onion. Add half of the avocado cream and stir to mix well. Add more salt if needed (this will depend on how salty your rotisserie chicken is.)
Prepare a 9×12-inch baking dish by giving it a light coat of cooking spray and ¼ cup of avocado cream spread evenly on bottom of baking dish.
To assemble enchiladas: Place about ⅓ cup chicken mixture along the bottom third of tortilla and top with ¼ cup of shredded cheese. Carefully roll the tortilla and place it seam-side down in the baking dish. Repeat placing tortillas side by side until you’ve run out of space. Pour avocado cream evenly over the tortillas and spread 1 cup cheese on top.
Cover with foil and bake for 20 minutes, remove foil and bake for another 10 minutes or until enchiladas are cooked through and cheese is lightly browned.
Garnish with chopped green onion, cotija cheese, additional avocado, cilantro leaves and salsa or fresh tomatoes.
We send good emails. Subscribe to FoodieCrush and have each post plus exclusive content only for our subscribers delivered straight to your e-mail box.
As always, thank you for reading and supporting companies I partner with, which allows me to create more unique content and recipes for you. There may be affiliate links in this post of which I receive a small commission. All opinions are always my own.
Disclosure: This is a working partnership with Avocados from Mexico and Muy Bueno Cookbook. I was compensated for recipe development but as always my opinions are my own and my opinion is I love avocados.
Celebrate the flavors of one of Mexico’s most popular street foods, elotes, in the form of this homemade Elote Seasoning recipe that is quick and easy to make and will add life, flavor, and fiesta to your foods! Highly versatile, its combination of smoky, spicy, sweet, tangy and salty is delicious on everything from grilled chicken and salmon to scrambled eggs and popcorn!
Mexican Street Corn Seasoning
You already know that I’m huge advocate of making homemade seasoning blends and this elote seasoning is no exception. Making your own gives you full control over what’s in it (and what isn’t), is fully customizable (adjusting the level of salt and spiciness, swapping out ingredients, etc), is cheaper to make, and is much fresher and more vibrant tasting!
One of my favorite Mexican seasoning blends, this homemade elote seasoning is wonderfully versatile and positively bursting with smoky, zesty, tangy, savory flavors! And if you’re looking for unique edible gift ideas, this is a great one!
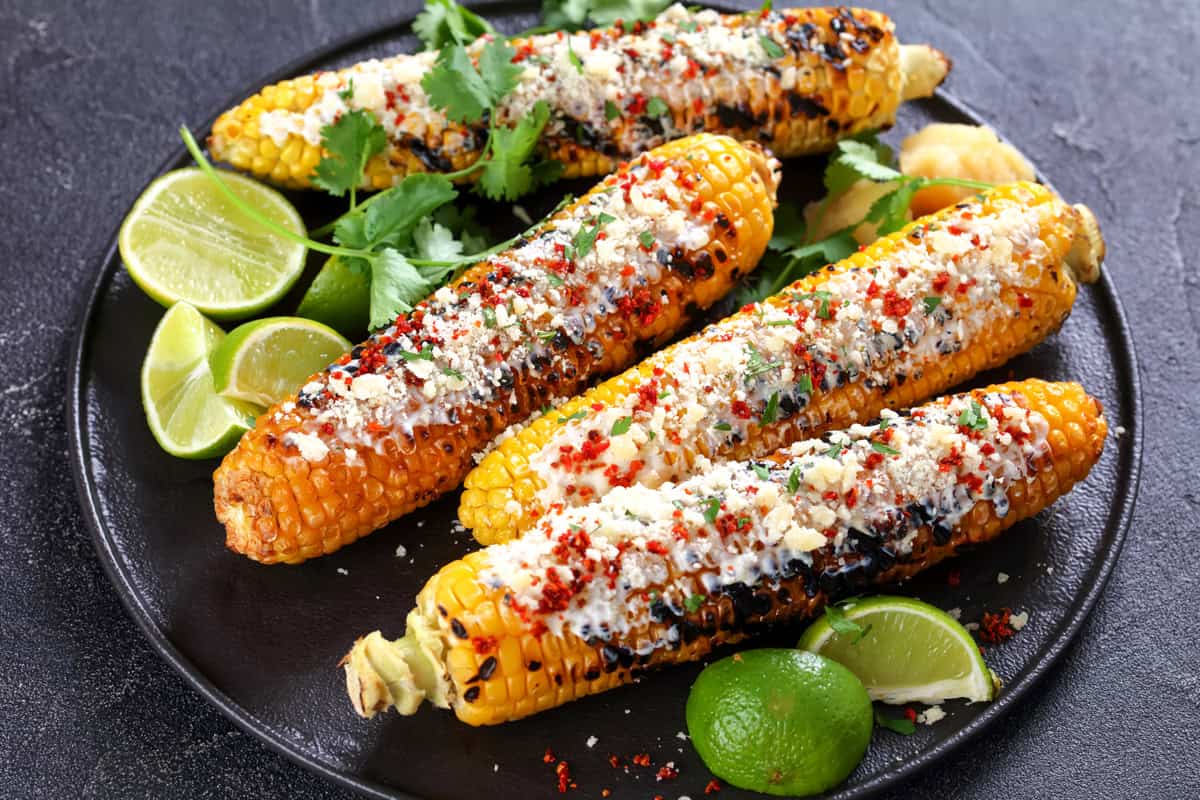
What is Elote Seasoning?
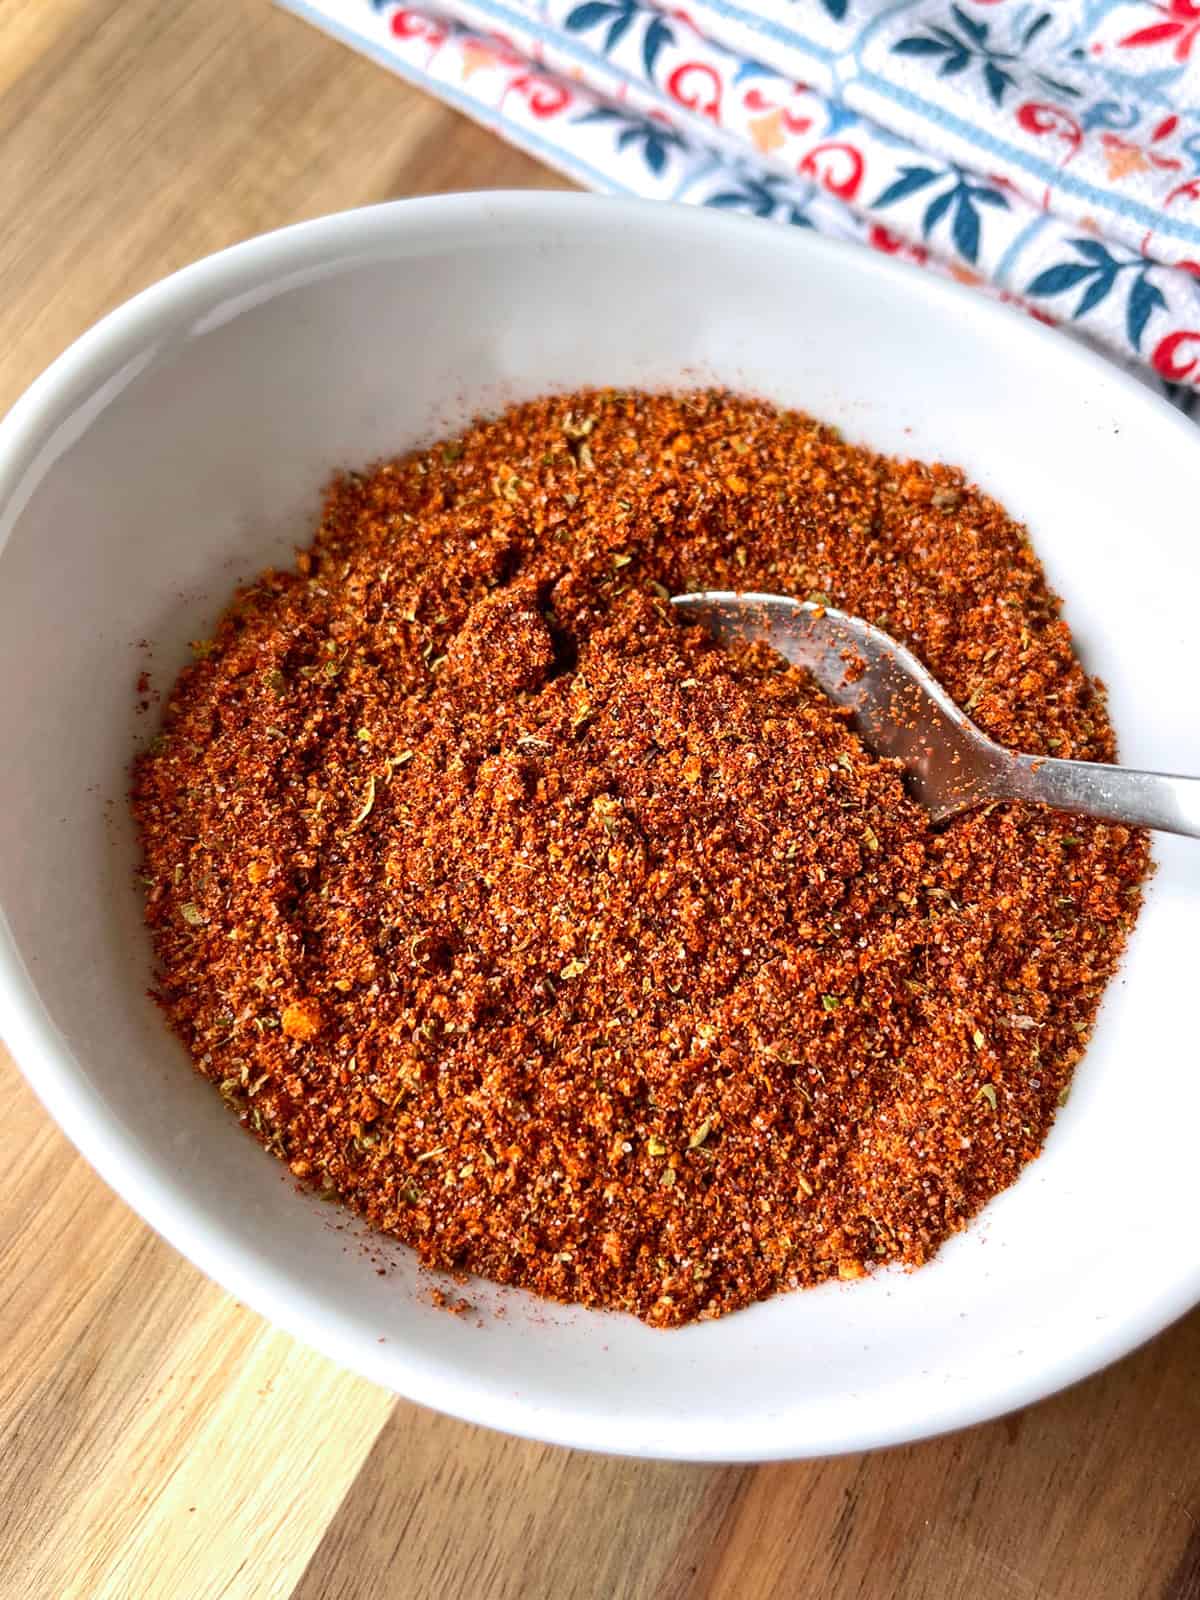
You may be familiar with “Trader Joe’s Everything But the Elote Seasoning”. This is my take on it, but with even more flavor. Elote seasoning is a spice blend that is inspired by a traditional Mexican snack called elotes, or Mexican street corn. While you won’t find “elote seasoning” in Mexico, what you’ll find is grilled corn on the cob that is seasoned with chilies, cumin, cilantro, lime juice and cotija or queso fresco cheese. That combination of smoky, sweet, spicy, savory, salty and herbaceous flavors is captured in this dried elote seasoning blend that you can conveniently grab and shake onto a variety of foods. It’s a fun way to harness that famous flavor profile in everything from roast chicken to popcorn!
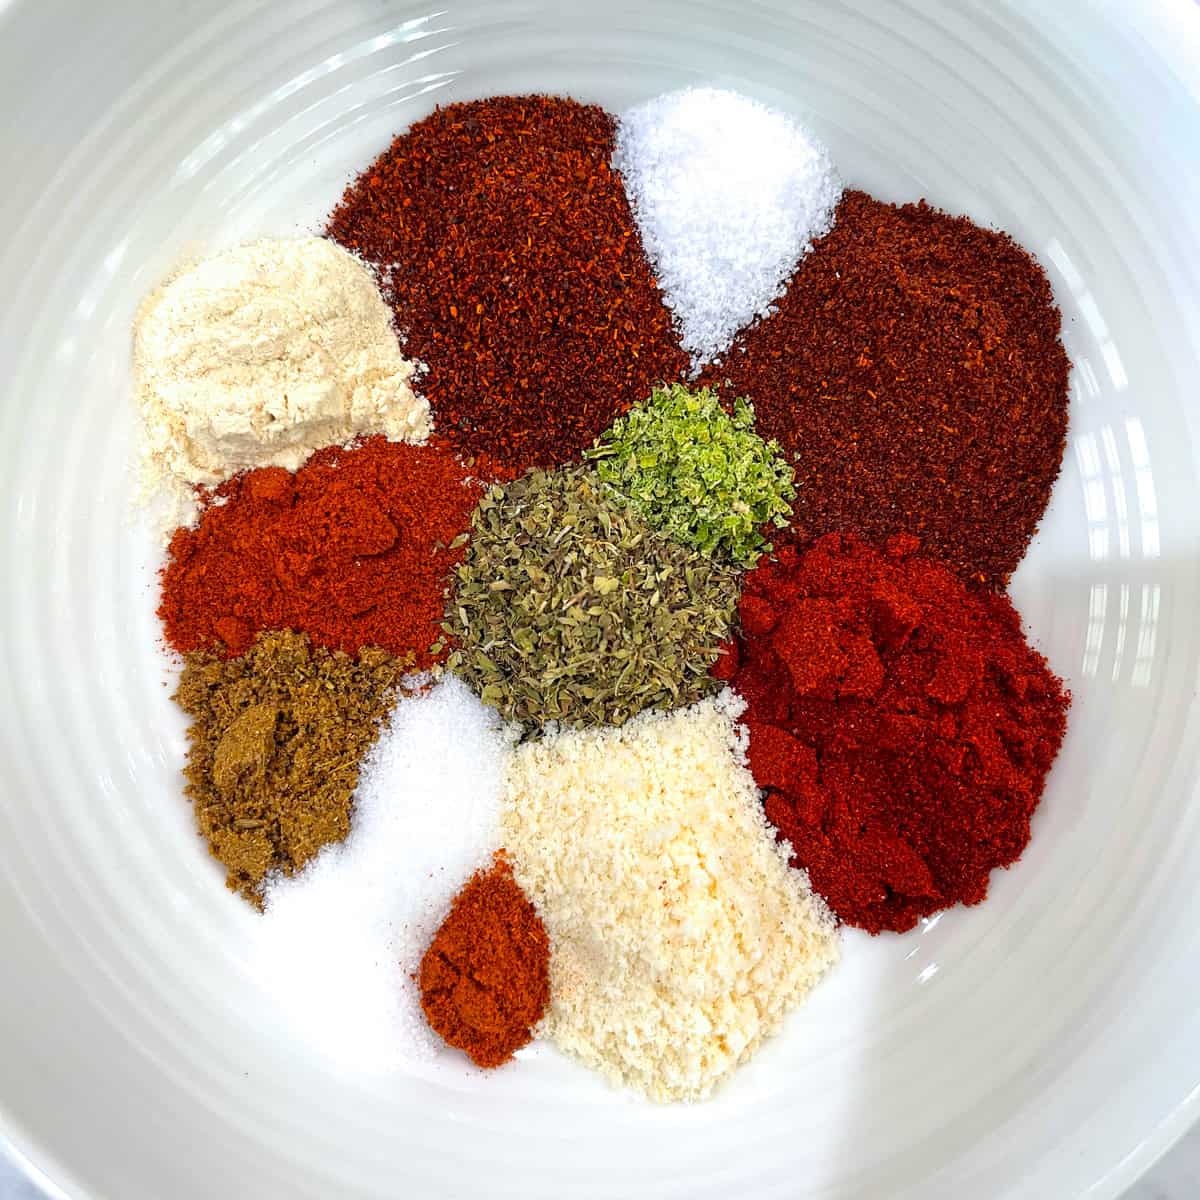
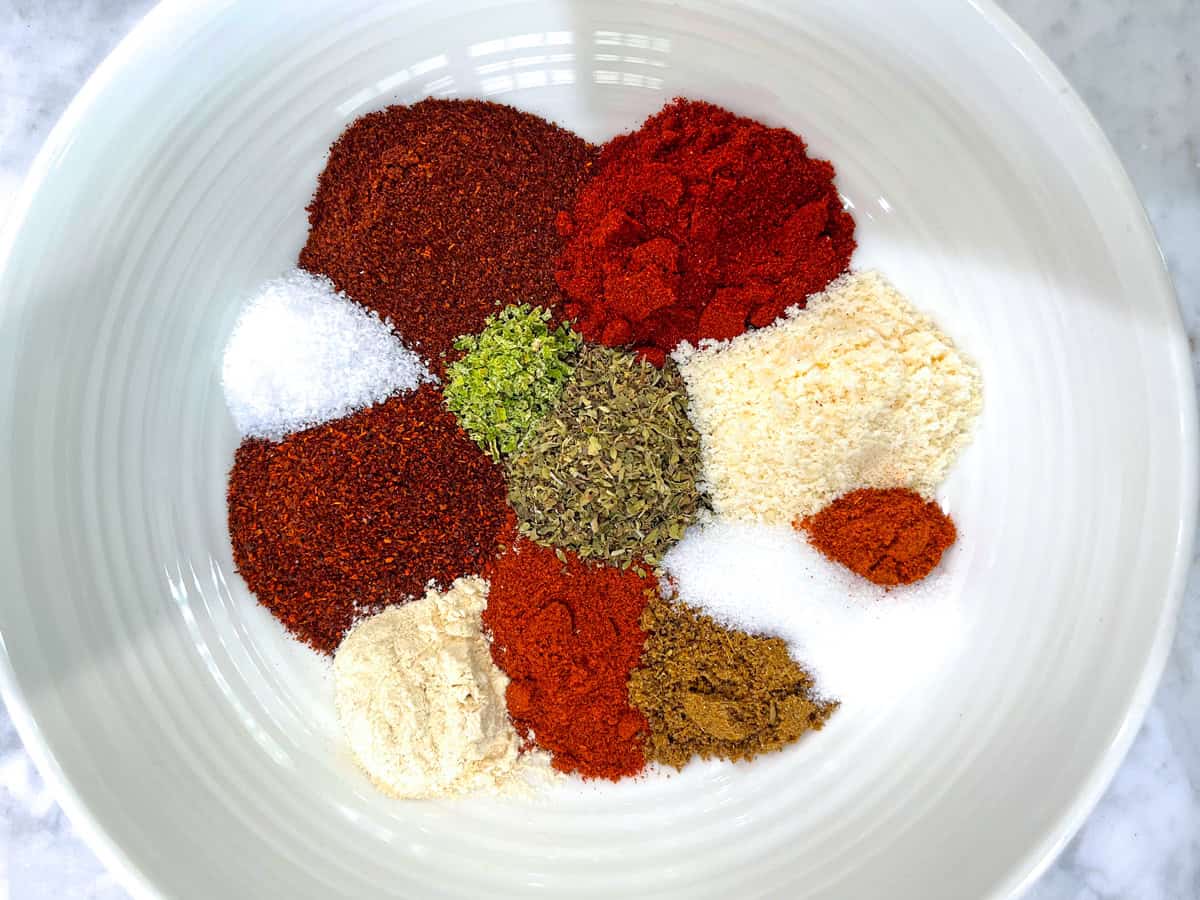
Elote Seasoning Ingredients
Mexican street corn (or elotes) feature a blend of sweet, smoky, spicy, herby, and salty. They’re sprinkled with a variety of ground chilies, cumin, salt, cilantro, lime juice and cotija or queso fresco cheese and then roasted on the grill. My elote seasoning recipe captures these flavors in a dried spice blend form that you can easily grab and shake onto your foods to capture that famous flavor. Here is what you’ll need to make it:
Chili Powder: This is your standard mild chili powder that you can find in any store.
Guajillo or Ancho Chili Powder: I like to add a variety of chili blends for flavor complexity but if you don’t have guajillo chili powder or ancho chili powder you can substitute more of the regular chili powder. If you have another chili variety, add that!
Paprika: Adds color and an earthy sweetness.
Chipotle Powder: This adds the smoky component of the blend. Chipotle powder is made from smoked and ground jalapeno peppers. If you don’t have chipotle powder you can substitute smoked paprika. For my DIY’ers, see my tutorial on How to Make Chipotle Peppers and then grind some to use in this blend.
Cayenne Pepper: If you’re using chipotle powder you won’t need the extra heat (unless you want more heat) but if you’re using smoked paprika, the cayenne will provide that added kick.
Parmesan cheese: This mimics the flavor of the cotija and adds that wonderful “umami” element to the blend. If you’re vegan or dairy free, you can substitute nutritional yeast.
Cumin: Adds a slightly sweet, nutty flavor.
Garlic Powder: This adds a wonderful earthy umami component and rounds out the elote seasoning.
Dried cilantro: Adds a bright citrusy-peppery flavor. Cilantro is the signature herb used for making elotes but it is a polarizing herb (it’s literally a gene thing; if you have the gene it tastes like soap). If you’re one of those people who can’t tolerate it, you can substitute oregano. You can find dried cilantro in the spice section of most grocery stores or you can easily make your own by dehydrating some fresh cilantro in the oven at 170-180F until dried and flaky and then crumble it with your fingers.
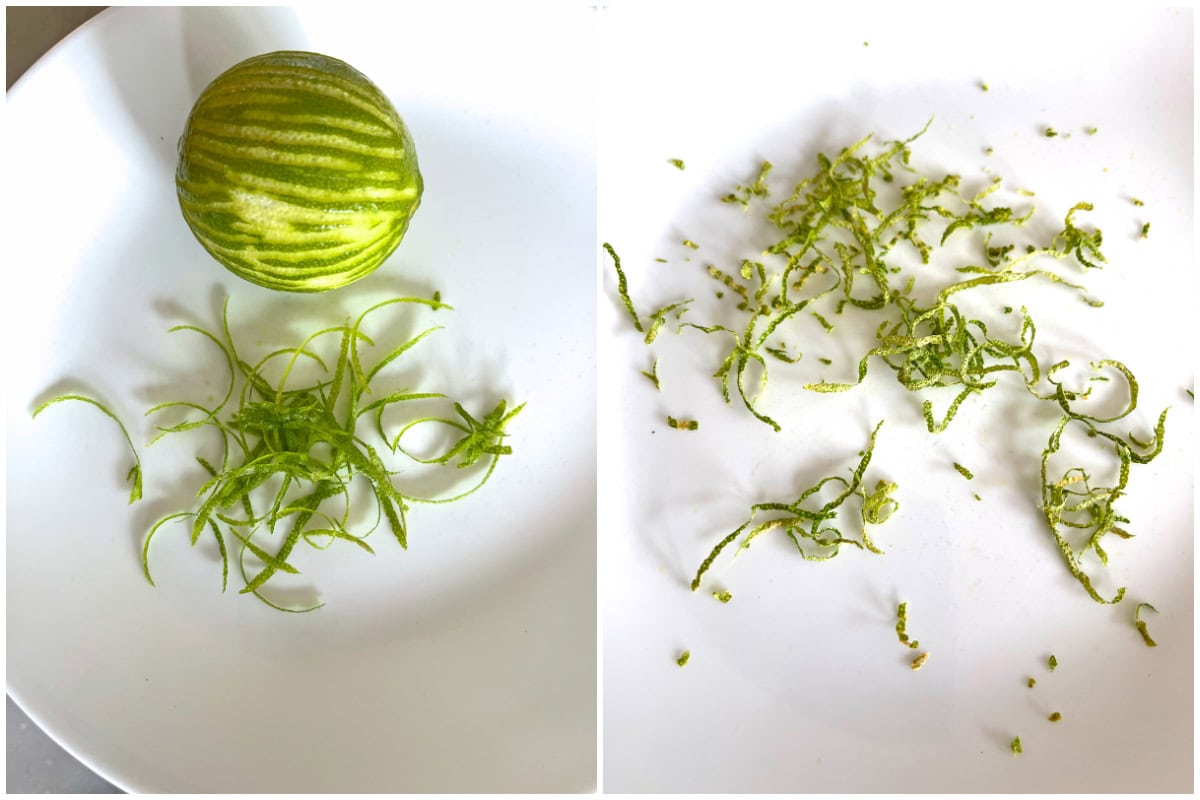
Dried Lime Zest: A key flavor component in Mexican street corn, you don’t want to miss out on this. Don’t worry about special ordering it, it’s so easy to make and I’ll show you how below.
Cane Sugar: This mimics the sweetness of the corn and provides balance.
Salt: I use kosher or sea salt. Depending on how you’re planning on using this blend, you can add more or less salt, or omit it entirely.
Elote Seasoning Recipe
Let’s get started!
First you’ll need to make the dried lime zest. Preheat the oven to 170-180F/75-80C.
Zest one lime, lay the zest out on a plate and stick it in the oven for 15-20 minutes. Remove and let it cool completely, then crumble it up finely with your fingers.
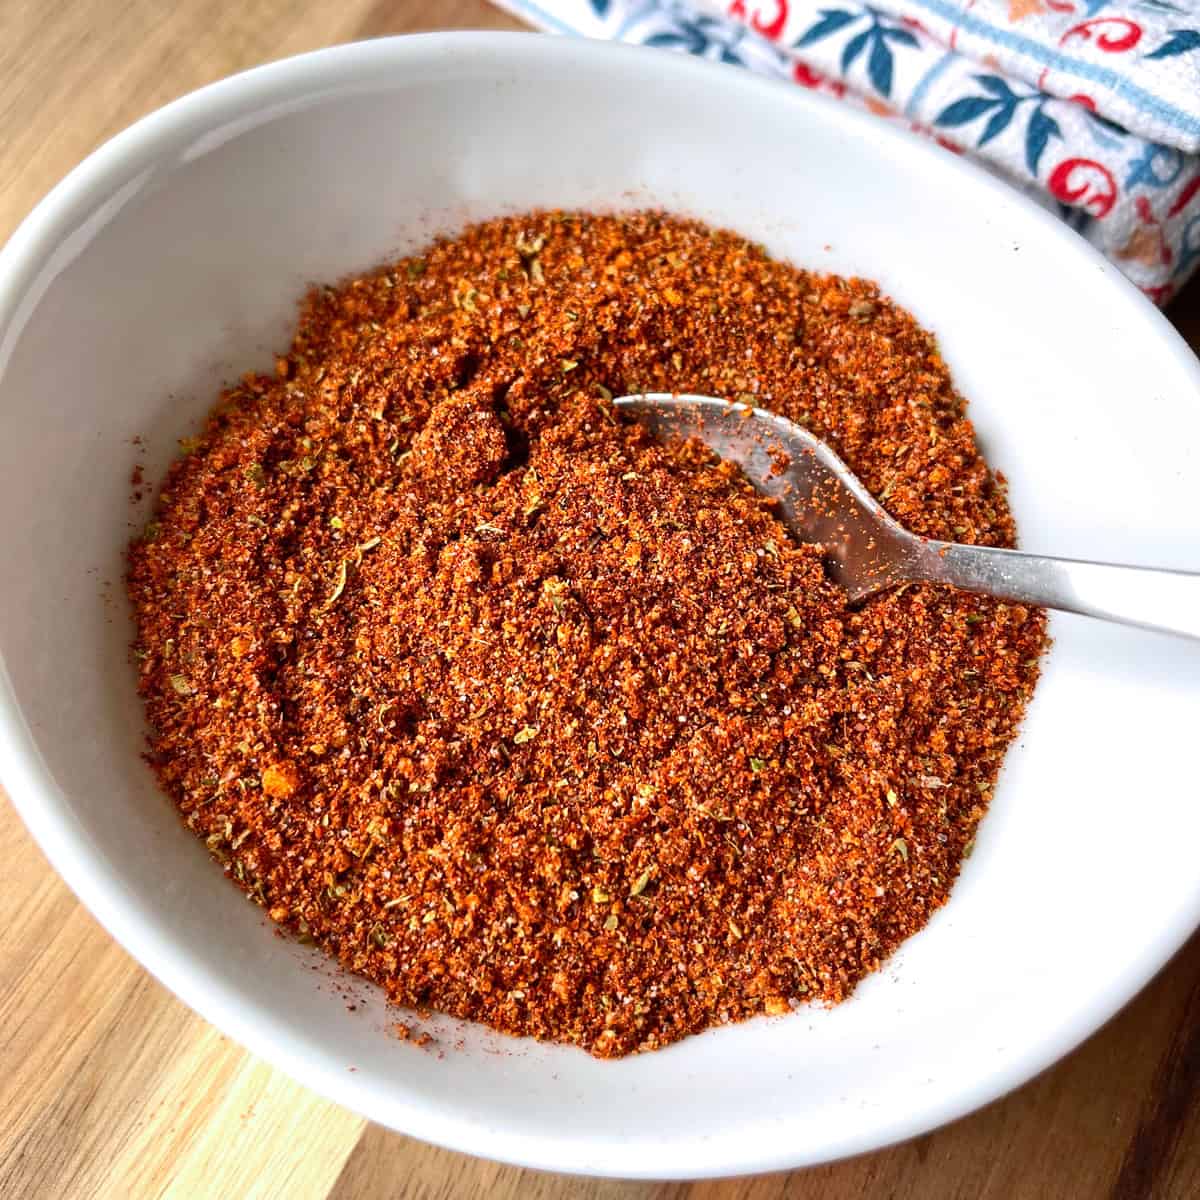
Measure the ingredients and place them into a bowl or jar.
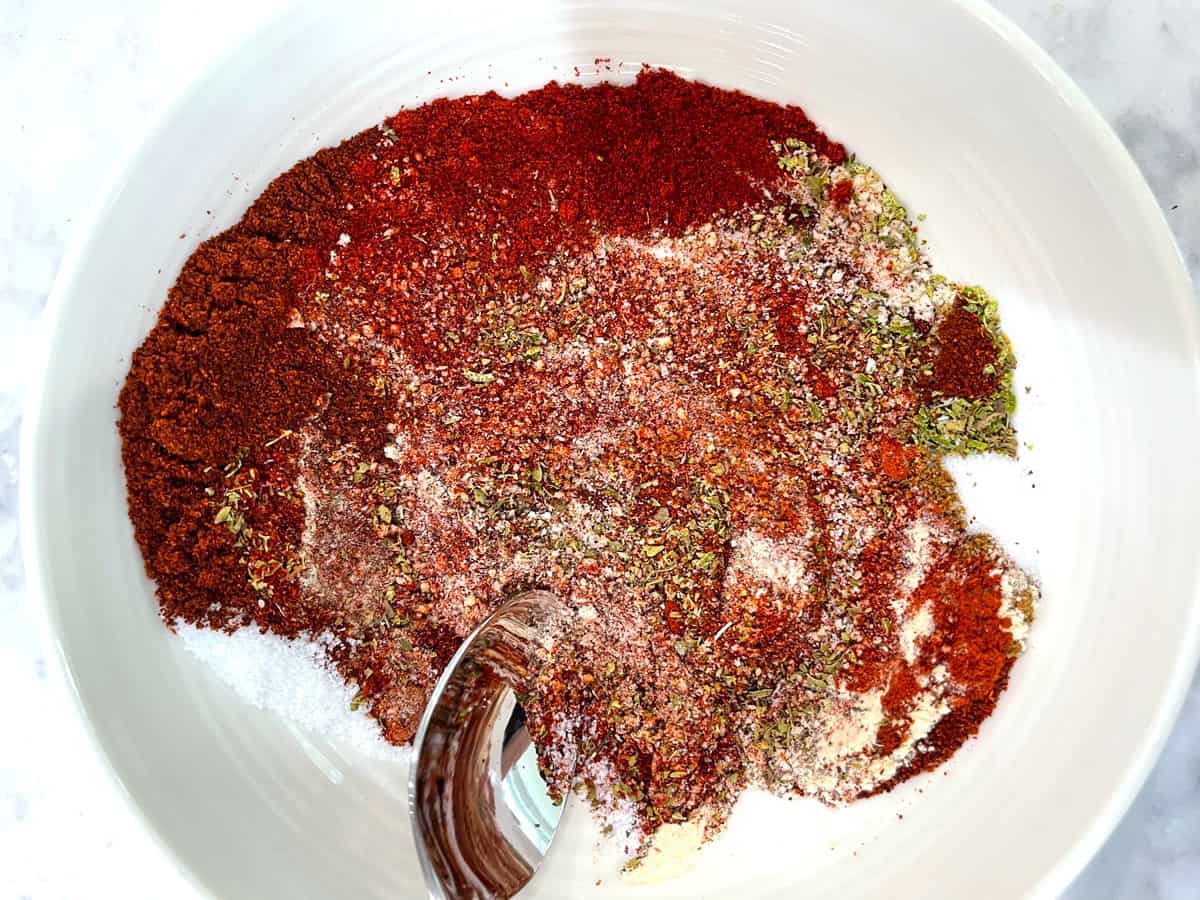
Stir the spices or shake the jar until combined. Done!
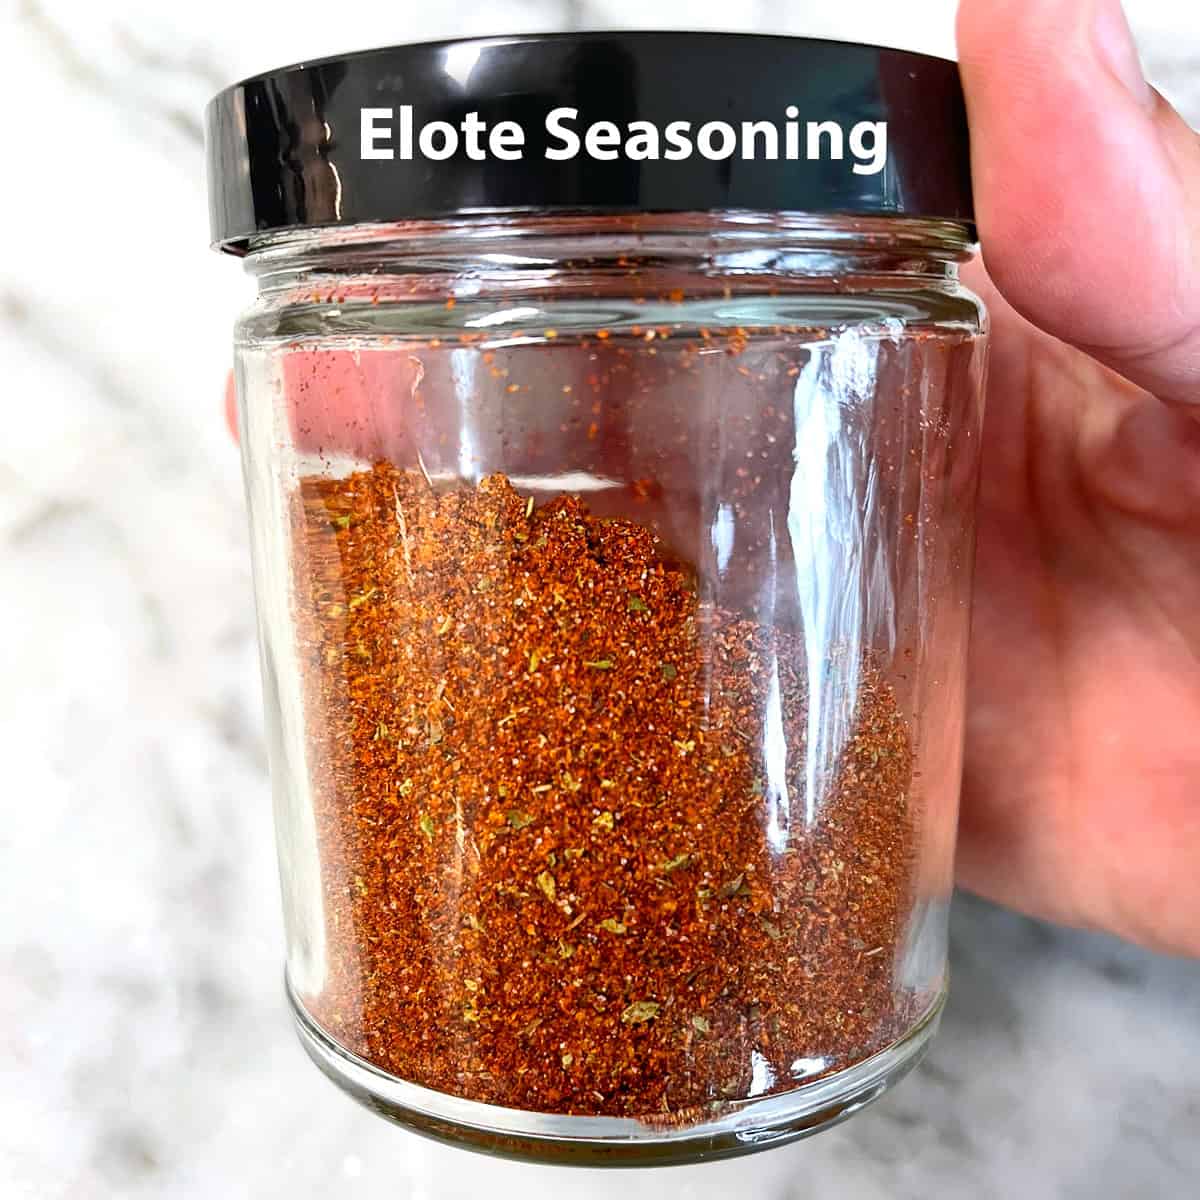
Store the elote seasoning in a glass jar with an airtight lid.
Store in the fridge where it will keep for up to a month or at room temperature where it will keep for up to a week.
How to Use It
One of the things I love about elote seasoning is its versatility. There are so many creative ways that you can use it. Here are just a few ideas to get you started:
Use as a dry rub for chicken, pork, beef, lamb, fish and seafood.
Added to olive oil and lemon juice for a simple Mexican-style vinaigrette.
Tossed into freshly popped popcorn
Storing Tips
Unless you’re using the spice blend right away, be sure to use dehydrated and not fresh parmesan (dehydrated is the stuff in the canisters stored at room temp). If storing at room temp I recommend using the elote seasoning within a week. If you store it in the fridge, it will keep for up to a month.
For more homemade seasoning blends from around the world try my:
Elote Seasoning Recipe
This Elote Seasoning captures the life and flavor of one of Mexico’s most famous street foods, elotes, in the form of a convenient spice blend you can add to a variety of foods for a delicious flavor kick!
Prep Time 5 minutesmins
Dehydrating Time (Lime Zest) 15 minutesmins
Total Time 20 minutesmins
Course Seasoning Blend
Cuisine Mexican
Servings 16
Calories 8kcal
To make the lime zest (this can be done days in advance): Preheat the oven to 170-180F/75-80C.Zest one lime, lay the zest out on a plate and stick it in the oven for 15-20 minutes. Remove and let it cool completely, then crumble it up finely with your fingers.
Place all of the ingredients in a bowl or in a jar and stir or shake to thoroughly combine. Store in a glass jar with an airtight lid in the fridge where it will keep for up to a month. At room temperature it should be used within a week. Makes about 1/3 cup seasoning.
Storage: Unless you’re using the spice blend right away, be sure to use dehydrated and not fresh parmesan (dehydrated is the stuff in the canisters stored at room temp). If storing at room temp I recommend using the elote seasoning within a week. If you store it in the fridge, it will keep for up to a month.
Hi, I’m Kimberly Killebrew and welcome to Daring Gourmet where you’ll find delicious originals, revitalized classics, and simply downright good eats from around the world! Originally from Germany, later raised in England, world-traveled, and now living in the U.S., from my globally-influenced kitchen I invite you to tour the world through your taste buds!


