برچسب: Recipe

  • Easy Cheesy Frito Chili Pie Recipe

    Easy Cheesy Frito Chili Pie Recipe


    This website may contain affiliate links and advertising so that we can provide recipes to you. Read my disclosure policy.

    Not to be dramatic, but Frito Chili Pie might have saved my sanity. Zero whining, zero leftovers, it was a total dinner miracle. Crunchy, flavorful and ridiculously easy… you need this in your life ASAP.

    Overhead shot of Frito chili pie garnished with cilantro and jalapeños.

    Crunchy, Saucy, Totally Addictive

    • Big flavor, little effort: Layers of savory chili, crunchy Fritos, and melty cheese are all the things your kids love! It couldn’t be easier, and it tastes amazing!
    • Made-From-Scratch or Made-in-Minutes: This recipe has you make your own chili from scratch. But, if you need dinner on the table now? Grab your favorite canned chili and call it a win.

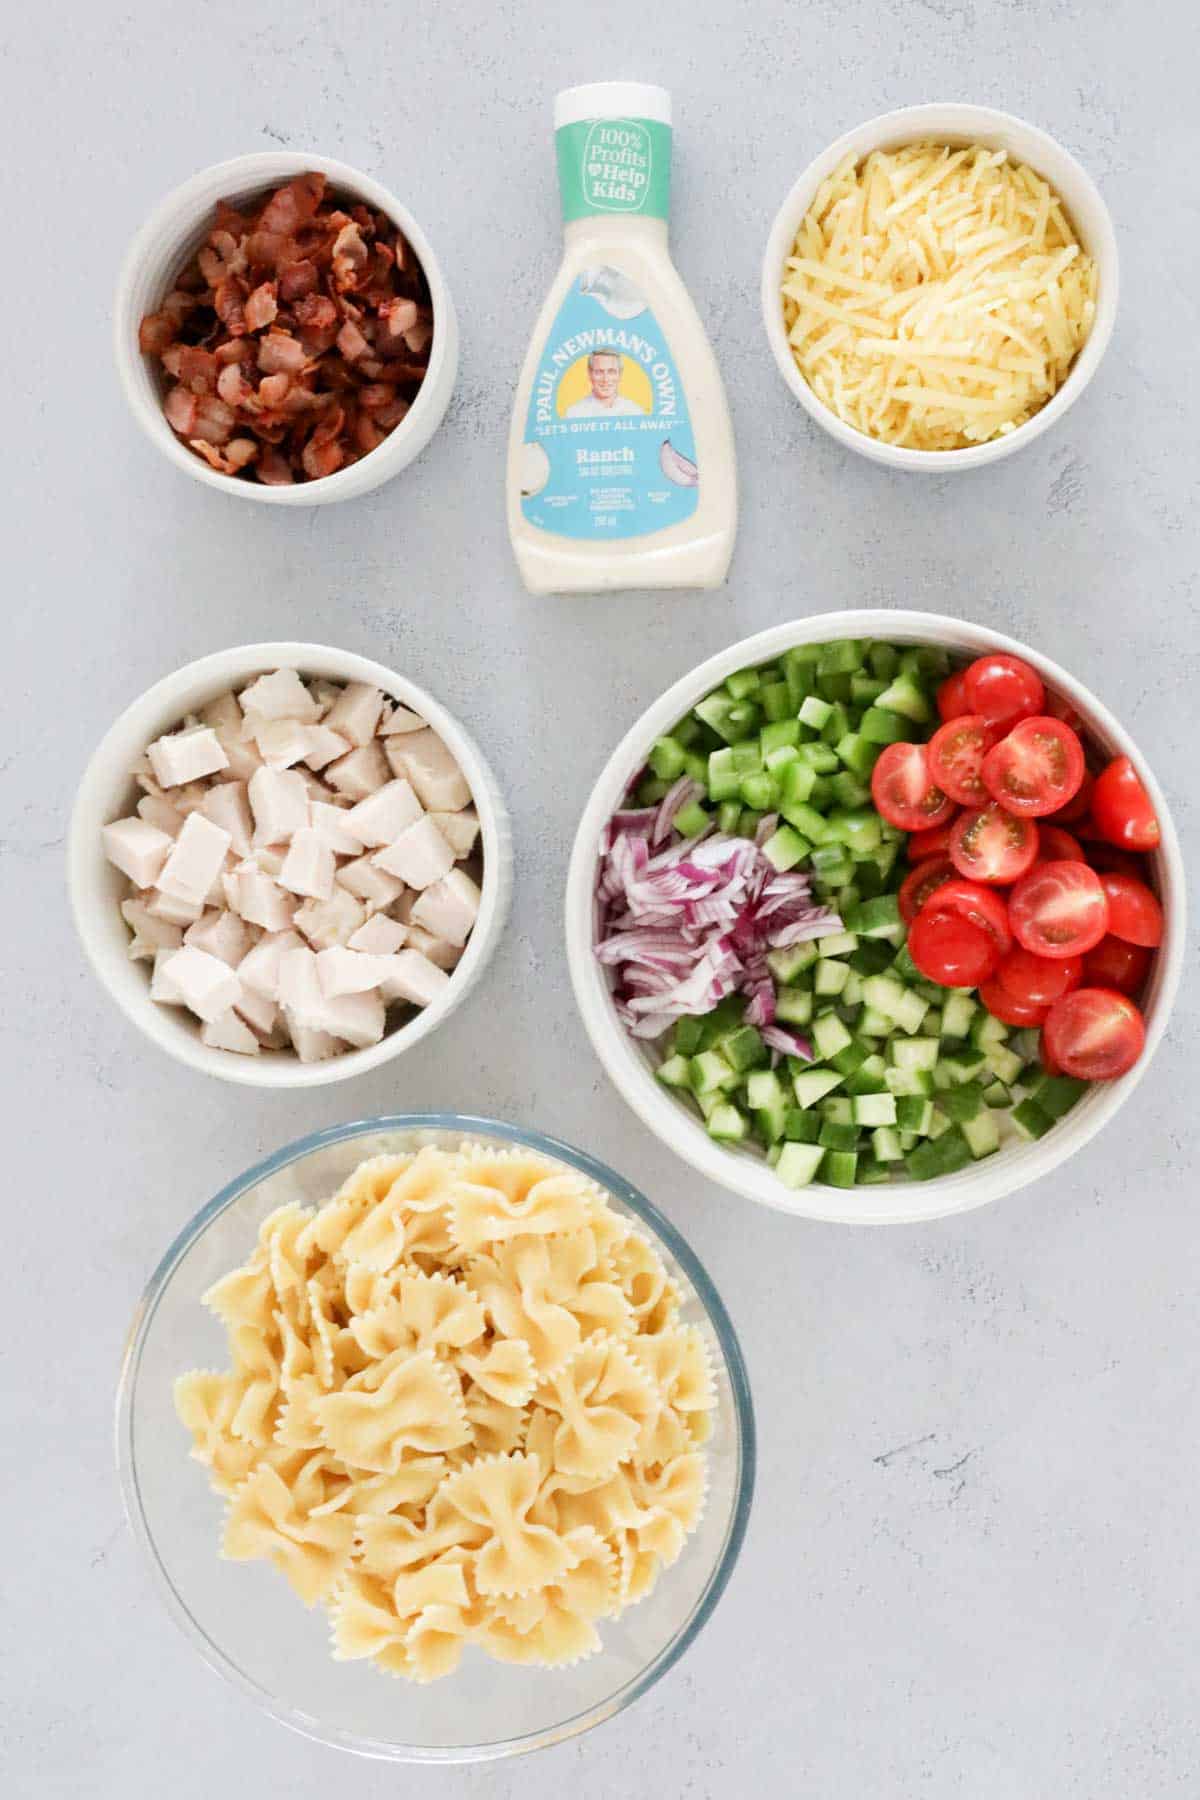
    Frito Chili Pie Ingredients

    Overhead shot of labeled ingredients.
    • Short on Time? Use Canned Chili instead! You can either make the chili from scratch using this recipe or keep things quick and easy by swapping in two (14-ounce) cans of your favorite store-bought chili.
    • Customize This Recipe: One of my favorite things about homemade chili is how easy it is to customize — you can mix in extra veggies, leave the beans out, adjust the spices, swap ground turkey for beef, or tweak it any way you like!

    How to Make Frito Chili Pie

    Frito chili pie is not just for Texans! Just whip up the tasty chili (or crack open a couple cans if you’re keeping it easy), layer it over crunchy chips, add plenty of cheese, and pop it in the oven.

    1. Cook the Meat: Heat a pot over medium-high heat on the stove, add the ground beef and diced onion to the pot. Cook for 8 minutes until the meat is browned and the onions are tender.
    2. Add Seasonings: Add the garlic, chili powder, oregano, ground cumin, coriander, salt, and pepper to the meat mixture, then stir to combine. Cook for one more minute.
    3. Add Tomatoes and Beans: Add in the beef broth, tomato sauce, Rotel tomatoes, pinto beans, and kidney beans, then stir and simmer for another 5 minutes to heat through.
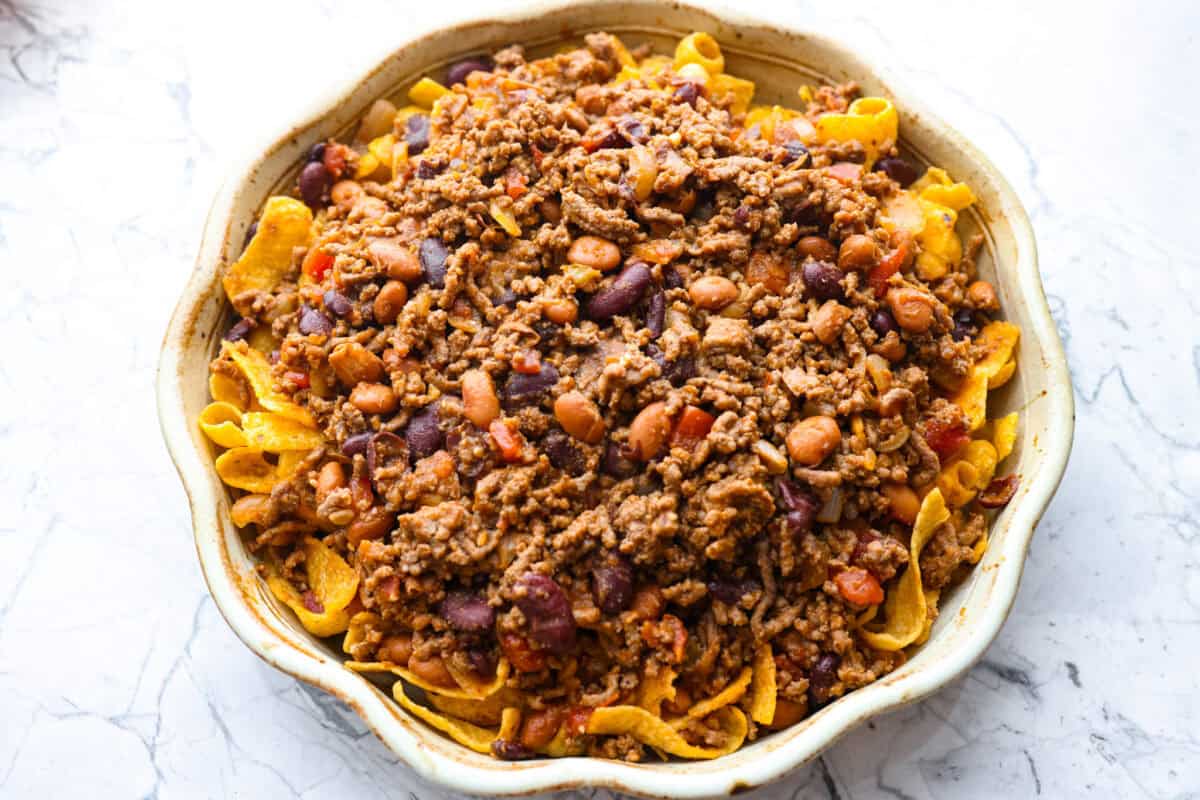
    4. Prep Pie Pan: Spray a 2-inch deep 9-inch pie pan with non-stick cooking spray and dump the bag of Fritos chips into the pan.
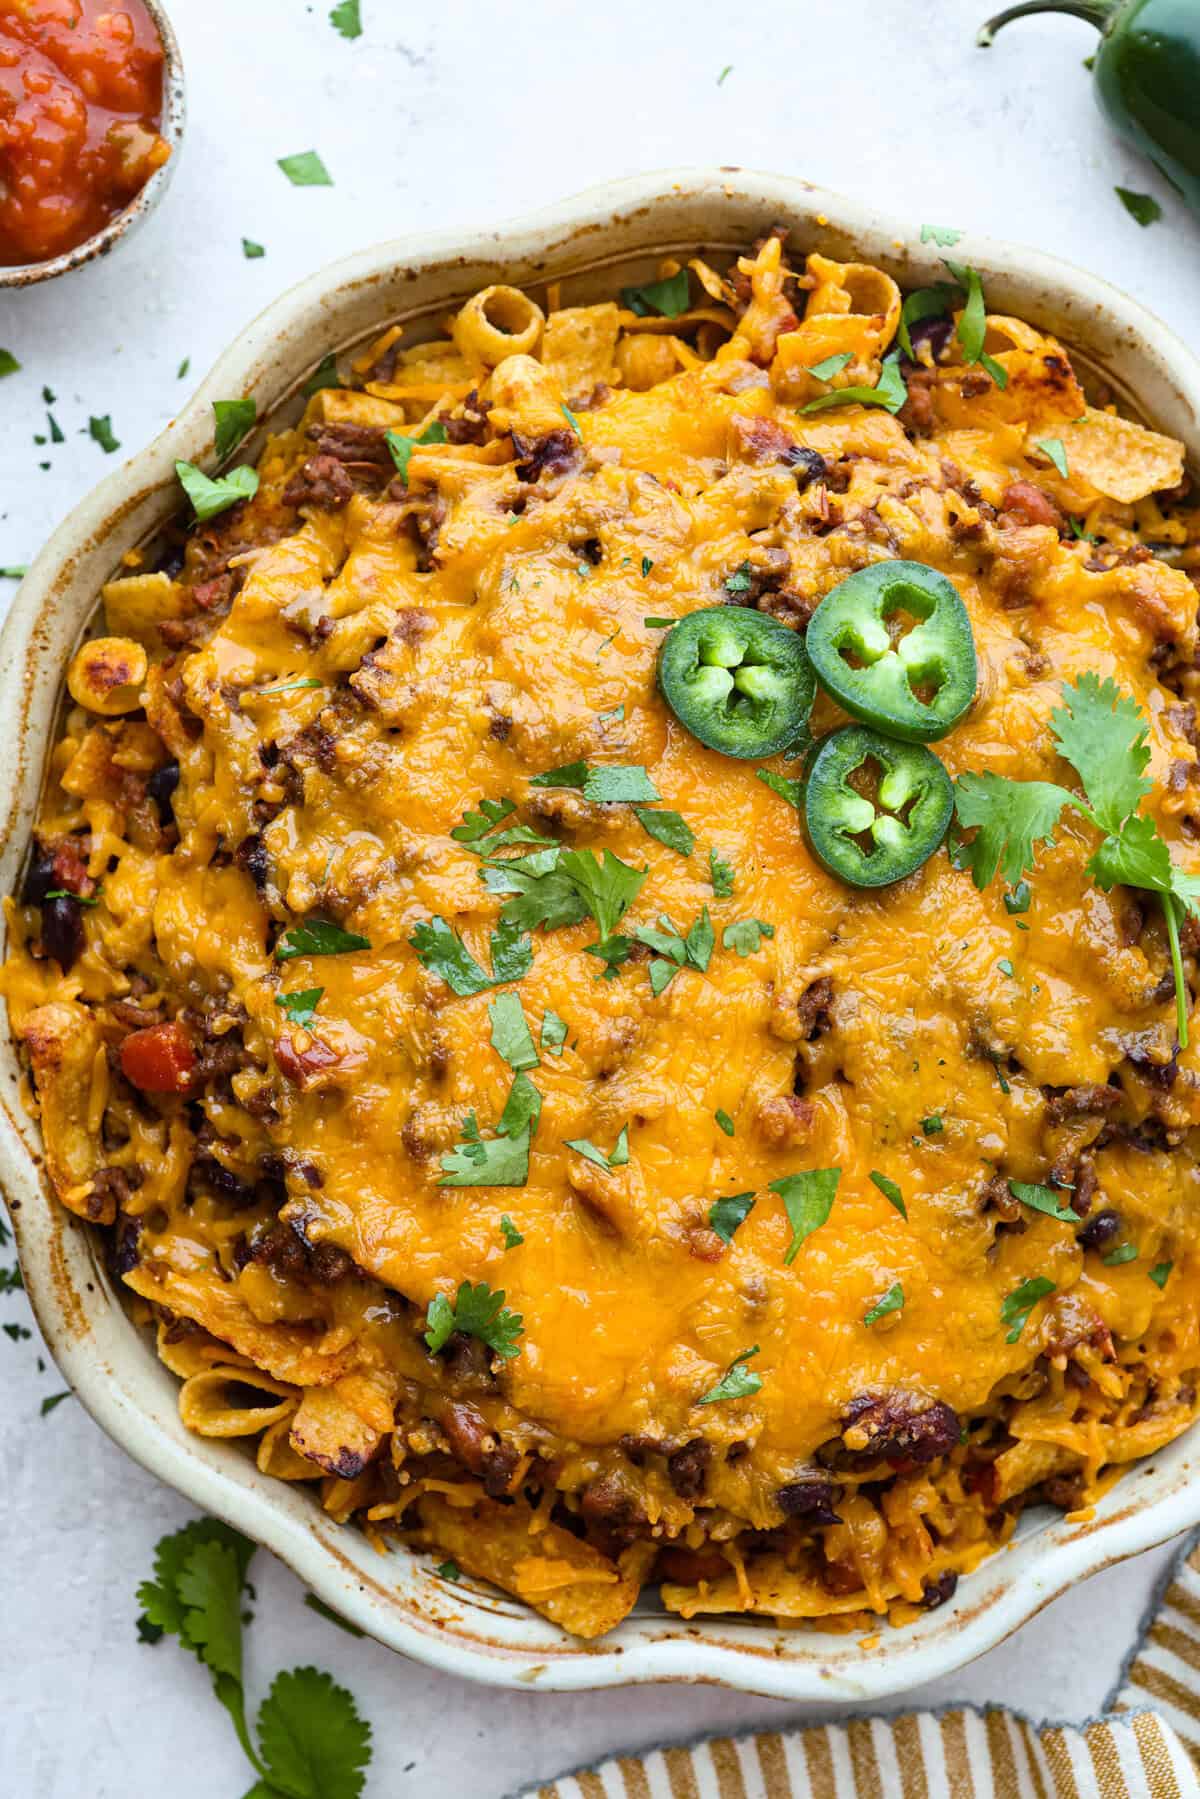
    5. Assemble: Pour the chili evenly over the Fritos in the pie pan.
    6. Bake with Cheese: Top with shredded sharp cheddar cheese. Broil the pie on HIGH in the oven for 2-3 minutes until the cheese is melted and bubbling. Remove from the oven and then serve fresh.

    Alyssa’s Pro Tip

    No deep pie pan? No problem. You can either split the Frito Chili Pie ingredients between two pans, use a 9×13 dish, or serve the extra chili on the side!

    Close up shot of Frito chili pie.

    Storing Leftovers

    • In the Fridge: I recommend enjoying this dish fresh; storing it will make the chips go soggy. But you can store leftovers in the fridge in an airtight container for 5 days.
    • In the Freezer: To freeze, store separately in an airtight container, and keep it frozen for up to a month.

    More Delicious Chili Recipes

    The great thing about this recipe is that you can add all of the toppings you want. cilantro, salsa, guacamole, jalapeños, and green onions. Here are some more chili recipes you can have fun with different toppings!

    Pin this now to find it later

    Pin It

    Prevent your screen from going dark

    • Spray a 2-inch deep 9-inch pie pan with non-stick cooking spray and dump the 1 (9-ounce) bag original Fritos chips into the pan.

    • Heat a pot over medium-high heat on the stove, add the 1 pound ground beef and 1 cup diced onion to the pot. Cook for 8 minutes until the meat is browned and the onion is tender.

    • Add the 3 teaspoons minced garlic, 1 tablespoon chili powder, 2 teaspoons oregano, 1 teaspoon cumin, 1 teaspoon coriander, 1 teaspoon salt, and ½ teaspoon pepper to the meat mixture and stir to combine. Cook for one more minute.

    • Add in the 1 cup beef broth, 1 (8-ounce) can tomato sauce, 1 (10-ounce) can Rotel tomatoes, 1 (15-ounce) drained and rinsed can pinto beans, and 1 (15-ounce) drained and rinsed can kidney beans. Stir and cook for another 5 minutes to heat through.

    • Pour the chili evenly over the Fritos in the pie pan.

    • Top with 1 ½ cups shredded sharp cheddar cheese. Broil the pie on HIGH in the oven for 2-3 minutes until the cheese is melted and bubbling. Remove from the oven and serve fresh.

    Calories: 272kcalCarbohydrates: 16gProtein: 22gFat: 13gSaturated Fat: 6gPolyunsaturated Fat: 1gMonounsaturated Fat: 4gTrans Fat: 0.4gCholesterol: 58mgSodium: 599mgPotassium: 496mgFiber: 5gSugar: 1gVitamin A: 523IUVitamin C: 3mgCalcium: 195mgIron: 4mg

    Nutrition information is automatically calculated, so should only be used as an approximation.


    Source link

  • Creamy Salmon Piccata Recipe | foodiecrush.com

    Creamy Salmon Piccata Recipe | foodiecrush.com


    Seared salmon filets are coated in a lemony, buttery, caper-studded sauce to create the rich and creamy salmon piccata of your dreams. Skip dining out this week and make this Italian staple at home in 20 minutes flat.

    Creamy Salmon Picatta on platter

    Here’s a little secret about the creamy lemon-caper concoction we all know and love as piccata sauce: you can slather it over just about any protein you like.

    Think outside the chicken piccata box, and submerge your favorite flaky fish in that luscious homemade piccata sauce instead.

    That’s right, today we’re ditching the poultry and making salmon piccata. It’s just as fast and easy to make as traditional veal or chicken piccata, but we’re swapping in salmon filets with a gorgeous golden sear for a more unique dining experience.

    Heidi’s Tips for Recipe Success

    • Normally I like to sear my proteins in a stainless steel skillet so golden flecks of flavor (called fond) can collect on the bottom of the pan. Salmon is much more tender, however, and sears best in a non-stick skillet.
    • For a bold lemon flavor, use both the juice and zest when making the piccata sauce.
    • Remove the salmon from the skillet after searing to prevent it from overcooking in the sauce. When it’s ready, nestle the salmon in the sauce and heat just until warmed through.
    lemon salmon picatta recipe ingredients

    What’s in This Recipe?

    The full recipe, with amounts, can be found in the recipe card below.

    • Salmon filets — You can have the butcher at your local grocery store skin and cut a large filet into 4-ounce portions, or you purchase pre-portioned filets and skin them yourself.
    • Butter + olive oil — The butter adds richness and flavor, while the olive oil raises the smoke point to prevent it from burning.
    • Shallot — Has a more delicate flavor than onion, which pairs better with the flaky salmon.
    • White wine — Use a dry white wine you’d be happy to drink. If you’d rather not cook with wine, substitute with an equal amount of chicken broth.
    • Heavy cream — The high fat content in heavy cream creates a silky smooth piccata sauce that won’t curdle as it simmers.
    • Lemon — We love a bold, lemon-flavored piccata sauce so I add both the juice and zest.
    • Capers — These pickled flower buds add an essential briny pop of flavor to the lemony salmon piccata.
    • Fresh dill — Traditional chicken piccata recipes don’t call for fresh dill, but it’s the perfect pairing for salmon.
    salmon seared in skillet

    How to Make Salmon Piccata

    1. Season the salmon. A little kosher salt and freshly ground black pepper are all it needs.
    2. Cook until golden brown. Try to flip the salmon only once so it has time to develop a nice sear. You’ll know it’s ready to flip when the bottom is golden and the top is opaque.
    creamy picatta sauce in skillets
    1. Cook the shallot, then deglaze the pan. If you diced the shallot finely, it should only need to cook for about 30 seconds in the now-empty skillet before streaming in the white wine. (Careful, it will sputter!)
    2. Add the remaining ingredients. In goes the heavy creamy, lemon juice and zest, capers, and a pinch of salt. Bring the mixture to a boil, then …
    creamy picatta sauce for salmon in skillet
    1. Reduce the sauce. The lemon caper sauce needs to gently bubble away for 5 minutes. You want it to cook down by about a third.
    2. Bring it all together. Stir in the fresh dill before returning the salmon to the pan. Spoon the piccata sauce over the salmon before serving.

    Heidi’s Tip: Did your sauce thicken too much? Stir in 1-2 tablespoons of water to loosen it up.

    Salmon fillets topped with lemon caper piccata sauce

    FAQs

    How can you tell when salmon is done?

    Salmon is considered done when it reaches an internal temperature of 145ºF. If you don’t own a meat thermometer, check to see if the fish is fully opaque and flakes easily with a fork.

    What can I use instead of capers?

    If you ran out of capers, try substituting them with finely chopped green olives.

    Can the heavy cream be substituted with half and half or whole milk?

    No, heavy cream is resistant to curdling thanks to its high fat content. If you use half and half or milk, you’ll wind up with a split piccata sauce.

    Salmon Picatta on platter

    Storage Tips

    The salmon piccata with lemon caper sauce is best enjoyed right away since fish doesn’t tend to reheat well. If you wind up with leftovers, reheat them gently in a skillet over medium heat or in the microwave for 30-second bursts.

    Creamy Salmon Picatta on plate with rice and asparagus

    What to Serve With Salmon Piccata

    If you make this recipe, please let me know! Leave a ⭐️⭐️⭐️⭐️⭐️ rating below, leave a comment to tell us what you think, and tag me on Instagram @foodiecrush.

    Creamy Salmon Picatta on plate with rice and asparagus
    Jump to:
    A bowl of chicken pasta salad with a god fork resting on the side.

    Why You’ll Love This Recipe

    • Quick & Easy – Ready in just 25 minutes, this easy pasta salad recipe is a great option for those busy days when you need something tasty but fuss-free.
    • Full of Flavour – The smoky bacon, juicy chicken, and creamy ranch dressing make every bite a delight.
    • Great for Meal Prep – Make it ahead of time and store it in the fridge for an easy grab-and-go meal.
    • Versatile – Easily adaptable to suit your preferences with different veggies or protein options.

    What You Need

    Note: Scroll to the recipe card at the bottom for the ingredients quantities and full detailed method.

    Ingredients for salad on a bench top.

    Ingredients

    • Uncooked pasta – Bow-tie or spirals work best as they hold the dressing well and add a great texture.
    • Streaky bacon – Crispy bacon adds a delicious smoky, savoury crunch to the salad.
    • Cooked chicken breast or thigh – A great way to use leftover chicken or BBQ rotisserie chicken for extra convenience.
    • Red onion – Adds a mild bite and a touch of colour to the salad. You could substitute with spring onions / green onions too.
    • Cherry tomatoes – These juicy, sweet tomatoes balance out the savoury elements perfectly.
    • Cucumber – Fresh and crunchy, cucumber helps to keep the salad light and refreshing.
    • Green capsicum – Adds a subtle sweetness and crisp texture. Capsicums are also known as bell peppers in the US.
    • Grated cheddar or tasty cheese – A rich and creamy element that ties the dish together.
    • Ranch dressingThe star of the dish, store-bought ranch dressing adds creaminess and flavour to every bite. Alternatively, you could make your own ranch dressing using sour cream, mayonnaise, herbs, and seasonings.
    • Salt and pepper – To taste, season, and enhance all the flavours.

    Equipment Required

    To make this recipe, you’ll need:

    • A large pot for cooking the pasta
    • A colander for draining the pasta
    • A frying pan for cooking the bacon
    • A sharp knife and chopping board for prepping the ingredients
    • A large bowl for combining everything
    • A spoon or spatula for mixing the salad.
    An overhead shot showing bow tie pasta in the chicken bacon salad.

    Step-by-Step Instructions

    Note: Scroll to the recipe card at the bottom for the ingredients quantities and full detailed method.

    Step 1: Prepare The Pasta

    Start by bringing a large pot of salted water to a boil. Cook the pasta according to the packet instructions until it’s just al dente. Drain the cooked pasta and rinse it under cold water to cool it down and prevent sticking. Set aside.

    Bow tie pasta cooked and draining in a colander

    Step 2: Cook The Bacon

    Heat a frying pan over medium heat and add the diced bacon. Cook until crispy and golden brown, stirring occasionally to ensure even cooking. Once done, transfer the bacon to a plate lined with paper towels to drain any excess oil.

    A bowl of crispy fried bacon pieces.

    Step 3: Mix The Ingredients

    In a large mixing bowl, combine the cooled pasta with the crispy bacon, diced chicken, red onion, cherry tomatoes, cucumber, green capsicum, and grated cheese.

    All chicken, bacon and salad ingredients in a large glass bowl.

    Toss all ingredients to evenly distribute, reserving a little cooked bacon and grated cheese to sprinkle over the top.

    Cooked pasta added to the salad ingredients.

    Step 4: Add Dressing

    Drizzle three-quarters of the ranch dressing over the salad and gently mix until everything is well coated.

    Ranch dressing added to pasta and salad ingredients.

    Taste and add extra dressing if needed. Season your chicken pasta salad with salt and pepper to your liking.

    All ingredients combined with the ranch dressing in a mixing bowl.

    Finally, sprinkle the reserved bacon and cheese on top.

    Step 5: Serve And Enjoy

    This delicious pasta salad is best enjoyed at room temperature for the best flavour and texture. If you’ve prepared it beforehand, allow it to sit out for a few minutes before serving.

    A little crispy bacon, grated cheese, chopped cherry tomatoes added on top to garnish the salad.

    Recipe Tips & Variations

    • Type of Pasta: Bow-tie (farfalle) or spirals work well, but penne or macaroni are great alternatives. Be sure not to overcook the pasta to keep it tender yet firm.
    • Chicken Options: Use leftover roast chicken, rotisserie chicken, or quickly pan-fry some chicken breasts or chicken strips for this recipe.
    • Extra Add-Ins: For extra flavour and texture, try adding avocado, black olives, shredded lettuce, or even corn.
    • Make It Lighter: Swap out the full-fat ranch for a light version, or mix half ranch and half Greek yogurt for a healthier dressing or for personal preference.
    • Cheese Options: Swap cheddar for mozzarella, parmesan cheese, or feta for a different flavour twist.
    A bowl of ranch pasta salad with the serving bowl behind it.

    FAQs

    Can I make chicken bacon ranch pasta salad ahead of time?

    Yes! You can prepare all the ingredients in advance and store them separately in the fridge. Mix everything together with the dressing just before serving to keep it fresh.

    How long does this pasta salad last in the fridge?

    This salad can be stored in an airtight container in the fridge for up to 2 days. Just stir it the next day before serving.

    Can I use a different dressing instead of ranch?

    Absolutely! Caesar dressing, honey mustard, or a simple homemade vinaigrette are great alternatives if you want to switch things up.

    What other vegetables can I add?

    You can mix in whatever veggies you like! Add diced avocado, shredded carrots, corn, or even spinach or rocket for extra colour and nutrition.

    Can I serve chicken bacon pasta salad warm?

    Yes, while it’s traditionally served at room temperature or chilled, you can serve it slightly warm if preferred. Just add the pasta salad dressing last to keep the flavours balanced.

    Pasta salad in a black serving bowl.

    Storage & Meal Prep

    • Refrigeration: Store leftovers in an airtight container in the fridge for up to 2 days.
    • Freezing: Not suitable for freezing as the texture of the pasta and dressing changes.
    • Make Ahead: Prepare everything ahead, but add the dressing just before serving for the best texture.

    Serving Suggestions

    • Serve as a standalone main course for lunch or dinner.
    • Pair with a crusty bread roll for a more substantial meal.
    • Enjoy as a side dish at your next BBQ, picnic, or family gathering.

    This Chicken Bacon Ranch Pasta Salad is guaranteed to be a huge hit with the whole family! Creamy and savoury, with tender pasta and full of fresh ingredients, this easy pasta salad recipe is the ultimate meal that everyone will love. Enjoy!

    A close up of chicken bacon ranch pasta salad.

    For more easy salad recipes, check out these tasty summer saladswhich are always popular. Any leftover pasta salad makes a fabulous lunch the next day, too!

    WANT EVEN MORE DELICIOUS RECIPES? Subscribe to my newsletter or follow along on Facebook or Instagram. And if you love baking, then please come and join my Facebook cooking club group or subscribe to my YouTube channel. 

    A bowl of colourful salad with red onion, pasta, cherry tomatoes. chicken, bacon and cheese.

    Chicken Bacon Ranch Pasta Salad

    This simple and creamy Chicken Bacon Ranch Pasta Salad is flavour-packed with grated cheese, red onion, cherry tomatoes, cucumber and green capsicum!

    Print Pin Rate

    Course: Dinner, Main Course, pasta, Salads

    Cuisine: American

    Prep Time: 15 minutes

    Cook Time: 10 minutes

    Total Time: 25 minutes

    Servings: 8 serves

    Calories: 522kcal

    Prevent your screen from going dark

    Instructions

    • Cook the pasta according to the packet directions until just al dente. Run the pasta under cold water and strain well.
    • Cook the bacon in a frying pan until crispy. Set aside on paper towel to remove any excess oil.

    • Place the pasta into a large mixing bowl.

    • Add the crispy bacon, diced chicken, red onion, cherry tomatoes, cucumber, green capsicum and grated cheese. Mix until well combined.

    • Pour over ¾ cup of the ranch dressing and mix to combine.Taste the salad and add the remaining dressing if desired.Season with salt and pepper.

    Notes

    RECIPE NOTES & TIPS
    • Pasta – I like to use bow-tie pasta. However, spirals or penne also work well. Cook the pasta until just al dente (do not overcook). 
    • Chicken – This recipe is a great way to use up leftover cooked chicken! Alternatively, you can use a cooked rotisserie chicken or pre-cooked chicken breast.
    • Versatile – Mix and match with your favourite vegetables! Try substituting the red onion with spring onion, add some diced avocado, shredded lettuce or black olives, or use a different coloured capsicum (peppers).
    • Make it look even more impressive by reserving a small amount of bacon, cheese, tomatoes, cucumber and red onion to sprinkle over the top!
    • Serve at room temperature – This salad is best served at room temperature as the dressing remains creamy. If storing in the fridge, bring the salad to room temperature before serving.
    • Store – Store the salad in an airtight container in the fridge for up to two days.
    • Freezing – This salad is not suitable for freezing.

    Nutrition

    Calories: 522kcal | Carbohydrates: 48g | Protein: 24g | Fat: 23g | Saturated Fat: 9g | Polyunsaturated Fat: 3g | Monounsaturated Fat: 9g | Trans Fat: 0.1g | Cholesterol: 72mg | Sodium: 2598mg | Potassium: 405mg | Fiber: 2g | Sugar: 3g | Vitamin A: 378IU | Vitamin C: 19mg | Calcium: 125mg | Iron: 2mg


    [ad_2]
    Source link

  • Gluten Free Cocktail Recipe for Cozy Nights

    Gluten Free Cocktail Recipe for Cozy Nights


    As spring teases us with sunny afternoons and cool, lingering nights, there’s something undeniably comforting about wrapping your hands around a warm gluten-free cocktail at the end of the day. Enter the Barenjager Honey Bourbon Hot Toddy—a soothing, gently spiced nightcap that’s perfect for those in-between-season evenings.

    Hot-Toddy-Ingredients

    Made with Barenjager Honey Bourbon, this toddy brings together the cozy heat of bourbon with the natural sweetness of honey in one smooth sip. A splash of fresh lemon juice and warming spices like clove and star anise add depth and brightness, making every mug feel like a gentle hug.

    It’s more than just a drink—it’s a ritual. Whether you’re curled up with a book, winding down after a long day, or sharing a quiet moment with someone you love, this toddy sets the mood for rest and relaxation. The scent alone—steamy citrus and aromatic spice—feels like spring easing winter out the door.

    So when the chill lingers just a little too long, reach for this warming classic. It’s the perfect companion for a slow, cozy spring night.

    Cheers!

    Honey-Bourbon-Hot-Toddy-Recipe

    Barenjager Honey Bourbon Hot Toddy

    Servings: 2

    Calories: 136kcal

    Author: Gluten Free & More

    Nutrition Facts

    Barenjager Honey Bourbon Hot Toddy

    Amount Per Serving

    Calories 136
    Calories from Fat 9

    % Daily Value*

    Fat 1g2%

    Saturated Fat 0.1g1%

    Polyunsaturated Fat 0.2g

    Monounsaturated Fat 0.1g

    Sodium 13mg1%

    Potassium 176mg5%

    Carbohydrates 11g4%

    Fiber 3g12%

    Sugar 3g3%

    Protein 1g2%

    Vitamin A 28IU1%

    Vitamin C 59mg72%

    Calcium 44mg4%

    Iron 1mg6%

    * Percent Daily Values are based on a 2000 calorie diet.

    Disclaimer: All nutrition facts on Gluten Free & More are meant only as a guide and may differ depending on product brands used or ingredient substitutions. Some errors may occur, so you are encouraged to confirm the recipe’s ingredient and nutrition suitability for your own diet.

    Have you tried this recipe? Give it a star rating and let us know your thoughts in the Ratings & Reviews section below.


    Source link

  • Easy Homemade BBQ Seasoning | The Recipe Critic

    Easy Homemade BBQ Seasoning | The Recipe Critic


    This website may contain affiliate links and advertising so that we can provide recipes to you. Read my disclosure policy.

    My homemade BBQ seasoning brings bold, smoky flavor to just about anything! It’s the perfect blend of sweet, savory, and just a little kick, ready to shake onto chicken, veggies, ribs, and more.

    Overhead shot of a jar of homemade BBQ seasoning with a small wooden spoon.

    Why You’ll Want to Keep This on Hand

    • Big flavor, few ingredients: Just a few pantry spices turn into a tasty blend that you can use all BBQ season long!
    • Totally customizable: Dial up the heat or sweetness to make it your own.
    • Use it on EVERYTHING: Perfect for grilling, roasting, or seasoning snacks like popcorn and roasted nuts!

    BBQ Seasoning Ingredients

    Overhead shot of labeled ingredients.
    • Paprika: Use smoked paprika for a more smoky flavor.
    • Sugar: Brown sugar adds a sweet balance, but feel free to cut it back if you want more spice than sweet in your bbq rub.
    • Spice level: This blend’s got a little kick—skip or reduce the cayenne pepper if you’re not into the heat.

    How to Make BBQ Seasoning

    Get ready to level up your grilling game! This easy BBQ seasoning mix comes together in minutes and brings rich, smoky depth with a touch of sweetness to everything you add it to!

    1. Add Spices: In a small bowl, add paprika, brown sugar, kosher salt, chili powder, garlic powder, onion powder, black pepper, and cayenne pepper.
    2. Mix: Whisk all of the ingredients together until evenly mixed, then store in an airtight container.

    How to Store Homemade Seasoning

    This is great to have in the spice cabinet to add great flavor to so many different recipes.

    • Storing: Store your homemade seasoning in a spice jar or an airtight container in a cool, dark place.
    • How long does BBQ Seasoning Last? If you make sure it is in an airtight container, it will keep at room temperature for 1 year.

    Two steaks seasoned with homemade bbq seasoning.

    How Do I Use BBQ Seasoning?

    This spice blend is great for meat rubs, seasoning vegetables, steak, pork, shrimp, and more. Here are a few more options for you to try!

    Pin this now to find it later

    Pin It

    Prevent your screen from going dark

    • In a small bowl, add 3 tablespoons paprika, 2 tablespoons brown sugar, 1 tablespoon kosher salt, 1 tablespoon chili powder, 2 teaspoons garlic powder, 2 teaspoons onion powder, 1 teaspoon black pepper, and ½ teaspoon cayenne pepper.

    • Whisk all of the ingredients together until evenly mixed. Store in an airtight container.

    Calories: 27kcalCarbohydrates: 6gProtein: 1gFat: 1gSaturated Fat: 0.1gPolyunsaturated Fat: 0.3gMonounsaturated Fat: 0.1gSodium: 892mgPotassium: 103mgFiber: 2gSugar: 3gVitamin A: 1643IUVitamin C: 0.3mgCalcium: 16mgIron: 1mg

    Nutrition information is automatically calculated, so should only be used as an approximation.


    Source link

  • The BEST Mongolian Beef Recipe

    The BEST Mongolian Beef Recipe


    This mouthwatering Mongolian Beef recipe is loaded with bold flavor and comes together fast! Sweet, savory and with a subtle, spicy kick, it’s better than your favorite takeout! Serve with steamed, fluffy rice for an easy, irresistible dinner the whole family will love!

    Looking for more stir fry recipes to make? Try my Chicken Stir Fry, Cashew Chicken or Beef and Broccoli next!

    A top down view of Mongolian Beef served with rice on a white plate. The beef is garnished with sesame seeds and green onions.

    Mongolian Beef Recipe

    Mongolian Beef has always been one of my favorite takeout dishes, but making it at home is surprisingly quick and easy. In less than 30 minutes, you can have a restaurant-quality meal that tastes even better than the original. Plus, you get to control the ingredients – less oil, lower sodium, and no mystery artificial ingredients. It’s the perfect weeknight dinner that feels a little indulgent but is still simple enough to whip up anytime!

    Both of my boys give this recipe a 10 out of 10. They love it so much it’s become the standard when I’m testing new recipes. “It’s good…but not as good as the Mongolian Beef!” We love easy stir fry recipes and then one is now permanently in the rotation – a meal we all love!

    Thinly sliced flank steak or skirt steak gets coated in cornstarch to create the perfect crisp texture that is begging to be coated with savory sauce. It’s a mix of soy sauce, brown sugar, and a touch of heat from red pepper flakes that caramelizes beautifully, coating every bite of beef in a deep, umami-packed flavor that your tastebuds won’t be able to get enough of! Served over a bowl of fluffy white rice, it soaks up every bit of that sweet and savory sauce, making this meal completely irresistible.

    A top down view of cooked Mongolian Beef in a gray skillet.

    Why You’ll Love This Recipe

    Tender and flavorful, this Mongolian Beef recipe is a definite crowd-pleaser! With just a few simple ingredients, you can create a dish that rivals your favorite takeout spot—no delivery fee required!

    • Bold, takeout-style flavor. This Mongolian Beef is rich, savory, and slightly sweet, with tender slices of steak coated in mouthwatering sauce. It tastes just like your favorite restaurant version – but it’s even better because you made it at home!
    • Fast and easy. With minimal prep and just a few simple ingredients, this dish comes together in under 30 minutes. No complicated techniques, no long marinating – just quick, flavorful cooking that will fit perfectly into your busy schedule.
    • Perfect for any occasion. Whether you’re making it for a casual weeknight dinner or a meal to impress a special someone, this recipe delivers. Serve it over rice for a cozy, satisfying dish, or pair it with roasted veggies for a lighter, nutrient-packed option. However you enjoy it, you’ll be coming back for more!

    How to Make Mongolian Beef

    This recipe has become a staple in our kitchen over the past year and we make it at least once or twice a month. It’s not only quicker than takeout, it tastes better and is better for us. The Mongolian beef sauce is absolutely mouthwatering and uses pantry ingredients that I always have on hand. The steak is so tender and flavorful that between the sauce and the steak, we usually opt for a simple side of steamed rice to go alongside this Mongolian Beef recipe.

    Mongolian Beef Sauce

    1. Whisk together the ginger, garlic, red pepper flakes, brown sugar, soy sauce and water.

    Prepare Beef

    1. Cut steak into ¼ inch or thinner pieces and add to a large ziploc bag with cornstarch. Shake to coat.
    2. Add oil to a large skillet or wok. Once hot, add beef in a single layer and cook for 45 seconds. Flip and cook an additional 45 seconds. Remove.
    3. Add Mongolian beef sauce to the hot pan and bring to a boil.
    4. Reduce heat to medium and add the beef, tossing to combine.
    5. Sprinkle the green onions and sesame seeds over the top and toss once more.
    A 6 image collage that shows the steps for making the Mongolian Beef recipe.

    Storage Information

    • Refrigerator: If you have leftover beef, store it in an airtight container in the refrigerator for up to 3 days.
    • Freezer: Store the cooked beef (without the sauce) in an airtight container or freezer-safe bag for up to 2 months. Thaw overnight in the fridge and reheat in a skillet or microwave. I recommend making the sauce fresh when reheating for the best flavor.
    • Make Ahead: You can slice and coat the beef in cornstarch in advance, then store it in a ziploc bag in the fridge for up to 24 hours. You can also prepare the sauce ahead of time and store it in an airtight container for up to 3 days. When ready to cook, just sear the beef and toss it in the sauce for a quick, flavorful meal.
    • Reheat: To reheat, place the beef in a skillet over medium heat, adding a splash of water or broth to loosen the sauce. You can also microwave it, but be sure to cover it to prevent it from drying out. Serve the sauce as is, either warmed or at room temperature.
    White bowl of Mongolian Beef and steamed rice topped with green onions and sesame seeds.

    Can I use a different cut of beef?

    Yes! While flank steak is ideal for this recipe, you can also use skirt steak, sirloin, or even ribeye. Just make sure to slice the beef thinly against the grain for the best texture.

    How can I make this recipe spicier?

    If you like more heat, add extra red pepper flakes or a splash of chili paste to the sauce. You can also try adding fresh sliced chili peppers when cooking the beef for a bit of extra spice.

    Can I add vegetables to this dish?

    Yes! Feel free to toss in some stir-fried vegetables like bell peppers, broccoli, or snap peas for added flavor and texture. Just cook them separately and toss them in with the beef at the end.

    A top down view of Mongolian Beef served with rice on a white plate. The beef is garnished with sesame seeds and green onions.

    Variations to Try

    • Swap the beef for chicken or pork for a delicious variation.
    • For a vegetarian version, use firm tofu. Press and slice it into thin pieces, then sear it until crispy before adding the sauce.
    • Add more vegetables to make the dish more hearty and colorful. Stir-fried bell peppers, onions, broccoli, or snap peas can be added during the last few minutes of cooking.
    • Kick up the heat by adding sliced jalapeños, red chili flakes, or a drizzle of chili oil. This will give your Mongolian beef a fiery punch, perfect for spice lovers!
    • For a fun twist, serve the Mongolian beef over cooked noodles (like lo mein or rice noodles) instead of rice.
    • If you prefer a sweeter profile, try adding a splash of pineapple juice to the sauce, along with a few chunks of pineapple, for a sweet and tangy variation.
    • Incorporate more stir-fry elements by adding ingredients like water chestnuts, baby corn, or mushrooms.

    Trish’s Tips

    • Pop your beef in the freezer for 30 to 60 minutes before cutting for those perfectly thin cuts.
    • Slice the beef thinly and against the grain. This helps ensure the meat is tender and absorbs the flavors of the sauce better. Use a sharp knife for the best results!
    • When searing the beef, work in batches to avoid steaming the meat. You want it to have that crispy texture.
    • If you prefer your Mongolian beef a little sweeter, feel free to add more brown sugar to the sauce. Taste as you go to get the perfect flavor.
    • When you add the sauce to the pan, whisk continuously to ensure it thickens evenly without clumping or burning.
    • While you can serve the Mongolian Beef with leftover rice, freshly cooked rice absorbs the sauce better and has a fluffier texture.
    • Once you’ve seared the beef, let it rest for a few minutes before tossing it in the sauce to ensure the beef stays tender and juicy.
    • If you prefer more spice, feel free to add extra red pepper flakes or chili paste to the sauce for that extra kick.
    A close up view of black chopsticks holding a piece of Mongolian Beef topped with rice.

    More Stir Fry Recipes to Try

    1. Cashew Chicken
    2. Chicken Stir Fry
    3. Honey Walnut Shrimp
    4. Sesame Chicken with Broccoli
    5. Chicken Lo Mein
    6. Beef and Broccoli

    Mongolian Beef

    This mouthwatering Mongolian Beef recipe is loaded with bold flavor and comes together fast! Sweet, savory and with a subtle, spicy kick, it’s better than your favorite takeout! Serve with rice for an easy, irresistible dinner the whole family will love!

    Keyword mongolian beef, mongolian beef recipe, mongolian beef sauce
    Prep Time 20 minutes
    Cook Time 10 minutes
    Total Time 30 minutes
    Author Trish – Mom On Timeout

    Ingredients

    Mongolian Beef Sauce

    • 2 teaspoons ginger paste
    • 4 cloves garlic minced
    • pinch red pepper flakes
    • ½ cup light brown sugar
    • cup soy sauce low sodium
    • cup water

    Beef

    • 1 pound flank steak or skirt steak
    • ¼ cup corn starch
    • 3 tablespoons extra virgin olive oil

    Garnish (Optional)

    • 3 green onions green parts only cut into 1-2 inch pieces on the diagonal
    • 1 teaspoon sesame seeds

    Instructions

    Prepare Mongolian Beef Sauce

    • In a small bowl whisk together the ginger, garlic, red pepper flakes, brown sugar, soy sauce and water. Set aside.

      2 teaspoons ginger paste, 4 cloves garlic, pinch red pepper flakes, ½ cup light brown sugar, ⅓ cup soy sauce, ⅓ cup water

    Cook Beef

    • Cut the steak into ¼ inch or thinner pieces with a sharp knife against the grain.

      1 pound flank steak

    • Add the cornstarch to a large ziploc bag and add the steak pieces into it. Shake the bag and make sure all the beef is covered. Let it sit in the bag for a few minutes while you continue on in the recipe.

      ¼ cup corn starch

    • Add the oil to a large skillet or wok and heat over hot heat. Once hot, add half the beef in a single layer and cook for 45 seconds. Flip the beef over and cook an additional 45 seconds. Remove to a plate and cook the second half of the beef the same way you cooked the first half. *The beef does not need to cook through in this step. It will continue cooking with the sauce later.*

      3 tablespoons extra virgin olive oil

    Combine

    • Remove to a plate and reduce heat to medium high.

    • Add the sauce you previously mixed to the hot pan and whisk continuously and bring to a boil. Reduce heat to medium and add the beef to the sauce. Toss to combine, cooking to thicken the sauce, about 2-3 minutes.

    • Sprinkle the green onions and sesame seeds over the top and toss once more. Remove from heat and serve with rice, if desired.

      3 green onions, 1 teaspoon sesame seeds, 2-3 cups cooked rice

    Notes

    Storage Information
    • Refrigerator: If you have leftover beef, store it in an airtight container in the refrigerator for up to 3 days.
    • Freezer: Store the cooked beef (without the sauce) in an airtight container or freezer-safe bag for up to 2 months. Thaw overnight in the fridge and reheat in a skillet or microwave. I recommend making the sauce fresh when reheating for the best flavor.
    • Make Ahead: You can slice and coat the beef in cornstarch in advance, then store it in a zipper-top bag in the fridge for up to 24 hours. You can also prepare the sauce ahead of time and store it in an airtight container for up to 3 days. When ready to cook, just sear the beef and toss it in the sauce for a quick, flavorful meal.
    • Reheat: To reheat, place the beef in a skillet over medium heat, adding a splash of water or broth to loosen the sauce. You can also microwave it, but be sure to cover it to prevent it from drying out. Serve the sauce as is, either warmed or at room temperature.

    Tools and Equipment (affiliate links): Wok or Large Skillet | Glass Mixing Bowls Whisk
    Please see post above for more information, step-by-step process photos, recipe tips and frequently asked questions.   

    Nutrition

    Calories: 407kcal | Carbohydrates: 37g | Protein: 27g | Fat: 16g | Saturated Fat: 4g | Polyunsaturated Fat: 1g | Monounsaturated Fat: 10g | Cholesterol: 68mg | Sodium: 1153mg | Potassium: 504mg | Fiber: 1g | Sugar: 27g | Vitamin A: 90IU | Vitamin C: 3mg | Calcium: 68mg | Iron: 3mg


    Source link
  • The BEST Creamy Lemon Orzo Recipe

    The BEST Creamy Lemon Orzo Recipe


    This website may contain affiliate links and advertising so that we can provide recipes to you. Read my disclosure policy.

    Fresh lemons make me so happy! They’re bright, cheerful, and lift me out of the winter rut. Add that citrusy sunshine to a creamy pasta, and you get this dreamy Creamy Lemon Orzo! Simple, rich, and bursting with feel-good flavor.

    Overhead shot of plated creamy lemon orzo.

    Why This Orzo Understood the Assignment!

    • One Pan Simplicity: I know you need minimal cleanup meals, and this dish is made in one pan and done in under 30 minutes. I’ve got you!
    • Cozy, Creamy, Family Favorite: With rich heavy cream and fresh lemon, this dish feels fancy but is still totally family-friendly! Everyone always asks for seconds.
    •  Light Pasta Dish: Even though this dish is pasta, the lemon makes it light and bright, and not so heavy.

    Creamy Lemon Orzo Ingredients

    Overhead shot of labeled ingredients.
    • Parmesan: I used freshly shredded Parmesan for bold flavor. Pre-shredded works, but fresh makes all the difference in this simple dish.
    • Fresh Vs. Dry Basil: You can use 2 teaspoons of dried basil in place of fresh, but fresh brings way more flavor.
    • Heavy Cream Substitution: I recommend full-fat heavy cream for the creamiest texture. Half and half works, but it won’t be quite as rich.

    How to Make Creamy Lemon Orzo

    You know I’m all about making your weeknights easier! This creamy lemon orzo is one of those gems that comes together fast, with simple ingredients and the best flavor in every bite.

    1. Cook Shallots: Heat the butter in a large pan over medium-high heat, then add in the shallots and cook, stirring frequently, for 3 minutes.
    2. Toast Orzo: Add the orzo to the pan and continue to cook, stirring occasionally, for 5 minutes, to lightly toast the orzo. Add the garlic and lemon zest to the pan and cook for 1 minute, until fragrant. Whisk in the chicken broth, heavy cream, lemon juice, salt, and pepper.
    3. Cook, Stirring Frequently: Bring the liquid to a boil, then reduce the heat to medium-low and simmer the pasta for 8-10 minutes. Stir frequently to keep the pasta from sticking to the pan. Once the pasta is tender and the liquid has cooked down, sprinkle the dish with parmesan cheese and basil and then serve warm.

    How to Store Leftovers

    • In the Fridge: Store creamy lemon orzo leftovers in an airtight container in the fridge for up to 4 days. 
    • In the Freezer: Store completely cooled leftovers in a freezer-safe container in the freezer for up to 3 months.

    Cooked creamy lemon orzo in a skillet.

    What to Serve With Lemon Orzo

    This creamy lemon orzo pairs beautifully with just about anything—chicken, steak, pork, baked cod, even shrimp! Make these items below for an amazing meal. Your family will think you went all out (but we’ll know the truth).

    Pin this now to find it later

    Pin It

    Prevent your screen from going dark

    • Heat the 2 tablespoons salted butter in a large pan over medium-high heat. Add in the 2 minced shallots and cook, stirring frequently for 3 minutes.

    • Add the 1 ½ cups orzo to the pan and continue to cook, stirring occasionally for 5 minutes, to lightly toast the orzo.

    • Add the 3 minced cloves garlic and 1 tablespoon lemon zest to the pan and cook for 1 minute, until fragrant. Whisk in the 2 cups chicken broth, 1 cup heavy cream, 3 tablespoons lemon juice, 1 teaspoon salt, and ½ teaspoon pepper.

    • Bring the liquid to a boil, then reduce the heat to medium-low and simmer the pasta for 8-10 minutes, stirring frequently to keep the pasta from sticking to the pan.

    • Once the pasta is tender and the liquid has cooked down, sprinkle the dish with ½ cup freshly shredded Parmesan cheese and 2 tablespoons freshly chopped basil and serve.

    Calories: 358kcalCarbohydrates: 33gProtein: 9gFat: 21gSaturated Fat: 13gPolyunsaturated Fat: 1gMonounsaturated Fat: 5gTrans Fat: 0.2gCholesterol: 64mgSodium: 868mgPotassium: 199mgFiber: 2gSugar: 3gVitamin A: 811IUVitamin C: 6mgCalcium: 122mgIron: 1mg

    Nutrition information is automatically calculated, so should only be used as an approximation.


    Source link

  • Best Recipe for German Chocolate Cake

    Best Recipe for German Chocolate Cake


    What is German Chocolate Cake?

    German chocolate cake is a rich, show-stopping dessert that’s all about layers of tender, sweet chocolate cake stacked up with a gooey, dreamy coconut-pecan frosting!

    The “German” part? Fun fact—it’s not named after Germany! It’s named after Samuel German, the baker who created a special kind of sweet baking chocolate back in the 1850s. His chocolate—Baker’s German’s Sweet Chocolate—is milder and sweeter than regular dark chocolate, giving the cake its signature smooth, mellow flavor.

    Instead of being bold and dark, German chocolate cake has a lighter, almost caramelized chocolate taste that perfectly balances the rich, buttery frosting. Every bite is soft, sweet, nutty, and decadent—basically, it’s happiness in cake form!


    Source link

  • Pickling Spice Recipe – The Daring Gourmet

    Pickling Spice Recipe – The Daring Gourmet


    This post may contain affiliate links. See my disclosure policy.

    Behind every delicious pickled vegetable is a great pickling spice. And this special blend has the ability to transform everyday vegetables into tangy, zesty, crunchy morsels of pure delight. This homemade pickling spice recipe combines a gourmet variety of fabulous spices to create an extraordinary blend of flavors. Let the pickling begin!

    pickling spice recipe ingredients diy homemade gourmet blend all purpose best easy

    The Magic of Pickled Vegetables

    I’ve been canning and pickling for years, and my love for gardening definitely plays a role in that. Being able to bring in a fresh harvest of garden produce and transform it into something zesty, flavorful and crunchy that lasts throughout the year is incredibly satisfying.

    Having a variety of pickled vegetables and condiments on hand makes cooking and entertaining all the more fun. Do you have a pasta or potato salad that needs some embellishing or are you throwing some burgers on the grill? Open up a jar of dill pickle relish, sweet pickle relish or corn relish. Laying out a cheese and charcuterie spread for a party? Grab a jar of pickled pepperoncini peppers, English pickled onions, pickled asparagus, pickled green beans, pickled okra and arrange them on the board. Making a sandwich and want some yummy flavor crunch? Open up a can of bread and butter pickles or giardiniera. Or if you simply have the munchies, open up a jar of pickled carrots or pickled beets and dig in!

    This homemade pickling spice is the perfect all-purpose blend for your pickling needs!

    What is Pickling Spice?

    Pickling spice is a blend of spices that is used for pickling vegetables. It is added to vinegar and water to make a pickling brine. Every canner and pickler needs a good homemade pickling spice recipe and I’ve developed a gourmet pickling blend that combines some seriously fabulous spices in just the right ratios to infuse your pickled veggies with incredible flavor.

    And it’s not just vegetables, this is also the pickling spice you’ll need to make your own corned beef and it will elevate your homemade corned beef to delicious flavor heights! I used this blend to make our corned beef for this past St. Patrick’s Day dinner and it was a hit. Check out the bottom of this post for info on how to use this homemade pickling spice.

    pickling spice recipe ingredients diy homemade gourmet blend all purpose best easy

    What is in Pickling Spice?

    There is no “one” way to make pickling spice. It can be as simple or as elaborate as you choose to make it. But you know me, I am all about FLAVOR and when I can find ways to maximize flavor I do it. No, that doesn’t mean that the recipe is any more difficult, it just means taking the time to source the additional ingredients. And I would only recommend you doing that if I felt the end result was worth it. And I am always of the opinion that you can’t have too many spices in your cabinet. Spices are the magic behind great tasting food! So let’s take a look at what goes into this gourmet pickling spice:

    • Black Peppercorns
    • Allspice Berries
    • Yellow and Brown Mustard Seeds – you can use one or the other if you don’t have both. Yellow is the classic choice for pickling with its mild flavor, and brown adds just a bit of robust punch.
    • Coriander Seeds
    • Dill Seeds – dill seeds pack more flavor than dill weed and are better suited for pickling, especially long-term storage.
    • Star Anise
    • Cloves – use whole cloves, not ground, to avoid making the brine murky.
    • Juniper Berries – the Germans and Swedes know how to incorporate these in their cooking and they’re sadly overlooked in many other countries. They contribute an old-fashioned flavor reminiscent of fruity citrus and pungent, piney spiciness almost bordering sweetness. If you don’t want to use these simply omit.
    • Cardamom Seeds
    • Red Pepper Flakes
    • Dried Ginger Root – Avoid using ginger powder as it will make the pickling brine murky and will cause your pickled vegetables to turn color over time. You can easily make your own dried ginger root by peeling and slicing it, spreading the slices out on a lined baking sheet, and dehydrating it in the oven at 170-180 F for a few hours until it’s dried out, let it cool, and then break it up into small pieces either by hand or pulsing it in a spice grinder.
    • Cinnamon Stick – avoid using ground cinnamon to prevent the brine from being murky and discoloring the vegetables.
    • Bay Leaves
    pickling spice recipe ingredients diy homemade gourmet blend all purpose best easy

    Homemade Pickling Spice Recipe

    Let’s get started!

    Break up the star anise, cinnamon stick and bay leaves into small pieces and set aside.

    For maximum flavor I like to toast the spices. In a dry skillet over medium heat, toast the whole spices (leave out the ginger, bay leaves and pepper flakes) until very fragrant. Be careful not to let them burn. Let cool completely.

    Combine all of the ingredients.

    pickling spice recipe ingredients diy homemade gourmet blend all purpose best easy

    Transfer the pickling spice to an airtight jar and store it in a cool, dark place. It will keep for several months.

    This makes roughly 1/2 cup of pickling spice.

    pickling spice recipe ingredients diy homemade gourmet blend all purpose best easy

    How to Use Pickling Spice

    Use this picking spice in any recipe that calls for it. As a general guideline for making pickled vegetables, follow this procedure:

    • To make the brine, use equal parts water and vinegar.
    • Depending on the recipe add sugar and salt for flavor and balance.
    • Combine the water, vinegar, salt and sugar in a pot and boil until the salt and sugar are dissolved.
    • Use 1 tablespoon of pickling spice for every quart of pickling brine. You can place a tablespoon of pickling spice in each quart jar, add the vegetables to be pickled, and pour the hot brine over them. Seal the jars and follow the recipe instructions for canning.

    This homemade pickling spice blend pairs wonderfully with any of the following vegetables: cucumbers, asparagus, carrots, beets, cauliflower, green beans, peppers, radishes, okra, zucchini, cabbage, beets, onions, and more.

    Pickling Spice for Corned Beef

    This homemake pickling spice makes an absolutely phenomenal corned beef! For a standard 5-pound brisket you’ll need 1/4 cup of pickling spice for the brine and then an additional tablespoon to add to the water when you cook the brisket.

    Enjoy!

    pickling spice recipe ingredients diy homemade gourmet blend all purpose best easy

    For more delicious homemade spice blends try my:

    pickling spice recipe ingredients diy homemade gourmet blend all purpose best easy

    Pickling Spice Recipe

    A gourmet pickling blend that will transform your vegetables into tangy, zesty, crunchy morsels of pure delight and also enable you to create the most delicious homemade corned beef!

    Prep Time 5 minutes

    Cook Time 5 minutes

    Total Time 10 minutes

    Servings 8

    Calories 29 kcal

    • In a dry skillet over medium heat, toast the whole spices (except for the ginger, bay leaves and pepper flakes) until very fragrant. Be careful not to let them burn. Let cool completely. Toasting the spices will greatly enhance their flavor.Combine all of the ingredients and store in an airtight jar in a dark, cool place. Will keep for several months. Makes roughly 1/2 cup pickling spice.
    Make your own dried ginger root by peeling and slicing it, spreading the slices out on a lined baking sheet, and dehydrating it in the oven at 170-180 F for a few hours until it’s dried out, let it cool, and then break it up into small pieces either by hand or pulsing it in a spice grinder.
    Avoid using the powdered form of any of these spices as it will make the pickle brine murky and discolor the vegetables.  

    Serving: 1tablespoonCalories: 29kcalCarbohydrates: 4gProtein: 1gFat: 2gSaturated Fat: 0.1gPolyunsaturated Fat: 0.4gMonounsaturated Fat: 1gSodium: 7mgPotassium: 82mgFiber: 2gSugar: 0.2gVitamin A: 94IUVitamin C: 1mgCalcium: 45mgIron: 1mg

    kimberly killebrew the daring gourmet

    Hi, I’m Kimberly Killebrew and welcome to Daring Gourmet where you’ll find delicious originals, revitalized classics, and simply downright good eats from around the world! Originally from Germany, later raised in England, world-traveled, and now living in the U.S., from my globally-influenced kitchen I invite you to tour the world through your taste buds!

    Read more about me…


    Source link

  • Best Croque Monsieur Recipe (+ tips)

    Best Croque Monsieur Recipe (+ tips)


    What is Croque Monsieur?

    Croque Monsieur is France’s version of a grilled ham and cheese sandwich—on steroids! This Parisian café classic starts with thick slices of bread layered with creamy béchamel sauce, Gruyère cheese, savory ham, a smear of Dijon, and even more melty cheese, then pan-fried and baked to golden bubbling perfection.

    It’s indulgent, satisfying, irresistibly crispy, cheesy, and comforting—perfect for brunch, lunch, or an effortlessly elegant dinner with a French twist!


    Source link