Holly Nilsson is the creator of Spend With Pennies, where she creates easy, comforting recipes made for real life. With a passion for nostalgic flavors and simplified techniques, Holly helps busy home cooks create delicious meals that always work. She is also the author of “Everyday Comfort,” which promises to inspire even more hearty, home-cooked meals. See more posts by Holly
Published: · Modified: by Lucy · This post may contain affiliate links · 1 Comment
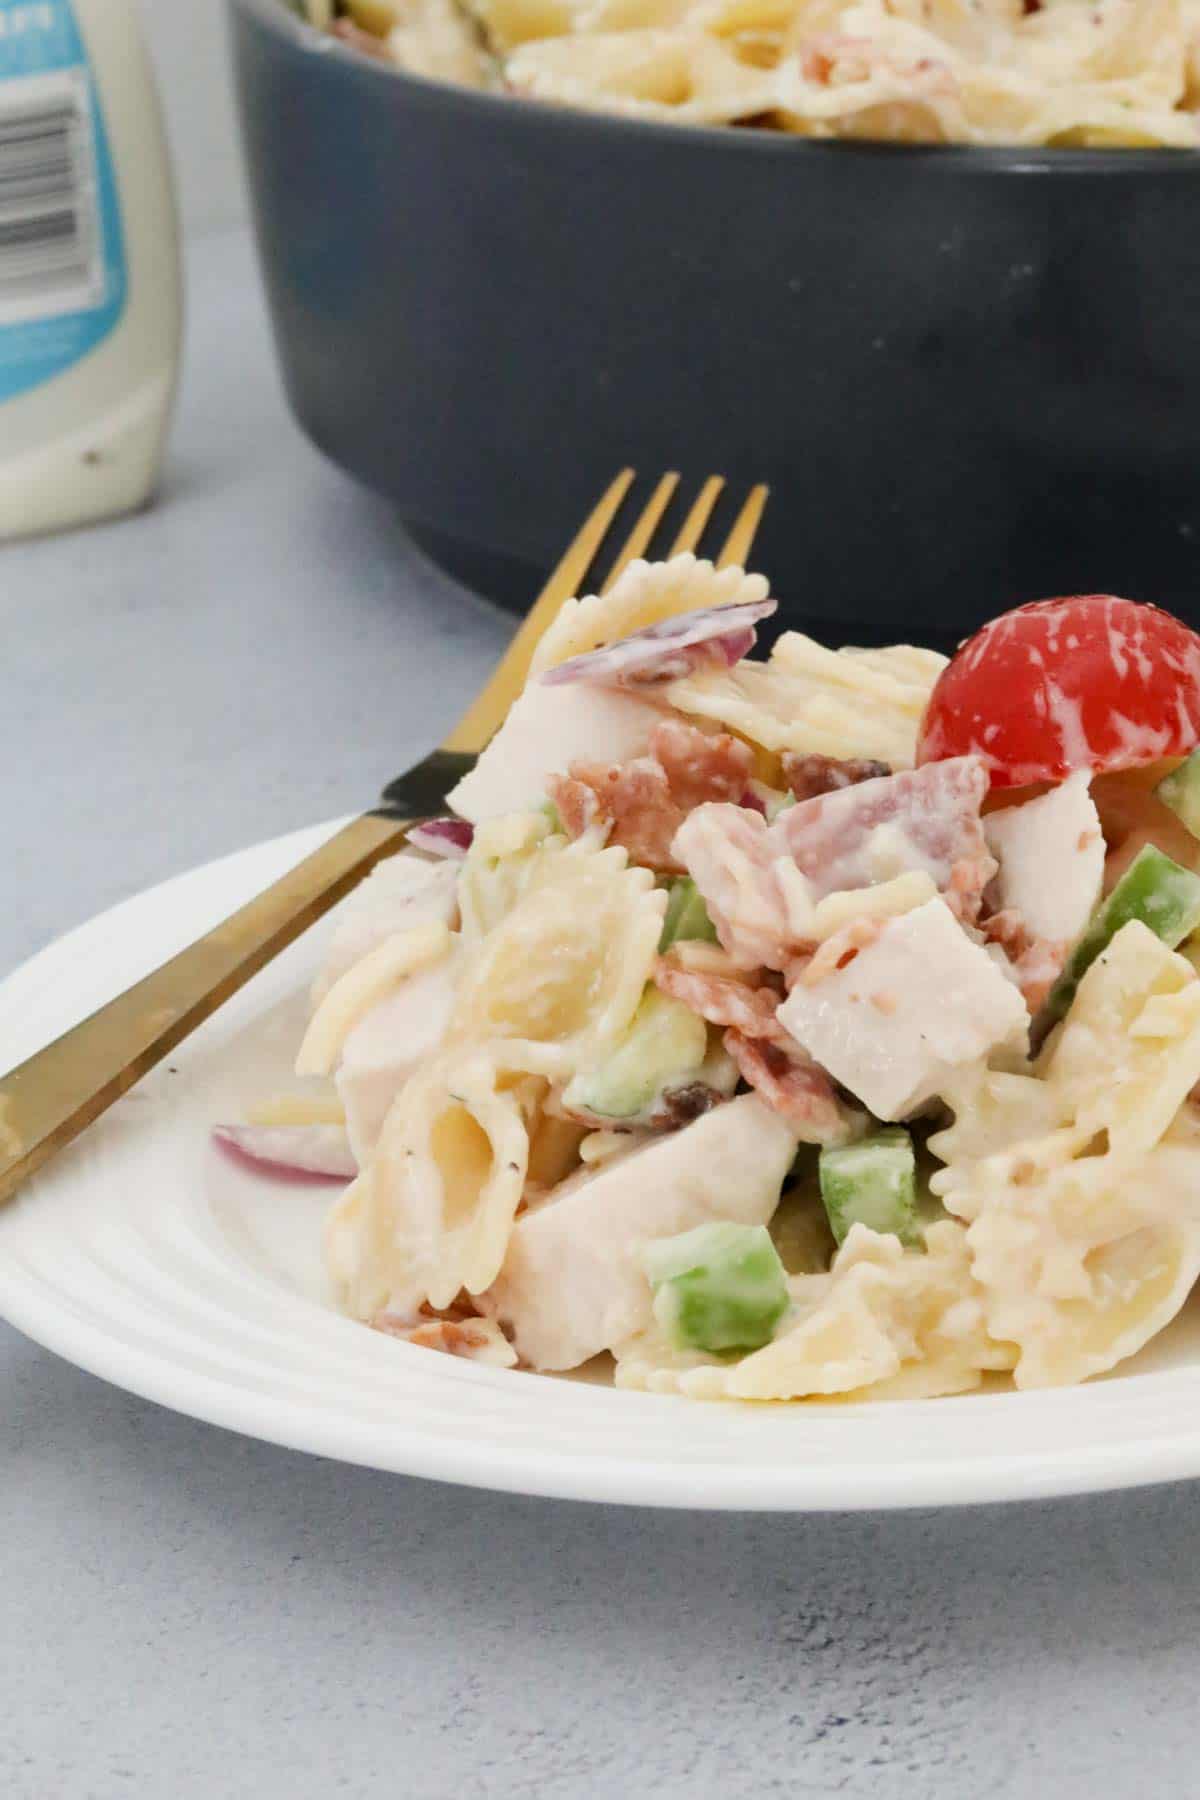
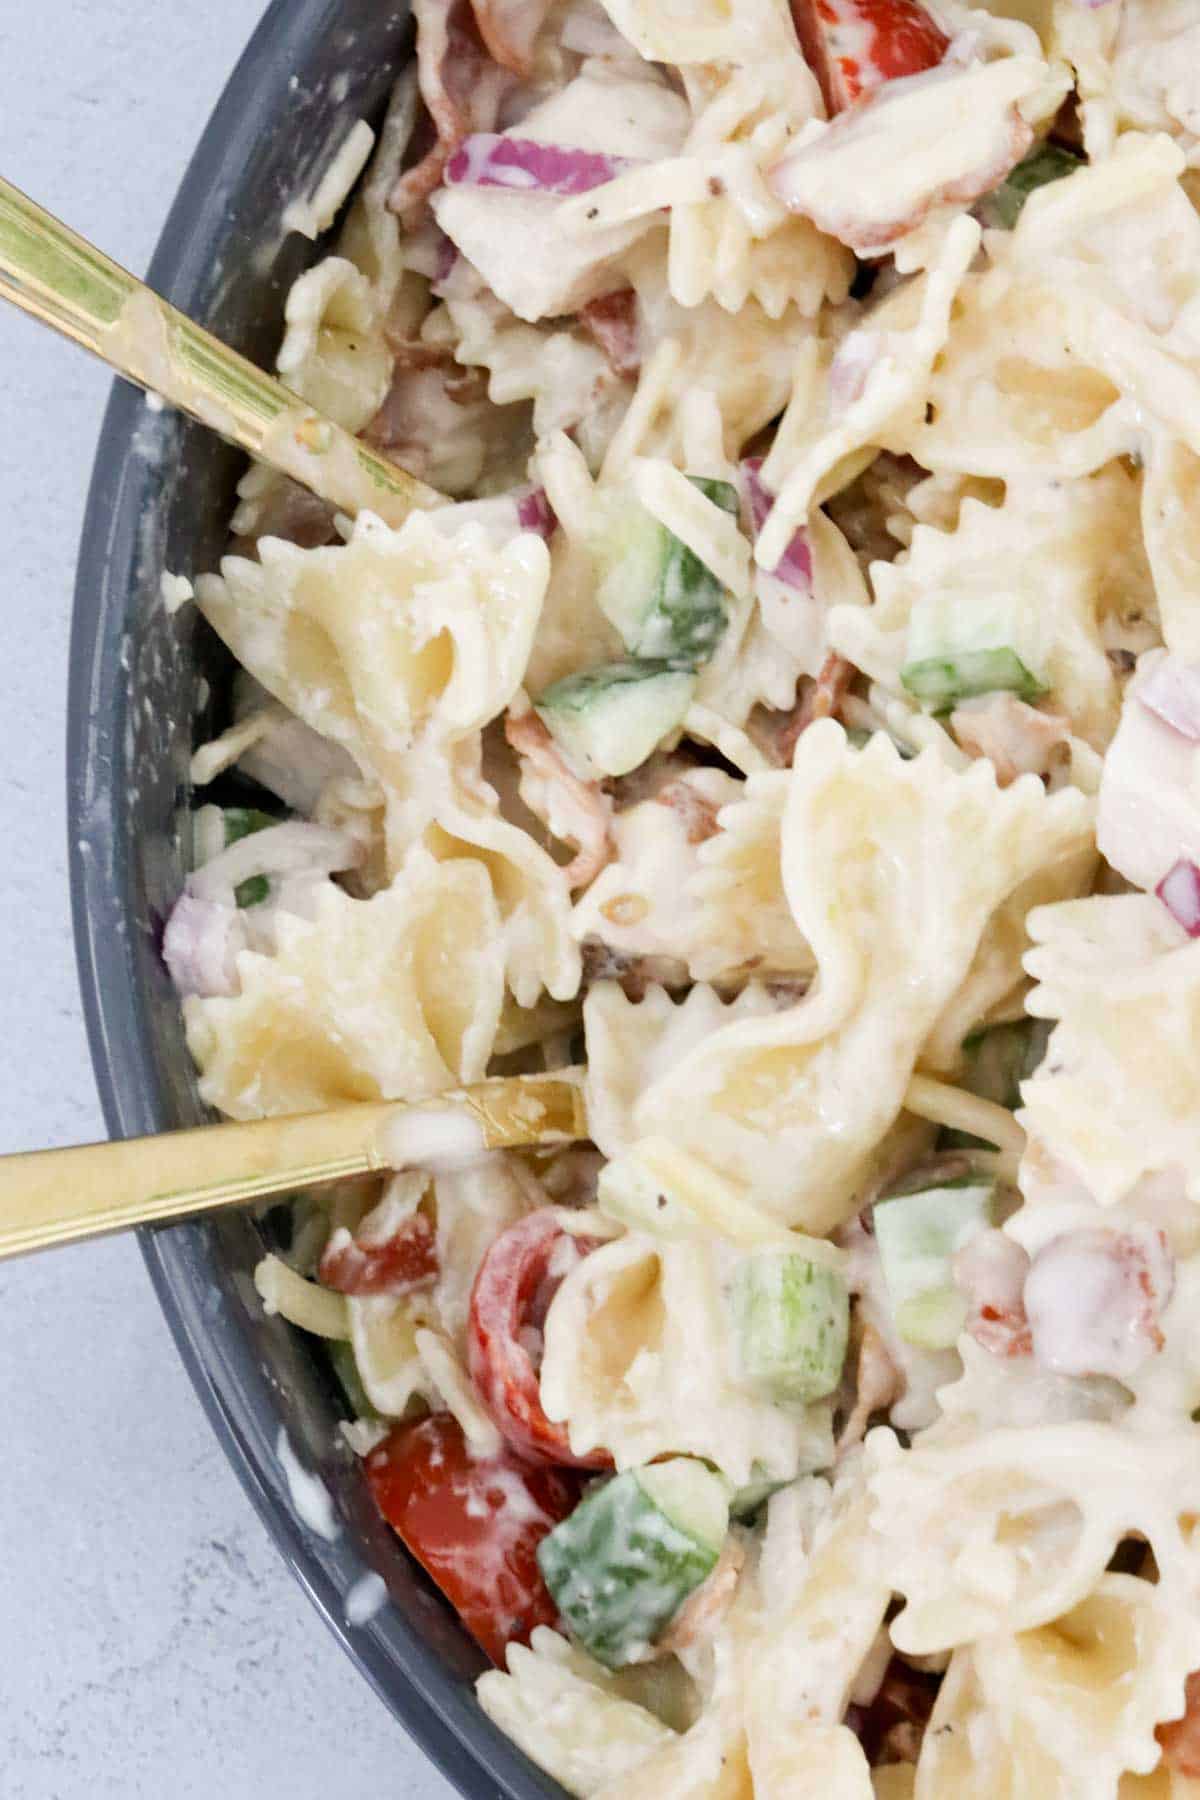
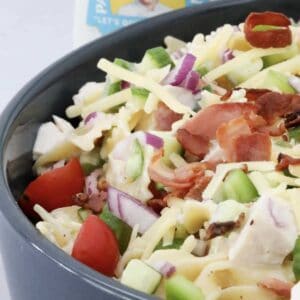
A delicious and creamy Chicken Bacon Ranch Pasta Salad packed full of flavour! This easy-to-make recipe is a perfect side dish for BBQs, family gatherings, or a quick midweek meal.
It’s a guaranteed crowd-pleaser, loaded with tender chicken, crispy bacon, fresh vegetables, and a creamy ranch dressing.
The beauty of this pasta salad recipe is that you can prepare many of the ingredients ahead of time. Then, you can simply combine the salad and dress it prior to serving.
Quick & Easy – Ready in just 25 minutes, this easy pasta salad recipe is a great option for those busy days when you need something tasty but fuss-free.
Full of Flavour – The smoky bacon, juicy chicken, and creamy ranch dressing make every bite a delight.
Great for Meal Prep – Make it ahead of time and store it in the fridge for an easy grab-and-go meal.
Versatile – Easily adaptable to suit your preferences with different veggies or protein options.
What You Need
Note: Scroll to the recipe card at the bottom for the ingredients quantities and full detailed method.
Ingredients
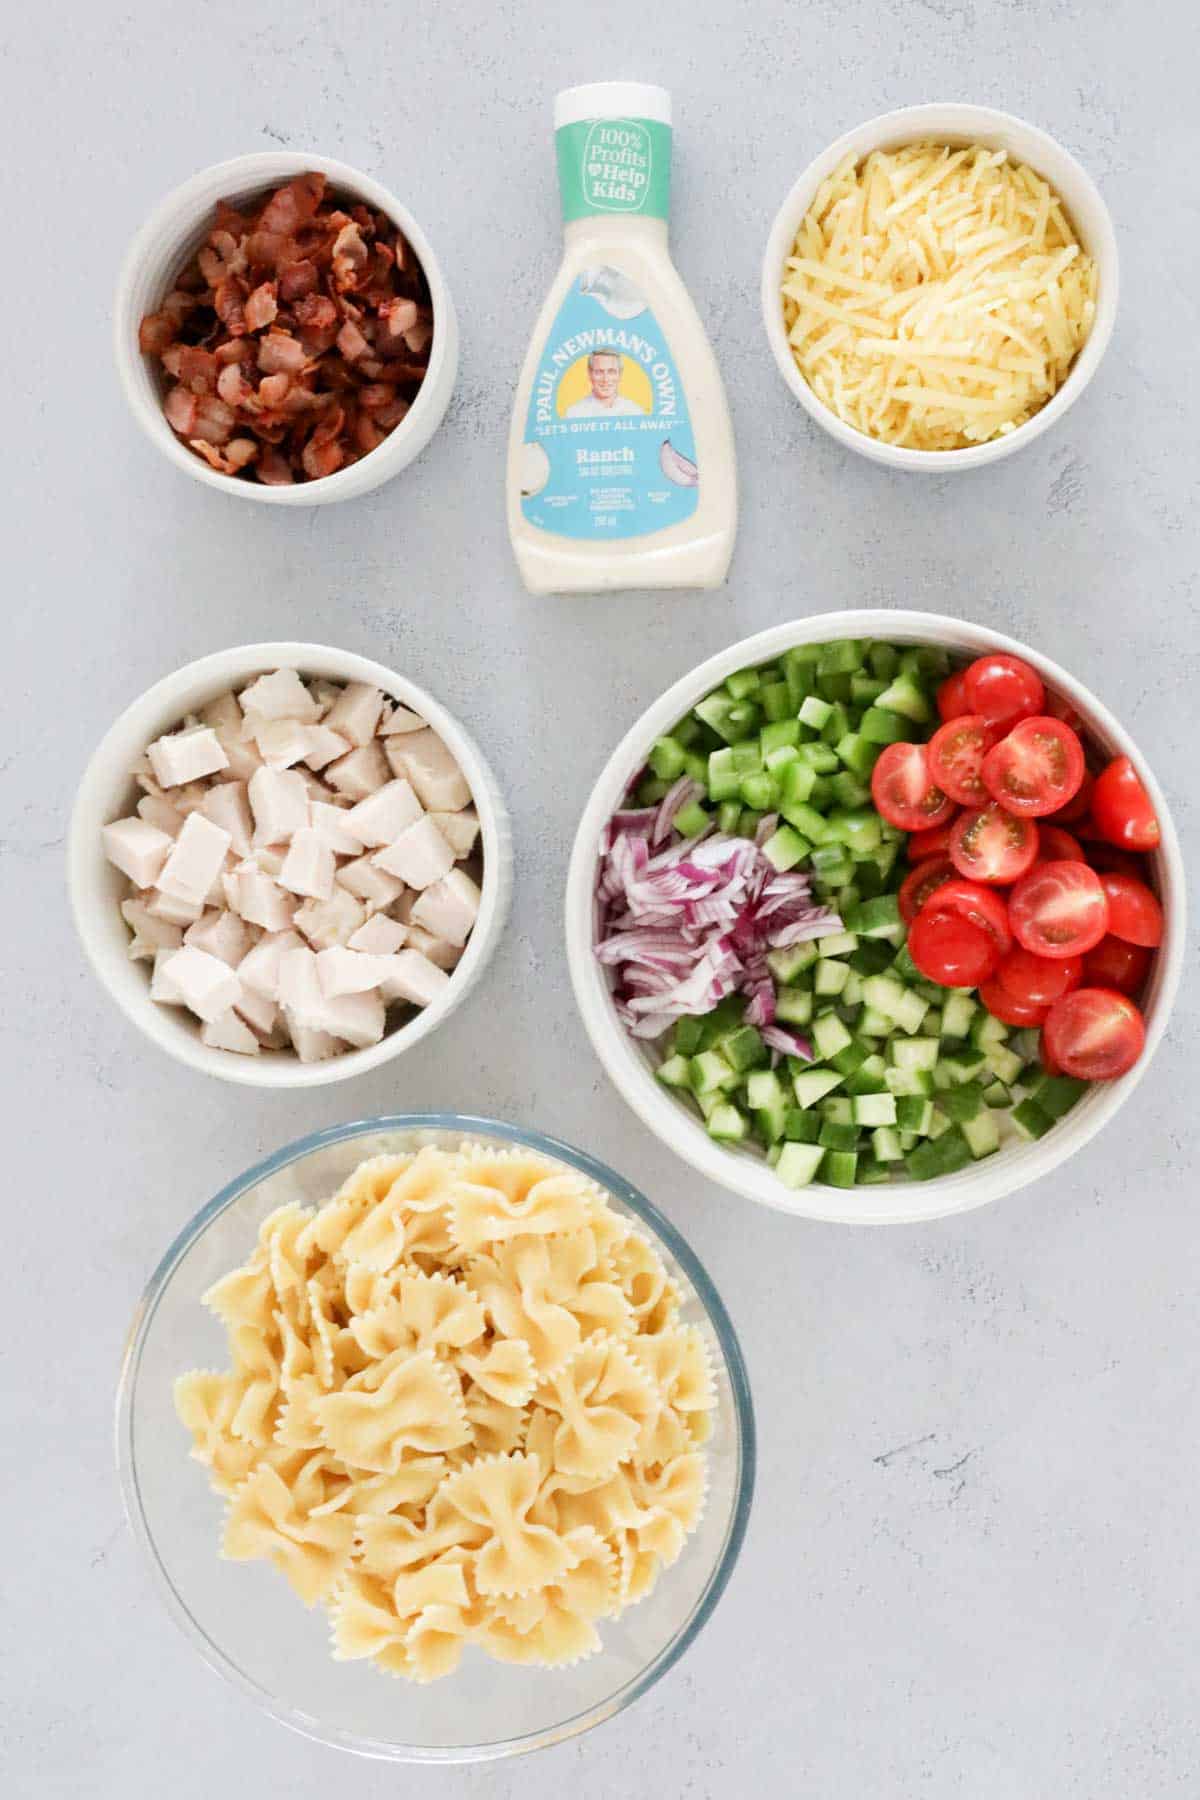
Uncooked pasta – Bow-tie or spirals work best as they hold the dressing well and add a great texture.
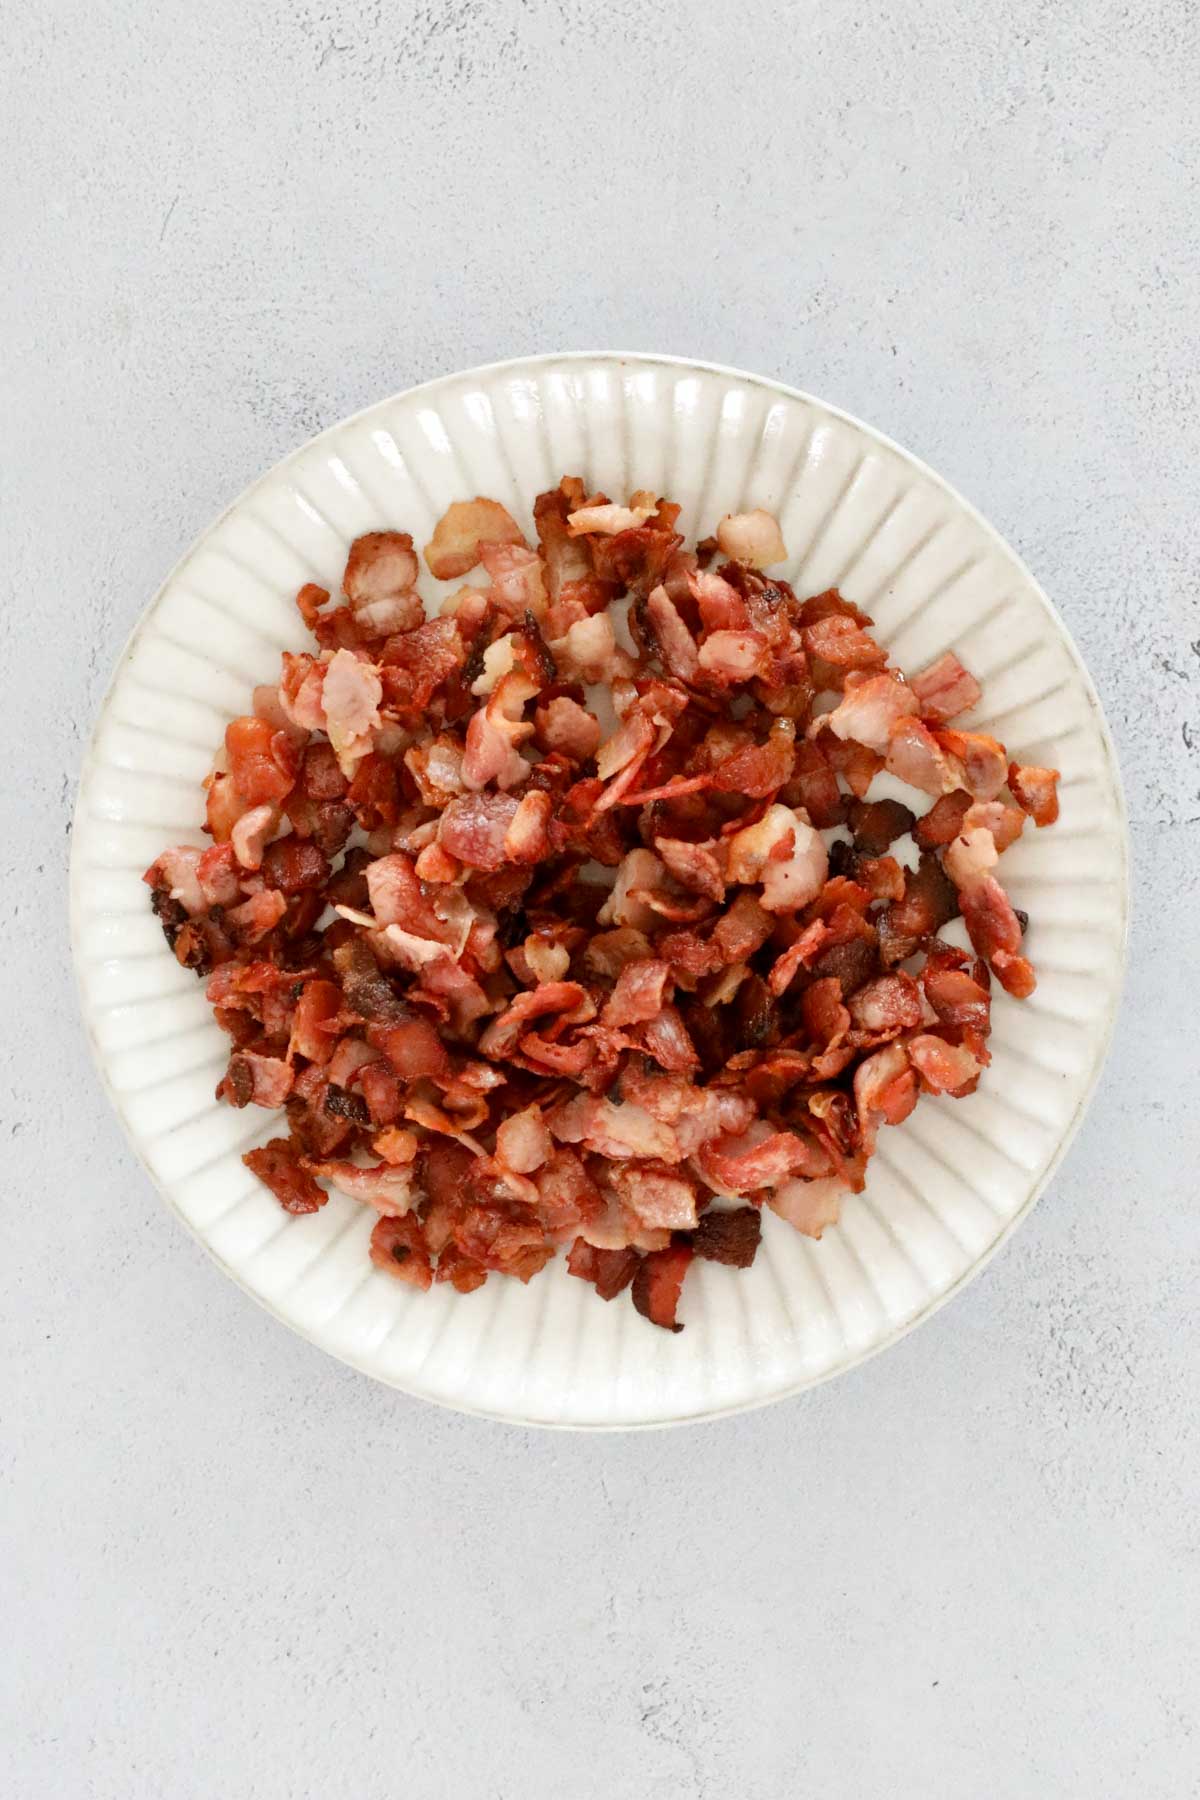
Streaky bacon – Crispy bacon adds a delicious smoky, savoury crunch to the salad.
Cooked chicken breast or thigh – A great way to use leftover chicken or BBQ rotisserie chicken for extra convenience.
Red onion – Adds a mild bite and a touch of colour to the salad. You could substitute with spring onions / green onions too.
Cherry tomatoes – These juicy, sweet tomatoes balance out the savoury elements perfectly.
Cucumber – Fresh and crunchy, cucumber helps to keep the salad light and refreshing.
Green capsicum – Adds a subtle sweetness and crisp texture. Capsicums are also known as bell peppers in the US.
Grated cheddar or tasty cheese – A rich and creamy element that ties the dish together.
Ranch dressing—The star of the dish, store-bought ranch dressing adds creaminess and flavour to every bite. Alternatively, you could make your own ranch dressing using sour cream, mayonnaise, herbs, and seasonings.
Salt and pepper – To taste, season, and enhance all the flavours.
Equipment Required
To make this recipe, you’ll need:
A large pot for cooking the pasta
A colander for draining the pasta
A frying pan for cooking the bacon
A sharp knife and chopping board for prepping the ingredients
A large bowl for combining everything
A spoon or spatula for mixing the salad.
Step-by-Step Instructions
Note: Scroll to the recipe card at the bottom for the ingredients quantities and full detailed method.
Step 1: Prepare The Pasta
Start by bringing a large pot of salted water to a boil. Cook the pasta according to the packet instructions until it’s just al dente. Drain the cooked pasta and rinse it under cold water to cool it down and prevent sticking. Set aside.
Step 2: Cook The Bacon
Heat a frying pan over medium heat and add the diced bacon. Cook until crispy and golden brown, stirring occasionally to ensure even cooking. Once done, transfer the bacon to a plate lined with paper towels to drain any excess oil.
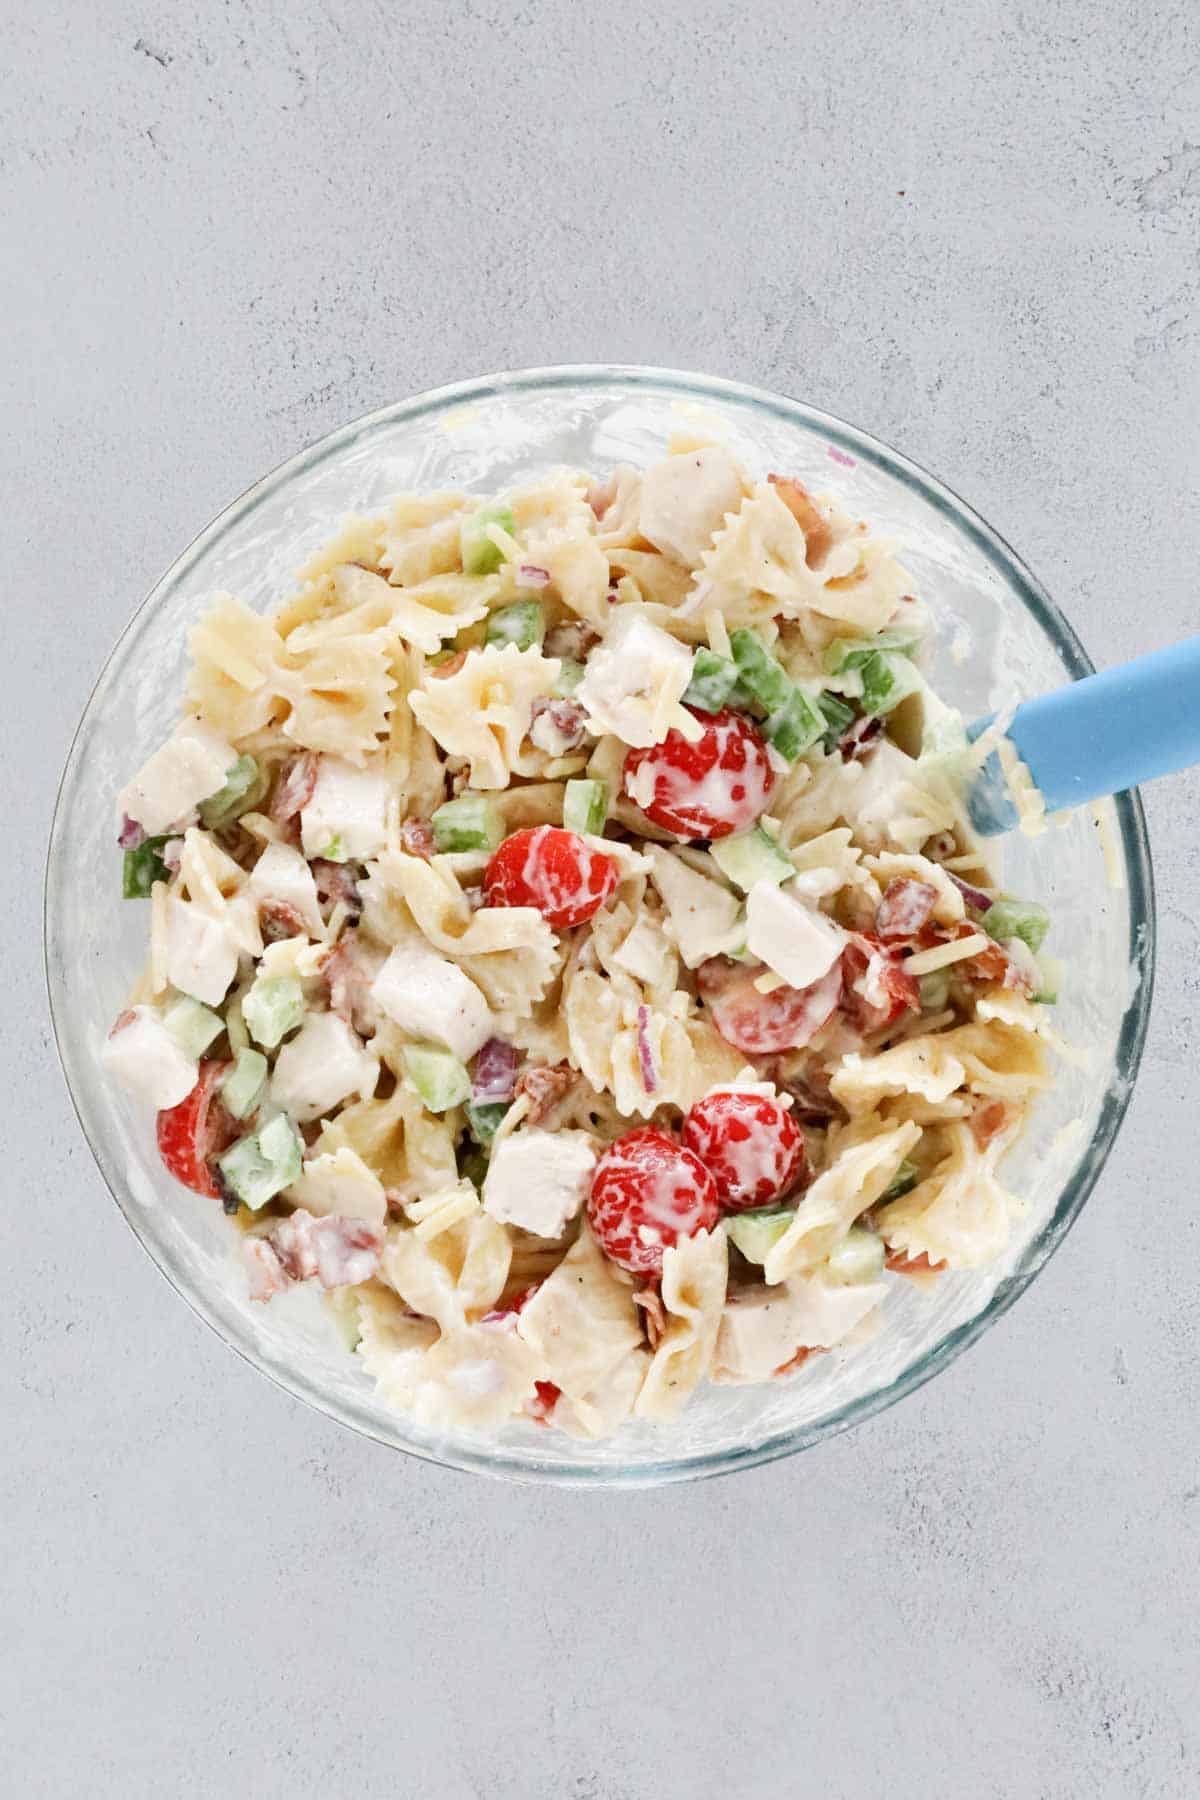
Step 3: Mix The Ingredients
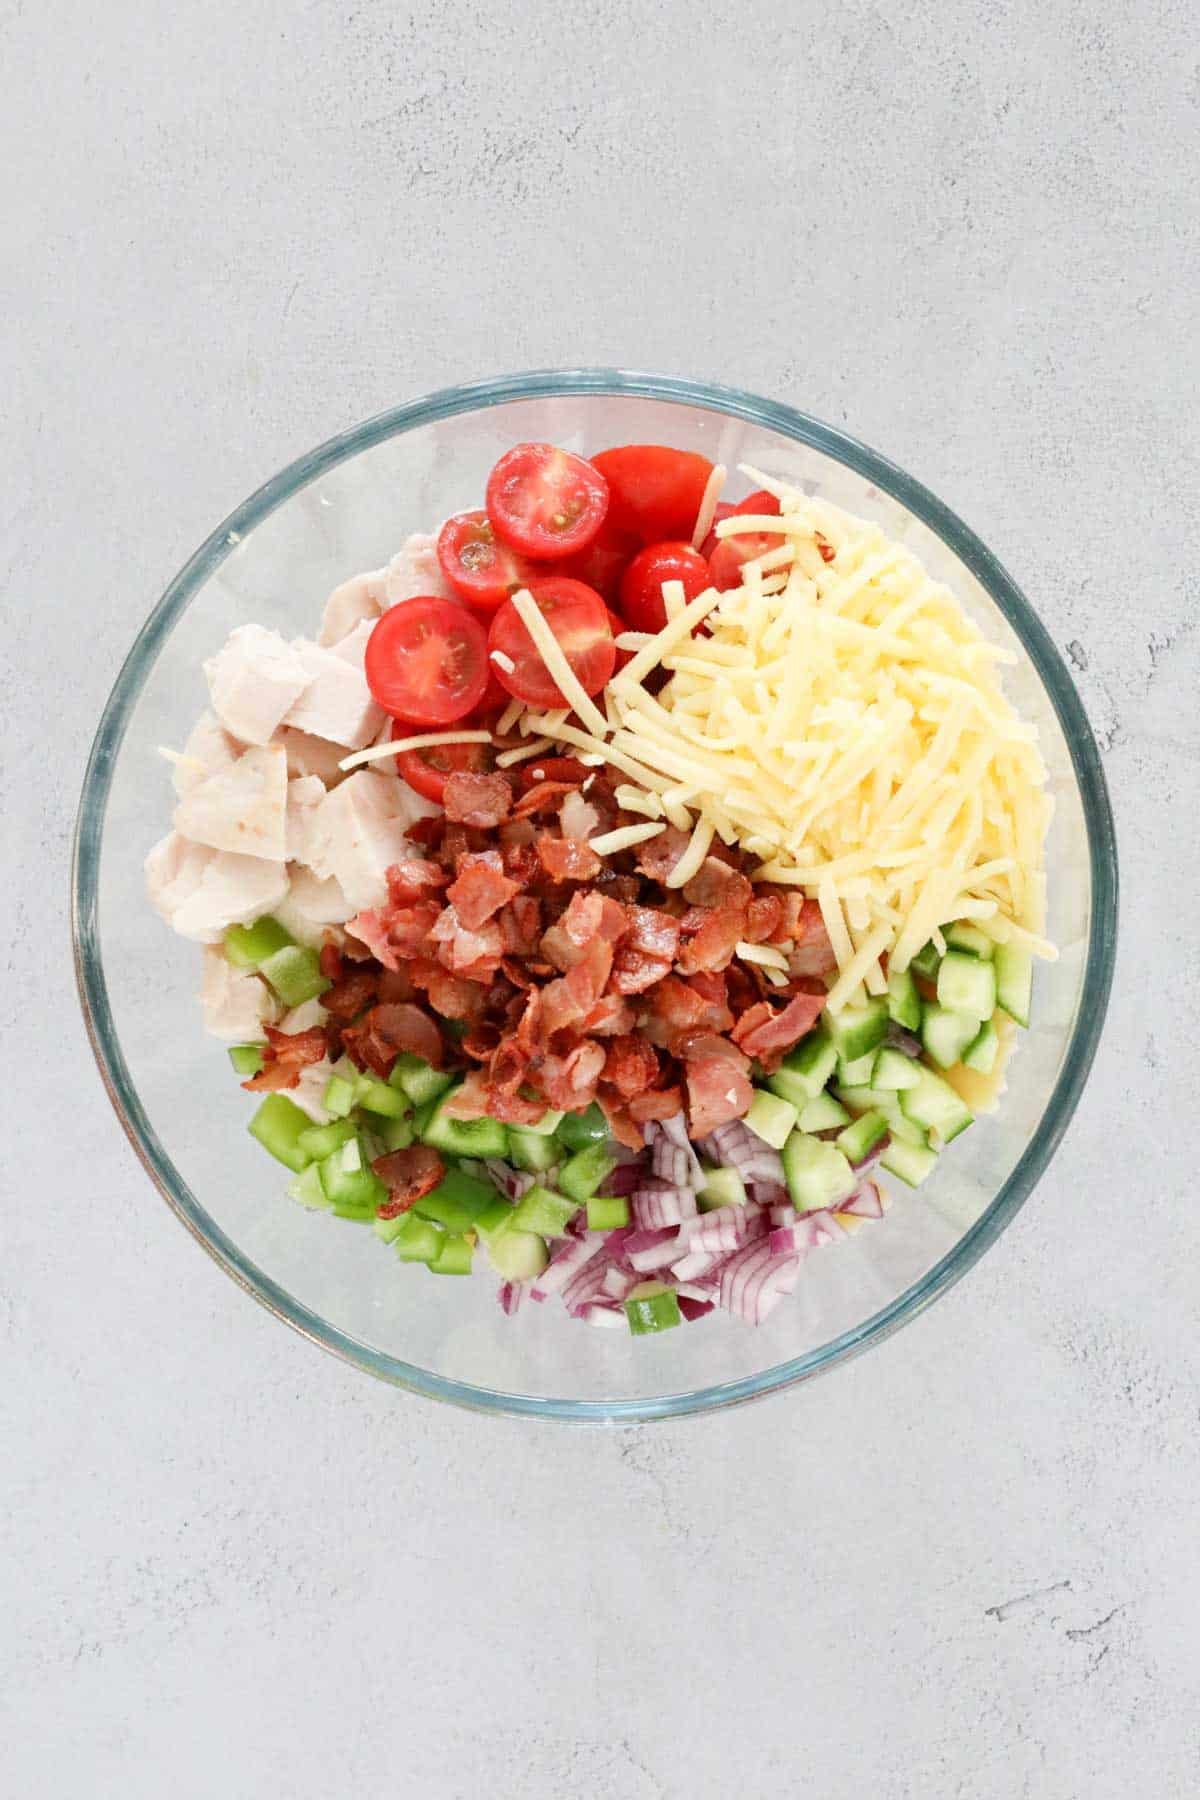
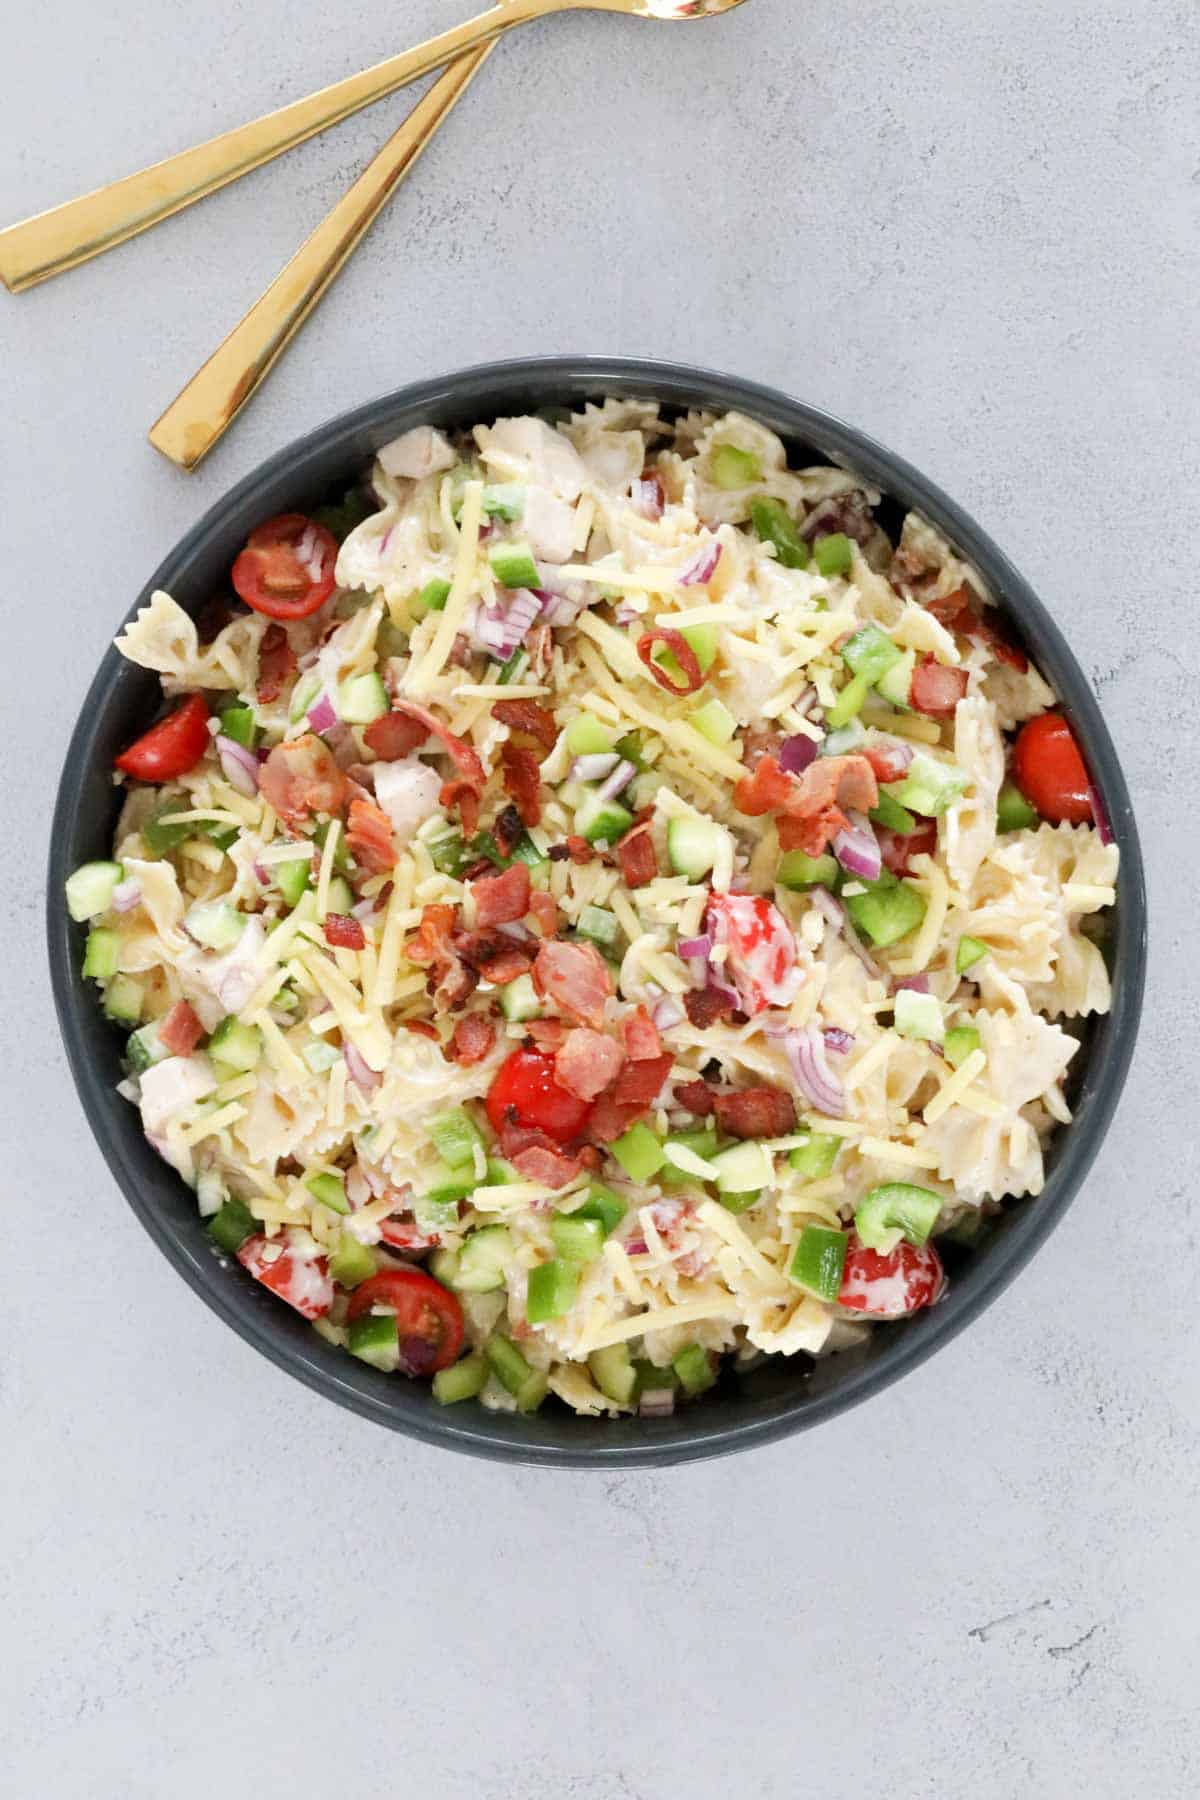
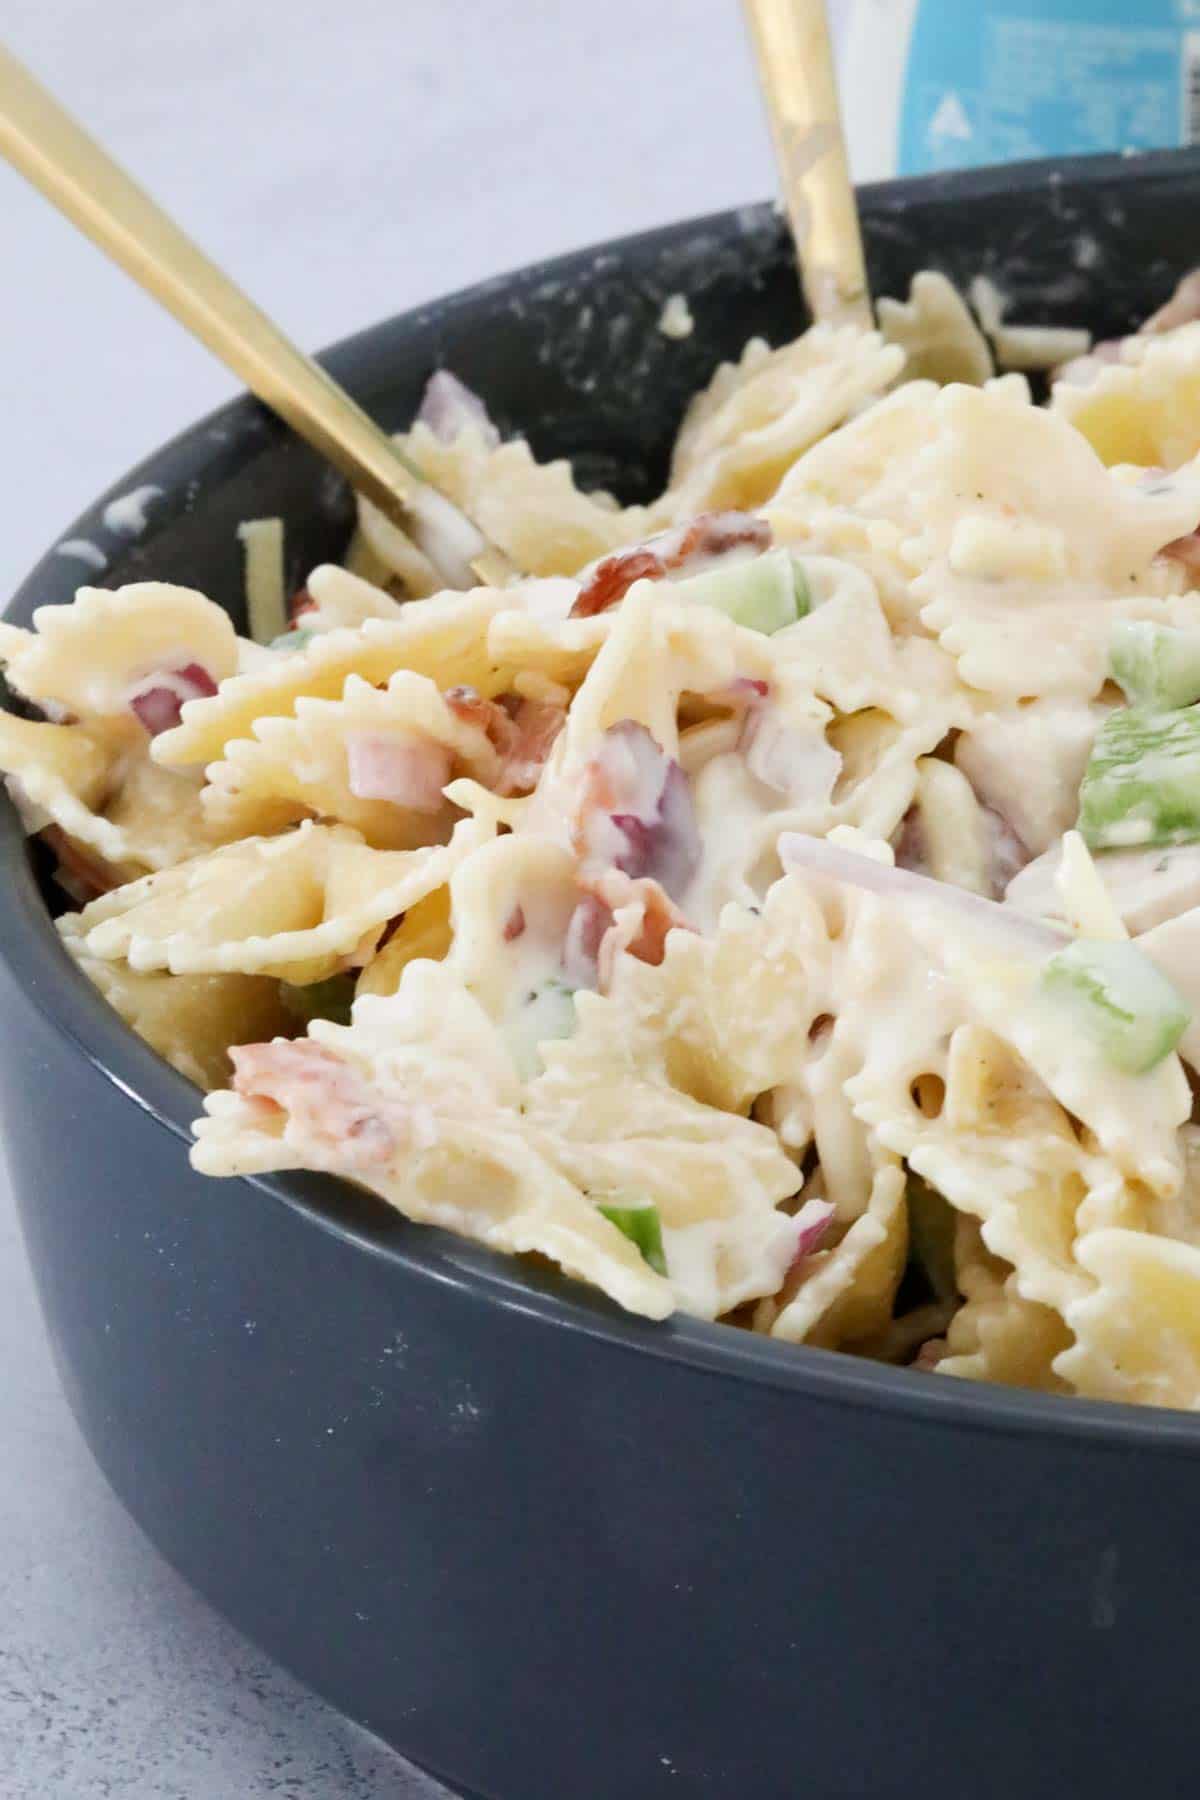
In a large mixing bowl, combine the cooled pasta with the crispy bacon, diced chicken, red onion, cherry tomatoes, cucumber, green capsicum, and grated cheese.
Toss all ingredients to evenly distribute, reserving a little cooked bacon and grated cheese to sprinkle over the top.
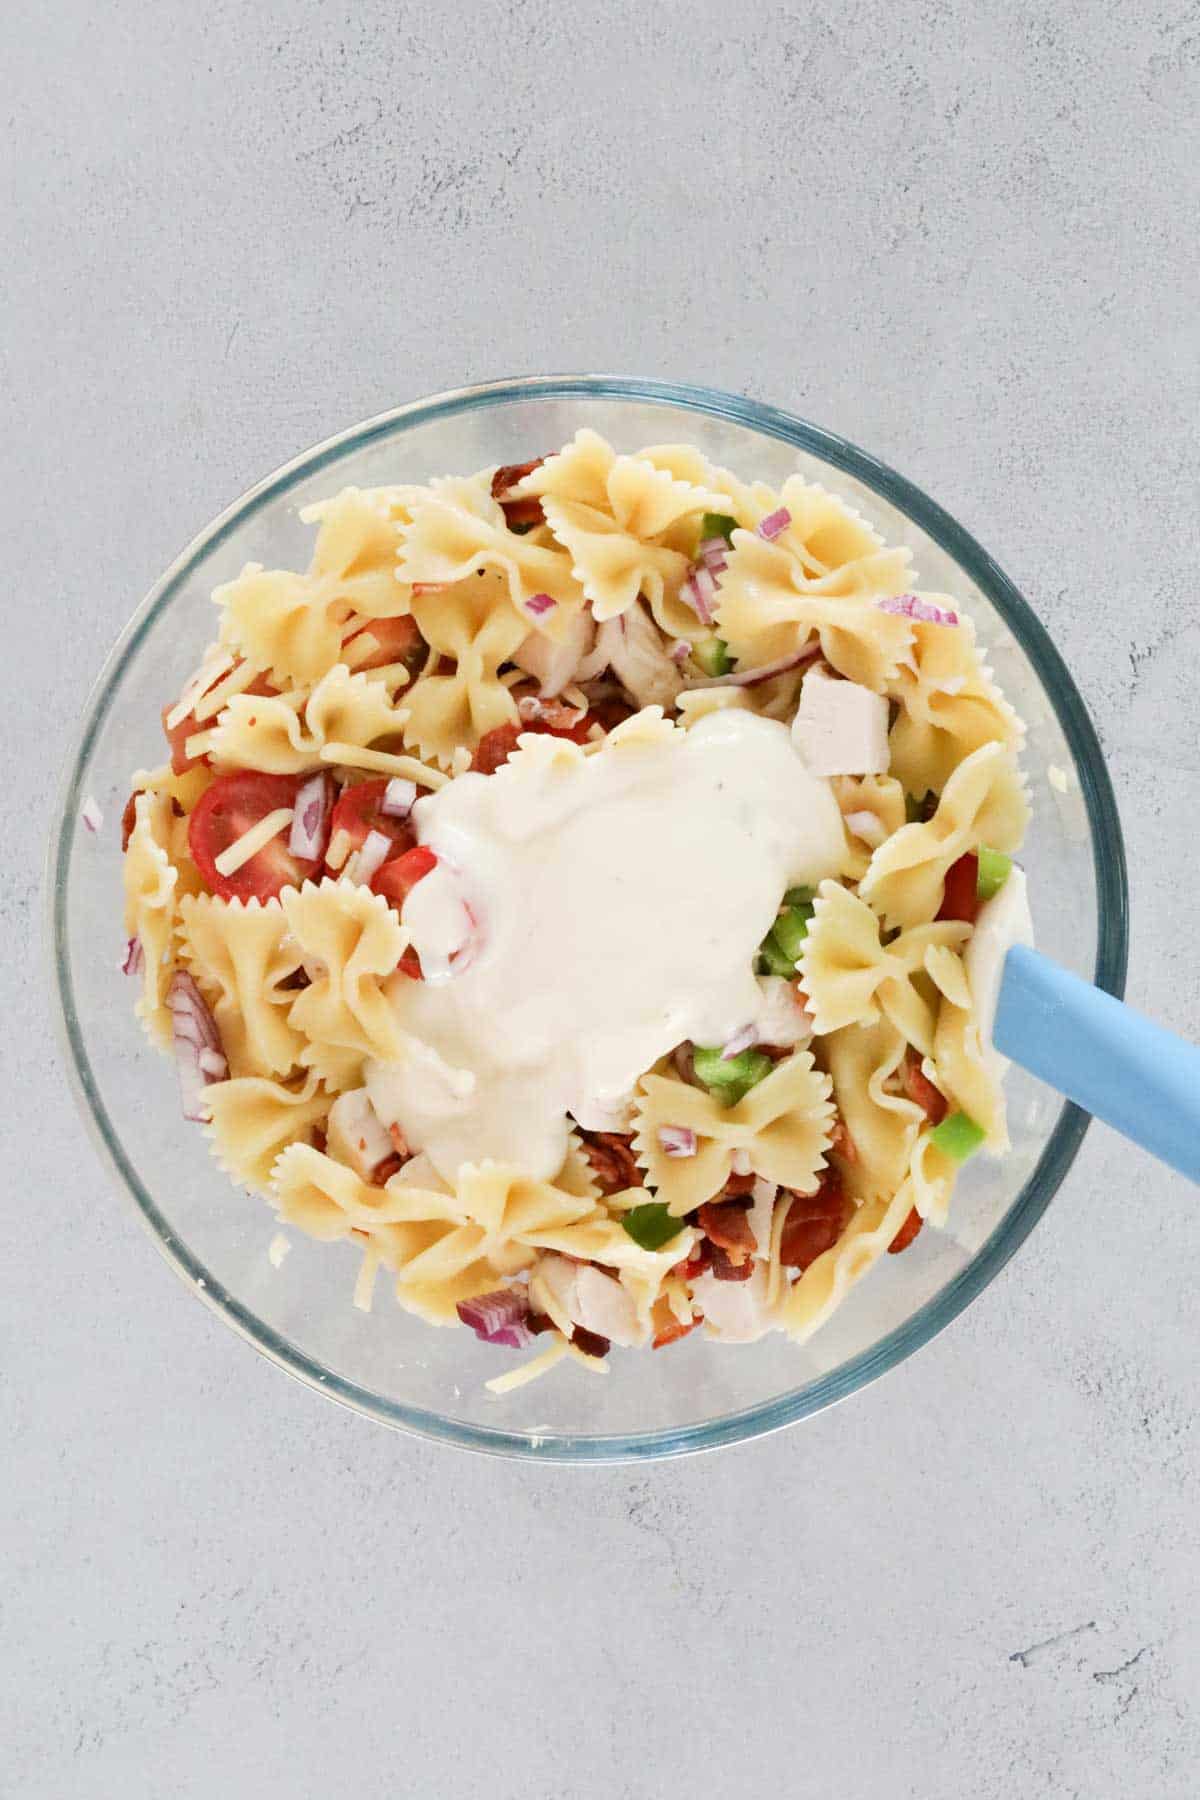
Step 4: Add Dressing
Drizzle three-quarters of the ranch dressing over the salad and gently mix until everything is well coated.
Taste and add extra dressing if needed. Season your chicken pasta salad with salt and pepper to your liking.
Finally, sprinkle the reserved bacon and cheese on top.
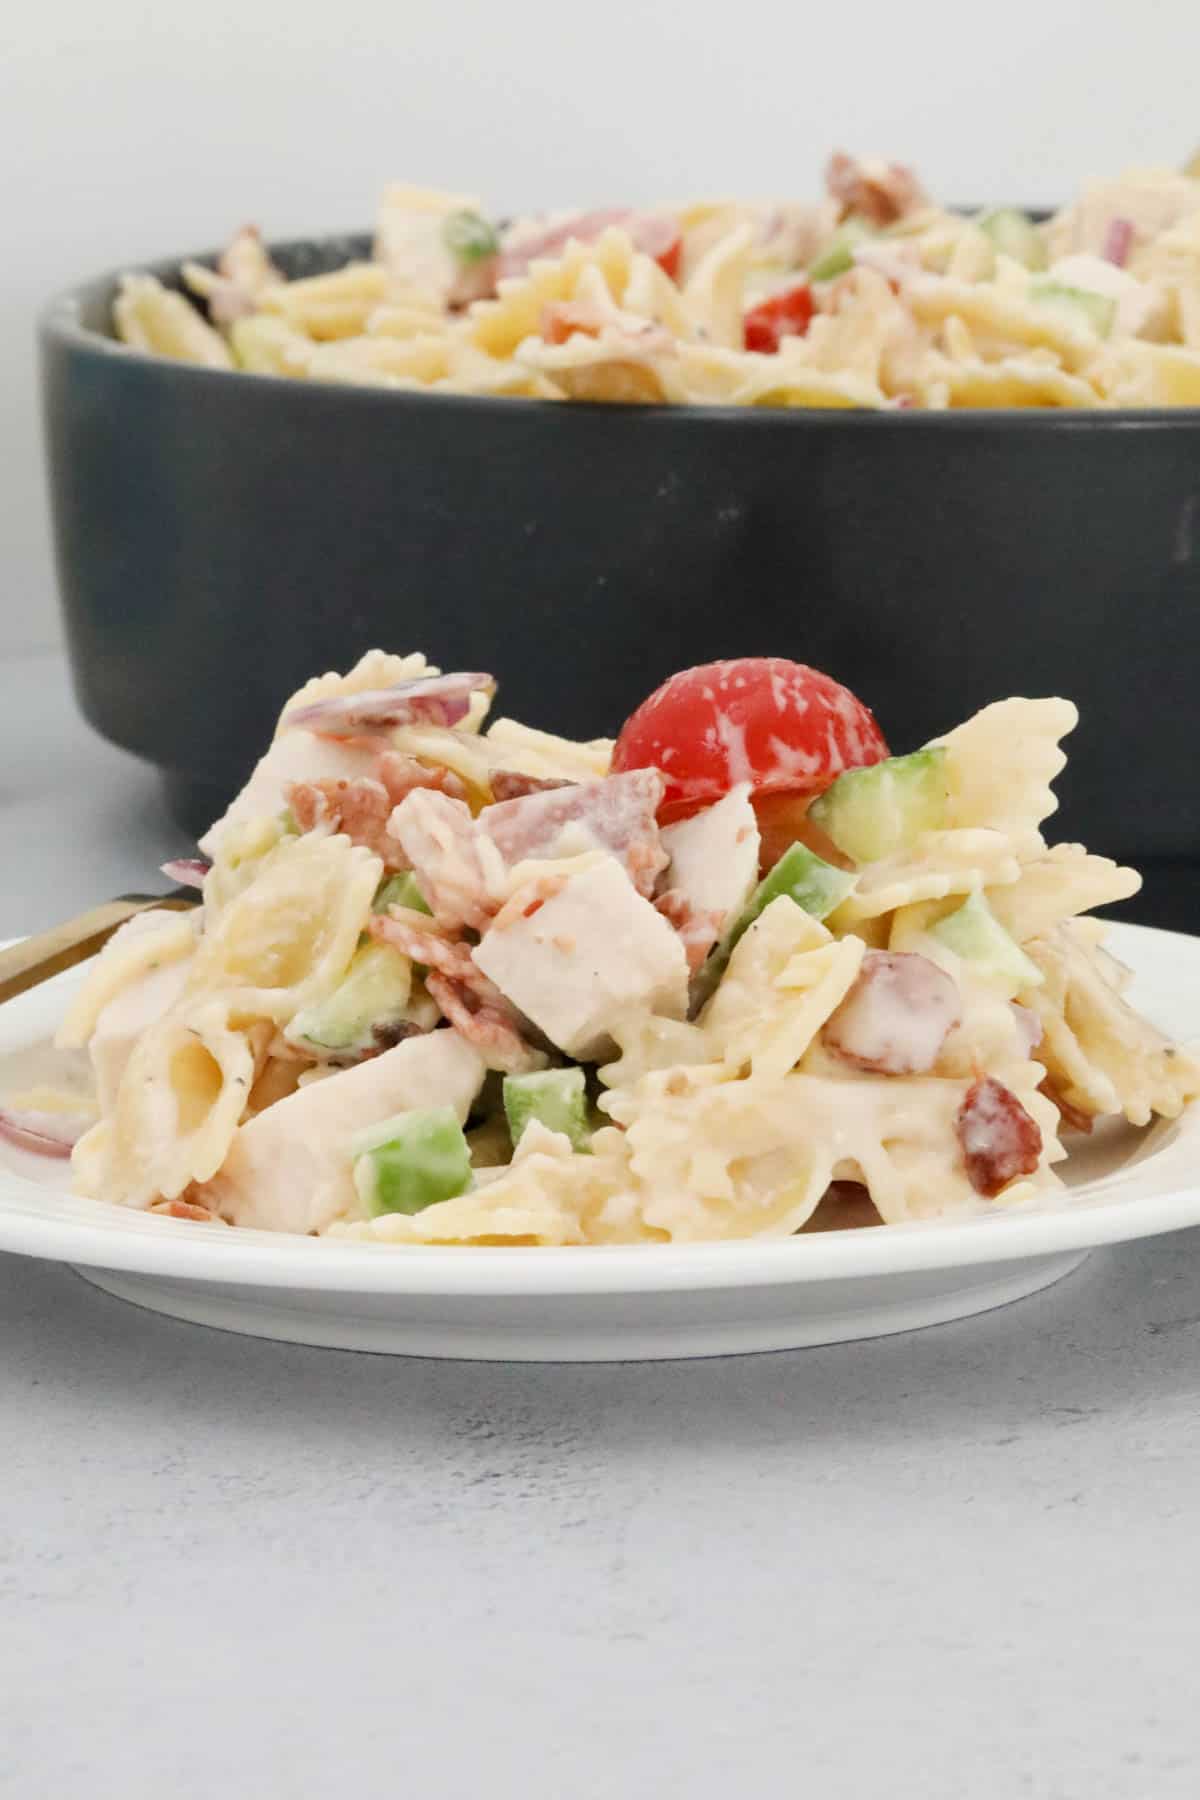
Step 5: Serve And Enjoy
This delicious pasta salad is best enjoyed at room temperature for the best flavour and texture. If you’ve prepared it beforehand, allow it to sit out for a few minutes before serving.
Recipe Tips & Variations
Type of Pasta: Bow-tie (farfalle) or spirals work well, but penne or macaroni are great alternatives. Be sure not to overcook the pasta to keep it tender yet firm.
Chicken Options: Use leftover roast chicken, rotisserie chicken, or quickly pan-fry some chicken breasts or chicken strips for this recipe.
Extra Add-Ins: For extra flavour and texture, try adding avocado, black olives, shredded lettuce, or even corn.
Make It Lighter: Swap out the full-fat ranch for a light version, or mix half ranch and half Greek yogurt for a healthier dressing or for personal preference.
Cheese Options: Swap cheddar for mozzarella, parmesan cheese, or feta for a different flavour twist.
FAQs
Can I make chicken bacon ranch pasta salad ahead of time?
Yes! You can prepare all the ingredients in advance and store them separately in the fridge. Mix everything together with the dressing just before serving to keep it fresh.
How long does this pasta salad last in the fridge?
This salad can be stored in an airtight container in the fridge for up to 2 days. Just stir it the next day before serving.
Can I use a different dressing instead of ranch?
Absolutely! Caesar dressing, honey mustard, or a simple homemade vinaigrette are great alternatives if you want to switch things up.
What other vegetables can I add?
You can mix in whatever veggies you like! Add diced avocado, shredded carrots, corn, or even spinach or rocket for extra colour and nutrition.
Can I serve chicken bacon pasta salad warm?
Yes, while it’s traditionally served at room temperature or chilled, you can serve it slightly warm if preferred. Just add the pasta salad dressing last to keep the flavours balanced.
Storage & Meal Prep
Refrigeration: Store leftovers in an airtight container in the fridge for up to 2 days.
Freezing: Not suitable for freezing as the texture of the pasta and dressing changes.
Make Ahead: Prepare everything ahead, but add the dressing just before serving for the best texture.
Serving Suggestions
Serve as a standalone main course for lunch or dinner.
Pair with a crusty bread roll for a more substantial meal.
Enjoy as a side dish at your next BBQ, picnic, or family gathering.
This Chicken Bacon Ranch Pasta Salad is guaranteed to be a huge hit with the whole family! Creamy and savoury, with tender pasta and full of fresh ingredients, this easy pasta salad recipe is the ultimate meal that everyone will love. Enjoy!
For more easy salad recipes, check out these tasty summer salads, which are always popular. Any leftover pasta salad makes a fabulous lunch the next day, too!
Cook the pasta according to the packet directions until just al dente. Run the pasta under cold water and strain well.
Cook the bacon in a frying pan until crispy. Set aside on paper towel to remove any excess oil.
Place the pasta into a large mixing bowl.
Add the crispy bacon, diced chicken, red onion, cherry tomatoes, cucumber, green capsicum and grated cheese. Mix until well combined.
Pour over ¾ cup of the ranch dressing and mix to combine.Taste the salad and add the remaining dressing if desired.Season with salt and pepper.
Notes
RECIPE NOTES & TIPS
Pasta – I like to use bow-tie pasta. However, spirals or penne also work well. Cook the pasta until just al dente (do not overcook).
Chicken – This recipe is a great way to use up leftover cooked chicken! Alternatively, you can use a cooked rotisserie chicken or pre-cooked chicken breast.
Versatile – Mix and match with your favourite vegetables! Try substituting the red onion with spring onion, add some diced avocado, shredded lettuce or black olives, or use a different coloured capsicum (peppers).
Make it look even more impressive by reserving a small amount of bacon, cheese, tomatoes, cucumber and red onion to sprinkle over the top!
Serve at room temperature – This salad is best served at room temperature as the dressing remains creamy. If storing in the fridge, bring the salad to room temperature before serving.
Store – Store the salad in an airtight container in the fridge for up to two days.
Freezing – This salad is not suitable for freezing.
Rich, hearty, and packed with flavor—this homemade pasta sauce recipe would make a Nonna proud. A beefy sauce that is slow-simmered for a rich, savory taste. Serve it over pasta or bake it into lasagna.
Flavor: This sauce has a savory flavor with hints of herbs and a fresh tomato taste.
Skill level: Making pasta sauce is a great beginner recipe, with simple steps but it has so much flavor that it’s perfect for anyone to make!
Technique: I include a spice mix that I add to the meat, which is similar to the one I use in my homemade Italian sausage. It’s easy and adds an extra layer of flavor.
Budget tip: Add leftover veggies in Step 3 for an extra boost of flavor and nutrients.
Prep ahead: Pasta sauce freezes beautifully so double or triple the recipe for future meals.
Ingredient Tips For Pasta Sauce
Meat: I use ground beef in this recipe and mix in my own seasonings. Half of the meat can be replaced with Italian sausage.
Tomatoes: Tomatoes are the base of this sauce, I recommend a high-quality brand, I love San Marzano style tomatoes.
Sugar: A pinch sugar will balance the acidity from the tomatoes. Or, instead of sugar, add half a grated carrot to the sauce.
Seasonings: Dried Italian seasonings are added to the sauce in addition to the meat seasoning above. If adding fresh herbs, they should be added at the end of cooking so their delicate flavor doesn’t get cooked out.
Variations: Add sauteed mushrooms and onions in Step 3 or some shredded zucchini, chopped spinach, or kale for an extra bump in nutrition.
The great thing about this ground beef pasta sauce is that it’s so versatile and having some on hand for last-minute meals is a weeknight timesaver.
Besides topping a pile of spaghetti, use pasta sauce for meatball subs, lasagna, mix it with rice for stuffed peppers, or create a casserole with veggies and cheese.
Storing Leftovers
Leftover homemade pasta sauce can be kept in the refrigerator in a covered container for up to 4 days. Freeze portions in zippered bags for up to 3 months and thaw overnight in the refrigerator or reheat from frozen on medium heat on the stovetop.
Did you love this Homemade Pasta Sauce? Leave us a rating and a comment below!
4.99 from 58 votes↑ Click stars to rate now! Or to leave a comment, click here!
Ground Beef Pasta Sauce
This homemade pasta sauce is a rich, savory blend of ground meat, tomatoes, fresh herbs, and spices, simmered to perfection for a hearty meal.
Prep Time 20 minutesminutes
Cook Time 1 hourhour15 minutesminutes
Total Time 1 hourhour35 minutesminutes
Prevent your screen from going dark
In a medium bowl, combine ground beef with sage, fennel seeds, thyme, pepper, and allspice until well mixed.
Heat a large pot or Dutch oven over medium-high heat. Add the ground beef mixture, onion, and garlic, breaking up the meat with a spoon. Cook until browned, drain excess fat if needed.
Add the canned tomatoes with the liquid, tomato sauce, green bell pepper, water, Italian seasoning, bay leaves, sugar, and salt to the pot. Stir well to combine.
Bring the mixture to a boil. Reduce the heat and simmer uncovered for 1 hour or until the sauce has reached your desired consistency. Stir occasionally.
Once the sauce has thickened, stir in the chopped parsley and basil.
Remove bay leaves, taste and season with additional salt and pepper. Serve over hot pasta.
Meat seasoning: I add a seasoning similar to sausage seasoning into the meat. If preferred, half of the beef and be replaced with Italian sausage and you can skip the meat seasoning mixture. Tomatoes: While any type of canned tomatoes works well in this recipe, I love San Marzano tomatoes for their bright flavor. If using whole tomatoes, break them up with your hands as you add them to the sauce. Leftover pasta sauce can be stored in a covered container in the fridge for up to 4 days. Freeze cooled portions in zippered bags for up to 3 months. Thaw in the fridge or reheat from frozen on the stovetop over medium heat.
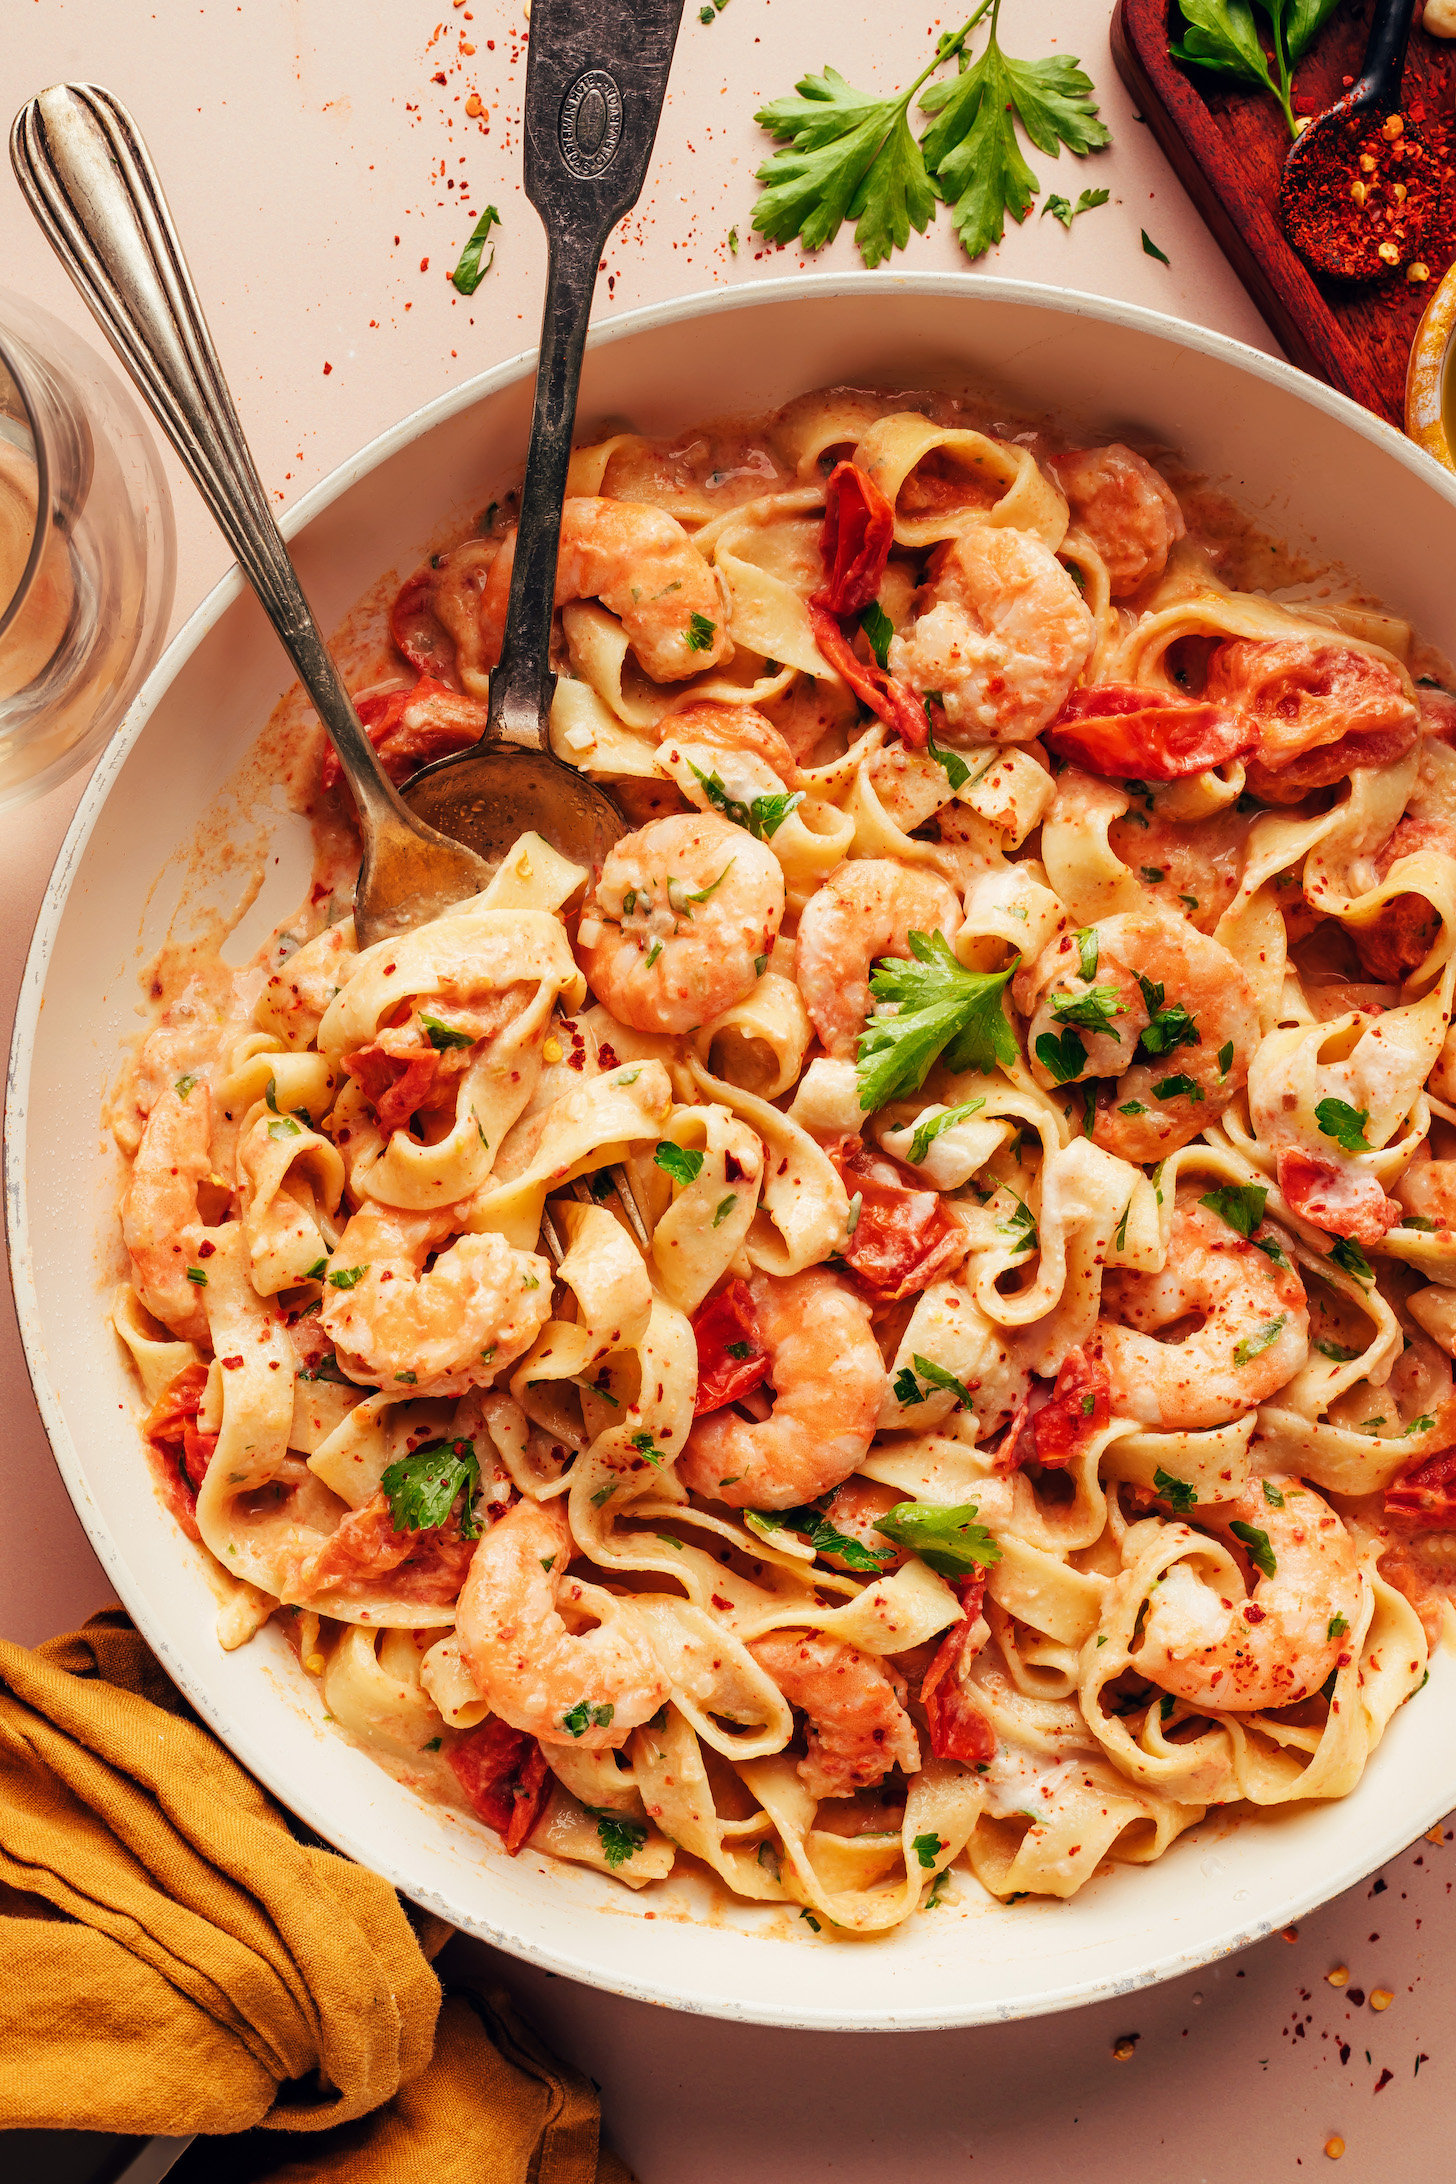
Weekend flavor meets weeknight ease: 30-minute Tuscan-style shrimp pasta! This CREAMY, dairy-free dish is rich, garlicky, and bursting with bright tomato flavor.
It’s impressive enough to wow any guests but simple enough that you’ll want to make it again and again! Let us show you how it’s done!
How to Make Dairy-Free Shrimp Pasta
This EASY shrimp pasta starts with cooking your favorite pasta (we like gluten-free fettuccine) and soaking some cashews for dairy-free creaminess.
Next come the perfectly cooked shrimp! The trick is to sauté shallots, garlic, and red pepper flakes for flavor, then add raw shrimp and cook until pink and slightly curled up. The timing will depend on the size of the shrimp and other factors, but we find 2 minutes per side is usually the magic number for shrimp that’s tender, fully cooked, and not rubbery.
Then it’s on to the bright, creamy tomato sauce! Inspired by our fan-favorite Creamy Italian White Bean Skillet Meal, cherry tomatoes cook with white wine, red pepper flakes, and salt until the tomatoes are soft and burst open.
Then we add homemade cashew cream and the sauce becomes creamy and develops a thick, luxurious texture!
Lastly, add in your cooked pasta, garnish with fresh parsley or basil, and dinner is served!
We can’t wait for you to try this shrimp pasta! It’s:
Creamy Bright Saucy Rich Flavorful Comforting & Easy to make!
1(8 oz.) box fettuccine or spaghetti(we like Jovial fettuccine // ensure gluten-free as needed)
1lbraw shrimp*, peeled and deveined with tails removed(thaw and pat dry if frozen*)
2Tbspolive oil
2mediumshallots, minced(2 shallots yield ~80 g or 1/2 cup)
6-8medium clovesgarlic, minced(6-8 cloves garlic yield ~1/4 cup or 50 g)
3/4-1tspred pepper flakes
5cupscherry tomatoes, left whole
3/4cupdry white wine(we like a lighter white like Sauvignon Blanc // or sub water)
3/4-1tspsea salt(plus more to taste)
1/2cupchopped fresh parsley (or basil)
Add cashews to a heatproof bowl and cover with hot water by at least 1-2 inches. Let them soak while you get started on everything else. Soaking makes the cashew cream neutral-flavored and extra creamy, but (in a pinch) you can skip this step if using a powerful blender such as a NutriBullet or Vitamix.
Bring a large pot of water to a boil. Once boiling, add your pasta and cook according to the package directions.
If using frozen shrimp, see notes for defrosting instructions.
Meanwhile, heat a large skillet over medium heat. Once hot, add olive oil, shallots, and garlic and cook for 3-4 minutes until softened. Add the red pepper flakes and cook until fragrant (~1 minute). Add the shrimp and cook for 1-3 minutes on each side — until they turn pink and curl up (2 minutes per side is usually perfect!). They will cook quickly and cook time will depend on how hot your pan is. We like to let them curl up completely on the first side, then flip and cook until the underside is pink. To avoid under cooking, you want them to have a vibrant pink color (not translucent) and feel firm when pierced with a fork, but avoid overcooking or they will get rubbery! Remove the shrimp from the pan, place them on a plate, and set aside.
Add the cherry tomatoes, white wine, and salt to the same (relatively empty) pan (it’s okay if the sautéed shallots and garlic remain). Cover and cook on medium-high heat for 5-10 minutes or until the tomatoes have burst.
Meanwhile, make the cashew cream. Drain the cashews and add them to a high-speed blender with the water. Blend on high until smooth and creamy.
Remove the lid from the tomatoes and use the back of your spoon or spatula to further break them down. Turn the heat to medium-low and stir in the cashew cream. Let the sauce cook down for about 2 more minutes. Taste and adjust flavor as needed, adding more salt for overall flavor or red pepper flakes for heat. Add the shrimp back into the mixture and stir to coat. Turn off the heat and stir in the chopped parsley (or basil) and cooked pasta (keep separate if preparing in advance).
Serve immediately garnished with dairy-free parmesan cheese, red pepper flakes, or extra parsley and/or basil (all optional). Best served fresh but can be stored in an airtight container in the refrigerator for up to 2-3 days. Not freezer friendly.
*We prefer using raw (vs. cooked) shrimp because it absorbs the flavors of the garlic and shallots while cooking. If using pre-cooked shrimp, we suggest adding it in step 3 very briefly (~20-30 seconds), then remove from the heat and proceed. *To quickly defrost frozen shrimp, place in a colander and run cold water over it for ~3 minutes, until no longer frozen. If it’s not defrosted (soft) after 3 minutes, allow to soak in cold water for up to 20-30 minutes, checking it and replacing the water after 5-10 minutes. Once thawed, drain and pat dry with a paper towel. *This dish pairs well with roasted broccoli, red bell pepper, and onion. To prepare the veggies, cut 1 head of broccoli into florets, 1/2 red bell pepper into 2-inch pieces, and 1/4 onion into 1/2-inch slices. Add to a parchment-lined baking sheet and toss with 1 Tbsp olive oil. Sprinkle generously with garlic powder, salt, and black pepper. Bake at 400 F (204 C) for ~15 minutes, until the veggies are tender and browned on the edges. *Inspired by our Creamy Italian White Bean Skillet Meal. *Nutrition information is a rough estimate calculated with Jovial brown rice fettuccine, the lesser amount of red pepper flakes, and without optional ingredients.