برچسب: Homemade

  • Homemade Sopapillas – The Cookie Rookie®

    Homemade Sopapillas – The Cookie Rookie®


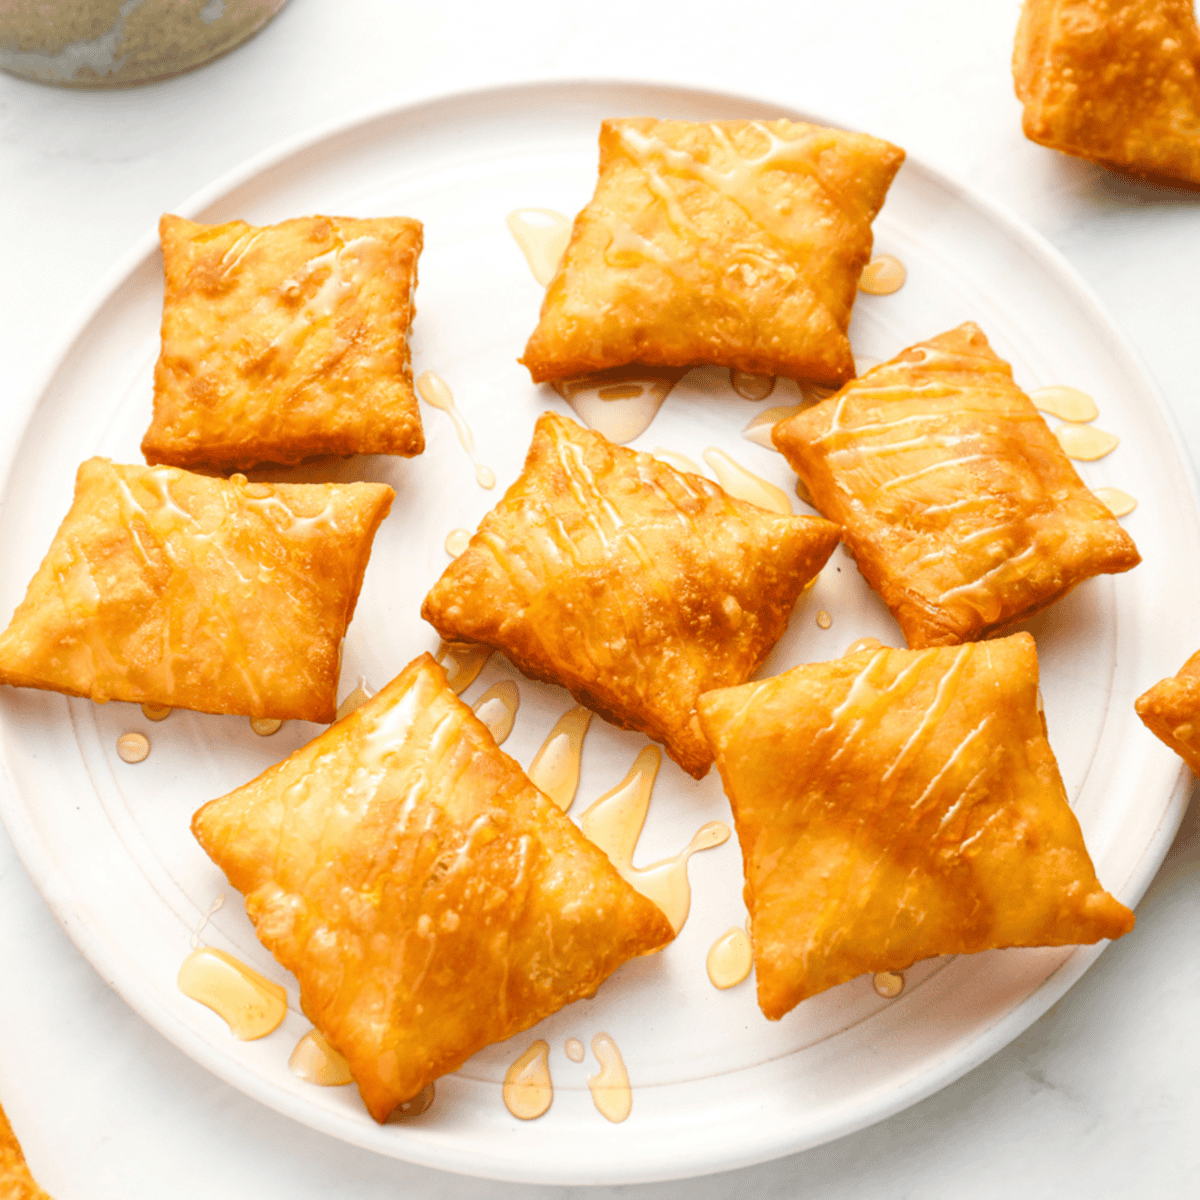
    Homemade sopapillas are deliciously fried pillows of dough from New Mexico. Whenever I want a sweet treat, I whip these up with simple pantry ingredients and enjoy them with a drizzle of sweet honey. The puffed dough is crispy and airy, and so easy to make. Whether dusted with cinnamon sugar, served plain or with traditional honey, they’re always a hit in my kitchen!

    Golden, fried sopapillas drizzled with honey on a white plate, showcasing their puffy and crispy texture.

    For me, making homemade sopapillas is like a little trip to the Southwest. These golden, puffed-up beauties are quick bread that fries up light and hollow, begging to be drizzled with honey or sprinkled with cinnamon sugar. 

    I grew up eating fried dough and churros at fairs with a heaping coat of powdered sugar. These sopapillas remind me of those carefree days, but with a delicious Southwestern twist. Their light, crispy exterior, and hollow center make them perfect for soaking up sweet honey or carrying a dusting of cinnamon sugar, creating a treat that’s both simple and irresistible.

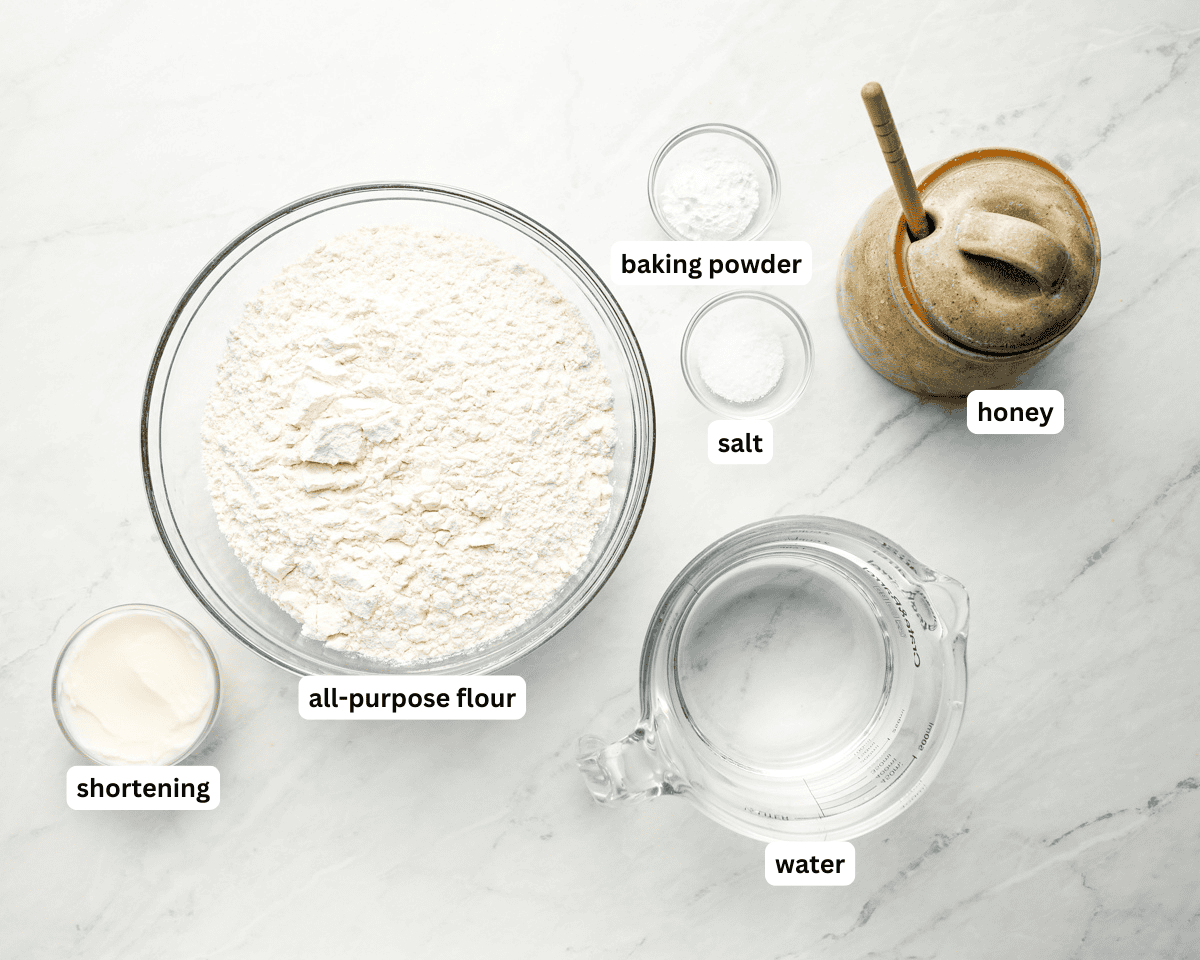
    What’s in This Homemade Sopapillas Recipe

    • All-Purpose Flour: All-purpose flour adds structure to the dough.
    • Baking Powder: Baking powder is essential in this recipe to puff up the dough.
    • Shortening: Adds tenderness, flakiness, and crispness while ensuring a soft interior and neutral flavor, perfect for frying.
    • Frying Oil: I like vegetable oil for frying. Any high smoke point oil will work.
    • Honey: I like drizzling my mini-fried pockets of dough with honey. You can also use a cinnamon sugar mix or powdered sugar.
    Homemade sopapillas ingredients

    Tips For Success

    • Warm tap water is essential to melt the shortening and incorporate the dough.
    • Test that the oil is hot enough by dropping one sopapilla or a scrap of dough first. If the oil bubbles and the dough starts to puff up and turn golden within a few seconds, the oil is hot enough. If it doesn’t bubble or puff up, the oil needs more time to heat. If it browns too quickly, the oil is too hot and should be adjusted.
    • Fry only a few pieces at a time to avoid overcrowding the pot, which can lower the oil temperature and result in soggy sopapillas.
    • When frying in batches, allow the oil to return to 375°F before frying the next batch.

    How to Store and Reheat

    If you have leftover sopapillas, store them in an airtight container at room temperature for up to a day. Reheat in the oven or air fryer to restore crispness.

    A plate of sopapillas with one torn open, revealing the airy and hollow inside, drizzled with honey.

    Serving Suggestions

    Traditional sopapillas are drizzled with honey, but you can also dust them with powdered sugar, cinnamon sugar, or even a drizzle of melted chocolate for a dessert twist. My family loves these all the same ways we’d enjoy fried dough at the fair, and we love them for Cinco de Mayo. I’ve also tried this recipe with a pinch of cinnamon or nutmeg to the dough for a subtle twist. We love to enjoy them with cups of hot drinking chocolate!

    Prevent your screen from going dark

    • Warm tap water is essential to melt the shortening and incorporate the dough.
    • Test that the oil is hot enough by dropping one sopapilla or a scrap of dough first. If the oil bubbles and the dough starts to puff up and turn golden within a few seconds, the oil is hot enough. If it doesn’t bubble or puff up, the oil needs more time to heat. If it browns too quickly, the oil is too hot and should be adjusted.
    • Fry only a few pieces at a time to avoid overcrowding the pot, which can lower the oil temperature and result in soggy sopapillas.
    • When frying in batches, allow the oil to return to 375°F before frying the next batch.
    • If you have leftovers, store them in an airtight container at room temperature for up to a day. Reheat in the oven or air fryer to restore crispness.

    Serving: 1servingCalories: 555kcalCarbohydrates: 21gProtein: 3gFat: 52gSaturated Fat: 8gPolyunsaturated Fat: 29gMonounsaturated Fat: 12gTrans Fat: 1gSodium: 178mgPotassium: 30mgFiber: 1gSugar: 0.1gCalcium: 31mgIron: 1mg

    Nutrition information is automatically calculated, so should only be used as an approximation.


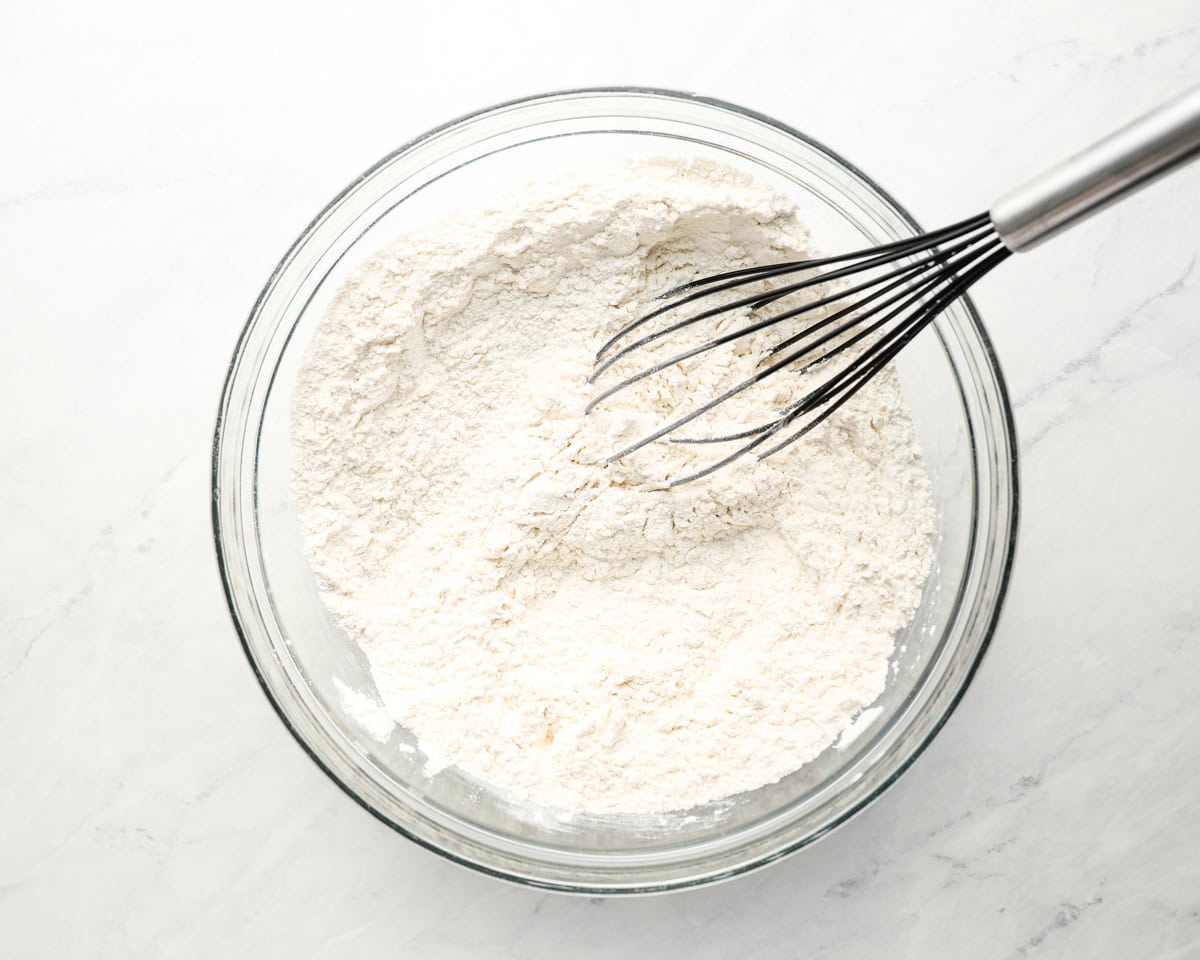
    How to Make Homemade Sopapillas Step by Step

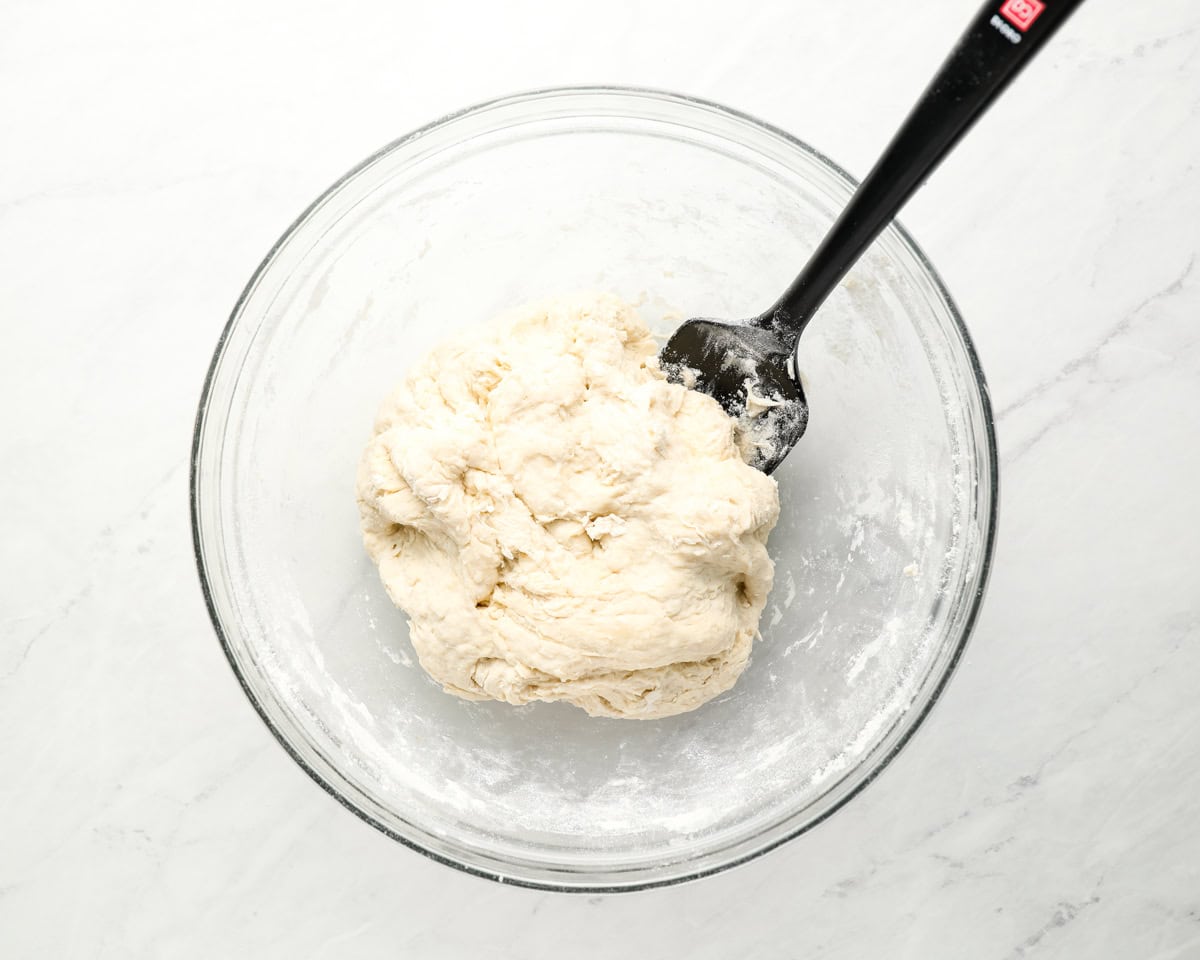
    Combine the Ingredients: Grab a large mixing bowl and whisk together 4 cups of all-purpose flour, 2 tsp baking powder, and 1 tsp salt. Add ¼ cup shortening and 1 ½ cups warm water to the dry ingredients. 

    A glass bowl filled with flour and a whisk, showing the beginning stage of the sopapilla dough preparation.

    Form the Dough: Using a spatula or spoon, mix the ingredients together until a dough forms. Cover the mixing bowl and set it aside to rest at room temperature for 20 minutes.

    A glass bowl containing freshly mixed sopapilla dough with a black spatula.

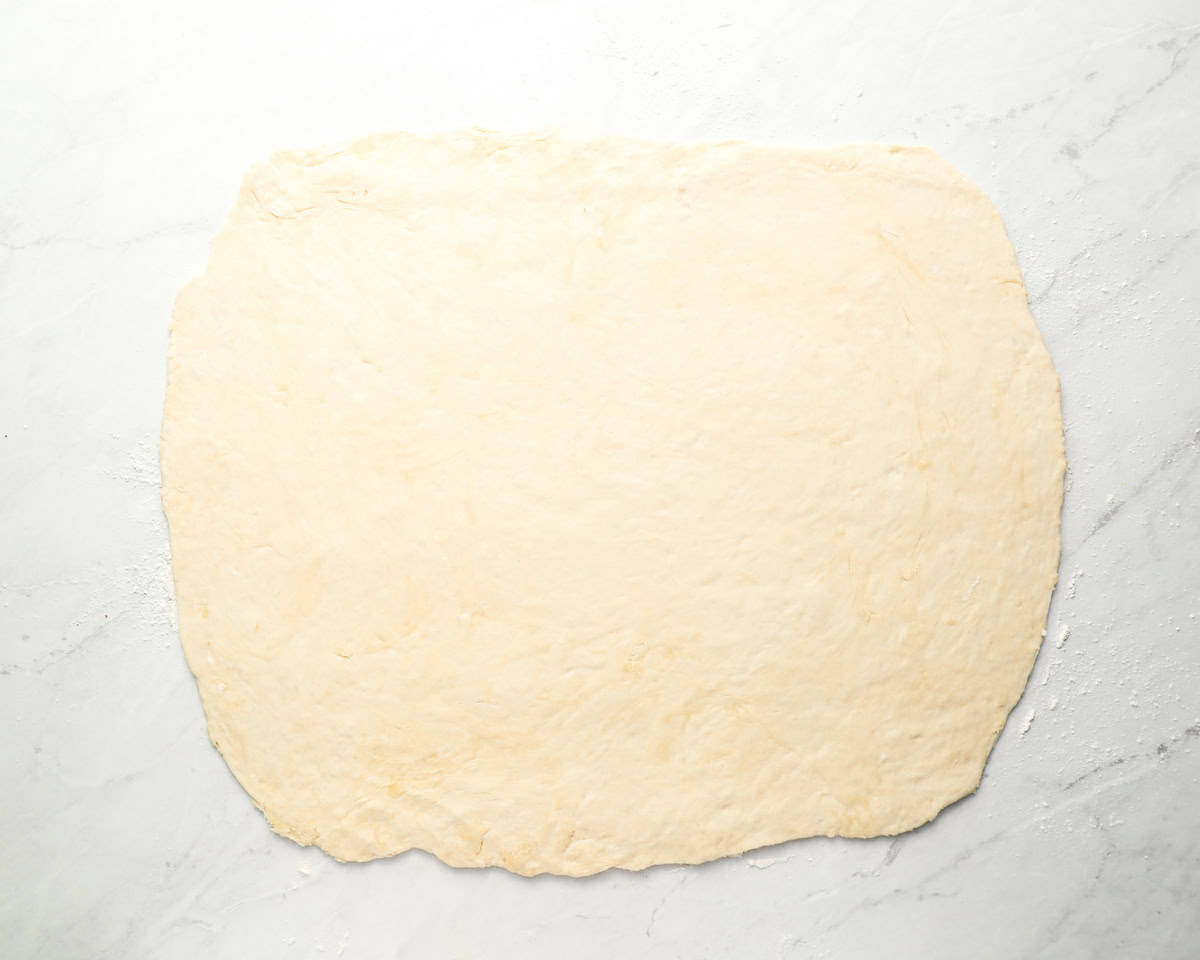
    Roll out the Dough: Place the dough on a lightly floured, clean workspace. Roll the dough into a ¼-inch thick rectangle.

    Rolled-out sopapilla dough on a floured surface, ready to be cut.

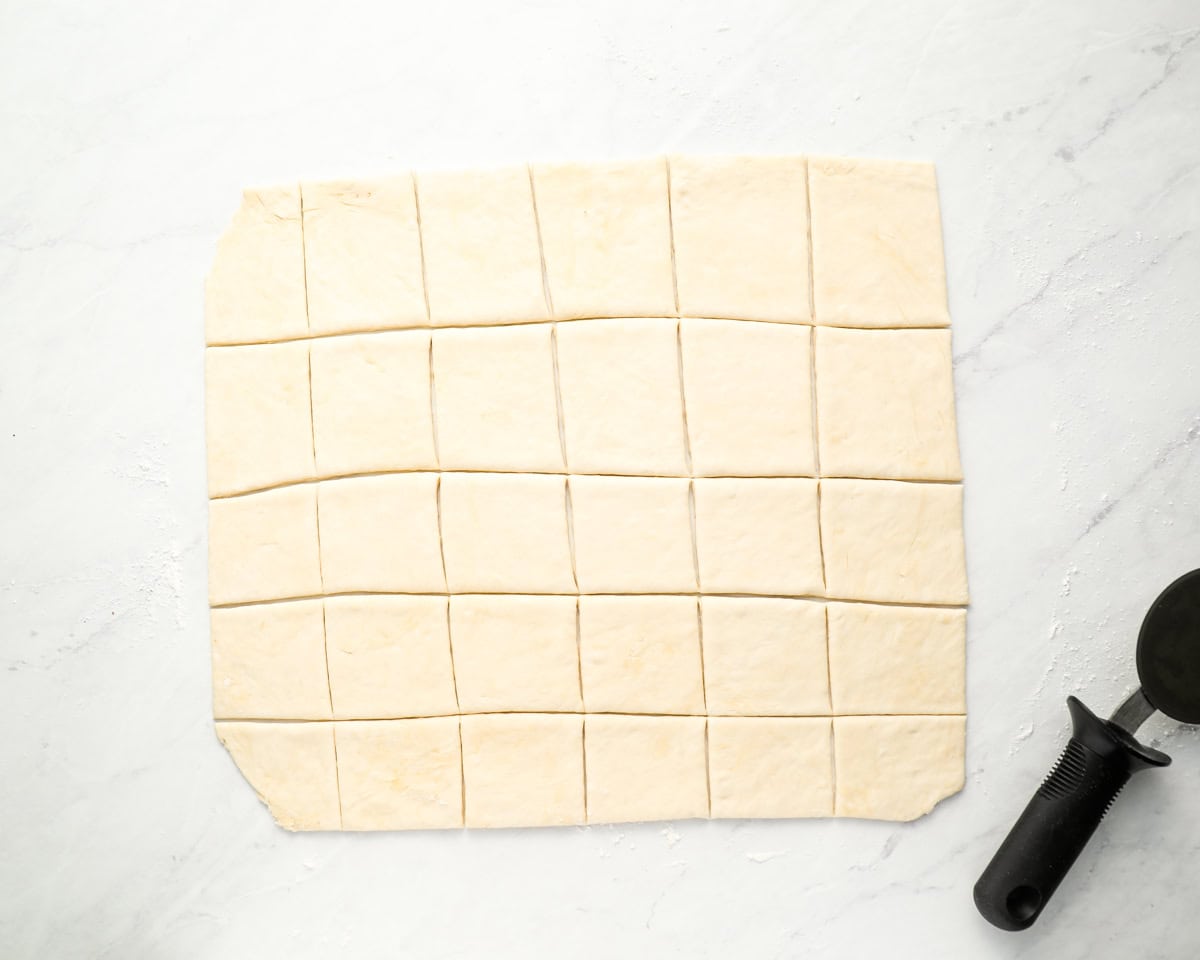
    Portion out the Dough: Using a pizza cutter, cut the dough into 3-inch squares. Don’t worry about them being perfect.

    Rolled-out dough cut into squares, prepared for frying, with a dough cutter visible on the side.

    Heat the Frying Oil: Heat up 1 ½ inches of frying oil in a Dutch oven. The oil should reach 375°F before frying. Use a thermometer to check the temperature. Line a baking sheet with paper towels.

    A pot of oil heating on the stove with a thermometer inserted, indicating preparation for frying sopapillas.

    Fry the Dough: Once the temperature of the oil has reached 375°F, fry the sopapillas in batches until they’re golden and puffed. This should take about 1-2 minutes per side. 

    Sopapillas frying in a pot of oil, turning golden brown, with a thermometer clipped to the side to monitor the temperature.

    Drain the Fried Dough: Remove the sopapillas from the oil using a slotted spoon and place them on the lined baking sheets to drain.

    A baking tray lined with paper towels holding freshly fried sopapillas, golden and crispy, cooling after frying.

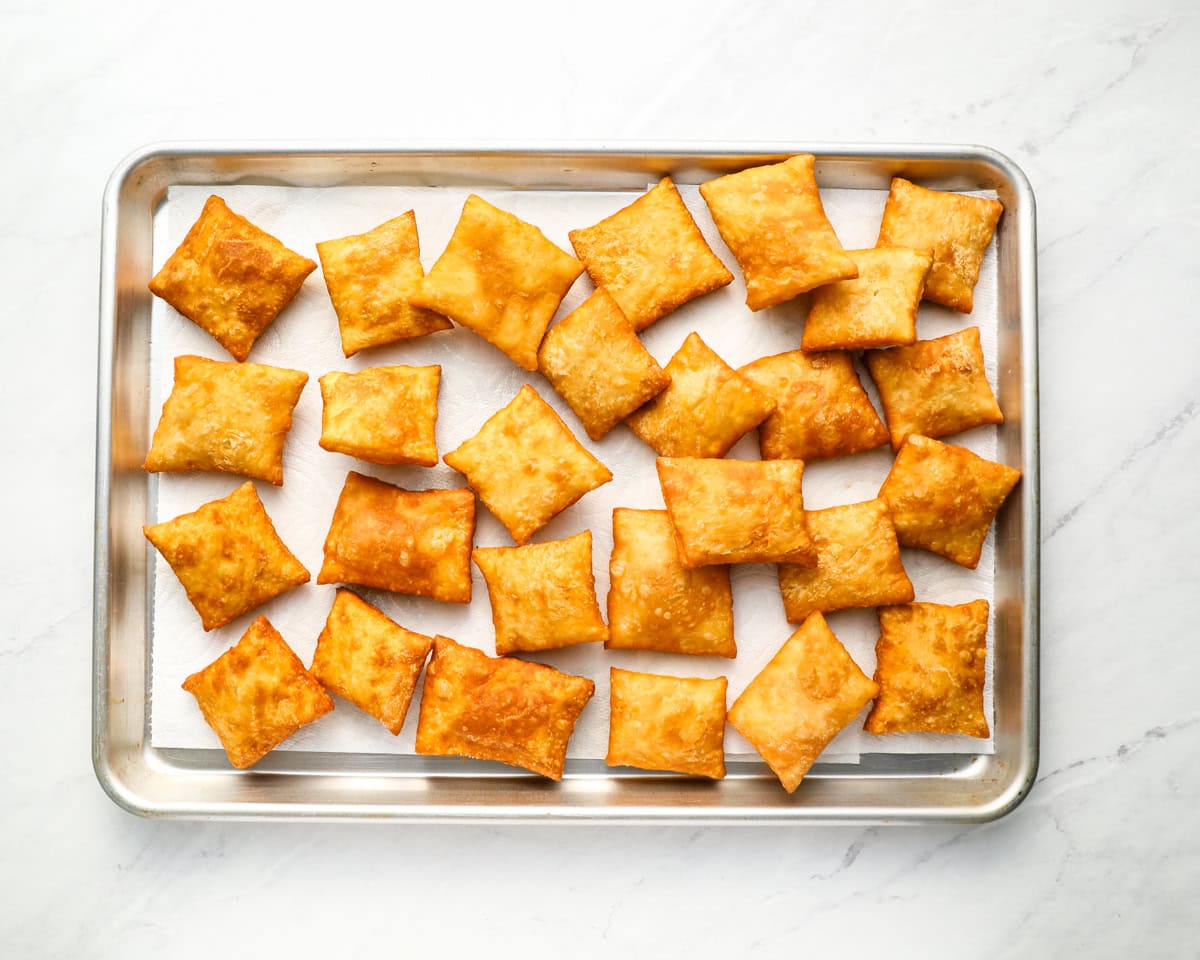
    Finish the Sopapillas: Repeat until all the sopapillas are fried. Serve warm with a drizzle of honey or cinnamon sugar. Enjoy!

    A plate of sopapillas drizzled with honey, arranged neatly, highlighting their puffy texture and golden color.

    More Dessert Recipes to Try


    Source link

  • Easy Homemade BBQ Seasoning | The Recipe Critic

    Easy Homemade BBQ Seasoning | The Recipe Critic


    This website may contain affiliate links and advertising so that we can provide recipes to you. Read my disclosure policy.

    My homemade BBQ seasoning brings bold, smoky flavor to just about anything! It’s the perfect blend of sweet, savory, and just a little kick, ready to shake onto chicken, veggies, ribs, and more.

    Overhead shot of a jar of homemade BBQ seasoning with a small wooden spoon.

    Why You’ll Want to Keep This on Hand

    • Big flavor, few ingredients: Just a few pantry spices turn into a tasty blend that you can use all BBQ season long!
    • Totally customizable: Dial up the heat or sweetness to make it your own.
    • Use it on EVERYTHING: Perfect for grilling, roasting, or seasoning snacks like popcorn and roasted nuts!

    BBQ Seasoning Ingredients

    Overhead shot of labeled ingredients.
    • Paprika: Use smoked paprika for a more smoky flavor.
    • Sugar: Brown sugar adds a sweet balance, but feel free to cut it back if you want more spice than sweet in your bbq rub.
    • Spice level: This blend’s got a little kick—skip or reduce the cayenne pepper if you’re not into the heat.

    How to Make BBQ Seasoning

    Get ready to level up your grilling game! This easy BBQ seasoning mix comes together in minutes and brings rich, smoky depth with a touch of sweetness to everything you add it to!

    1. Add Spices: In a small bowl, add paprika, brown sugar, kosher salt, chili powder, garlic powder, onion powder, black pepper, and cayenne pepper.
    2. Mix: Whisk all of the ingredients together until evenly mixed, then store in an airtight container.

    How to Store Homemade Seasoning

    This is great to have in the spice cabinet to add great flavor to so many different recipes.

    • Storing: Store your homemade seasoning in a spice jar or an airtight container in a cool, dark place.
    • How long does BBQ Seasoning Last? If you make sure it is in an airtight container, it will keep at room temperature for 1 year.

    Two steaks seasoned with homemade bbq seasoning.

    How Do I Use BBQ Seasoning?

    This spice blend is great for meat rubs, seasoning vegetables, steak, pork, shrimp, and more. Here are a few more options for you to try!

    Pin this now to find it later

    Pin It

    Prevent your screen from going dark

    • In a small bowl, add 3 tablespoons paprika, 2 tablespoons brown sugar, 1 tablespoon kosher salt, 1 tablespoon chili powder, 2 teaspoons garlic powder, 2 teaspoons onion powder, 1 teaspoon black pepper, and ½ teaspoon cayenne pepper.

    • Whisk all of the ingredients together until evenly mixed. Store in an airtight container.

    Calories: 27kcalCarbohydrates: 6gProtein: 1gFat: 1gSaturated Fat: 0.1gPolyunsaturated Fat: 0.3gMonounsaturated Fat: 0.1gSodium: 892mgPotassium: 103mgFiber: 2gSugar: 3gVitamin A: 1643IUVitamin C: 0.3mgCalcium: 16mgIron: 1mg

    Nutrition information is automatically calculated, so should only be used as an approximation.


    Source link

  • Homemade Ricotta Cheese – Spend With Pennies

    Homemade Ricotta Cheese – Spend With Pennies


    Did you know you can make homemade ricotta cheese with just 4 ingredients you likely have on hand? No special tools are required!

    Ricotta Cheese on bread and in a bowl

    A Soft Homemade Cheese

    Ricotta is Italian for ‘recooked’, and ricotta cheese is a soft curd cheese with a mild flavor and creamy texture.

    It pairs well with bold flavors like tomato marinara, basil pesto, or roasted garlic. It’s also great with fruit and a drizzle of honey over crostini.

    Ricotta vs. Cottage Cheese

    While they can be used interchangeably in many recipes, cottage cheese is cheese curds, so the texture is more chunky, while ricotta is smoother. I find ricotta cheese to be a bit sweeter in flavor and richer.

    ingredients to make Homemade Ricotta Cheese

    What You’ll Need

    • Milk: The base of this ricotta cheese recipe is milk. I use cow milk, but it can also be made with goat, sheep, or buffalo milk. Do not use ultra-pasteurized milk (UHT).
    • Heavy cream: This gives ricotta its rich, creamy flavor.
    • Vinegar: Vinegar is the acidic ingredient that creates the curds. If you don’t have vinegar, use lemon juice.
    • Salt: Salt is added for flavor.

    How to Make Homemade Ricotta Cheese

    It’s so easy to make fresh ricotta cheese!

    1. Boil milk, cream, and salt in a large pot (full recipe below).
    2. Remove from the heat, stir in vinegar, and let it rest until it forms curds.
    3. Strain the curds in a colander and enjoy your homemade cheese.

    The liquid strained from the cheese is called whey. Leftover whey is great to add to baked goods like bread, pizza dough, or even mixed with pancake mix in place of water. Place the colander over a bowl to catch the whey.

    Storage

    • Store ricotta cheese in the refrigerator for up to 5 days. It may need to be drained or stirred before using.

    Did you love this Ricotta Cheese recipe? Leave a comment and a rating below.

    image of Everyday Comfort cookbook by Holly Nilsson of Spend With Pennies plus text
    a bowl of homemade ricotta cheese next to crostini

    4.99 from 55 votes↑ Click stars to rate now!
    Or to leave a comment, click here!

    Homemade Ricotta Cheese (4 ingredients)

    Homemade Ricotta Cheese is easy to make with ingredients you likely have on hand—no special tools required. It’s perfect for homemade pasta dishes and more!

    Prep Time 5 minutes

    Cook Time 40 minutes

    Drain Time 45 minutes

    Total Time 1 hour 30 minutes

    buy hollys book

    Prevent your screen from going dark

    • In a heavy-bottomed saucepan, heat milk, cream, and salt over medium heat while stirring. Cook just until the mixture comes to a boil.

    • Remove from the heat, add the vinegar, and stir to combine.

    • Let the mixture rest undisturbed for 30 minutes to allow curds to form.

    • Line a fine mesh strainer or colander with 2 layers of damp cheesecloth. Gently spoon the ricotta curds into the strainer.

    • Allow to drain for 30-45 minutes.

    Homemade ricotta cheese will last up to 5 days if stored in an airtight container in the fridge. 

    Calories: 254 | Carbohydrates: 13g | Protein: 8g | Fat: 19g | Saturated Fat: 11g | Cholesterol: 65mg | Sodium: 262mg | Potassium: 344mg | Sugar: 12g | Vitamin A: 833IU | Calcium: 295mg | Iron: 1mg

    Nutrition information provided is an estimate and will vary based on cooking methods and brands of ingredients used.

    Course Appetizer, Side Dish
    Cuisine American

    Adapted from: “No Whey.” Canadian Living, Sept. 2018, 9.

    Ricotta Cheese on bread with a title
    deliciously creamy Ricotta Cheese in a bowl with writing
    easy to make Ricotta Cheese on a piece of bread with a title
    Ricotta Cheese in a bowl and on a piece of bread with a title


    Source link

  • Easy Homemade Kung Pao Chicken

    Easy Homemade Kung Pao Chicken


    A delectably spicy, sweet, and savory Asian-inspired sauce clings to every piece of juicy chicken in this easy dish. Kung pao chicken is quicker to make at home than ordering takeout, and it tastes so much better too. 

    Kung Pao Chicken with rice in bowl

    Kung pao chicken is a deceptively simple recipe to make by stir-frying juicy pieces of chicken in a nuanced spicy-sweet-savory sauce.

    Add in some toasted peanuts and before you know it, your favorite Chinese dish is on the dinner table in just 30 minutes for a fraction of the price of takeout. 

    Is this recipe 100% authentic? No. It’s sure tasty, though. 

    The kung pao chicken from your favorite Chinese restaurant typically leaves your mouth feeling numb and tingly from the Sichuan peppercorns that are traditionally included in this dish. But since Sichuan peppercorns are hard to find at most grocery stores (and can be pricey, to boot) this recipe uses dried red chiles for tons of flavor minus the tingling. 

    Heidi’s Tips for Recipe Success

    • Cook this homemade kung pao chicken in a wok or a skillet, and make it so easy to make at home
    • Give the chicken a quick marinade to make it tender and juicy. With crunchy peanuts, fresh green onions, and spicy-sweet-savory sauce, there are flavors and textures galore in this recipe.
    • This recipe delivers the unique flavors that kung pao chicken is known for using easy-to-find ingredients you can purchase at your local grocery store. 
    What's in Kung Pao Chicken ingredients

    What’s in Kung Pao Chicken? 

    The full recipe, with amounts, can be found in the recipe card below.

    • Chicken breasts — trim off any excess fat before dicing into ½-inch pieces
    • Soy sauce — lends the sauce so much umami flavor 
    • Shao xing cooking wine sometimes called “Chinese cooking wine;” it’s slightly sweet and nutty in flavor, and it helps to tenderize the chicken
    • Cornstarch — thickens the sauce and gives it a super glossy finish 
    • Sugar — you need a little sweetness to balance out the salty soy sauce and tangy vinegar 
    • Rice vinegar — this mild, sweet, and tangy vinegar rounds out the sauce (do NOT confuse it with rice wine) 
    • Toasted sesame oil — has a much richer sesame flavor than regular sesame oil 
    • Oil — use a neutral-flavored oil with a high smoke point, like canola or vegetable, for stir-frying the chicken 
    • Peanuts — choose roasted unsalted peanuts for lots of crunch 
    • Dried red chiles — use 6 to 10 depending on how spicy you like your kung pao chicken 
    • Garlic — a couple cloves finish off the stir-fry 
    • Green onions — you’ll be using both the green tops and white bottoms, but keep them separated after slicing 

    Ingredient Swaps and Substitutions

    • Soy sauce — you should be fine to use tamari if you need to keep the sauce gluten-free 
    • Shao xing cooking wine — replace it with sherry for a similar flavor profile 
    • Peanuts — are essential, in my opinion, but omit if you’re dealing with an allergy 
    • Dried red chiles — try using red pepper flakes instead (I haven’t tested this swap though, so I can’t give you an exact amount) 
    Marnate chicken for kung pao chicken

    How to Make Kung Pao Chicken

    This recipe cooks super quickly, so have everything ready to go before heating up the skillet.

    1. Marinate the chicken. Submerge the diced chicken in a mixture of soy sauce, shao xing cooking wine, and cornstarch. 
    2. Make the kung pao sauce. In another bowl, whisk together the sugar, rice vinegar, and water, plus the rest of the soy sauce, shao xing cooking wine, and cornstarch. 

    Heidi’s Tip: The soy sauce, cooking wine, and cornstarch each do double duty in this recipe. Read the recipe card closely before starting this dish to know how much of each ingredient to use, and when. 

    peanuts in fry pan and chicken, peppers, and green onion in skillet for kung pao chicken
    1. Stir-fry the peanuts. Heat a little oil in a wok or large skillet, then toast the peanuts for about 30 seconds. Remove them to a plate so they don’t burn. 
    2. Bring it all together. Once the peanuts are out of the skillet, add the white portion of the green onions, along with the dried red chile peppers and garlic. Cook just until fragrant, then add the chicken and stir-fry for 1 to 2 minutes. 
    Sauce for Kung Pao Chicken in skillet
    1. Sauce it up. Add the green tops of the onions and the silky kung pao sauce last, cooking just until the sauce thickens (it will take very little time). Stir in the peanuts before serving over a bed of white rice. I like to sprinkle mine with toasted sesame seeds.

    FAQs

    Is kung pao chicken spicy? 

    There’s definitely a nice kick of heat in this recipe, but it won’t set your mouth on fire.

    If you’re concerned it will be too spicy, use just six dried red chiles in the stir-fry. You can even go the extra mile and remove some of the seeds from the chiles, which is where their heat it stored. 

    Can I add vegetables to this stir-fry? 

    Feel free to stir-fry some sliced bell peppers, broccoli, or thinly sliced carrots before adding the chicken and sauce to the skillet. 

    Can this recipe be made in advance? 

    This is one dish that’s best eaten right away while the sauce is still glossy. You can definitely meal prep this kung pao chicken though, but you might need to add a splash of water when reheating to loosen up the sauce. 

    Kung Pao Chicken in skillet with spoon

    Storage Tips

    Let any leftovers cool before transferring to an airtight container. They’ll last up to 5 days in the fridge and can be gently reheated in the microwave or in a lightly oiled skillet. 

    What to Serve With Kung Pao Chicken

    If you make this recipe, please let me know! Leave a ⭐️⭐️⭐️⭐️⭐️ rating below, leave a comment to tell us what you think, and tag me on Instagram @foodiecrush.

    Kung Pao Chicken with rice in bowl