بلاگ

  • Gluten Free Thai Green Curry Mussels Recipe

    Gluten Free Thai Green Curry Mussels Recipe


    A Quick, Gluten Free Dinner That Feels Fancy

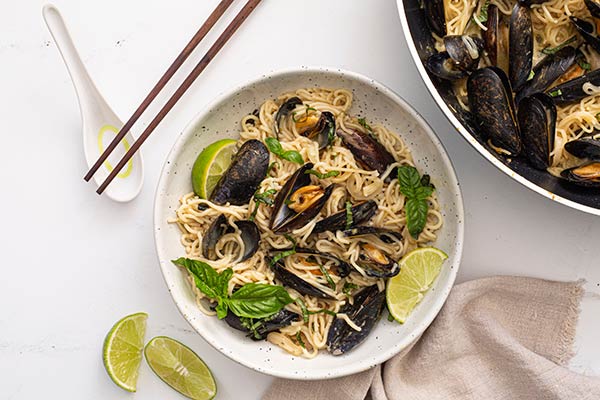
    Need a gluten-free recipe for dinner that’s both effortless and impressive? Look no further than this Thai Green Curry Mussels and Noodles dish. Not only does it come together in under 30 minutes, but it also feels like something you’d order at your favorite upscale Thai restaurant. It’s quick enough for a weeknight meal, yet elegant enough to serve guests. 

    What makes this even better is how budget-friendly it is. Mussels are one of the most affordable seafood options, and when combined with just a few pantry staples, they transform into a dish that’s comforting, exciting, and just a little bit exotic. Even better, it’s incredibly flexible—you can add more spice, swap in shrimp, or toss in some extra veggies depending on your preferences.

    Gluten-Free-Thai-Green-Curry-Mussels-and-Noodles-Ingredients-1

    What You Need:

    • 1 (9.9 ounce) package GloryLand Brown Rice & Millet Noodles
    • 1 tablespoon olive oil
    • 2 large shallots, thinly sliced
    • 2 cloves garlic, minced
    • 1 tablespoon fresh ginger, grated
    • 3 tablespoons lemongrass paste
    • 1 lime, zested and juiced
    • 2 tablespoons Thai green curry paste
    • 1 (14 ounce) can coconut cream
    • 1½ tablespoons fish sauce
    • 1½ teaspoons coconut sugar or brown sugar
    • 1½ pounds mussels, scrubbed and debearded
    • ¼ cup fresh basil or Thai basil, chopped (plus more for garnish)
    • Lime wedges, for serving

    This dish hits all the right notes—fragrant, creamy, tangy, and just the right amount of spicy. In fact, the noodles soak up the curry-infused coconut broth perfectly, while the mussels add elegance and briny depth. For best results, don’t forget the extra lime and fresh basil on top—it really takes the whole dish to the next level.

    Because this recipe is naturally gluten free, it’s a fantastic way to treat yourself without worrying about substitutions. Whether you’re cooking to impress guests or simply want a new favorite weeknight meal, this flavorful Thai-inspired dinner brings the wow factor—without the extra work.

    Thai-Green-Curry-Mussels-and-Noodles-Recipe

    Thai Green Curry Mussels and Noodles

    Prep Time20 minutes

    Cook Time15 minutes

    Servings: 4

    Calories: 136kcal

    Author: Gluten Free & More

    • Cook the noodles for one minute less than the package directions. Drain and rinse with cold water. Set aside.

    • In a large skillet or braiser, heat the oil over medium-high heat. Add shallots, garlic, and ginger. Cook, stirring for 1 – 2 minutes. Add lemongrass paste, lime zest, and curry paste. Cook for another 2 minutes or until fragrant. Stir in lime juice, coconut cream, fish sauce, and sugar. Bring to a boil. Add the mussels, cover the pan, and cook for 4 – 5 minutes or until the mussels have opened. Discard any mussels that do not open. Add the noodles and chopped basil leaves, toss gently and cook for another minute or until everything is warmed through.

    • Serve with additional basil leaves and lime wedges.

    Nutrition Facts

    Thai Green Curry Mussels and Noodles

    Amount Per Serving

    Calories 136
    Calories from Fat 54

    % Daily Value*

    Fat 6g9%

    Saturated Fat 1g5%

    Polyunsaturated Fat 1g

    Monounsaturated Fat 3g

    Cholesterol 24mg8%

    Sodium 781mg33%

    Potassium 404mg12%

    Carbohydrates 11g4%

    Fiber 1g4%

    Sugar 3g3%

    Protein 11g22%

    Vitamin A 228IU5%

    Vitamin C 14mg17%

    Calcium 45mg5%

    Iron 4mg22%

    * Percent Daily Values are based on a 2000 calorie diet.

    Disclaimer: All nutrition facts on Gluten Free & More are meant only as a guide and may differ depending on product brands used or ingredient substitutions. Some errors may occur, so you are encouraged to confirm the recipe’s ingredient and nutrition suitability for your own diet.

    Have you tried this recipe? Give it a star rating and let us know your thoughts in the Ratings & Reviews section below.


    Source link

  • Friday Faves : April 4, 2025

    Friday Faves : April 4, 2025


    Helllloooo Friday! Welcome to this week’s faves!

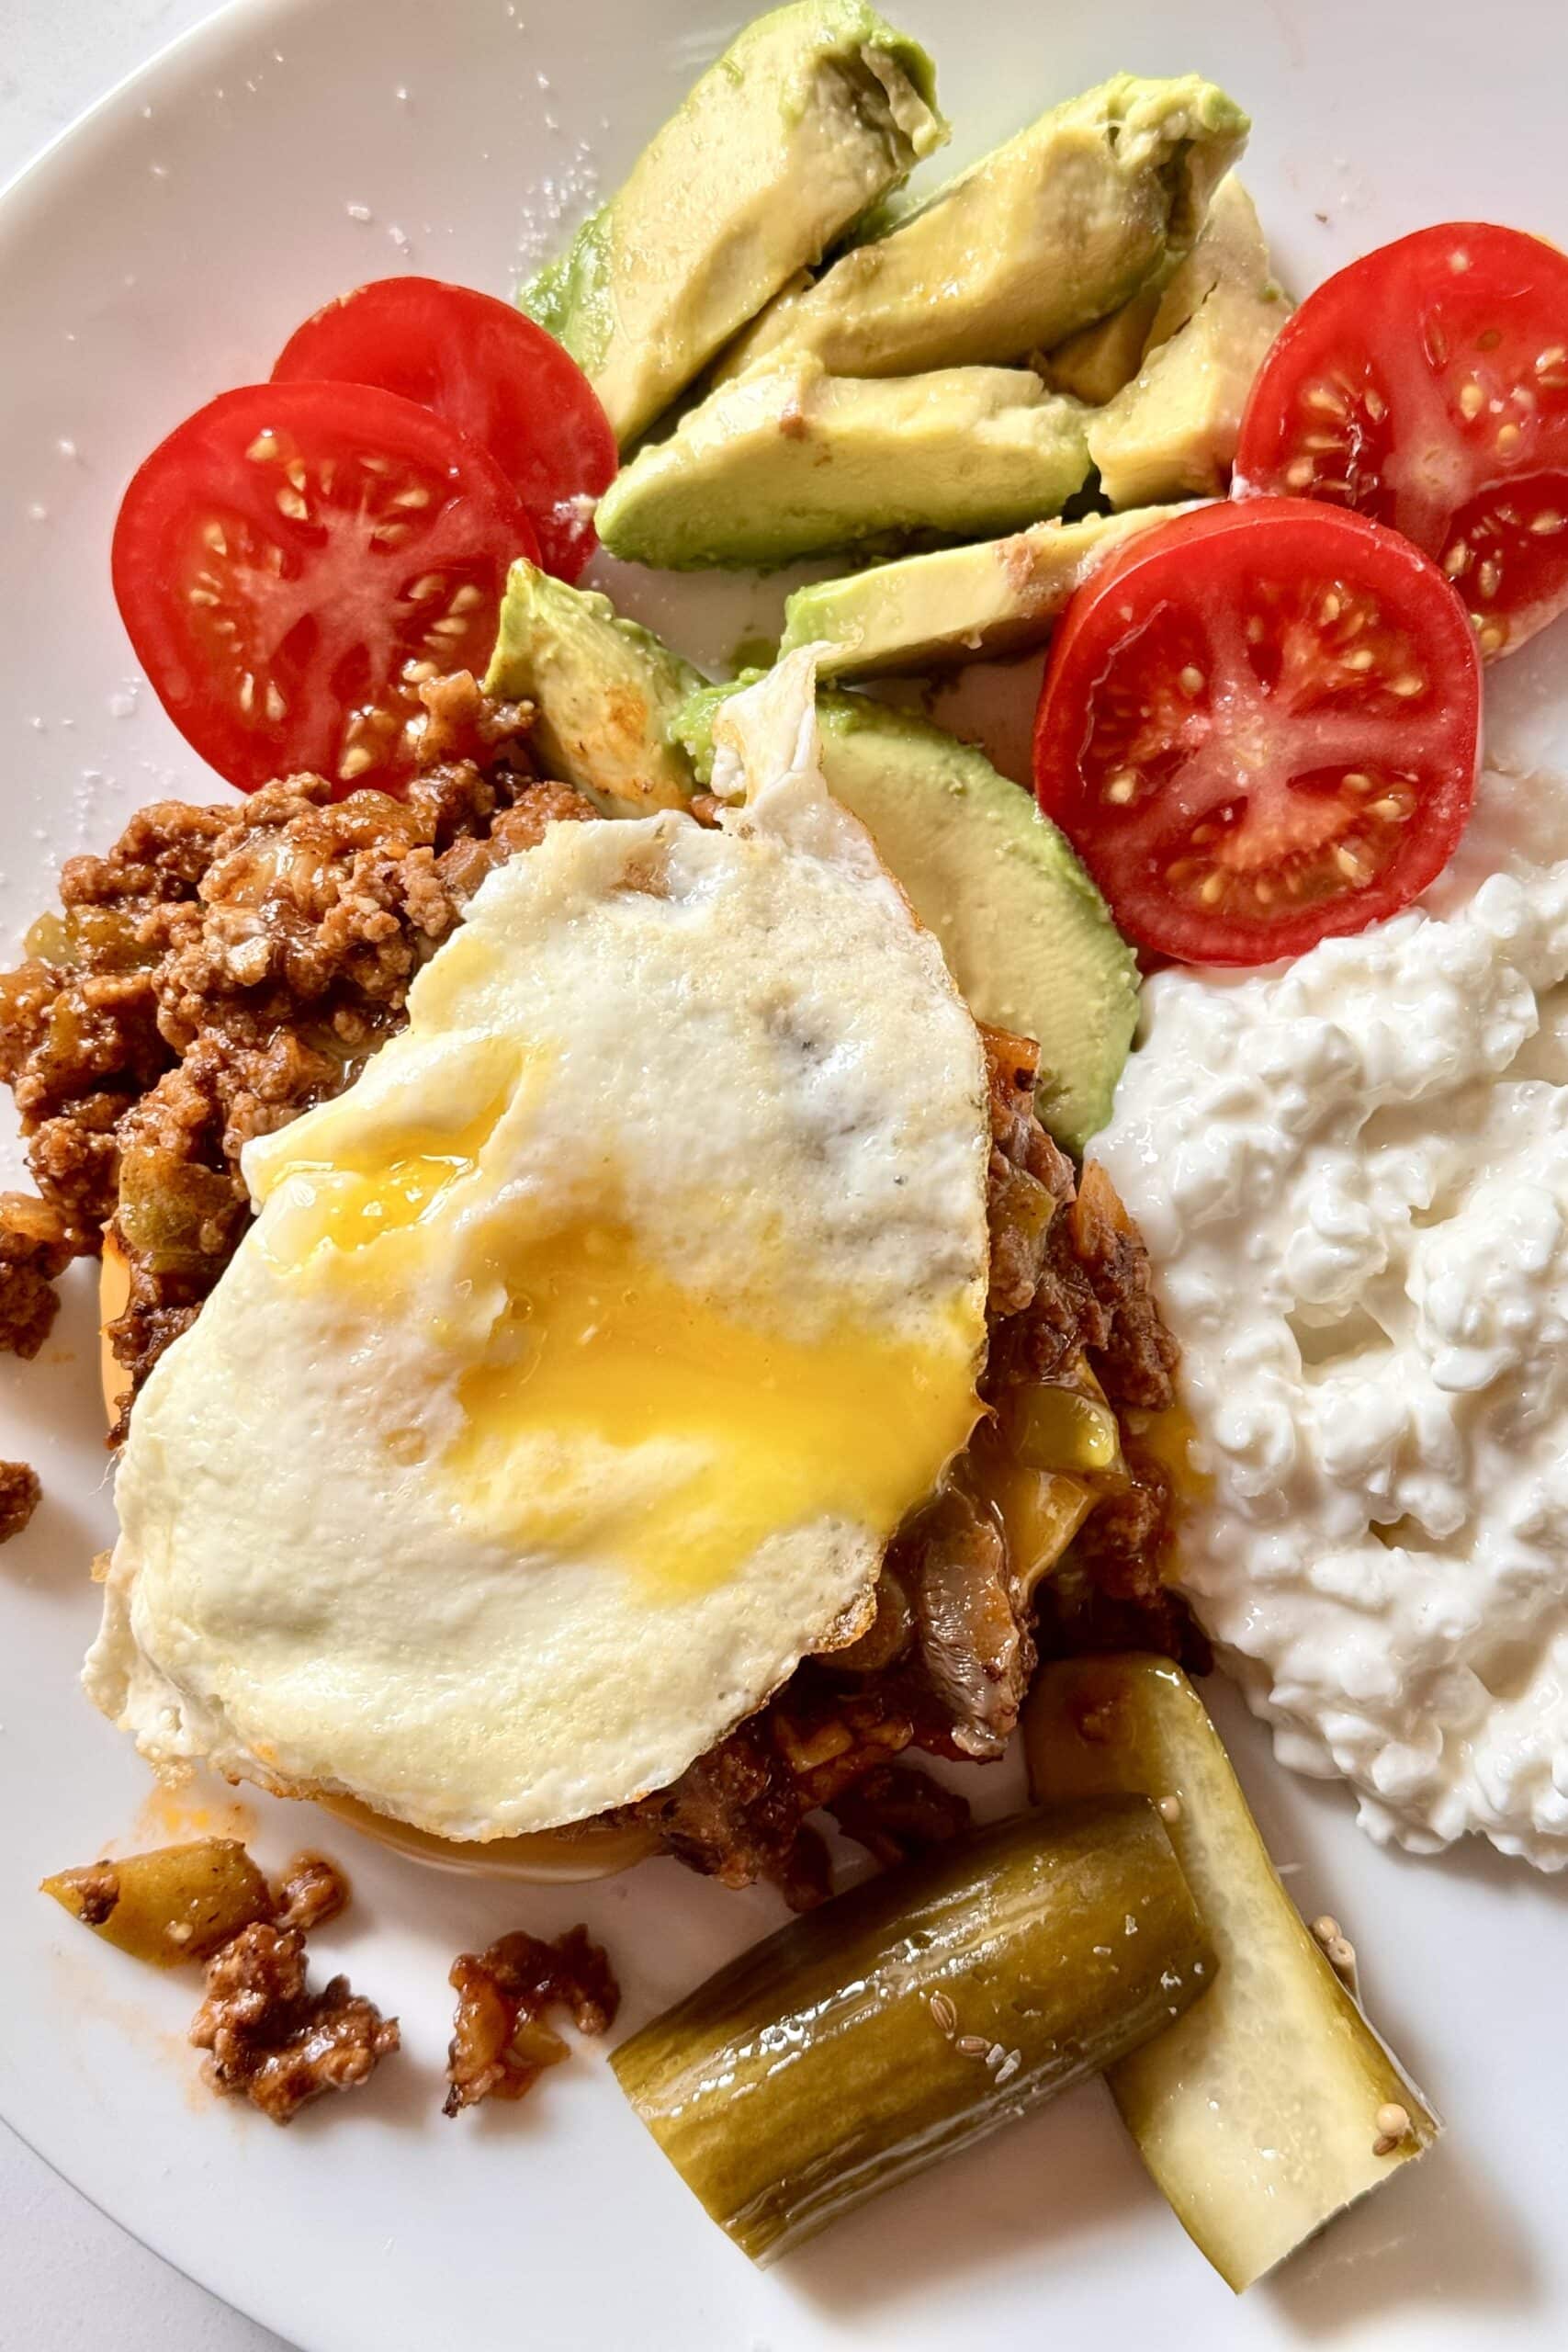
    Sloppy Joe breafkast with cottage cheese, tomatoes, and avocado on plate

    One of my latest deal-with-reality moments is acknowledging I’m wasting way too much time in the bottomless depth of Instagram and its algorithm. Eat more protein! Save this dog! Anti-aging tips! Cute donkeys! Improve your golf swing! Hey, I’m the first to admit I’ve learned some great tips through social media and value it for that. But I do realize that what on the surface is masked as self-improvement or entertainment can become a big time-waster. So that’s it. I’m taking my time back, and I’m starting with these tips to make it happen. It’s time to be present and live my life instead of endlessly half-absorbing how to improve it through IG reels.

    We started watching this new show (I love they’re back to releasing tv shows one episode a week!) and have really liked it. The second episode was so chaotic and nerve wracking and funny that we both had to catch our breath afterward. Bonus: The celebrity cameos are very impressive.

    Attention White Lotus fans, could an all-star season be in the works? OOOOO, so good.

    We have two squirrels at our cabin, Buster and Betty, who have become our favorite woodland watchdogs. We endlessly watch them squirrel about as they flit from bird feeder to squirrel feeder, up and down trees then into the woodpile that is their winter habitat. Like any pet, they’re always a topic of conversation and caretaking. Hence, this guy, nicknamed the Squirrel Whisperer of his neighborhood, is like a kindred spirit. Love.

    Meteor showers, micromoons, and more! The nighttime skies are delivering it all this month, and here’s when!

    From tennis balls to banana peels, there’s a bounty of creatively helpful tips and ideas in this list of great uses for old things.

    Happy ideas for decorating your Easter table.

    Red wine vs. white wine: Is one healthier when it comes to cancer risk?

    This week I made my famous sloppy joes for dinner then had the leftovers for breakfast. I topped my open faced sando with a fried egg, cottage cheese, and tomatoes with avocado. And yes, always a pickle (good for digestion!)

    Talk about spring! This salmon with orzo recipe doubles down on flavor.

    Or, add this lemony orzo with shrimp recipe to your sunshine dinner menu.

    Meal prep is easy when it’s a dish like this sweet and light chicken bowl.

    Warm up the air fryer, it’s time to make buffalo chicken patties (and that sauce!).

    Go chickpea, go! This recipe takes falafel to new heights.

    And, this chickpea curry is amped up on protein-power.

    Dill is one of the best springtime flavor boosters and these chicken bites prove it.

    Pasta me this recipe, stat!

    This cajun rice is made extra easy when it’s made in the oven.

    Feeling all the Mexican food feels with this beefy, cheesy quesadilla.

    I’m going to add this egg wrap to my morning breakfast routine. So veg sneaky!

    I’d add nuts to these marshmallow brownies because I love a rocky road.

    I love the savory depth of my beefy bolognese but I’d be down with trying this chicken bolognese. How about you?

    Let’s talk spring cleaning. Here are a few of my favorite cleaning products:

    43,000 nearly 5-star reviews can’t be wrong when it comes to this detangling brush.

    This dress is so flowy and the color so pretty, perfect for a spring party/wedding/celebration.
    I have these sneakers in black but how cute are they in summer white?

    Apple watch or the Oura ring?? Please share your opinion in the comments so I know which one to get!

    That’s it for this week! Enjoy a lazy weekend and cook something good!

    We send good emails. Subscribe to FoodieCrush and have each post plus exclusive content only for our subscribers delivered straight to your e-mail box.

    Follow me on InstagramFacebook, and Pinterest for more FoodieCrush inspiration.

    As always, thank you for reading and supporting companies I partner with, which allows me to create more unique content and recipes for you. There may be affiliate links in this post of which I receive a small commission. All opinions are always my own.


    Source link

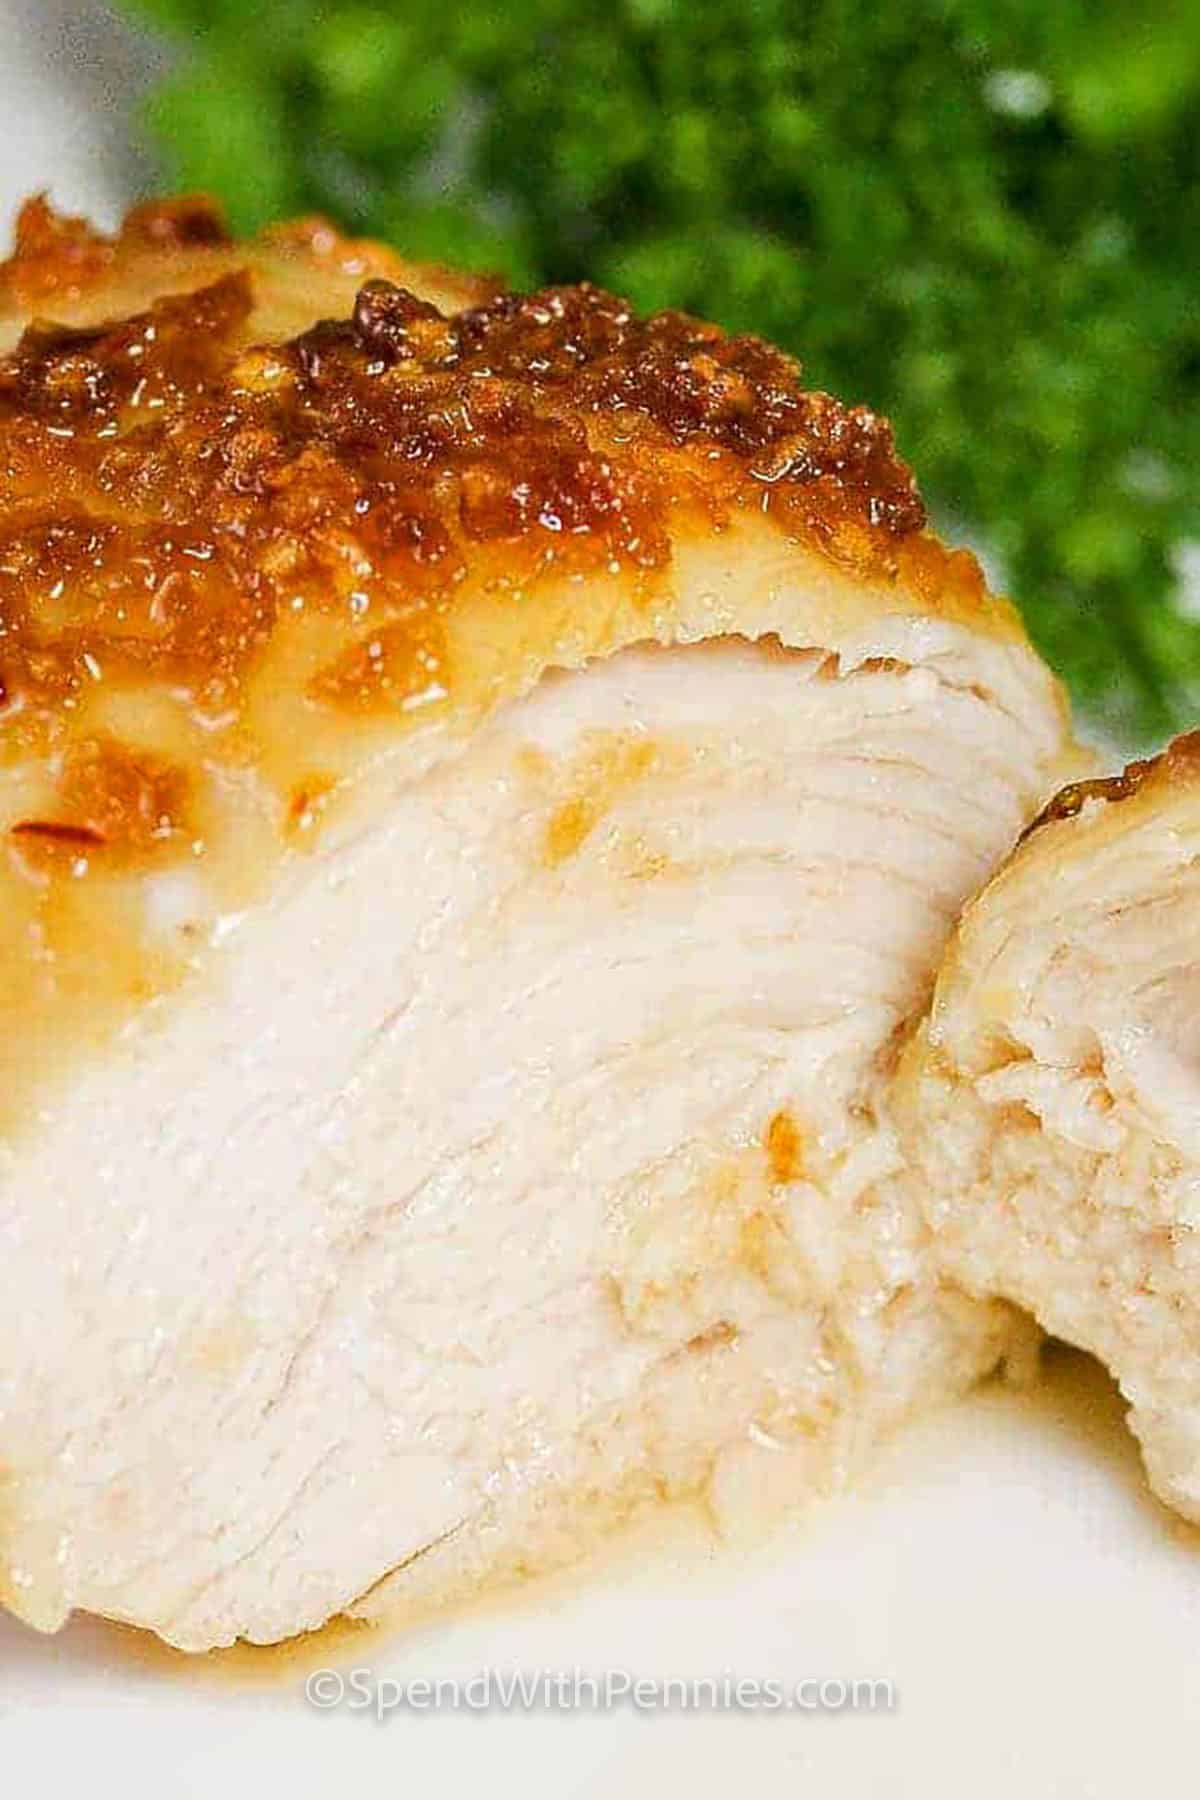
  • Brown Sugar Chicken – Spend With Pennies

    Brown Sugar Chicken – Spend With Pennies


    About the author

    Holly Nilsson is the creator of Spend With Pennies, where she creates easy, comforting recipes made for real life. With a passion for nostalgic flavors and simplified techniques, Holly helps busy home cooks create delicious meals that always work. She is also the author of “Everyday Comfort,” which promises to inspire even more hearty, home-cooked meals.
    See more posts by Holly

    Follow Holly on social media:

    pinterest facebook twitter instagram


    Source link

  • White Gravy Recipe (Country Gravy)

    White Gravy Recipe (Country Gravy)


    This post may contain affiliate links. See my disclosure policy.

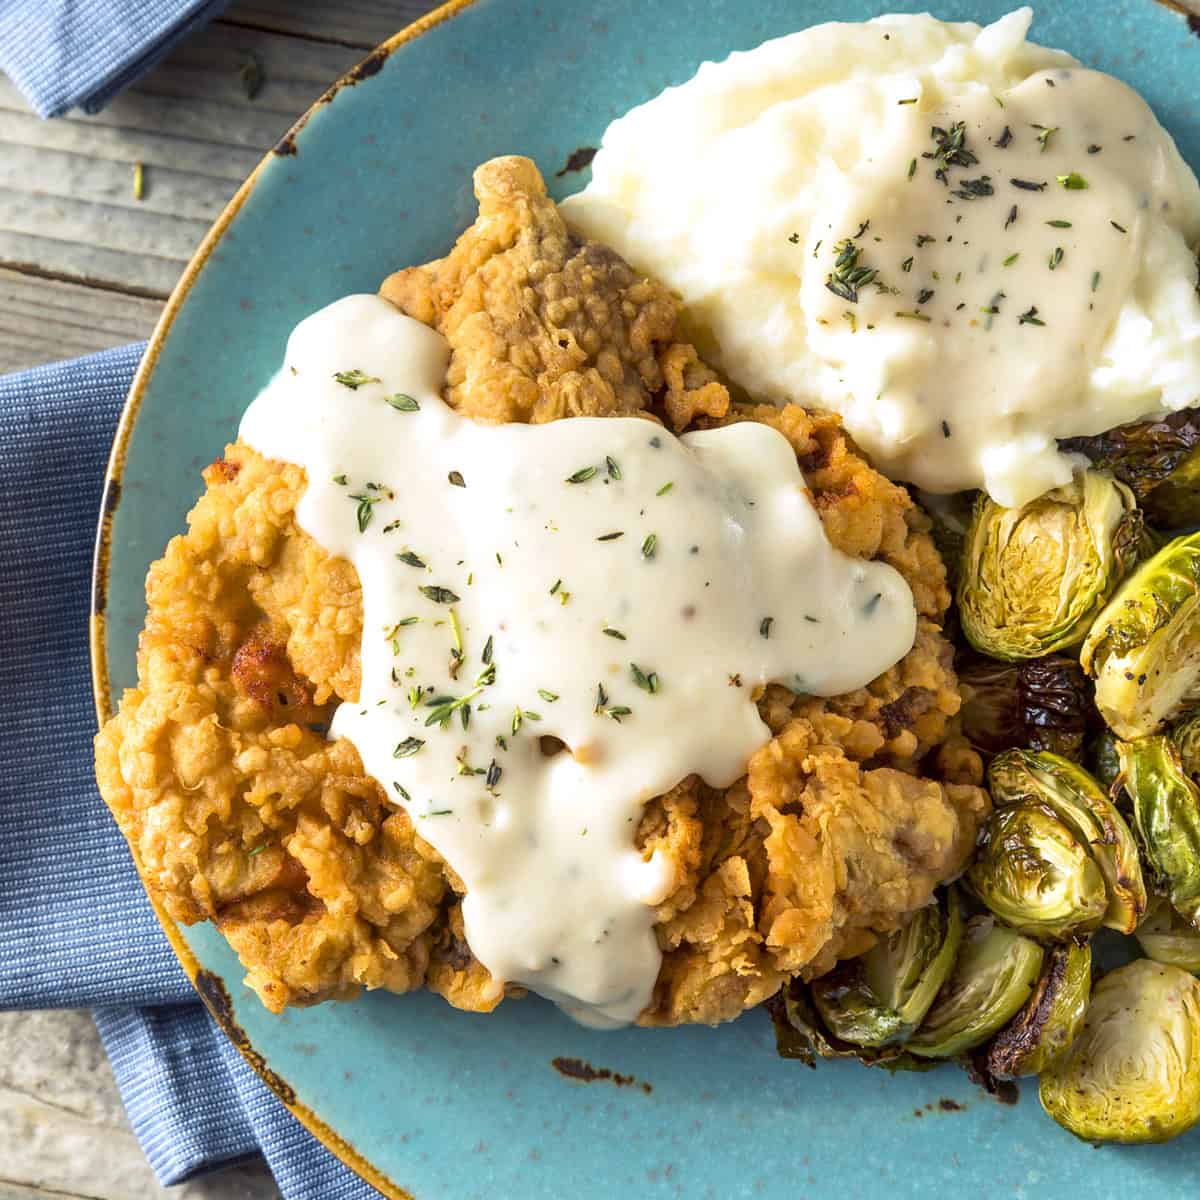
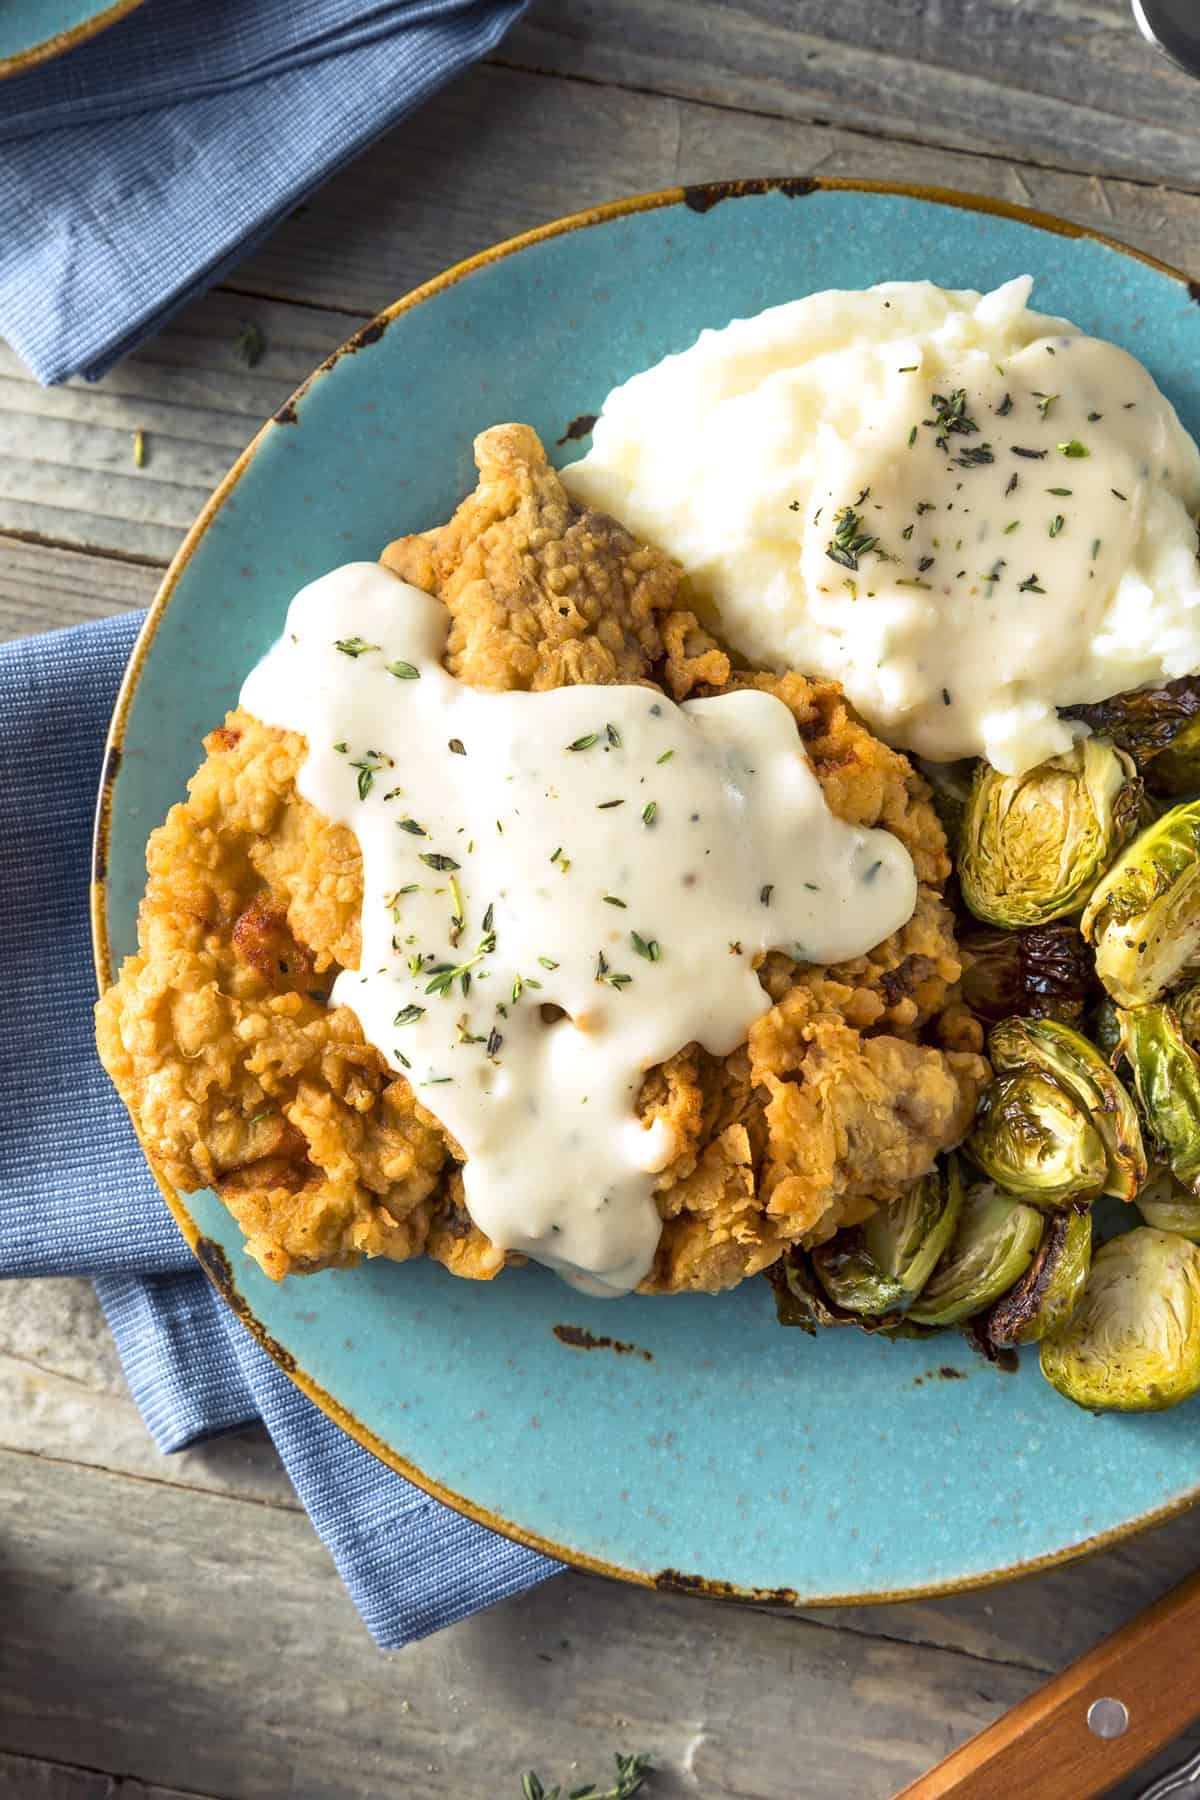
    A Southern classic, this homemade white gravy recipe is a true taste of down-home comfort cooking. It’s a creamy béchamel-style American gravy that’s delicious served with everything from mashed potatoes and biscuits to pork chops and fried chicken! Made from scratch and ready in less than 10 minutes!

    white gravy recipe homemade country sauce from scratch how to make american southern bacon grease sausage drippings chicken fried steak

    Why You’ll Love It

    • It’s quick and easy. This white gravy recipe comes together in less than 10 minutes and it uses just a handful of ingredients, all of which are pantry staples.
    • It’s deliciously versatile. Wonderfully creamy, it pairs beautifully with everything from mashed potatoes and steamed or grilled vegetables to chicken fried steak and pork chops.

    White Gravy vs Country Gravy vs Sausage Gravy

    White gravy and country gravy are the same thing and the names are used interchangeably depending on the geographic region and family tradition. Sometimes the name country gravy is used to specifically denote the use of bacon grease instead of butter for the roux, though that isn’t always the case and white gravy can likewise use either. It’s also sometimes referred to as American gravy. A variation called sawmill gravy adds a little cornmeal for a gritty texture. Sausage gravy is white/country gravy that includes sausage and is classically served over buttermilk biscuits.

    Homemade White Gravy Ingredients

    This homemade white gravy recipe uses just a handful of staple ingredients. And the bacon grease is easy to make simply by frying up or baking some bacon and pouring the drippings in the bowl to save for when you’re ready to use it. Here’s what you’ll need:

    • Bacon Grease or Butter:  My personal preference is bacon grease hands down. It adds so much flavor. Where do you get bacon grease? Next time you make bacon, pour the grease into a bowl, cover and refrigerate until you need it to make this gravy.  It will keep for up to 3 months and can be frozen even longer. If you prefer you can use butter and this will also make it vegetarian-friendly. I always use unsalted because it gives me full control over the salt content. You can always add more salt if needed but it’s very difficult to fix something that’s over-salted.
    • All-Purpose Flour:  Whether using bacon grease or butter you’ll use equal parts of fat and flour to make the roux.
    • Milk: I use and recommend whole milk but you can use 2% if you prefer.
    • Heavy Cream: This adds incredible flavor and richness. But if you’re trying to cut down on calories, you can use milk only. I’ve tried it both ways and I can tell you that whole milk and cream make all the difference in flavor and texture.
    • Seasonings: Salt, pepper and a dash of cayenne are all you need. I use kosher salt and freshly ground black pepper. If you prefer a spicier gravy feel free to add more cayenne.
    white gravy recipe homemade country sauce from scratch how to make american southern bacon grease sausage drippings chicken fried steak

    How to Make White Gravy

    The process of making homemade white gravy is as simple as its ingredients. As with a traditional bechamel sauce, it starts by making a roux, which is a flour that is whisked into melted butter or bacon grease until smooth and allowed to cook for a few minutes to both cook off the flour flavor and to deepen the flavor of the gravy. Milk and cream are then whisked into the roux until smooth and thickened and then seasoned. The consistency of the gravy be made thicker by increasing the flour and butter when making the roux or made thinner by adding more milk or cream.

    Country Gravy Recipe Preparation Tips

    This is a very simple and easy gravy to make but here are a few tips for making the best tasting gravy, some storage and reheating tips, as well as some tips on how to avoid common problems:

    • For maximum flavor I recommend using bacon grease. You’ll need one tablespoon for every tablespoon of flour.
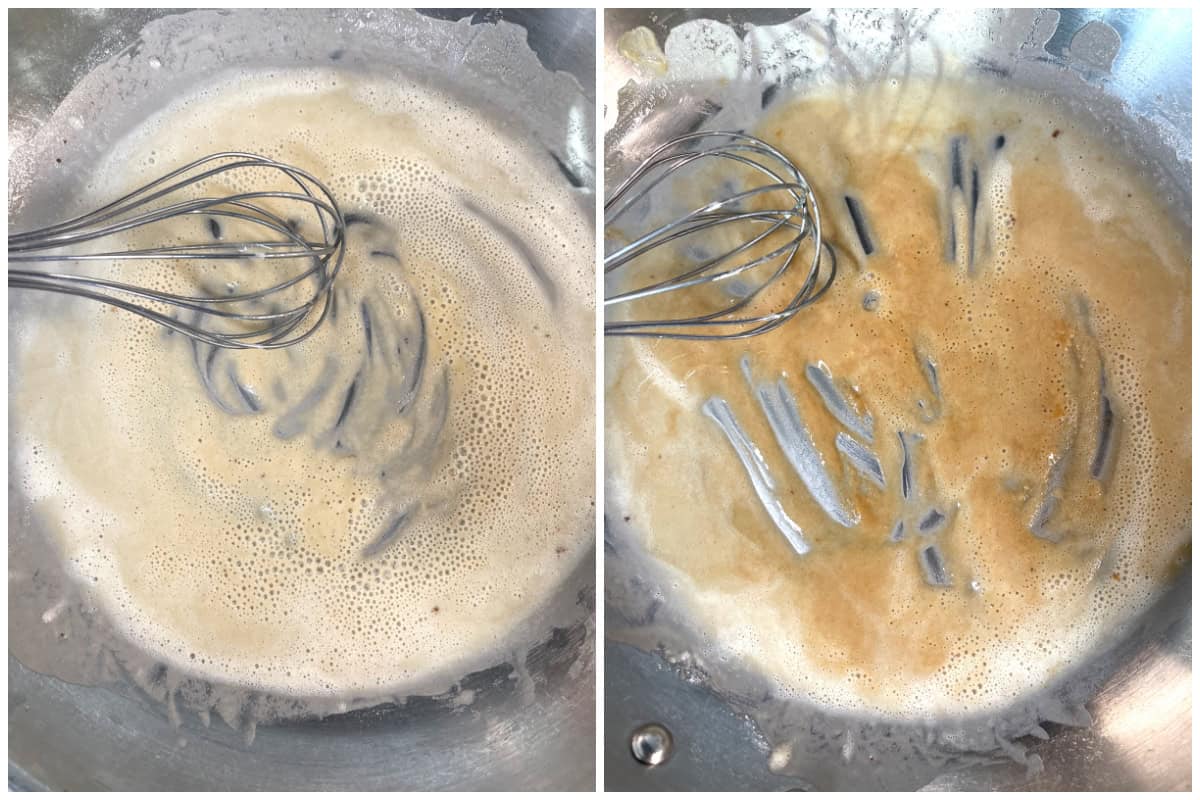
    • Why does my gravy taste like flour? The roux (which is the fat and flour mixture) wasn’t cooked long enough. Be sure to cook it, whisking frequently to prevent burning, until it turns a golden color. This not only cooks off the raw flour taste but it’s what gives your country gravy a rich flavor.
    • Use cold milk and cold heavy cream when adding it to the hot roux to ensure a perfectly smooth, lump-free gravy. Adding cold milk and cream gives you enough time to quickly whisk the ingredients together to dissolve before they begin to warm up and thicken.
    • If you like your gravy spicy, use extra cayenne pepper.
    • When reheating the white gravy, if it’s too thick stir in a little milk or cream to thin it out to the desired consistency. Start with less and add more as needed.
    • This country gravy can be made well in advance and will keep in the fridge for up to 4 days.
    • It can also be frozen for up to 3 months. Let it thaw in the fridge. Reheat on the stovetop over low heat or in the microwave on reduced power.

    White Gravy Recipe

    Let’s get started!

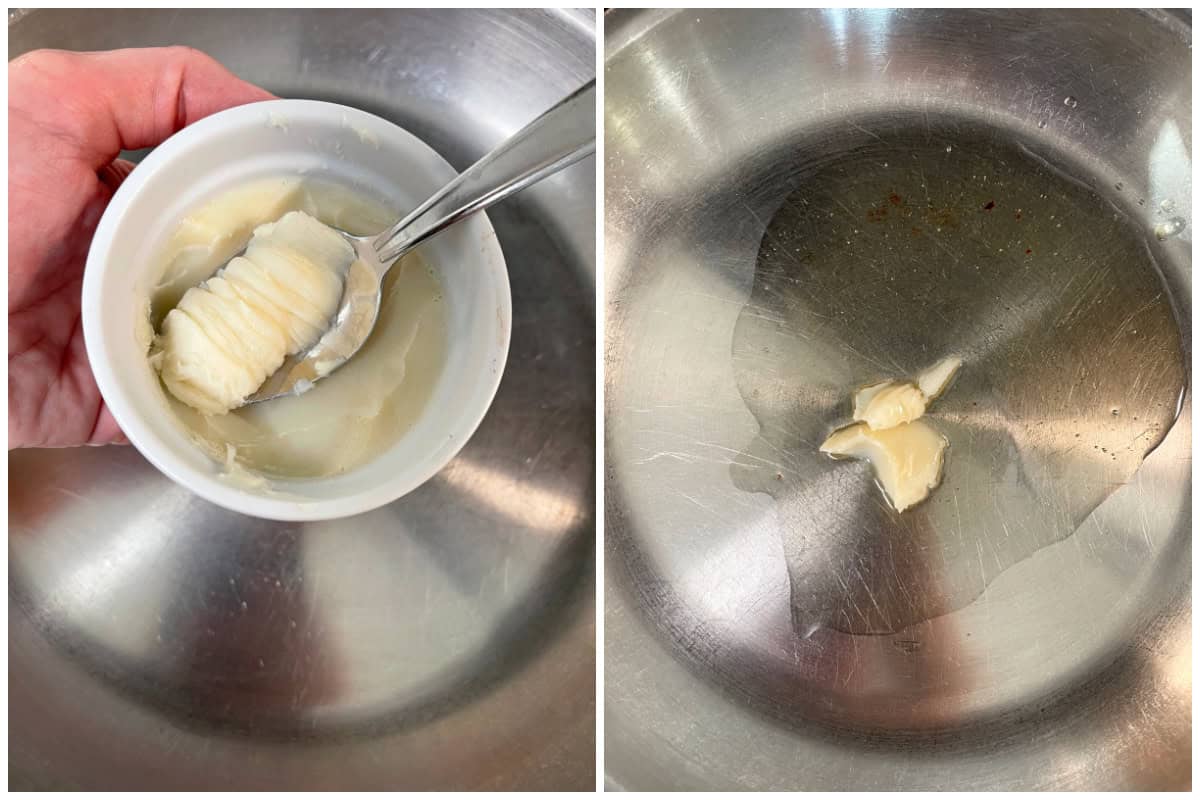
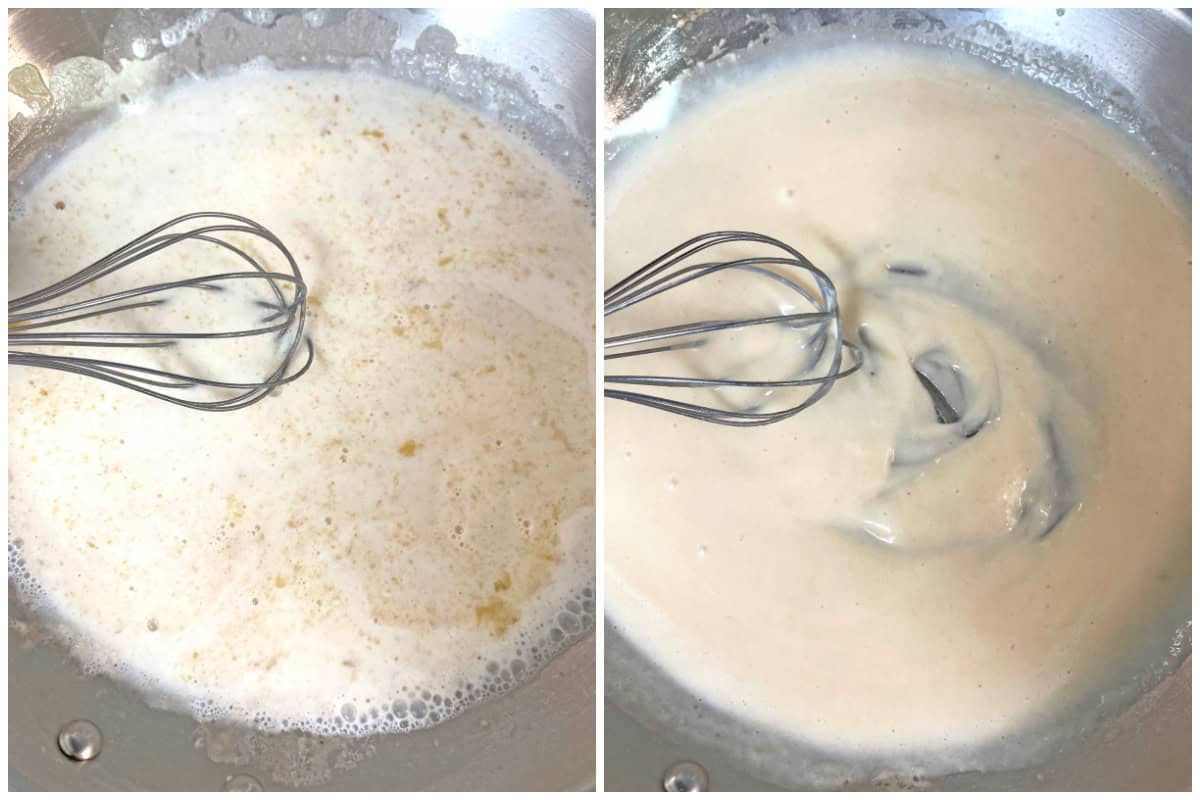
    Melt the bacon grease in a skillet over medium heat.

    melting bacon grease in skillet

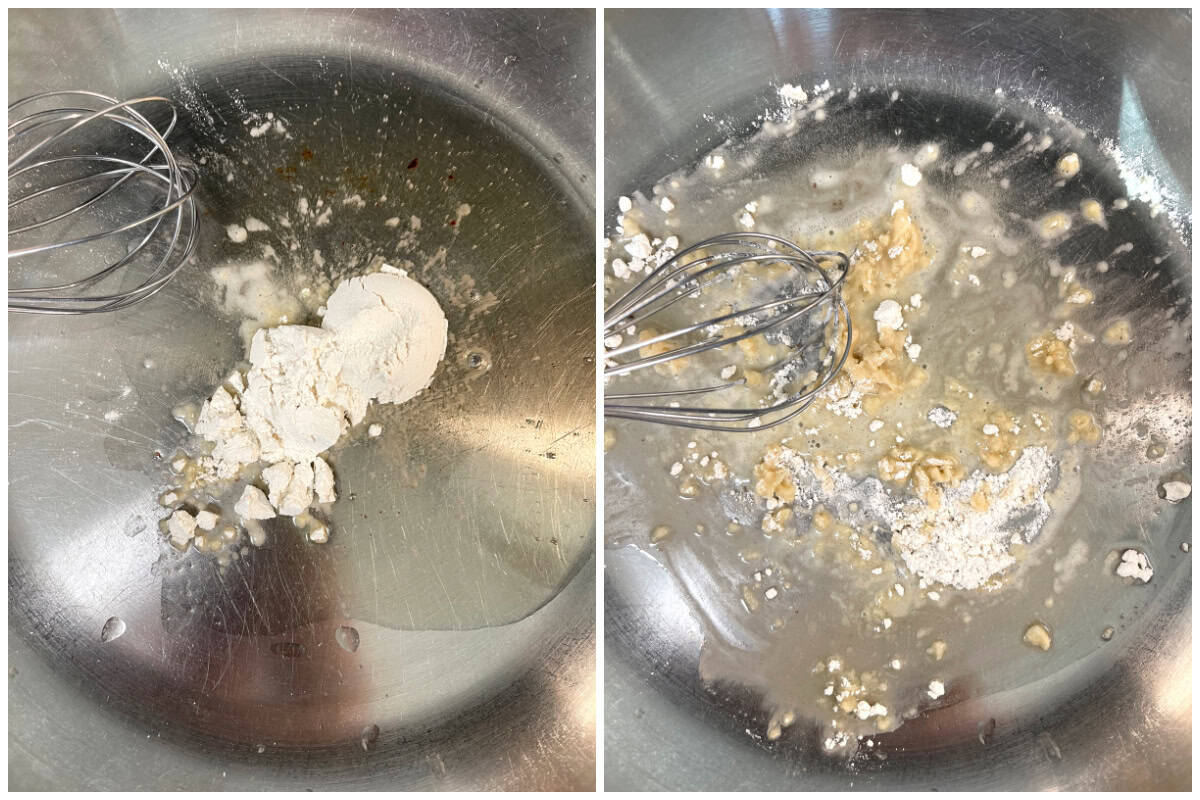
    Add the flour and whisk continually until it is dissolved.

    making roux with flour and bacon grease

    Continue whisking until the mixture has turned a rich golden color, about 3 minutes. Be sure to whisk constantly to prevent the mixture from burning.

    making roux in skillet

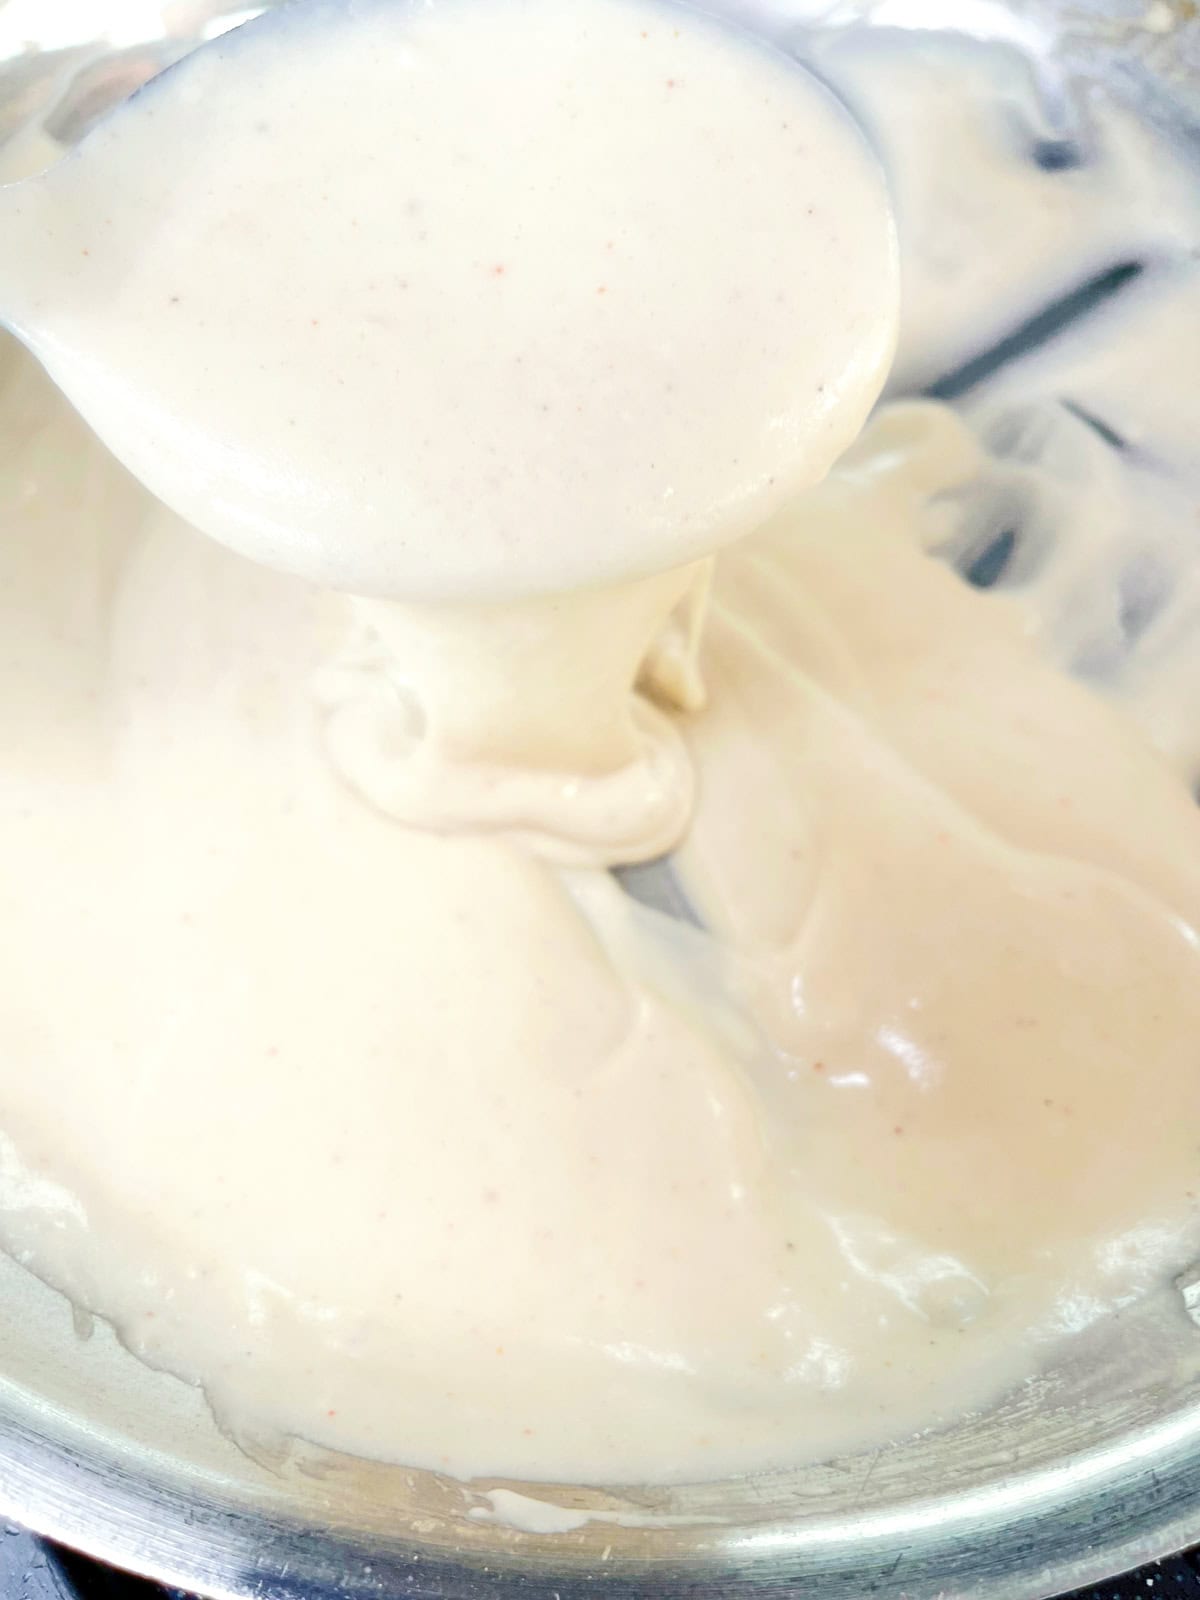
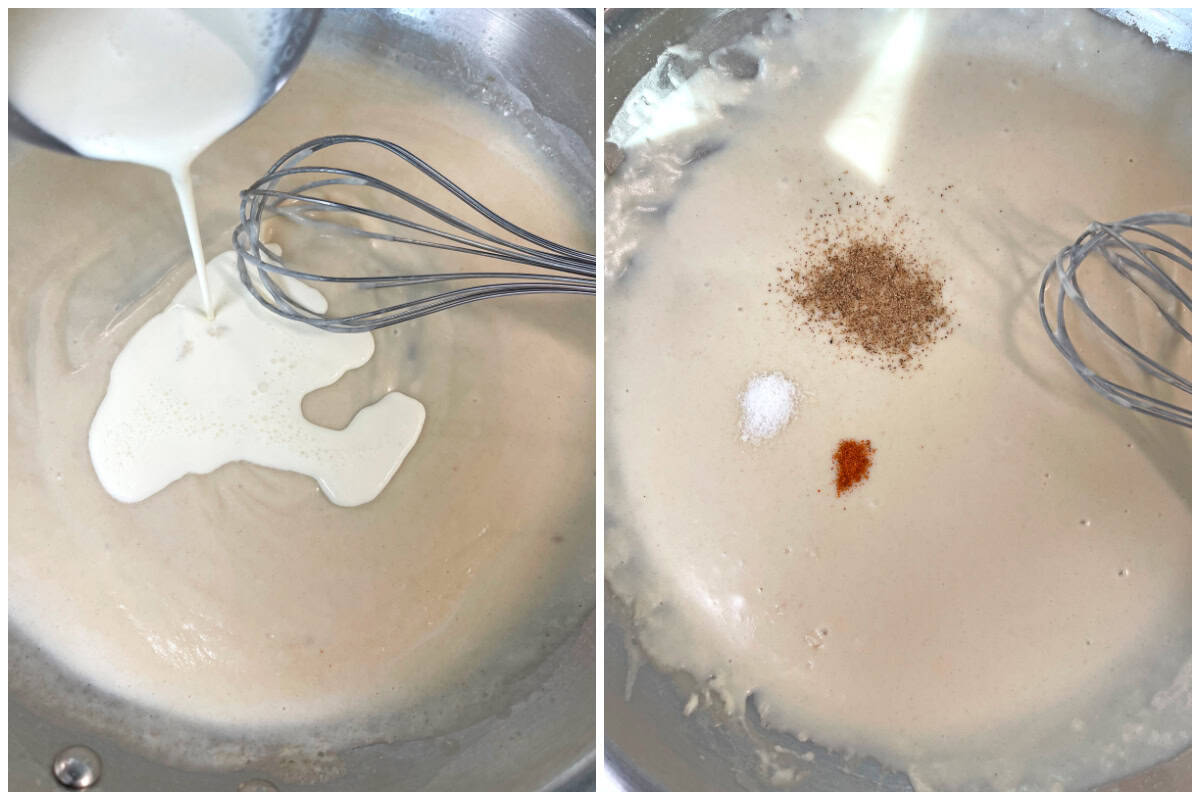
    Add the milk and whisk until the mixture is smooth and thickened.

    adding milk to roux

    Add the heavy cream and whisk until incorporated.

    Add the salt, pepper and cayenne.

    adding cream and seasonings

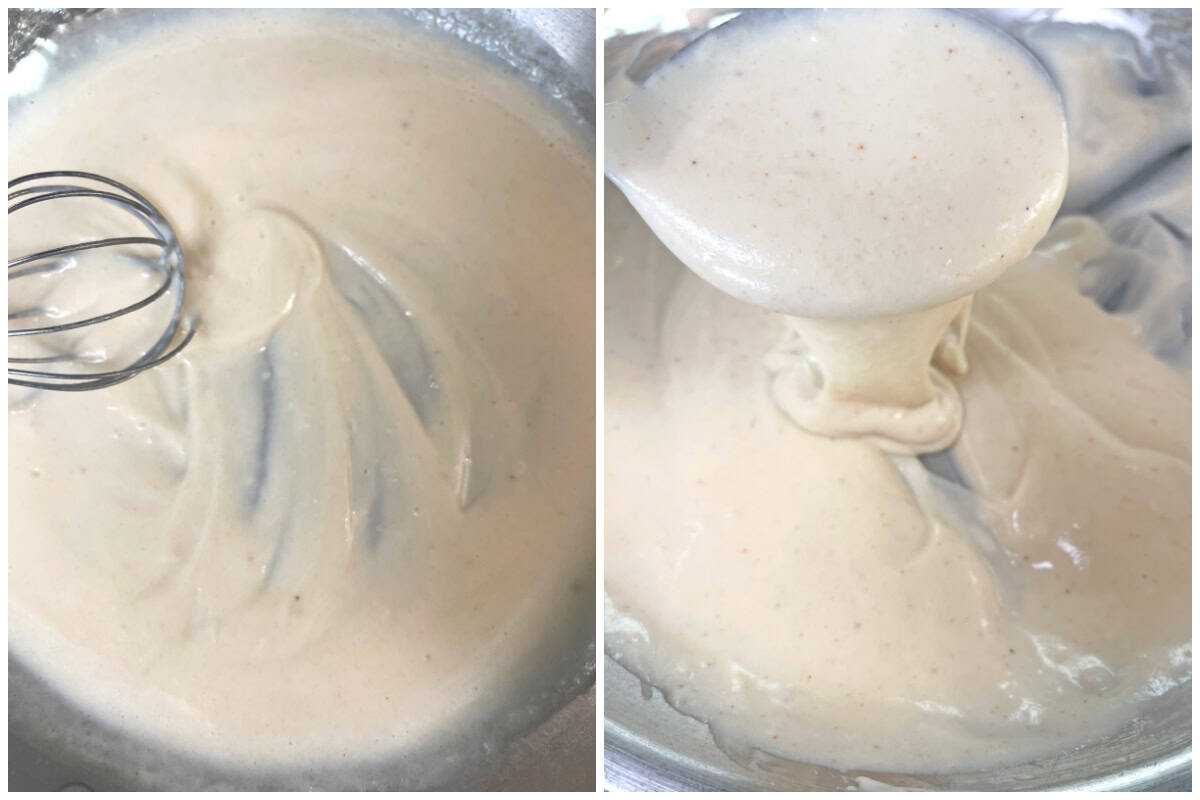
    Let the gravy simmer for another minute.

    Add more salt and pepper to taste.

    white gravy recipe homemade country sauce from scratch how to make southern bacon grease sausage drippings chicken fried steak

    Storage and Freezing

    White gravy can be made in advance and will keep in the fridge for up to 4 days. It can be reheated over low heat on the stovetop or at reduce power in the microwave. If the gravy is too thick simply stir in a little milk or cream when you reheat it (start with less and add more as needed). White gravy can also be frozen for up to 3 months. Let it thaw slowly in the refrigerator and then reheat.

    What to Serve with White Gravy

    White gravy has a flavor profile that makes it very versatile. Here are just a few ways you can use it to get you started:

    Enjoy!

    country gravy recipe homemade white sauce from scratch how to make southern bacon grease sausage drippings chicken fried steak

    For more delicious homemade gravy recipes try my:

    country gravy recipe homemade white sauce from scratch how to make southern bacon grease sausage drippings chicken fried steak

    White Gravy Recipe (Country Gravy)

    A Southern classic, this homemade white gravy is a true taste of down-home comfort cooking! It’s ready in less than 10 minutes and is deliciously versatile.

    Cook Time 10 minutes

    Total Time 10 minutes

    Course condiment

    Cuisine American, Southern

    Servings 4

    Calories 230 kcal

    • 3 tablespoons bacon grease , recommended for best flavor (see note); can substitute butter (vegetarian-friendly)
    • 3 tablespoons all-purpose flour
    • 1 3/4 cup cold whole milk , see note
    • 1/4 cup cold heavy cream , see note
    • 1/2 teaspoon kosher salt , plus more to taste
    • 1/4 teaspoon freshly ground black pepper , plus more to taste
    • 1/8 teaspoon cayenne pepper , or more according to heat preference
    • Melt the bacon grease in a skillet over medium heat. Add the flour and whisk continually until it is dissolved. Continue whisking until the mixture has turned a rich golden color, about 3 minutes. Add the milk and whisk until the mixture is smooth and thickened. Add the heavy cream and whisk until incorporated. Add the salt, pepper and cayenne and let the gravy simmer for another minute. Add more salt and pepper to taste. Makes about 2 1/4 cups white gravy.
    Next time you make bacon, pour the grease into a bowl, cover and refrigerate until you need it to make this gravy.  It will keep for up to 3 months and can be frozen even longer.
    For the creamiest and most flavorful results I recommend using whole milk and heavy cream.  If you’d like to make a lower calorie version, you can substitute 2% milk and use half and half, or use all milk.  
    If you like you can add a teaspoon of a finely chopped fresh herb of your choice along with the other seasonings (I like fresh thyme).   

    Serving: 0.5cupCalories: 230kcalCarbohydrates: 10gProtein: 5gFat: 19gSaturated Fat: 10gPolyunsaturated Fat: 2gMonounsaturated Fat: 7gCholesterol: 40mgSodium: 351mgPotassium: 183mgFiber: 0.2gSugar: 6gVitamin A: 418IUVitamin C: 0.1mgCalcium: 143mgIron: 0.3mg

    Keyword Country Gravy, White Gravy

    kimberly killebrew the daring gourmet

    Hi, I’m Kimberly Killebrew and welcome to Daring Gourmet where you’ll find delicious originals, revitalized classics, and simply downright good eats from around the world! Originally from Germany, later raised in England, world-traveled, and now living in the U.S., from my globally-influenced kitchen I invite you to tour the world through your taste buds!

    Read more about me…


    Source link

  • Thai Green Curry Mussels & Noodles

    Thai Green Curry Mussels & Noodles


    A Quick Dinner That Feels Fancy

    Need a dinner that’s both effortless and impressive? Look no further than this Thai Green Curry Mussels and Noodlesdish. It’s the kind of meal that comes together in under 30 minutes, yet feels like something you’d order at your favorite upscale Thai restaurant. It’s quick enough for a weeknight, but with its rich, aromatic broth and elegant presentation, it’s also a showstopper for guests.

    What makes this even better? It’s surprisingly budget-friendly! Mussels are one of the most affordable seafood options, and with just a few pantry-friendly ingredients, you can transform them into a dish that’s comforting, exciting, and just a little bit exotic.

    Gluten-Free-Thai-Green-Curry-Mussels-and-Noodles-Ingredients-1

    What You Need:

    • 1 (9.9 ounce) package GloryLand Brown Rice & Millet Noodles
    • 1 tablespoon olive oil
    • 2 large shallots, thinly sliced
    • 2 cloves garlic, minced
    • 1 tablespoon fresh ginger, grated
    • 3 tablespoons lemongrass paste
    • 1 lime, zested and juiced
    • 2 tablespoons Thai green curry paste
    • 1 (14 ounce) can coconut cream
    • 1½ tablespoons fish sauce
    • 1½ teaspoons coconut sugar or brown sugar
    • 1½ pounds mussels, scrubbed and debearded
    • ¼ cup fresh basil or Thai basil, chopped (plus more for garnish)
    • Lime wedges, for serving

    This dish hits all the right notes—fragrant, creamy, tangy, and just the right amount of spicy. The noodles soak up the curry-infused coconut broth perfectly, while the mussels add elegance and briny depth. Don’t forget the extra lime and basil on top—it takes the whole dish to the next level.

    Whether you’re cooking for guests or just treating yourself to something special, this is a meal that brings the wow-factor without the work.

    Thai-Green-Curry-Mussels-and-Noodles-Recipe

    Thai Green Curry Mussels and Noodles

    Prep Time20 minutes

    Cook Time15 minutes

    Servings: 4

    Calories: 136kcal

    Author: Gluten Free & More

    • Cook the noodles for one minute less than the package directions. Drain and rinse with cold water. Set aside.

    • In a large skillet or braiser, heat the oil over medium-high heat. Add shallots, garlic, and ginger. Cook, stirring for 1 – 2 minutes. Add lemongrass paste, lime zest, and curry paste. Cook for another 2 minutes or until fragrant. Stir in lime juice, coconut cream, fish sauce, and sugar. Bring to a boil. Add the mussels, cover the pan, and cook for 4 – 5 minutes or until the mussels have opened. Discard any mussels that do not open. Add the noodles and chopped basil leaves, toss gently and cook for another minute or until everything is warmed through.

    • Serve with additional basil leaves and lime wedges.

    Nutrition Facts

    Thai Green Curry Mussels and Noodles

    Amount Per Serving

    Calories 136
    Calories from Fat 54

    % Daily Value*

    Fat 6g9%

    Saturated Fat 1g5%

    Polyunsaturated Fat 1g

    Monounsaturated Fat 3g

    Cholesterol 24mg8%

    Sodium 781mg33%

    Potassium 404mg12%

    Carbohydrates 11g4%

    Fiber 1g4%

    Sugar 3g3%

    Protein 11g22%

    Vitamin A 228IU5%

    Vitamin C 14mg17%

    Calcium 45mg5%

    Iron 4mg22%

    * Percent Daily Values are based on a 2000 calorie diet.

    Disclaimer: All nutrition facts on Gluten Free & More are meant only as a guide and may differ depending on product brands used or ingredient substitutions. Some errors may occur, so you are encouraged to confirm the recipe’s ingredient and nutrition suitability for your own diet.

    Have you tried this recipe? Give it a star rating and let us know your thoughts in the Ratings & Reviews section below.


    Source link

  • Simple Korean Cucumber Salad (Oi Muchim)

    Simple Korean Cucumber Salad (Oi Muchim)


    Rate & Comment

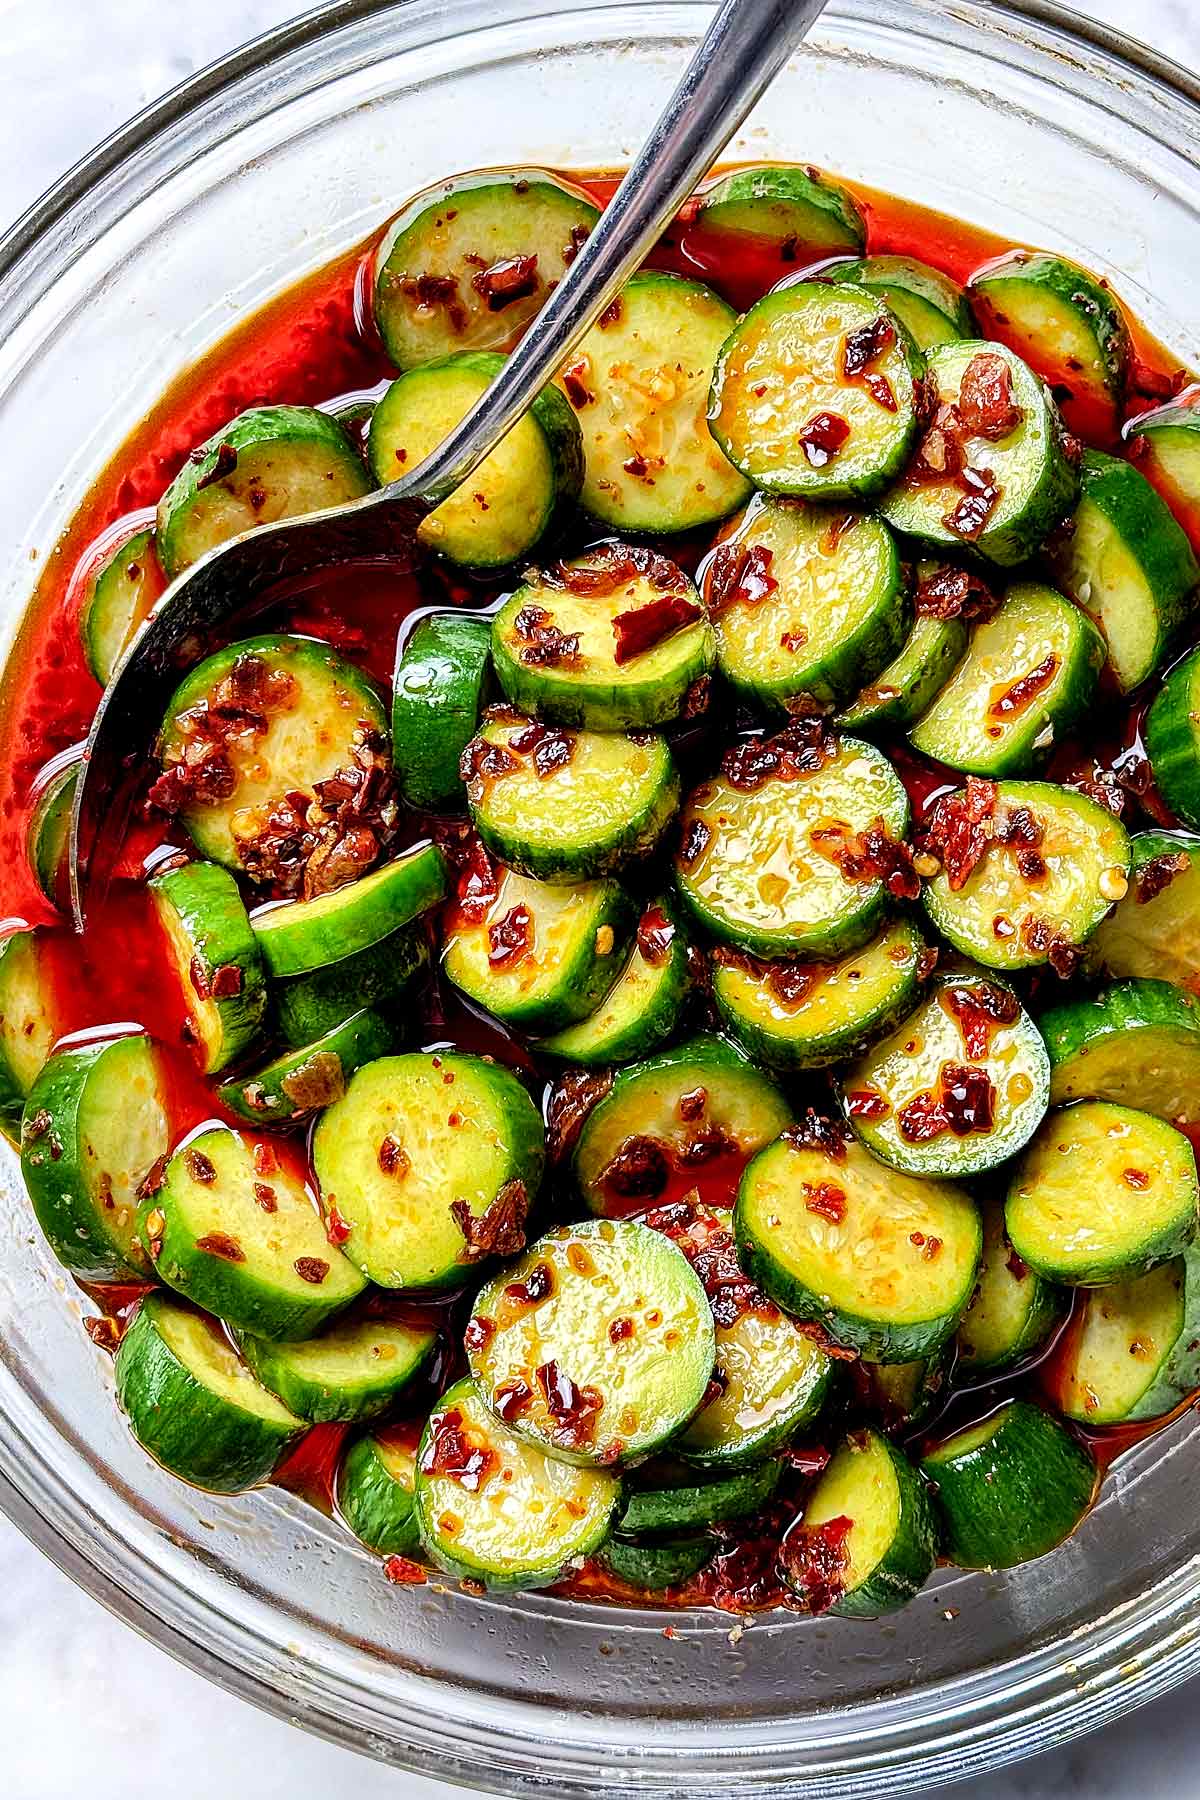
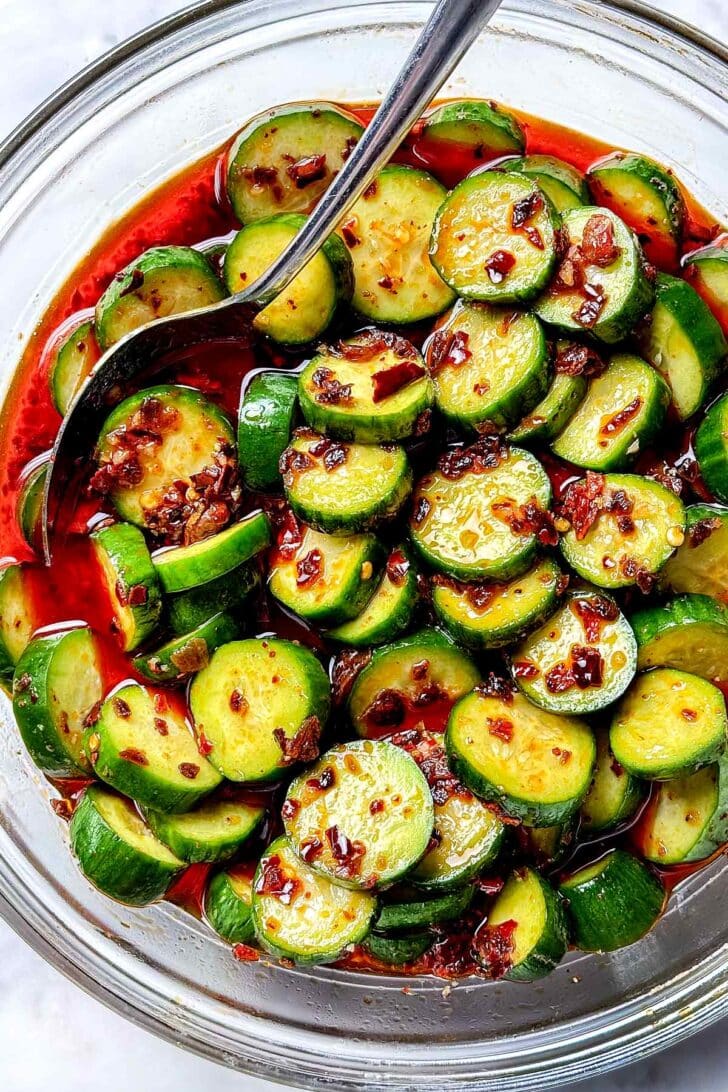
    This Korean cucumber salad tastes spicy, sweet, and fresh with each crisp and crunchy bite. It takes just 5 minutes to make and is delicious to eat as a simple side dish or tangy salad.

    Spicy Korean Cucumber Salad with gochujang in bowl

    My cucumber-obsessed husband makes this spicy Korean Cucumber Salad recipe (Oi Muchim) at least once a week. We were introduced to it years ago when eating Korean BBQ when each tangy bite with a bit of heat turned us into instant fans. It’s a typical part of the banchan (small side dishes) served with the main Korean meal and is so good that we always ask for more.

    This cucumber salad recipe takes 5 minutes to make and is ready to eat in just 30 minutes or can be refrigerated for hours before serving. In our recipe, thin-skinned cucumbers are mixed with rice vinegar, sesame oil, garlic, and ginger. For the spicy kick, we use either chili crisp or gochugaru (Korean chili flakes) to deliver the heat.

    Salting the cucumbers draws out moisture, keeping them snappy and crisp. As the salad sits, the released water mixes with the seasoned vinegar to create a spunky, perfectly balanced dressing that mellows the heat of the chili’s spice. These babies are addicting!

    Heidi’s Tips for Recipe Success

    • Salt the cucumbers, toss them well, then rest for 5-10 minutes before rinsing and adding the rest of the ingredients. This trick coaxes out their moisture, giving the Korean pickled cucumbers a fresh and snappy bite that won’t go soggy.
    • Prepare the salad at least 30 minutes to 1 hour before serving for the flavors to meld and infuse.
    • Use Persian, Korean, or English cucumbers. They have fewer seeds and thinner skin so there’s no peeling involved.
    What's in Spicy Korean Cucumber Salad with gochujang ingredients

    Korean Cucumber Salad Ingredients

    The full recipe, with amounts, can be found in the recipe card below.

    • Thin-skinned cucumbers — look for Persian cucumbers, English cucumbers, or Korean cucumbers with minimal seeds and no need to peel!
    • Kosher salt — the larger crystals pull moisture from the cucumbers, providing a quick, brined cure to keep them crisp
    • Seasoned rice vinegar — this slightly sweet Japanese vinegar adds tangy notes that aren’t too acidic
    • Toasted sesame oil — adds a nutty, savory note
    • Garlic — pressed smooth, it imparts another zesty layer of flavor
    • Ginger — grate fine to add a peppery pop
    • Chili crisp or gochugaru — use one or the other (or try a combo of both) to provide the warming chili flavor that’s distinct to this dish

    Ingredient Swaps and Substitutions

    • Cucumbers — if using a regular garden variety, peel, slice in half lengthwise, and remove the seeds before chopping
    • Chili crisp or gochugaru — we use them interchangeably or try this salad using a combo of both, just be sure to taste test for spiciness! Gochugaru paste, gochujang, or sambal olek also provide a spice kick.
    • Seasoned rice vinegar — try apple cider vinegar or plain rice vinegar with 1 teaspoon granulated sugar

    Heidi’s Add-ins: Feel free to add chopped green onion, slivered carrot, or chopped cilantro for more fresh flavor. For a nutty crunch, sprinkle with toasted sesame seeds. And while not authentic, a generous dose of everything bagel seasoning is pretty tasty, too.

    Salt on cucumbers in bowl with spicy cucumber salad ingredients in another bowl

    How to Make Spicy Korean Cucumbers

    • Salt the cucumbers. Cut into ¼-inch coins then add half to a bowl. Season with ½ teaspoon kosher salt. Add the rest of the cucumbers and season with the remaining salt. Let sit for 5-10 minutes.
    • Rinse the cucumbers. Rinse the salt from the cucumbers under cold water. Pat dry with a paper towel (or tea towel) and return to the bowl.
    • Add the seasonings. Add the chili crisp (or gochugaru), sesame oil, garlic, and ginger.

    Heidi’s Tip: I like to mix this salad the old-school way, in a bowl with a spoon. However, my husband adds the ingredients to a container with a fitted lid, covers it tight, and shakes it to combine — a useful tactic to let it all out after a hard day :)

    Vinegar added to Spicy Korean Salad ingredients in bowls
    • Drizzle with the seasoned rice vinegar and mix. Fold the ingredients together until well coated.
    • Let it rest. Refrigerate the salad for 30 minutes (up to 6 hours) before serving. This allows the flavors to mingle and infuse their spiced tang.
    Spicy Korean Cucumber Salad with gochujang in bowl

    FAQ

    Can I use regular cucumbers in this salad?

    Thin-skinned, seedless cucumbers are best in this salad for texture, size, and color—the green skin really adds to the dish! However, if using garden-variety cucumbers, peel them first, cut in half lenghtwise, and remove the seeds before slicing.

    Can I use table salt instead of kosher salt to crisp the cucumbers?

    In my book, no. Kosher salt’s larger, flakier crystals draw moisture out of cucumbers better than the fine grains of table salt that dissolve too quickly. Iodized table salt also gives a metallic aftertaste that can overpower the cucumber flavor.

    What’s the difference between chili crisp and gochugaru

    Chili crisp is a savory, oil-based condiment with crunchy bits of fried chili, garlic, onions, and other ingredients
    Gochugaru is a powder or flakes made from dried Korean red peppers that’s less hot than many other chili flakes

    Storage Tips

    This Korean cucumber salad will last in an airtight container in the fridge for 2-3 days, but it’s at its crispest within 1-2 days. We keep a batch in the fridge for as long as they’ll last without getting eaten — up to a week. Just know the cucumbers become softer as the days go by.

    Heidi’s Tip: The cucumbers let off more water the longer they sit, creating a tangy dressing. I like to drizzle it on my lunch time salads as a dressing or over white rice served with my Chili Crisp Salmon.

    Spicy Korean Cucumber Salad with gochujang in bowl

    What to Serve With Korean Cucumber Salad

    If you make this recipe, please let me know! Leave a ⭐️⭐️⭐️⭐️⭐️ rating below, leave a comment to tell us what you think, and tag me on Instagram @foodiecrush.

    Spicy Korean Cucumber Salad with gochujang in bowl

    Easy Korean Cucumber Salad (Oi Muchim)

    This easy Korean cucumber salad tastes spicy, sweet, tangy, and fresh. It takes just 5 minutes to make, or can be refrigerated for up to 6 hours (or more) before serving.

    Print

    Course Salad

    Cuisine Korean

    Keyword cucumber salad, Korean cucumber salad

    Prep Time 5 minutes

    Resting Time 30 minutes

    Total Time 35 minutes

    Servings 8

    Calories 54kcal

    Ingredients 

    • 1 pound Persian cucumbers, English cucumbers, or Korean cucumbers
    • 1 teaspoon kosher salt
    • 3 tablespoons chili crisp, or 1-2 teaspoons gochugaru to taste
    • 2 tablespoons toasted sesame oil
    • 2 teaspoons pressed garlic, or grated or finely minced
    • 1 teaspoon grated ginger
    • ¾ cup seasoned rice vinegar

    Instructions

    • Slice the cucumbers into ¼-inch coins, discarding the ends. Add half the cucumbers to a medium bowl and sprinkle with ½ teaspoon kosher salt. Add the remaining cucumbers and sprinkle with the rest of the salt. Toss well so all of the cucumbers are coated with salt. Set aside for 5-10 minutes.

    • Transfer the cucumbers to a colander and rinse them well. Drain, pat dry with paper towels or a tea towel, then add them back to the bowl. Add the chili crisp (or gochugaru if using), sesame oil, garlic, and ginger. Add the rice vinegar and toss well, thoroughly coating the cucumbers. Cover with plastic wrap or a lid and refrigerate for 30 minutes to 6 hours. Toss and taste for seasoning before serving.

    Notes

    This cucumber salad will last in an airtight container in the fridge for 2-3 days, but it’s at its crispest within 1-2 days.

    Nutrition

    Calories: 54kcal | Carbohydrates: 4g | Protein: 1g | Fat: 4g | Saturated Fat: 1g | Polyunsaturated Fat: 2g | Monounsaturated Fat: 1g | Sodium: 342mg | Potassium: 146mg | Fiber: 1g | Sugar: 1g | Vitamin A: 949IU | Vitamin C: 2mg | Calcium: 22mg | Iron: 1mg

    More Cucumber Salad Recipes

    We send good emails. Subscribe to FoodieCrush and have each post plus exclusive content only for our subscribers delivered straight to your e-mail box.

    Follow me on Instagram, Facebook, and Pinterest for more FoodieCrush inspiration.

    As always, thank you for reading and supporting companies I partner with, which allows me to create more unique content and recipes for you. There may be affiliate links in this post of which I receive a small commission. All opinions are always my own.


    [ad_2]
    Source link

  • Rustic Chicken Cacciatore (Oven-Baked One-Pot Comfort Food)

    Rustic Chicken Cacciatore (Oven-Baked One-Pot Comfort Food)


    This post may contain affiliate links. Please read my disclosure policy.

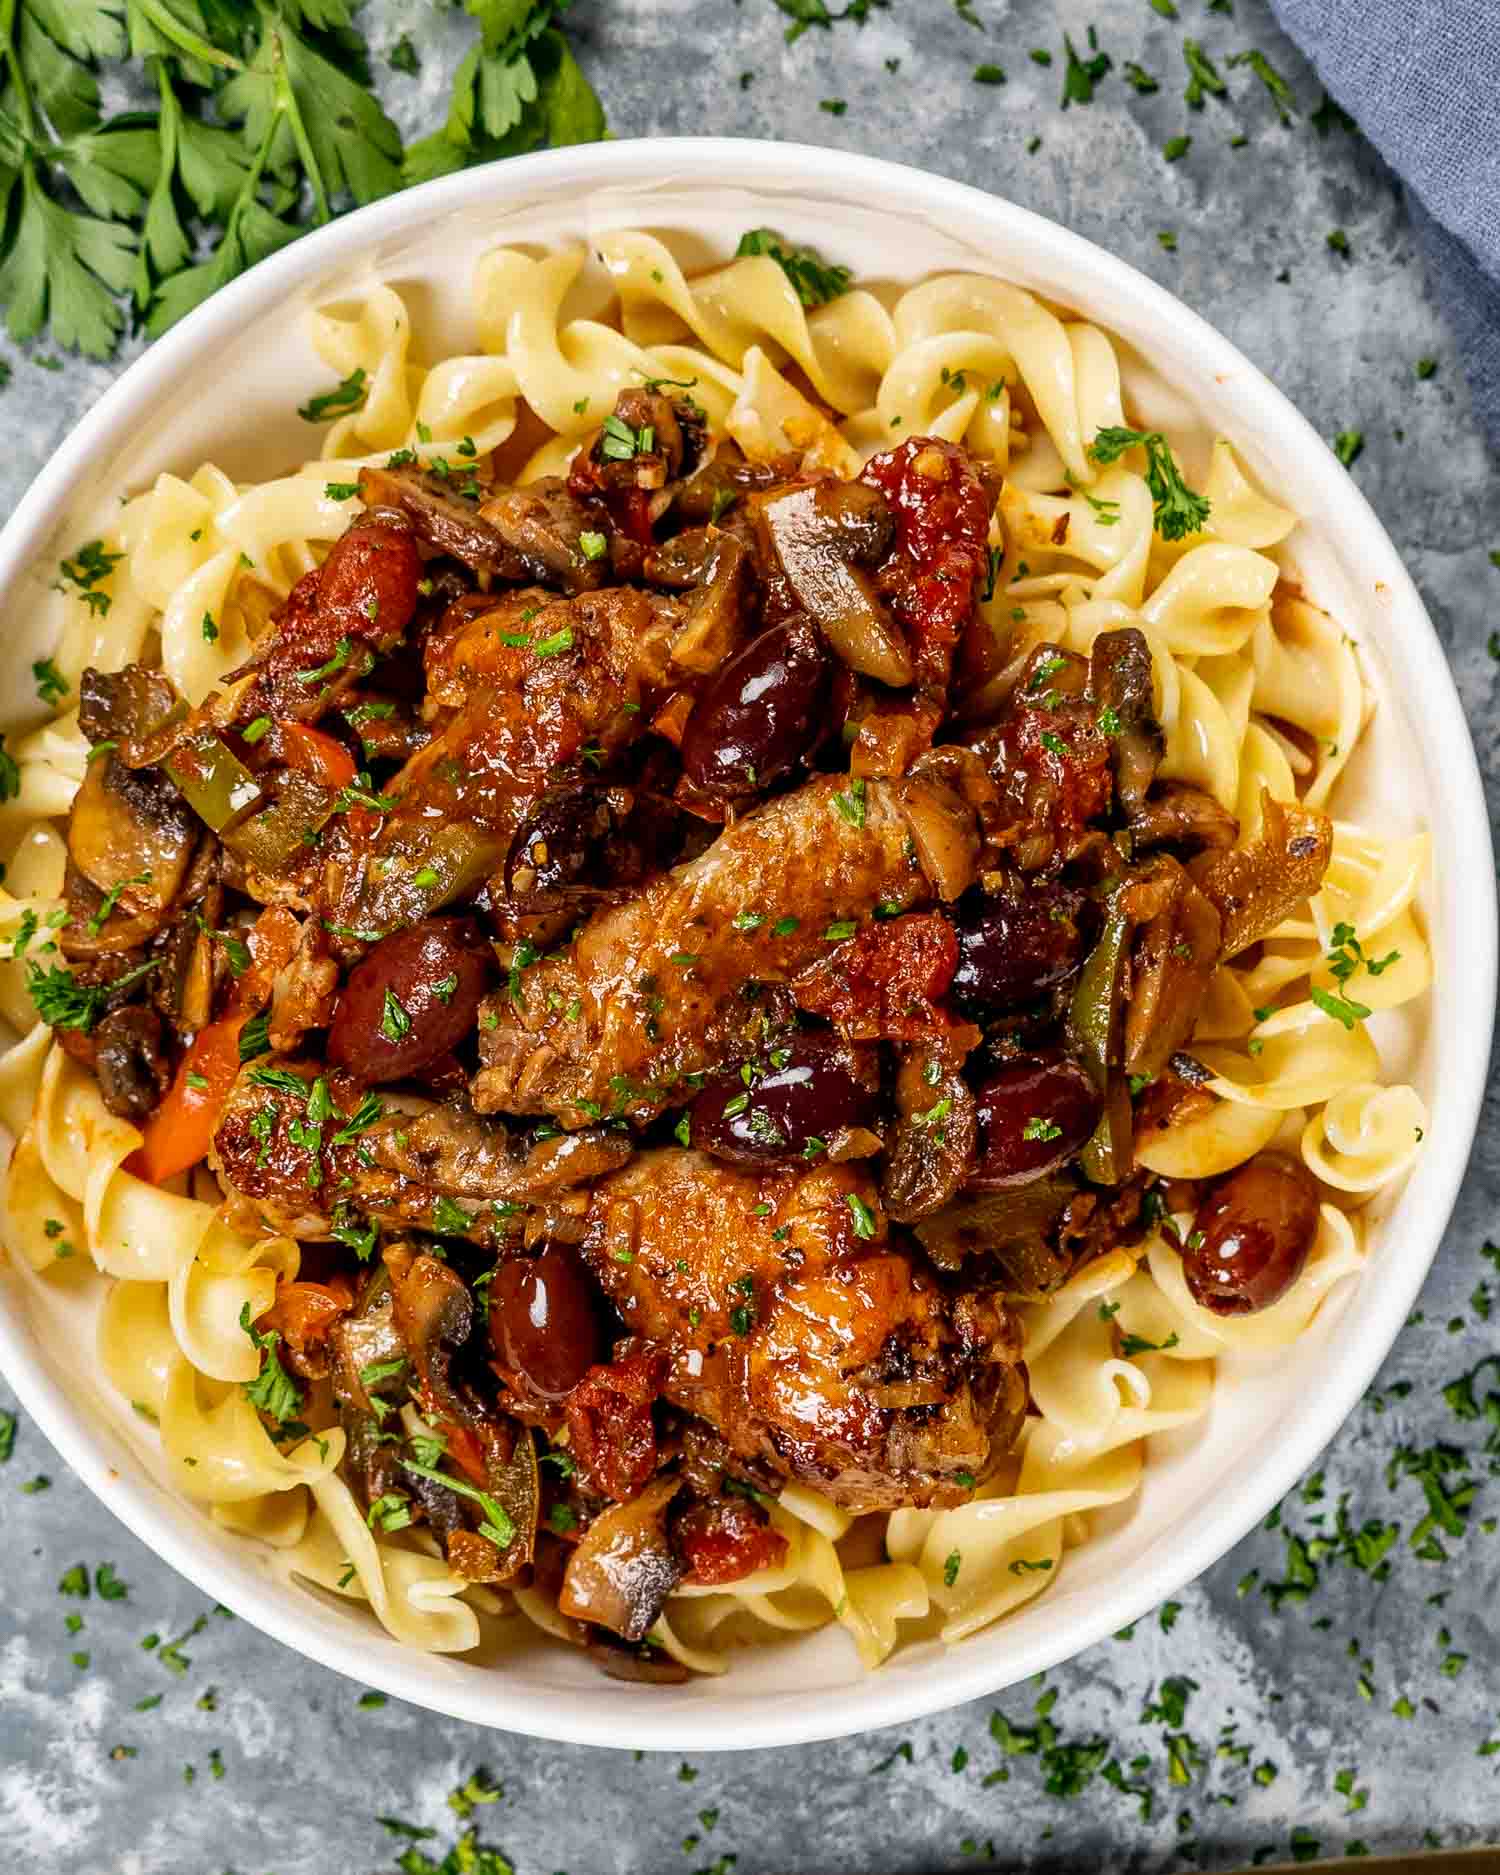
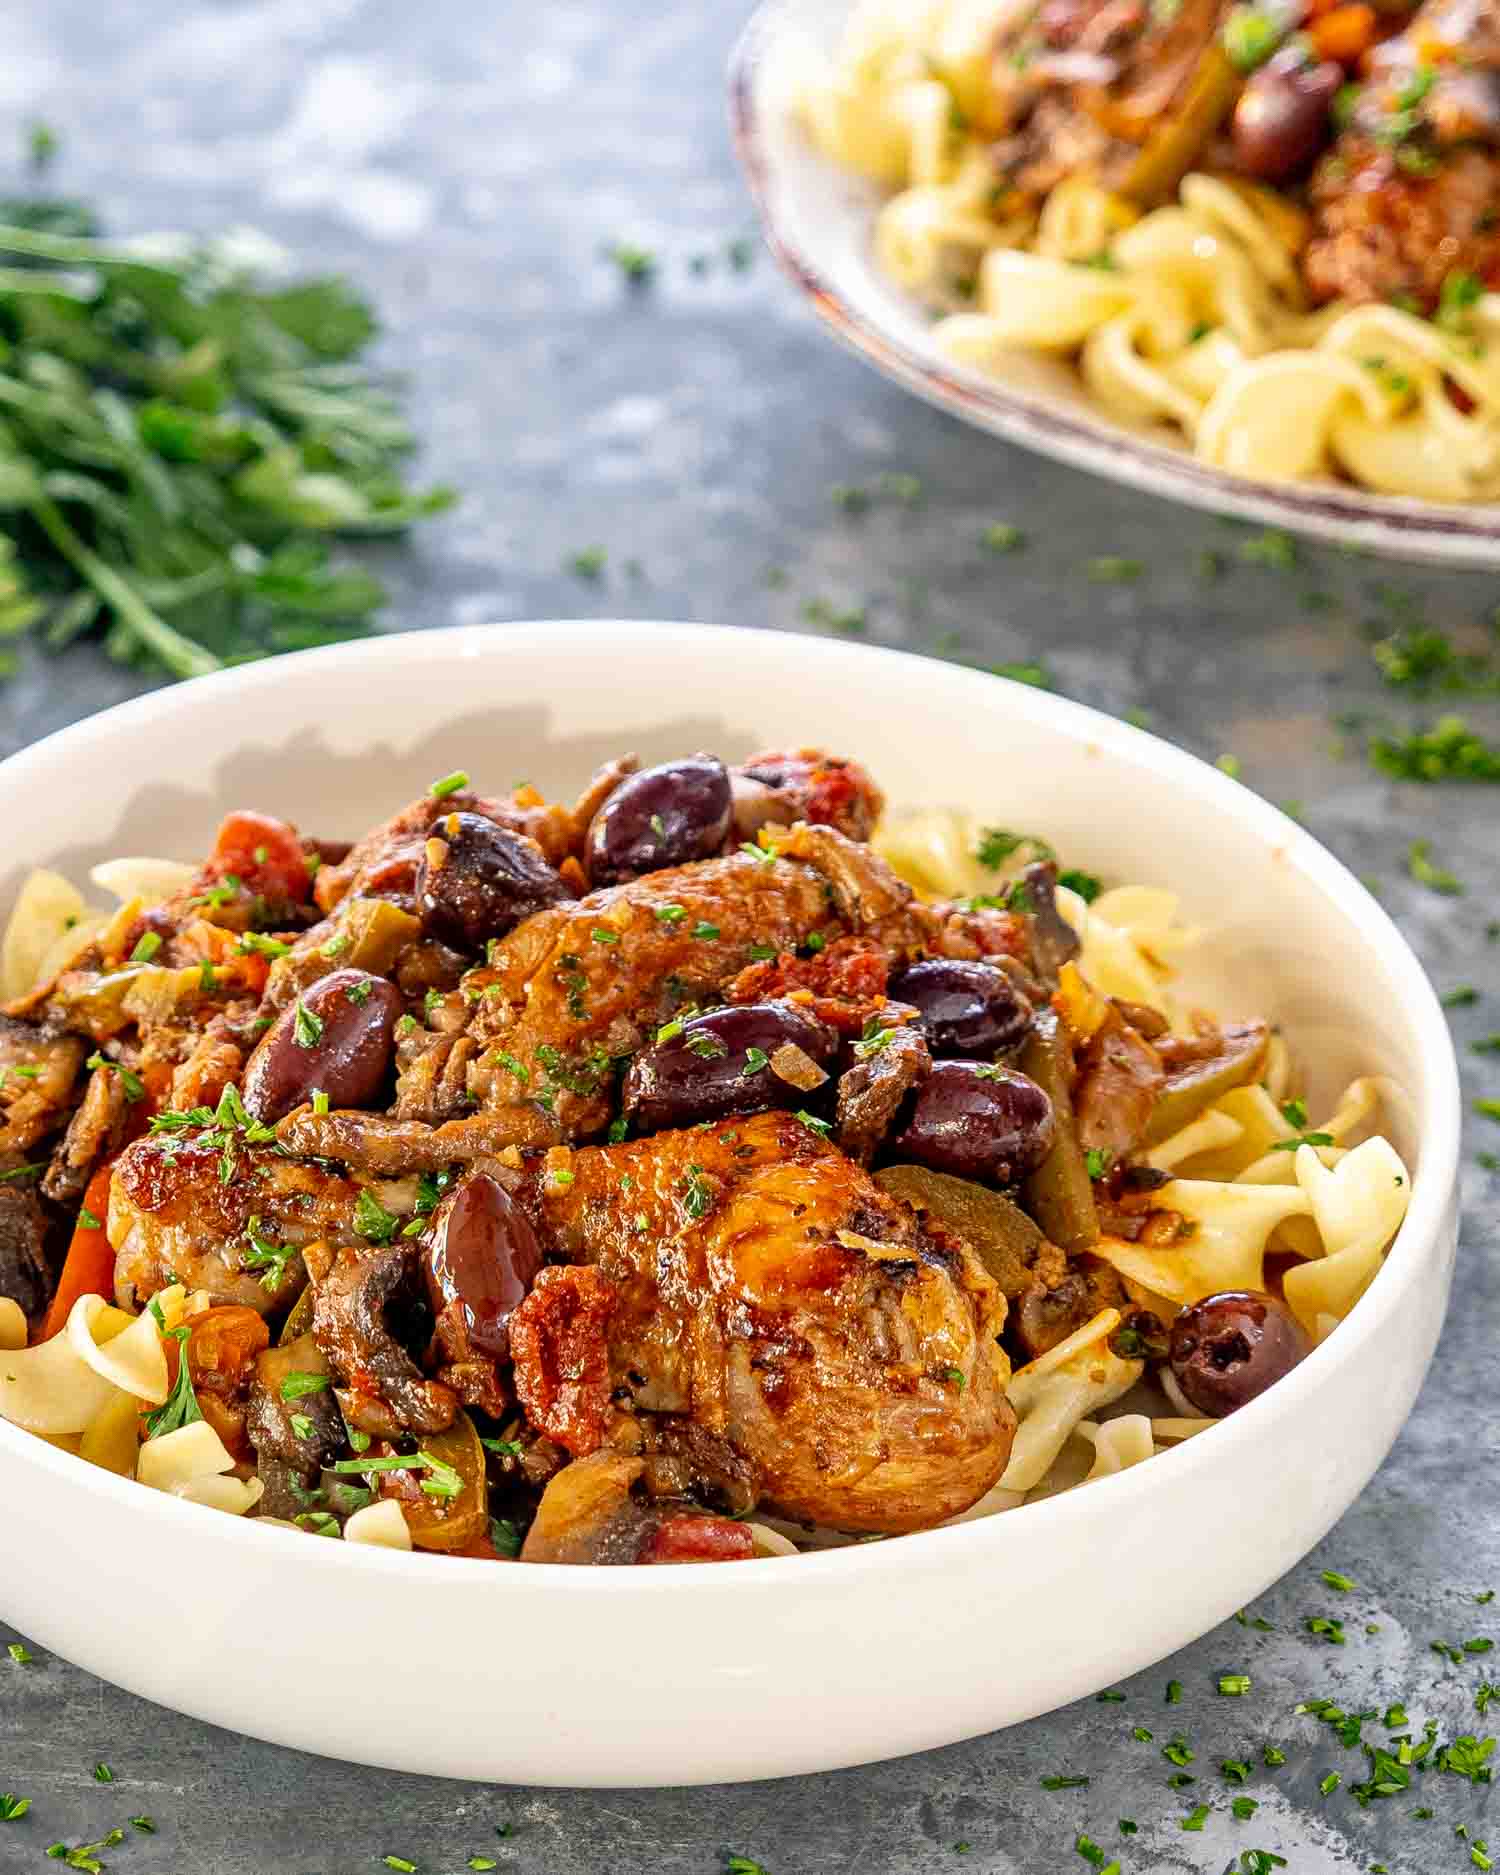
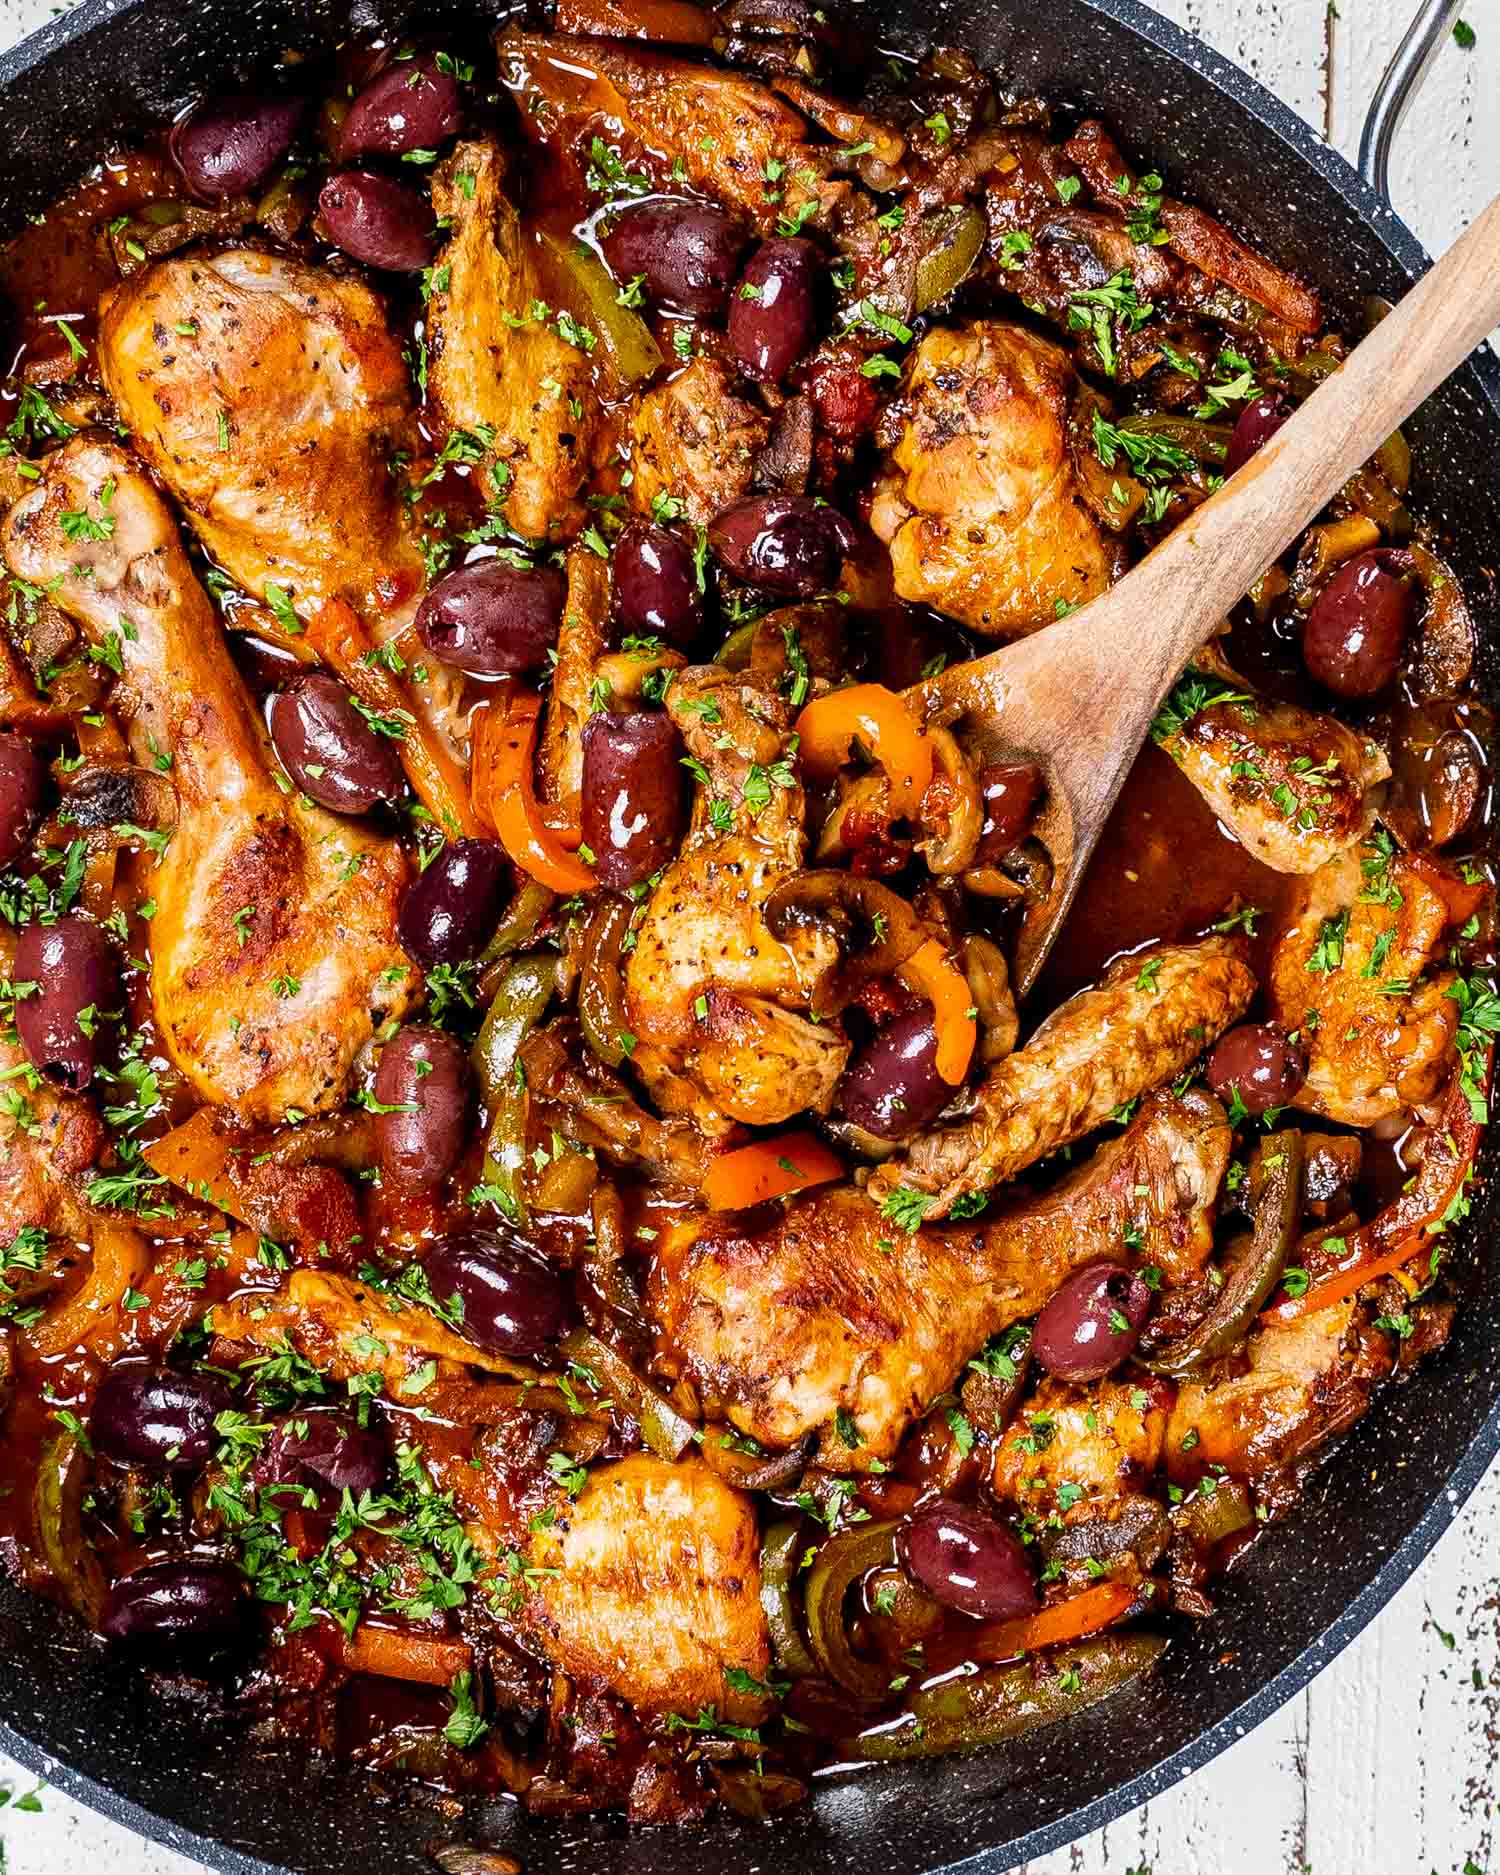
    This rustic Chicken Cacciatore is everything comfort food should be—tender, fall-off-the-bone chicken baked in a rich tomato and red wine sauce, with mushrooms, sweet bell peppers, and briny olives. One pot, big flavor, and the kind of cozy dinner that basically cooks itself while you pretend you’re in the Italian countryside.

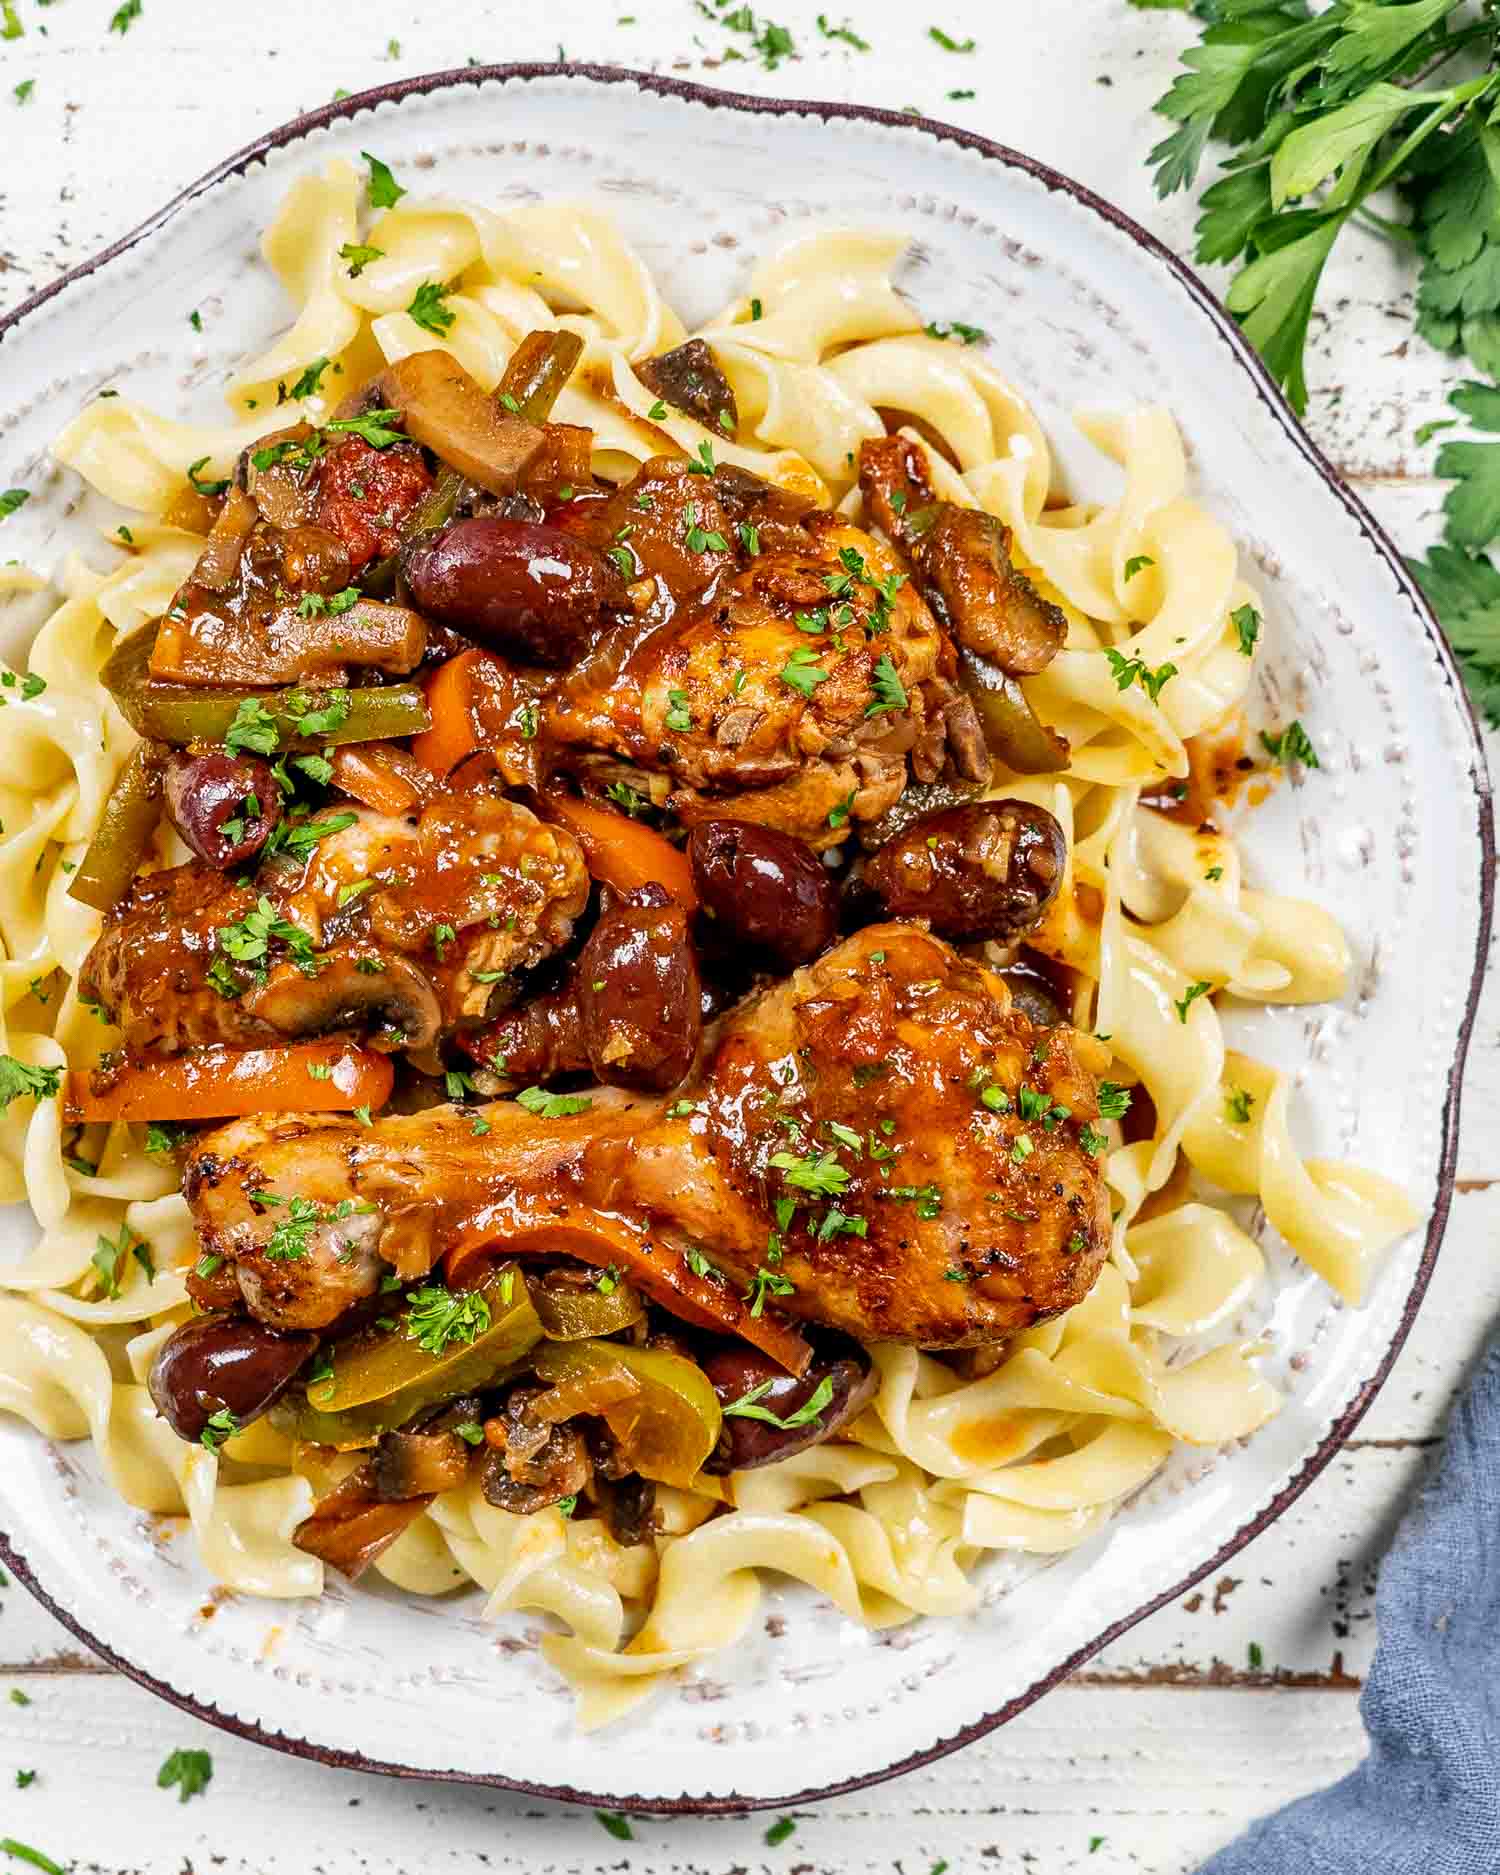
    a serving of chicken cacciatore over noodles in a white bowl.

    The Best Chicken Cacciatore Recipe

    Chicken Cacciatore is one of those dishes that instantly makes me feel like I’ve got life together—even if I’m wearing pajama pants and the dogs are barking at nothing. It’s cozy, rustic, and full of flavor, but totally unfussy. One big pan, some basic ingredients, and the oven takes it from there.

    This is how I make it at home—bone-in chicken that practically falls off the bone, sautéed peppers and mushrooms, a splash of red wine (some for the pot, some for me), and olives tossed in at the end because we’re fancy like that. It smells like you’ve been simmering all day, but your stove knows better.

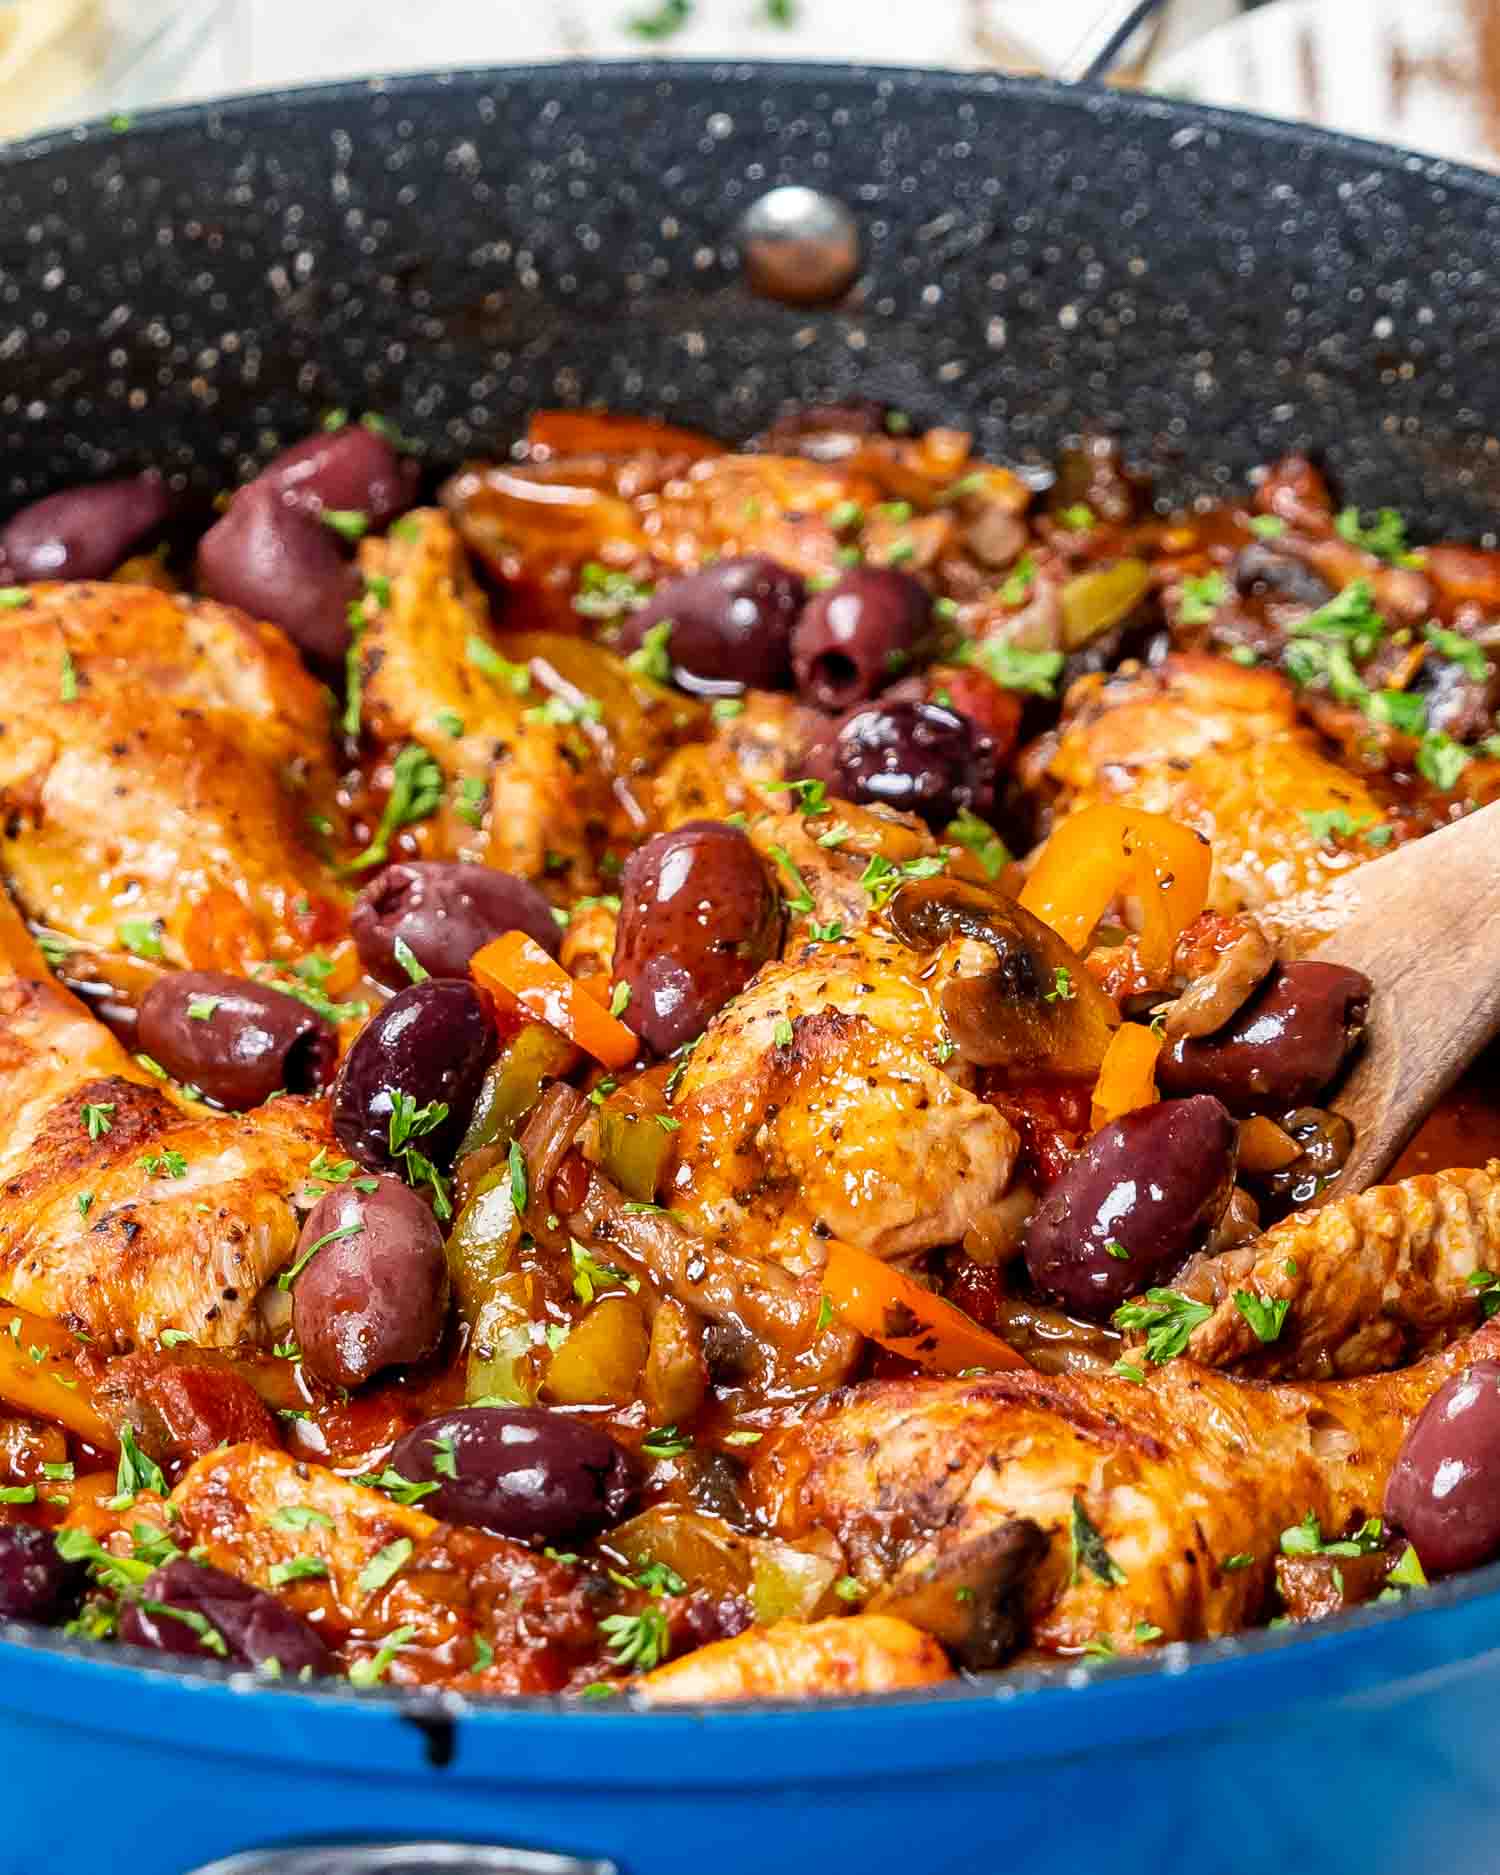
    freshly made chicken cacciatore in a blue pot.

    Chicken Cacciatore isn’t complicated, but there are a few things you should know before you start tossing things into the pan. This dish is all about building flavor in layers, using simple techniques that actually matter.

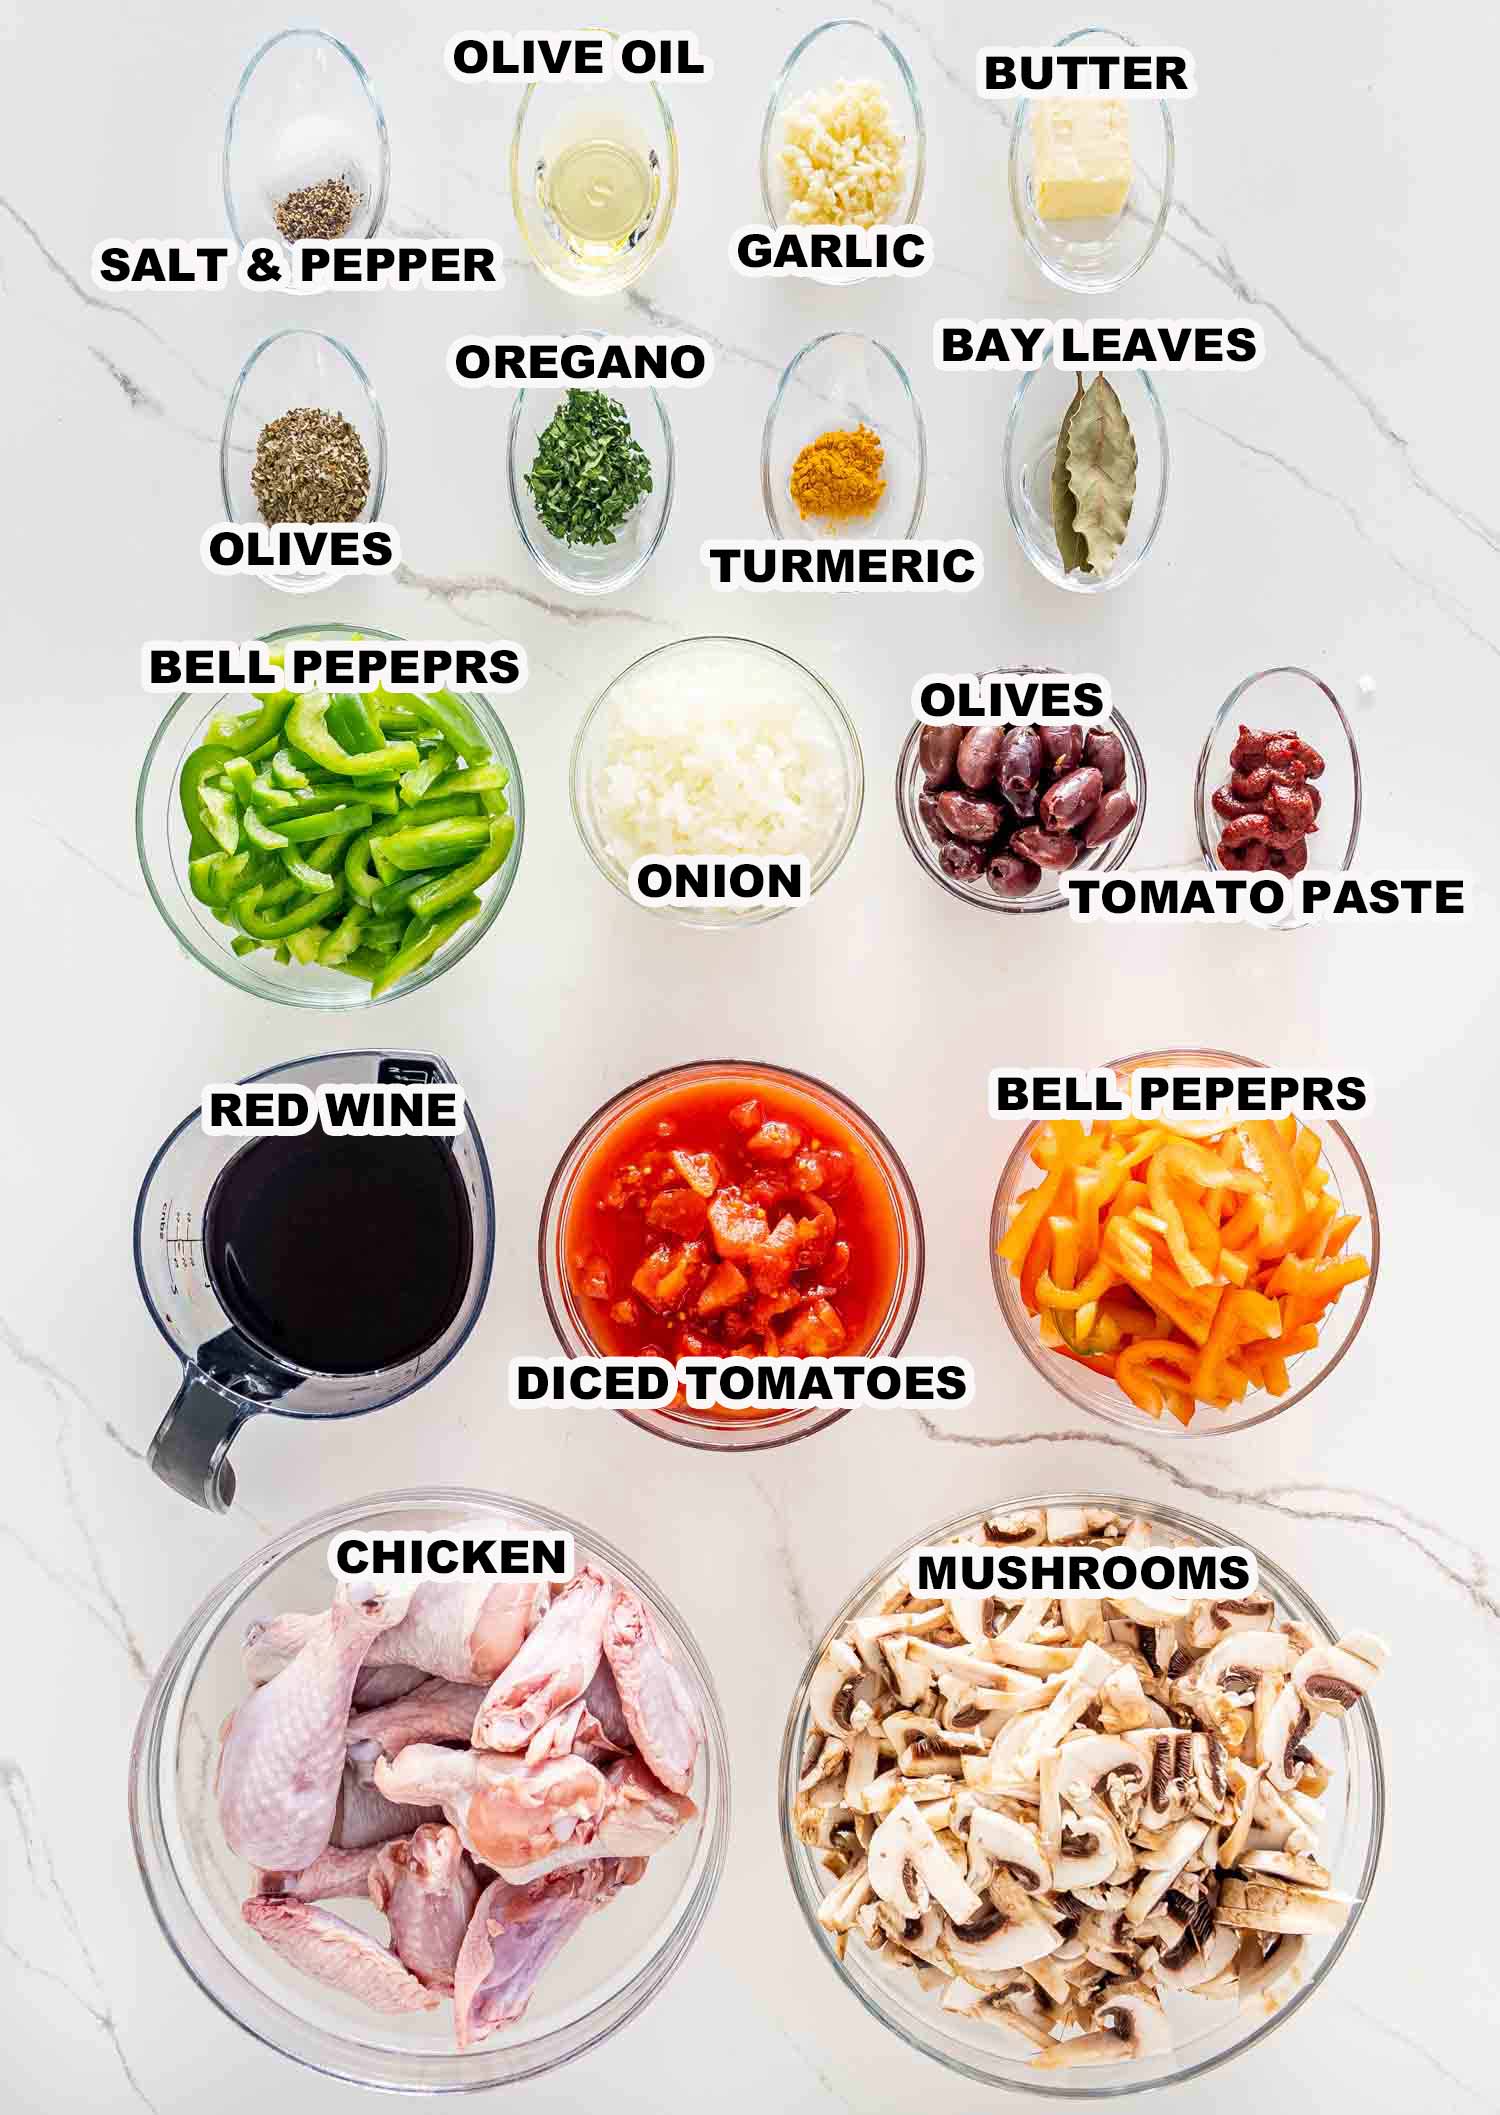
    ingredients needed to make chicken cacciatore.

    🍗 Use Bone-In, Skin-On Chicken

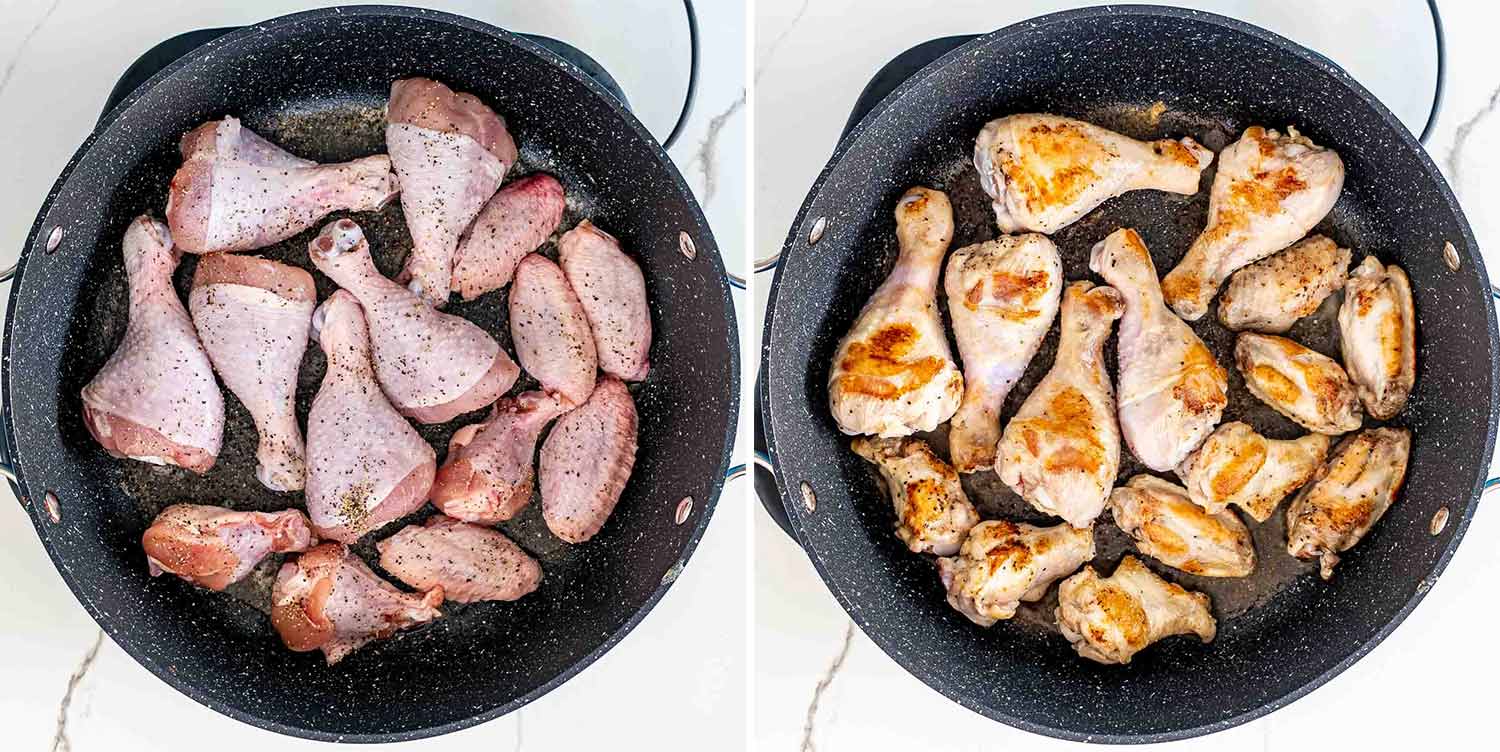
    Wings and drumsticks are perfect here. They stay juicy, they add richness to the sauce, and they handle long cooking like champs. Boneless breasts will dry out and don’t bring the same depth—save those for something faster.

    🔥 Don’t Skip the Sear

    Browning the chicken before it goes into the oven adds a ton of flavor. You don’t need to cook it through—just get that golden crust going. It makes a difference.

    🍄 Cook the Mushrooms First

    Yes, before the peppers. Mushrooms release moisture, and if you throw everything in together, they’ll steam instead of brown. I like to give them 5 minutes to cook down on their own first, then add the peppers after.

    🍷 Wine or No Wine?

    I use red wine because it gives the sauce depth and richness you can’t fake. But if you’re skipping alcohol, use low-sodium chicken broth and maybe a splash of balsamic vinegar to round things out.

    🫒 Don’t Add the Olives Too Early

    Olives go in at the end so they don’t get mushy or overpower the sauce. They’re meant to finish the dish—not take it over.

    ⏱️ This One’s a Slow Simmer

    The oven time is where the magic happens. Give it at least 45 minutes for the chicken to fully soak in that sauce. Want it falling-off-the-bone tender? Go for the full hour.

    This is a one-pan wonder, so once you’ve got everything prepped, the rest is mostly hands-off. Just build flavor in layers, pop it in the oven, and let it work its magic.

    process shots showing how to make chicken cacciatore.

    Heat the olive oil and butter in a large oven-safe skillet or Dutch oven. Add the chicken and season with salt and pepper. Sear for about 4 minutes per side until golden. No need to cook it through—it’ll finish in the oven. Transfer to a plate and set aside.

    process shots showing how to make chicken cacciatore.

    Add the garlic and onions to the same pan and cook for about 2 minutes until soft and fragrant. Don’t rush this step—it lays the foundation.

    process shots showing how to make chicken cacciatore.

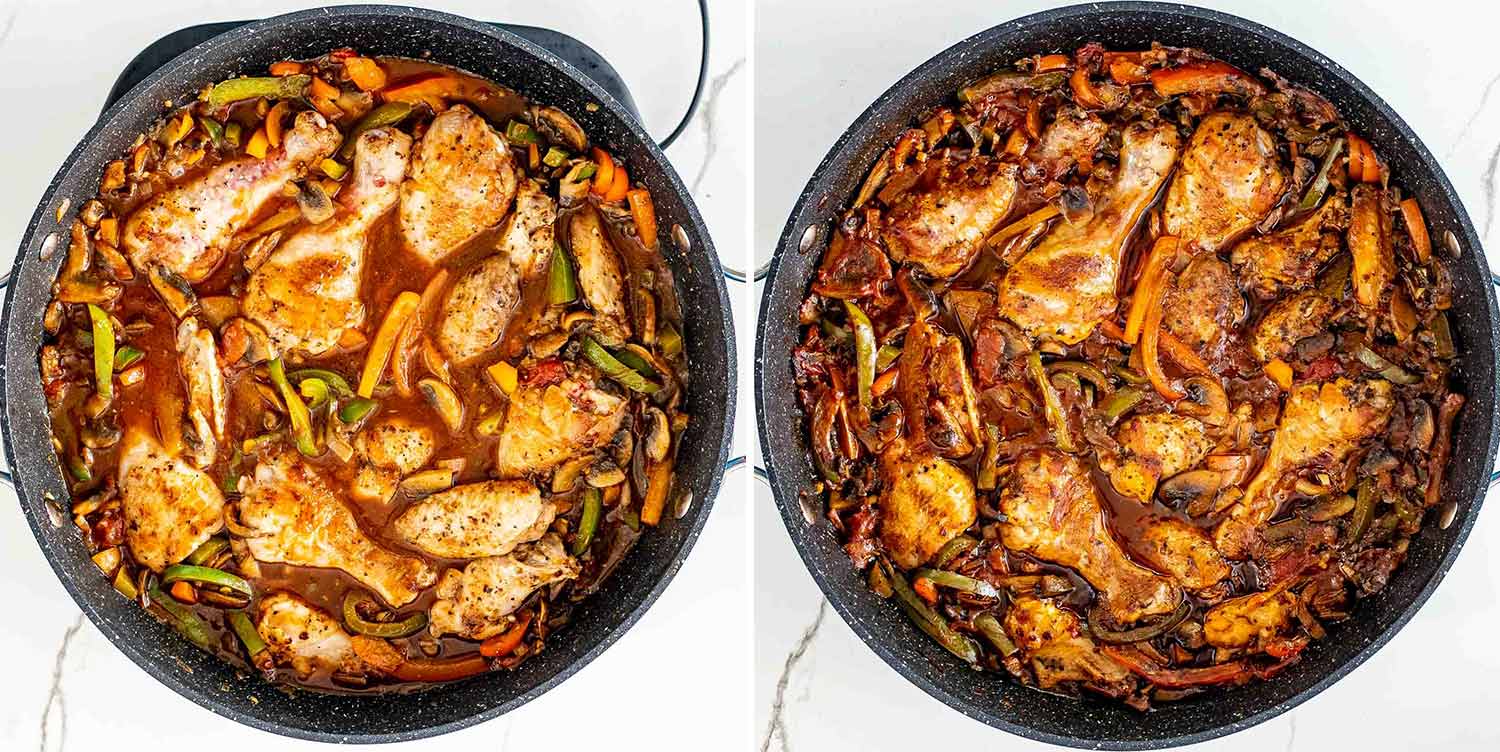
    Toss in the mushrooms and cook for 5 minutes. Let them release their moisture and start to brown. Then add the bell peppers and sauté for another couple of minutes just until they soften slightly.

    process shots showing how to make chicken cacciatore.

    Stir in the turmeric, oregano, bay leaves, red wine, tomato paste, and diced tomatoes. Bring everything to a gentle boil, scraping up all those browned bits from the bottom of the pan. 

    process shots showing how to make chicken cacciatore.

    Nestle the seared chicken pieces back into the sauce. Cover with a lid and transfer the whole pan to the oven. Bake at 400°F for 45 minutes to 1 hour, depending on how tender you like your chicken.

    freshly made chicken cacciatore in a blue pot.

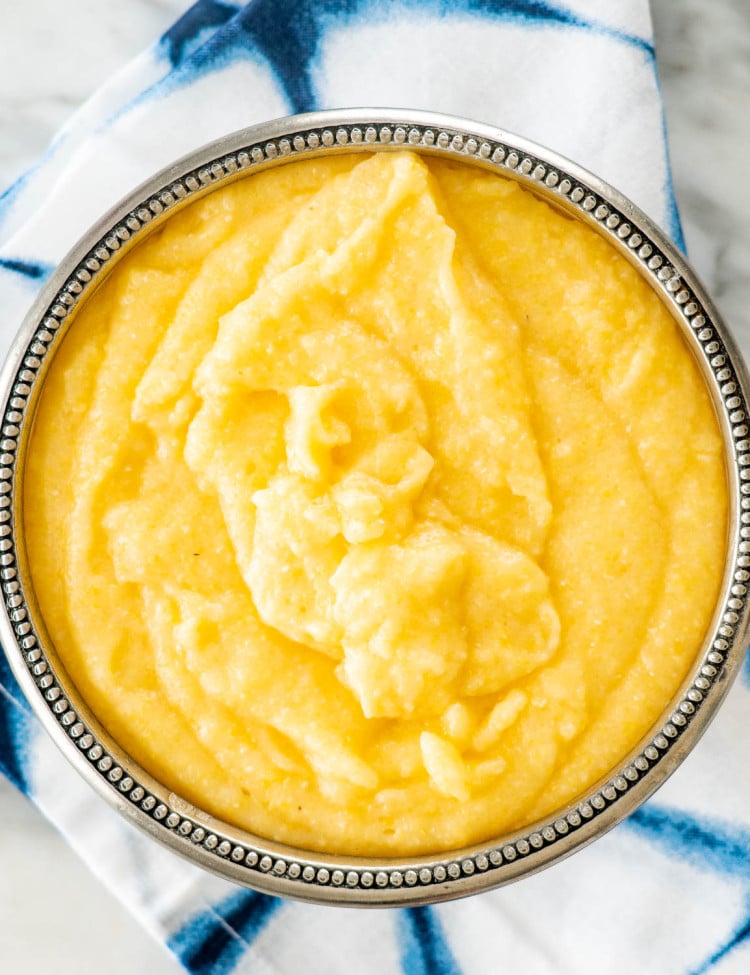
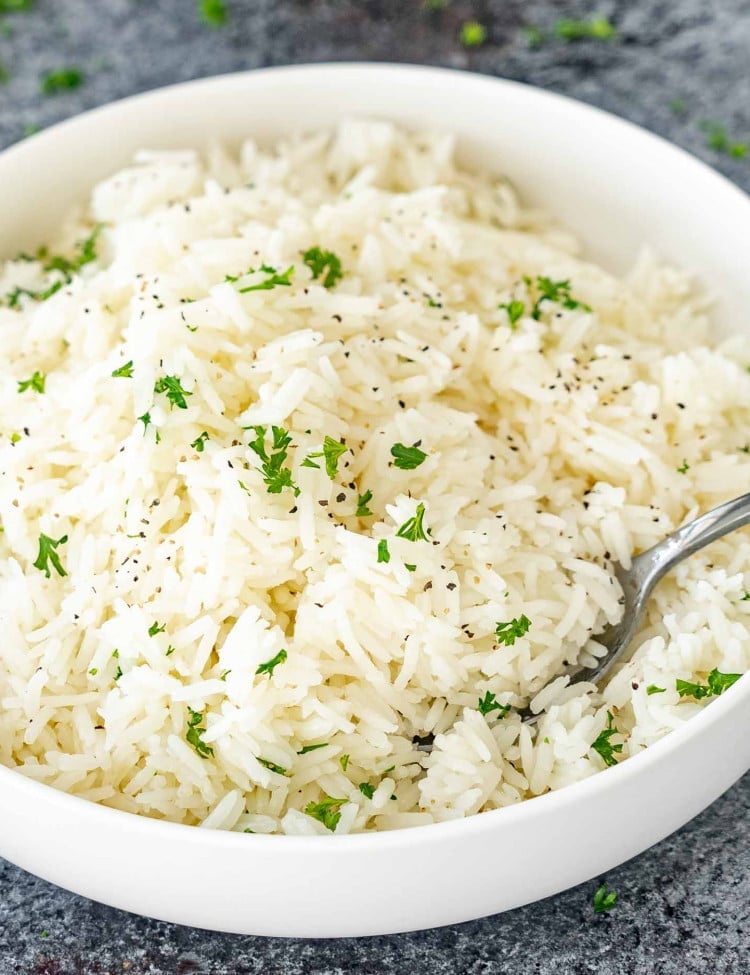
    Once it’s out of the oven, top with the Kalamata olives and sprinkle with fresh parsley. Serve it over noodles, rice, or creamy polenta. And don’t forget the crusty bread for mopping up that sauce.

    a serving of chicken cacciatore over noodles in a white bowl.

    Frequently Asked Questions

    Can I use boneless chicken?

    You can, but bone-in, skin-on chicken brings way more flavor and stays juicy while it bakes. Boneless thighs will work if you’re short on time, but I’d skip the breasts.

    Can I make this without wine?

    Yep. Swap the wine for low-sodium chicken broth and add a splash of balsamic or red wine vinegar for a little acidity and richness.

    What kind of wine should I use?

    Go for a dry red wine—Chianti, Pinot Noir, or even Cabernet Sauvignon work great. Use something you’d drink (not cooking wine) but don’t stress—just keep it dry, not sweet.

    What kind of olives are best?

    I love Kalamata olives for their bold flavor, but green or Castelvetrano work too. Just wait to add them at the end so they don’t go mushy or take over the sauce.

    Can I make it ahead of time?

    Absolutely. This dish gets even better after a day in the fridge. Make it up to 2 days ahead and reheat gently on the stove or in a 350°F oven.

    Can I freeze Chicken Cacciatore?

    Yes, minus the olives if possible. Freeze in an airtight container for up to 3 months. Thaw overnight in the fridge, then reheat gently until warmed through.

    freshly made chicken cacciatore in a blue pot.

    Storage & Reheating

    Fridge:

    Store leftovers in an airtight container for up to 4 days. The flavors get even better overnight, so don’t be surprised if it tastes even richer the next day.

    Freezer:

    Chicken Cacciatore freezes well—just leave the olives out if you’re making it specifically to freeze (they can go a bit mushy). Store in a freezer-safe container for up to 3 months. Thaw overnight in the fridge.

    To Reheat:

    Warm gently on the stovetop over medium-low heat, or reheat in a 350°F oven until heated through. Add a splash of broth or water if the sauce has thickened too much in the fridge.

    a serving of chicken cacciatore over noodles in a white bowl.

    Try These Chicken Recipes Next

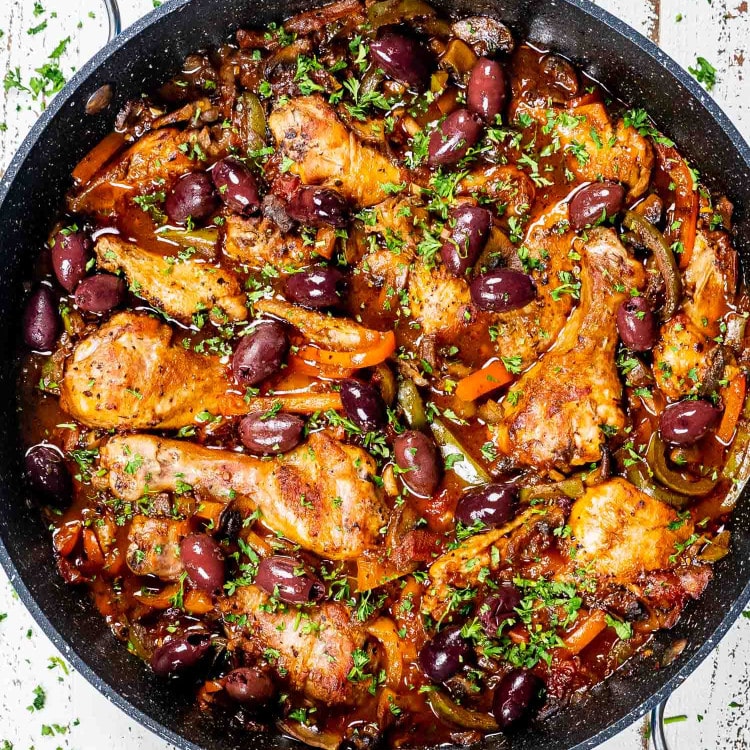
    freshly made chicken cacciatore in a blue pot.

    Chicken Cacciatore

    Prep 10 minutes

    Cook 1 hour 10 minutes

    Total 1 hour 20 minutes

    This rustic Chicken Cacciatore is comfort food at its finest—juicy bone-in chicken simmered in a rich tomato and red wine sauce with mushrooms, sweet peppers, and briny olives. All baked in one pot for deep flavor and easy cleanup.

    Instructions 

    • Preheat oven to 400°F.

    • Add the olive oil and butter to a large oven-safe skillet with a lid, and heat until butter has melted. 

    • Add the chicken to the skillet and season generously with salt and pepper. Fry the chicken on both sides until golden, about 4 min per side. The chicken doesn't have to be cooked through, as it will continue cooking while in the oven. Transfer the chicken to a plate and set aside.

    • Add the garlic and onions to the skillet and saute for 2 minutes until the onion is translucent and the garlic becomes aromatic. Add the chopped mushrooms and cook for 5 min until the mushrooms cook down then add the peppers.

    • I like to cook my mushrooms first, but you could add the mushrooms and peppers all at once. Stir and cook for a couple more minutes until the peppers soften a bit.

    • Add the turmeric, oregano, bay leaves, red wine, tomato paste, and diced tomatoes. Stir well and bring to a boil. 

    • Add the chicken back to the pot, cover with a lid and place in the oven. Bake for 45 minutes to an hour.

    • Top with whole Kalamata olives and garnish with fresh parsley before serving.

    • Serve over noodles, rice or polenta.

    Notes

    1. Chicken: I use a mix of wings and drumsticks, but any bone-in, skin-on pieces work. Thighs are great too. Boneless chicken will cook faster, but it won’t have the same depth of flavor.
    2. Mushrooms First: Cooking the mushrooms before the peppers helps them brown and build flavor instead of steaming.
    3. Wine Swaps: Chianti, Pinot Noir, or any dry red works. No wine? Use low-sodium chicken broth + a splash of balsamic or red wine vinegar.
    4. Make It Ahead: Perfect for prepping ahead. Store in the fridge for up to 4 days—flavors deepen and the sauce gets even better overnight.
    5. Deglaze the pan. When adding the wine and other liquid ingredients make sure to scrape the bottom of the pan to loosen all the browned bits. This will make the cacciatore more flavorful.

    Nutrition Information

    Serving: 1servingCalories: 354kcal (18%)Carbohydrates: 14g (5%)Protein: 22g (44%)Fat: 21g (32%)Saturated Fat: 6g (38%)Polyunsaturated Fat: 3gMonounsaturated Fat: 10gTrans Fat: 0.2gCholesterol: 103mg (34%)Sodium: 712mg (31%)Potassium: 877mg (25%)Fiber: 4g (17%)Sugar: 6g (7%)Vitamin A: 1196IU (24%)Vitamin C: 90mg (109%)Calcium: 75mg (8%)Iron: 3mg (17%)

    Notice: Nutrition is auto-calculated for your convenience. Where relevant, we recommend using your own nutrition calculations.

    freshly made chicken cacciatore in a blue pot.

    Did You Make This?

    We love seeing what you made! Tag us on Instagram at @jocooks or hashtag #jocooks so we can see your creations!

    Originally shared Sept 17, 2013.

    [ad_2]
    Source link

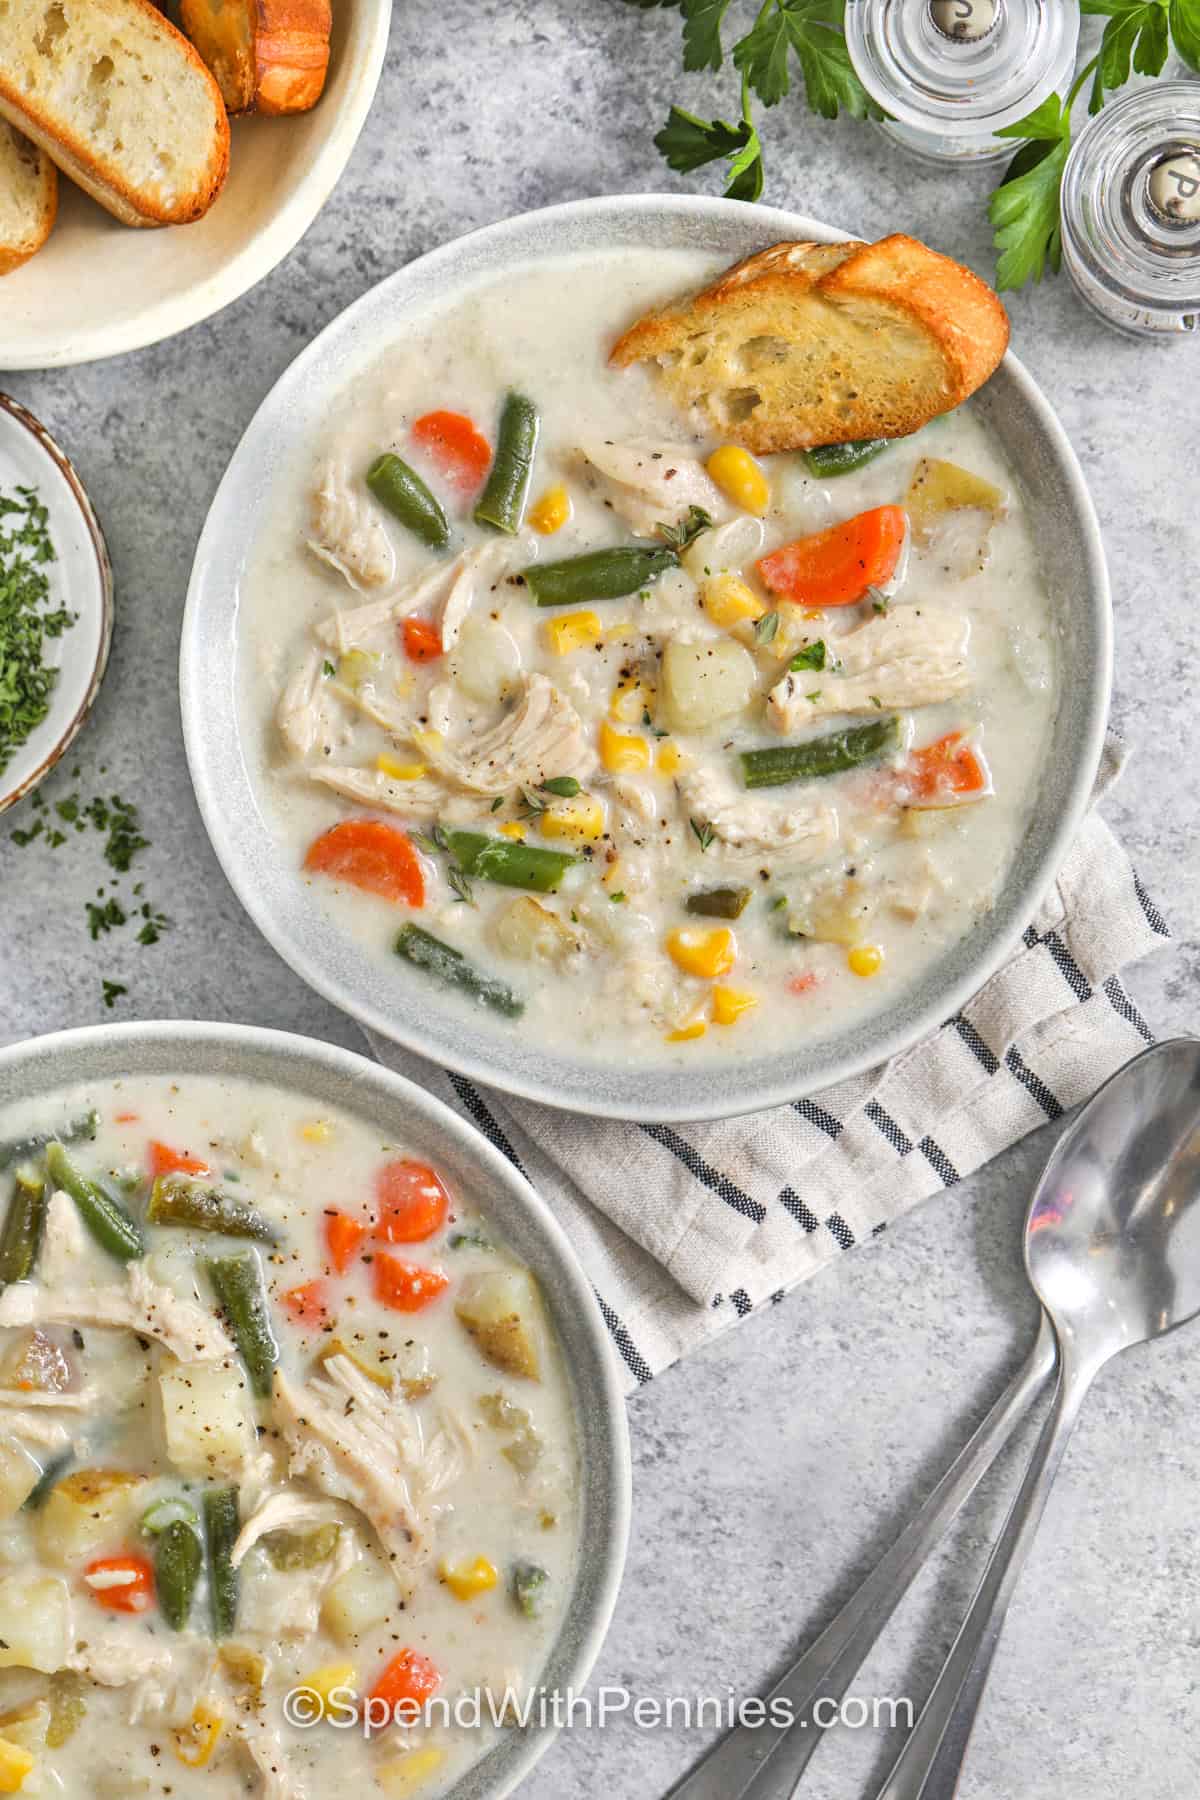
  • Slow Cooker Chicken Stew – Spend With Pennies

    Slow Cooker Chicken Stew – Spend With Pennies


    About the author

    Holly Nilsson is the creator of Spend With Pennies, where she creates easy, comforting recipes made for real life. With a passion for nostalgic flavors and simplified techniques, Holly helps busy home cooks create delicious meals that always work. She is also the author of “Everyday Comfort,” which promises to inspire even more hearty, home-cooked meals.
    See more posts by Holly

    Follow Holly on social media:

    pinterest facebook twitter instagram


    Source link

  • Easy Homemade Kung Pao Chicken

    Easy Homemade Kung Pao Chicken


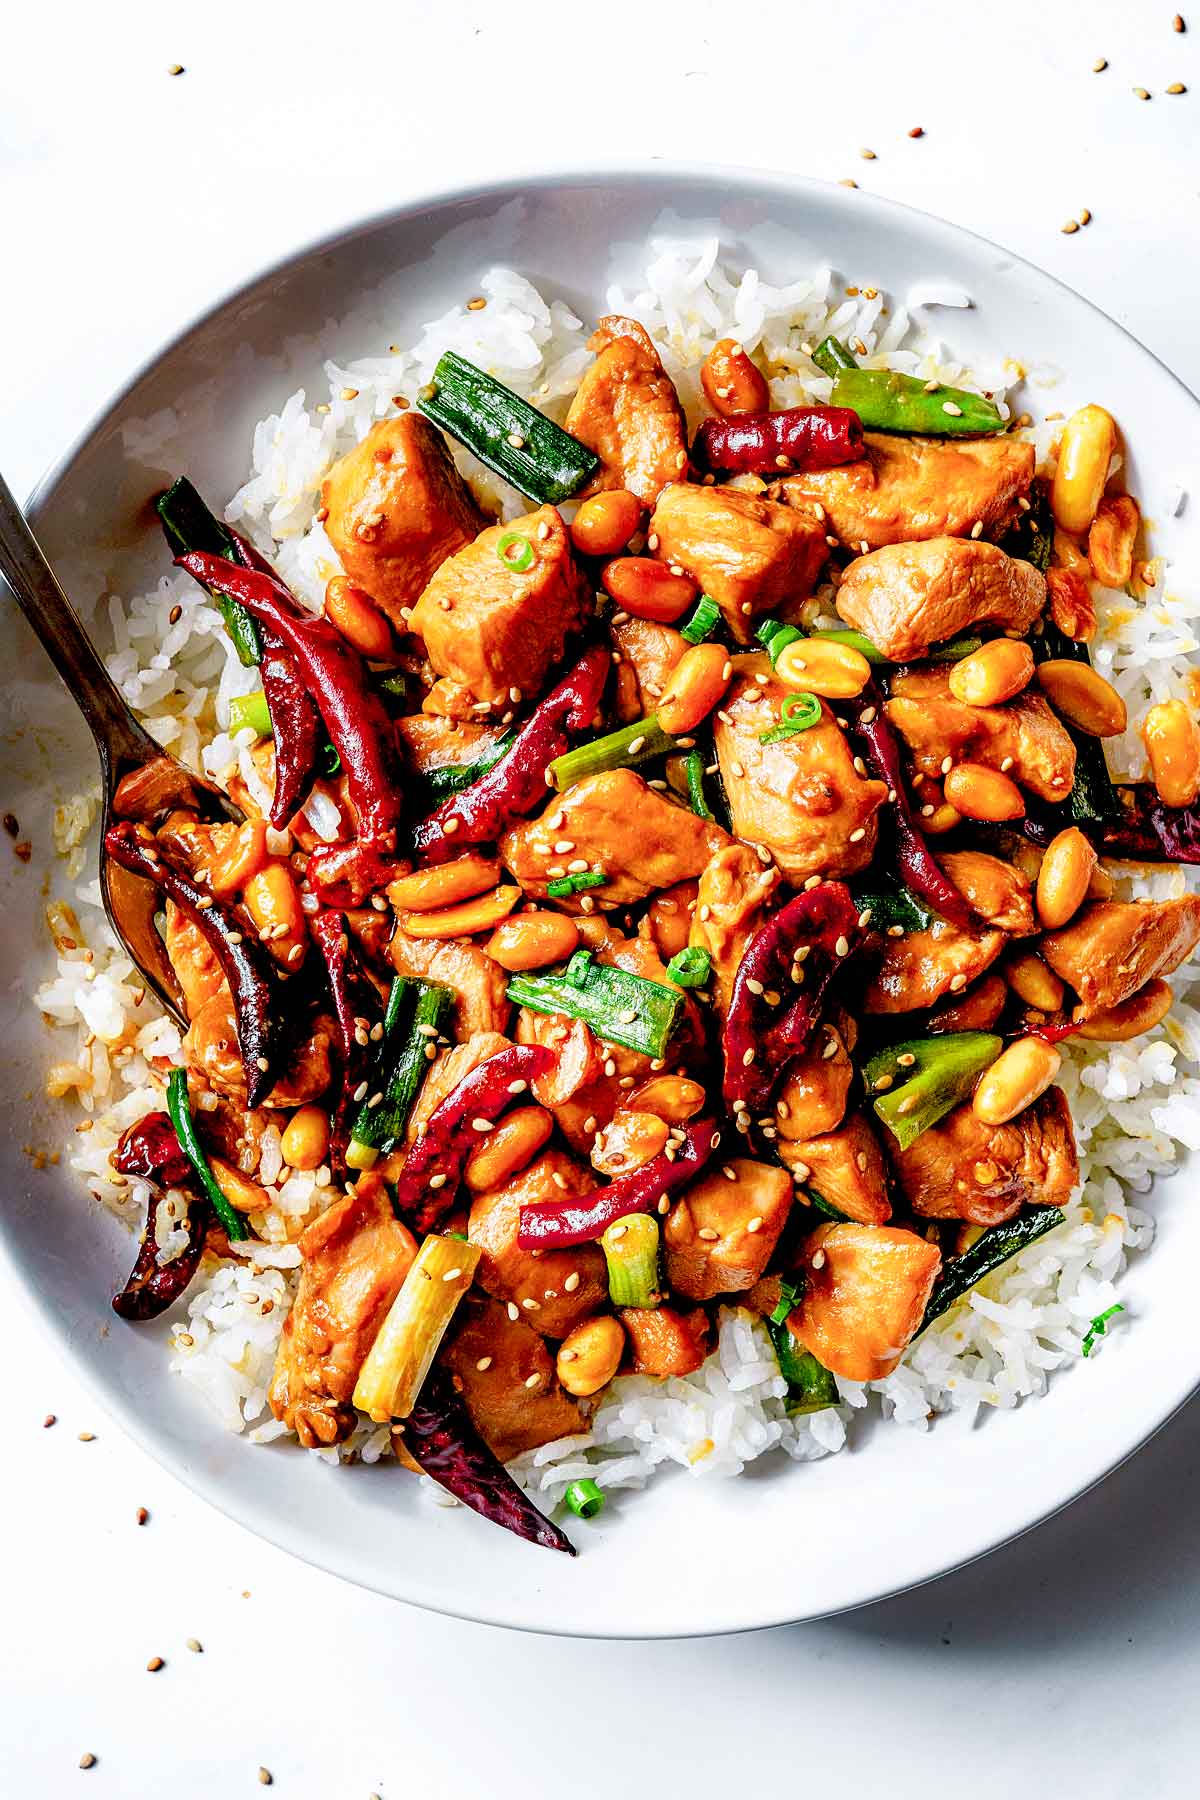
    A delectably spicy, sweet, and savory Asian-inspired sauce clings to every piece of juicy chicken in this easy dish. Kung pao chicken is quicker to make at home than ordering takeout, and it tastes so much better too. 

    Kung Pao Chicken with rice in bowl

    Kung pao chicken is a deceptively simple recipe to make by stir-frying juicy pieces of chicken in a nuanced spicy-sweet-savory sauce.

    Add in some toasted peanuts and before you know it, your favorite Chinese dish is on the dinner table in just 30 minutes for a fraction of the price of takeout. 

    Is this recipe 100% authentic? No. It’s sure tasty, though. 

    The kung pao chicken from your favorite Chinese restaurant typically leaves your mouth feeling numb and tingly from the Sichuan peppercorns that are traditionally included in this dish. But since Sichuan peppercorns are hard to find at most grocery stores (and can be pricey, to boot) this recipe uses dried red chiles for tons of flavor minus the tingling. 

    Heidi’s Tips for Recipe Success

    • Cook this homemade kung pao chicken in a wok or a skillet, and make it so easy to make at home
    • Give the chicken a quick marinade to make it tender and juicy. With crunchy peanuts, fresh green onions, and spicy-sweet-savory sauce, there are flavors and textures galore in this recipe.
    • This recipe delivers the unique flavors that kung pao chicken is known for using easy-to-find ingredients you can purchase at your local grocery store. 
    What's in Kung Pao Chicken ingredients

    What’s in Kung Pao Chicken? 

    The full recipe, with amounts, can be found in the recipe card below.

    • Chicken breasts — trim off any excess fat before dicing into ½-inch pieces
    • Soy sauce — lends the sauce so much umami flavor 
    • Shao xing cooking wine sometimes called “Chinese cooking wine;” it’s slightly sweet and nutty in flavor, and it helps to tenderize the chicken
    • Cornstarch — thickens the sauce and gives it a super glossy finish 
    • Sugar — you need a little sweetness to balance out the salty soy sauce and tangy vinegar 
    • Rice vinegar — this mild, sweet, and tangy vinegar rounds out the sauce (do NOT confuse it with rice wine) 
    • Toasted sesame oil — has a much richer sesame flavor than regular sesame oil 
    • Oil — use a neutral-flavored oil with a high smoke point, like canola or vegetable, for stir-frying the chicken 
    • Peanuts — choose roasted unsalted peanuts for lots of crunch 
    • Dried red chiles — use 6 to 10 depending on how spicy you like your kung pao chicken 
    • Garlic — a couple cloves finish off the stir-fry 
    • Green onions — you’ll be using both the green tops and white bottoms, but keep them separated after slicing 

    Ingredient Swaps and Substitutions

    • Soy sauce — you should be fine to use tamari if you need to keep the sauce gluten-free 
    • Shao xing cooking wine — replace it with sherry for a similar flavor profile 
    • Peanuts — are essential, in my opinion, but omit if you’re dealing with an allergy 
    • Dried red chiles — try using red pepper flakes instead (I haven’t tested this swap though, so I can’t give you an exact amount) 
    Marnate chicken for kung pao chicken

    How to Make Kung Pao Chicken

    This recipe cooks super quickly, so have everything ready to go before heating up the skillet.

    1. Marinate the chicken. Submerge the diced chicken in a mixture of soy sauce, shao xing cooking wine, and cornstarch. 
    2. Make the kung pao sauce. In another bowl, whisk together the sugar, rice vinegar, and water, plus the rest of the soy sauce, shao xing cooking wine, and cornstarch. 

    Heidi’s Tip: The soy sauce, cooking wine, and cornstarch each do double duty in this recipe. Read the recipe card closely before starting this dish to know how much of each ingredient to use, and when. 

    peanuts in fry pan and chicken, peppers, and green onion in skillet for kung pao chicken
    1. Stir-fry the peanuts. Heat a little oil in a wok or large skillet, then toast the peanuts for about 30 seconds. Remove them to a plate so they don’t burn. 
    2. Bring it all together. Once the peanuts are out of the skillet, add the white portion of the green onions, along with the dried red chile peppers and garlic. Cook just until fragrant, then add the chicken and stir-fry for 1 to 2 minutes. 
    Sauce for Kung Pao Chicken in skillet
    1. Sauce it up. Add the green tops of the onions and the silky kung pao sauce last, cooking just until the sauce thickens (it will take very little time). Stir in the peanuts before serving over a bed of white rice. I like to sprinkle mine with toasted sesame seeds.

    FAQs

    Is kung pao chicken spicy? 

    There’s definitely a nice kick of heat in this recipe, but it won’t set your mouth on fire.

    If you’re concerned it will be too spicy, use just six dried red chiles in the stir-fry. You can even go the extra mile and remove some of the seeds from the chiles, which is where their heat it stored. 

    Can I add vegetables to this stir-fry? 

    Feel free to stir-fry some sliced bell peppers, broccoli, or thinly sliced carrots before adding the chicken and sauce to the skillet. 

    Can this recipe be made in advance? 

    This is one dish that’s best eaten right away while the sauce is still glossy. You can definitely meal prep this kung pao chicken though, but you might need to add a splash of water when reheating to loosen up the sauce. 

    Kung Pao Chicken in skillet with spoon

    Storage Tips

    Let any leftovers cool before transferring to an airtight container. They’ll last up to 5 days in the fridge and can be gently reheated in the microwave or in a lightly oiled skillet. 

    What to Serve With Kung Pao Chicken

    If you make this recipe, please let me know! Leave a ⭐️⭐️⭐️⭐️⭐️ rating below, leave a comment to tell us what you think, and tag me on Instagram @foodiecrush.

    Kung Pao Chicken with rice in bowl