بلاگ

  • Best Recipe for German Chocolate Cake

    Best Recipe for German Chocolate Cake


    What is German Chocolate Cake?

    German chocolate cake is a rich, show-stopping dessert that’s all about layers of tender, sweet chocolate cake stacked up with a gooey, dreamy coconut-pecan frosting!

    The “German” part? Fun fact—it’s not named after Germany! It’s named after Samuel German, the baker who created a special kind of sweet baking chocolate back in the 1850s. His chocolate—Baker’s German’s Sweet Chocolate—is milder and sweeter than regular dark chocolate, giving the cake its signature smooth, mellow flavor.

    Instead of being bold and dark, German chocolate cake has a lighter, almost caramelized chocolate taste that perfectly balances the rich, buttery frosting. Every bite is soft, sweet, nutty, and decadent—basically, it’s happiness in cake form!


    Source link

  • No-Bake Gluten-free Cookie Pops | Gluten Free & More

    No-Bake Gluten-free Cookie Pops | Gluten Free & More


     Spring Fun in Every Gluten Free Bite:

    Looking for a delightful, gluten-free dessert that’s fun to make and even more fun to eat? These No-Bake Cookie Pops are exactly what you need! Whether you’re planning a spring party, filling Easter baskets, or just searching for an easy activity with the kids, this no-bake recipe is a sweet solution.

    To begin with, these cookie pops are made with  Home Free Chocolate Chip Mini Cookies which are free of the top 14 allergens and deliciously crunchy. Since no baking is required, they’re a perfect choice for little helpers in the kitchen. Kids can join in every step of the way—from crushing the cookies and mixing the filling, to rolling and decorating each pop.

    In addition to being easy, these cookie pops are wonderfully customizable. We used pastel-colored chocolate melts—like soft pink, blue, yellow, and green—for a vibrant spring theme. However, you can switch up the colors or decorations to fit any celebration. Naturally, a generous dash of sprinkles adds a playful touch and plenty of personality.

    Moreover, these cookie pops are not only good for people with dietary restrictions, but they’re also mess-friendly. There’s no oven, minimal cleanup, and lots of opportunities for creativity. Simply chill the cookie mixture, insert your sticks, dip them in melted chocolate, and let the decorating begin.

    Because they’re so quick and simple, these treats are ideal for weekend projects or last-minute party snacks. Additionally, they store well in the fridge, making them a great make-ahead option.

    So, if you’re looking to add a little extra fun to your spring dessert lineup this season, these no-bake cookie pops are a must-try. They’re proof that gluten free can still mean all the fun—and all the flavor.

    Gluten-Free-No-Bake-Cookie-Pops-Recipe

    Gluten Free No-Bake Cookie Pops

    Easy no-bake treat made with allergy-friendly ingredients and pastel decorations. Perfect for spring and fun with kids.

    Prep Time15 minutes

    Fridge Time45 minutes

    Servings: 10 pops

    Calories: 40kcal

    Author: Gluten Free & More

    Nutrition Facts

    Gluten Free No-Bake Cookie Pops

    Amount Per Serving

    Calories 40
    Calories from Fat 36

    % Daily Value*

    Fat 4g6%

    Saturated Fat 2g10%

    Polyunsaturated Fat 0.2g

    Monounsaturated Fat 1g

    Cholesterol 11mg4%

    Sodium 36mg2%

    Potassium 15mg0%

    Carbohydrates 1g0%

    Sugar 0.4g0%

    Protein 1g2%

    Vitamin A 152IU3%

    Calcium 11mg1%

    Iron 0.01mg0%

    * Percent Daily Values are based on a 2000 calorie diet.


    Disclaimer: All nutrition facts on Gluten Free & More are meant only as a guide and may differ depending on product brands used or ingredient substitutions. Some errors may occur, so you are encouraged to confirm the recipe’s ingredient and nutrition suitability for your own diet.

    Have you tried this recipe? Give it a star rating and let us know your thoughts in the Ratings & Reviews section below.


    Source link

  • Cucumber Lime Agua Fresca – Minimalist Baker Recipes

    Cucumber Lime Agua Fresca – Minimalist Baker Recipes


    Glasses of cucumber lime agua fresca with cucumber slices on the rims and garnished with fresh mint

    Staycation, anyone? One sip in and this cucumber lime agua fresca will have you feeling in full vacation mode. Made with just 3 ingredients in 10 minutes, it couldn’t be simpler or more refreshing! 

    It’s the ultimate hydrating sip, poolside drink, and also perfect for making in large batches for sharing. Let’s get refreshed!

    Fresh mint, maple syrup, lime wedges, and sliced cucumbers

    What is an Agua Fresca?

    An agua fresca (which translates to “fresh water”) is a refreshing drink widely popular in Central and South America, Mexico, and parts of the Caribbean. It’s typically a combination of water and sugar mixed with fruit, flowers, or other flavorful ingredients.

    It’s thought that the making of agua frescas may go back centuries and that they may have originally been created by the Aztec people. The following is our inspired, naturally sweetened take based on one we tried in Mexico.

    How to Make a Cucumber Lime Agua Fresca

    This agua fresca employs the subtle, cooling, and thirst-quenching goodness of one of our favorite veggies: cucumber! The best part? You don’t even have to peel them. Just wash, chop, and toss in the blender!

    Pouring water into a blender over cucumber slices and fresh mint

    Along with the cucumber, lime juice adds bright fruitiness while agave nectar (or maple syrup) adds a touch of sweetness. Mint is optional but highly recommended!

    Straining a blended cucumber lime mixture through a fine mesh strainer

    After combining the ingredients with water, it’s as easy as blend, strain, and serve. Easy peasy, lime squeezy! That’s how it goes, right?

    Overhead shot of several glasses filled with our cucumber lime agua fresca recipe

    We hope you LOVE this agua fresca, friends! It’s:

    Refreshing
    Subtly sweet
    Hydrating
    Quick & easy
    & Vacay in a cup!

    It’s the ultimate summer drink for parties, poolside, and beyond!

    More Refreshing Summer Drinks

    If you try this recipe, let us know! Leave a comment, rate it, and don’t forget to tag a photo @minimalistbaker on Instagram. Cheers, friends!

    Side view of glasses of cucumber lime agua frescas with sliced cucumbers and fresh mint

    Prep Time 10 minutes

    Total Time 10 minutes

    Servings 4 (~1 cup servings)

    Course Beverage

    Cuisine Gluten-Free, Mexican-Inspired, Vegan

    Freezer Friendly 1 month

    Does it keep? 1-2 Days

    Prevent your screen from going dark

    • 3 cups water
    • 2 medium cucumbers, roughly chopped (2 medium cucumbers yield ~4 cups or 450 g chopped)
    • 3 medium limes (3 medium limes yield ~1/4 cup or 60 ml juice)
    • 2-3 Tbsp agave nectar or maple syrup
    • 1 small handful fresh mint leaves (optional but highly recommended // 1 small handful yields ~15-20 leaves)
    • Ice cubes (for serving)
    • Before blending, we recommend tasting your cucumbers to see if the peel is bitter. We left our peels on for vibrant color and flavor, but bitter peels should be removed.

    • Add all ingredients to a blender (starting with the lesser amount of agave or maple syrup) and blend until completely smooth. Pour through a fine mesh strainer over a large bowl or measuring cup to remove pulp, using a spoon to move it around and speed up straining as needed. Taste and adjust, adding more agave or maple syrup for sweetness or more lime juice for tartness.

    • Serve chilled, over ice. Leftovers keep for 1-2 days in the refrigerator, or can be frozen into ice cubes or popsicle molds!

    *Nutrition information is a rough estimate calculated with the lesser amount of agave nectar and without optional ingredients.

    Serving: 1 cup Calories: 53 Carbohydrates: 13.2 g Protein: 0.8 g Fat: 0.2 g Saturated Fat: 0 g Polyunsaturated Fat: 0.04 g Monounsaturated Fat: 0 g Trans Fat: 0 g Cholesterol: 0 mg Sodium: 3 mg Potassium: 177 mg Fiber: 1.3 g Sugar: 9.2 g Vitamin A: 23 IU Vitamin C: 9 mg Calcium: 19 mg Iron: 0.3 mg


    Source link

  • Turkey Burrito Rice Bowls – Spend With Pennies

    Turkey Burrito Rice Bowls – Spend With Pennies


    About the author

    Holly Nilsson is the creator of Spend With Pennies, where she creates easy, comforting recipes made for real life. With a passion for nostalgic flavors and simplified techniques, Holly helps busy home cooks create delicious meals that always work. She is also the author of “Everyday Comfort,” which promises to inspire even more hearty, home-cooked meals.
    See more posts by Holly

    Follow Holly on social media:

    pinterest facebook twitter instagram


    Source link

  • Hatch Chile Deviled Eggs %

    Hatch Chile Deviled Eggs %


    A Spicy Twist on a Classic Party Favorite

    After Easter, it’s not uncommon to find yourself with a fridge full of hard-boiled eggs. But even if you don’t have leftovers on hand, these Hatch Chile Deviled Eggs are worth making from scratch. They’re a bold, flavor-packed upgrade to the traditional deviled egg—and an instant hit at any party or gathering. And of course, deviled eggs are typically a naturally gluten-free recipe and this one is no exception.

    What makes them special? A can of Hatch diced green chiles (mild or hot—your call) adds smoky heat and Southwestern flair, while a dash of cumin and hot sauce brings just the right amount of kick. Creamy, tangy, and perfectly spiced, the filling is both unexpected and addictive.

    These deviled eggs are naturally gluten-free, dairy-free, and party-perfect. Whether you’re hosting a spring brunch, prepping appetizers for a BBQ, or just looking for a way to dress up your egg stash, this fun twist is sure to disappear fast. Garnish with paprika and fresh cilantro, and you’ve got a dish that’s as eye-catching as it is delicious!

    Hatch-Chile-Deviled-Eggs-Ingredients-1

    What You Need:

    • 12 hardboiled eggs, peeled and cooled
    • ½ cup mayonnaise
    • 1 (4-ounce) can Hatch Diced Green Chiles, mild or hot, drained
    • 1 teaspoon Dijon mustard
    • ½ teaspoon kosher or fine sea salt (or to taste)
    • ¼ teaspoon ground cumin
    • 2–3 dashes hot sauce
    • Paprika, to garnish
    • Fresh cilantro leaves, to garnish

    Hatch-Chile-Deviled-Eggs-Mixing-Filling-2

    Mixing the Filling & Assembling the Eggs

    Once your eggs are peeled and cooled, slice them in half lengthwise and gently remove the yolks into a bowl. Mash the yolks with a fork until smooth, then stir in the mayonnaise, green chiles, mustard, salt, cumin, and hot sauce. The result should be creamy and well blended, with a spicy, savory punch.

    Use a spoon or piping bag to neatly fill the egg whites with the yolk mixture. For an extra pro touch, use a star tip on your piping bag to create a decorative swirl. Chill the eggs until ready to serve, and don’t forget the final sprinkle of paprika and fresh cilantro leaves to finish them off.

    Hatch-Chile-Deviled-Eggs-Recipe-2

    Pro Tip: How to Make the Perfect Hardboiled Egg

    Start with cold water and place your eggs in a single layer in a saucepan. Cover them with water by about an inch, then bring to a boil over medium heat. Once the water reaches a gentle boil, cover the pot, turn off the heat, and let the eggs sit for 10–12 minutes. Transfer them immediately to an ice bath to cool—this not only stops the cooking process but also makes peeling much easier.

    Hatch-Chile-Deviled-Eggs-Recipe

    Whether you’re using up Easter eggs or making these for a special occasion, Hatch Chile Deviled Eggs are a crowd-pleasing twist that brings the heat in all the right ways. And it is always a great idea to have gluten free options for guests when emtertaining.


    Hatch Chile Deviled Eggs

    Servings: 24

    Calories: 72kcal

    Author: Gluten Free & More

    Nutrition Facts

    Hatch Chile Deviled Eggs

    Amount Per Serving

    Calories 72
    Calories from Fat 54

    % Daily Value*

    Fat 6g9%

    Saturated Fat 1g5%

    Trans Fat 0.01g

    Polyunsaturated Fat 2g

    Monounsaturated Fat 2g

    Cholesterol 95mg32%

    Sodium 130mg5%

    Potassium 38mg1%

    Carbohydrates 1g0%

    Fiber 0.1g0%

    Sugar 0.3g0%

    Protein 3g6%

    Vitamin A 139IU3%

    Vitamin C 2mg2%

    Calcium 15mg2%

    Iron 0.4mg2%

    * Percent Daily Values are based on a 2000 calorie diet.


    Disclaimer: All nutrition facts on Gluten Free & More are meant only as a guide and may differ depending on product brands used or ingredient substitutions. Some errors may occur, so you are encouraged to confirm the recipe’s ingredient and nutrition suitability for your own diet.

    Have you tried this recipe? Give it a star rating and let us know your thoughts in the Ratings & Reviews section below.


    Source link

  • Pickling Spice Recipe – The Daring Gourmet

    Pickling Spice Recipe – The Daring Gourmet


    This post may contain affiliate links. See my disclosure policy.

    Behind every delicious pickled vegetable is a great pickling spice. And this special blend has the ability to transform everyday vegetables into tangy, zesty, crunchy morsels of pure delight. This homemade pickling spice recipe combines a gourmet variety of fabulous spices to create an extraordinary blend of flavors. Let the pickling begin!

    pickling spice recipe ingredients diy homemade gourmet blend all purpose best easy

    The Magic of Pickled Vegetables

    I’ve been canning and pickling for years, and my love for gardening definitely plays a role in that. Being able to bring in a fresh harvest of garden produce and transform it into something zesty, flavorful and crunchy that lasts throughout the year is incredibly satisfying.

    Having a variety of pickled vegetables and condiments on hand makes cooking and entertaining all the more fun. Do you have a pasta or potato salad that needs some embellishing or are you throwing some burgers on the grill? Open up a jar of dill pickle relish, sweet pickle relish or corn relish. Laying out a cheese and charcuterie spread for a party? Grab a jar of pickled pepperoncini peppers, English pickled onions, pickled asparagus, pickled green beans, pickled okra and arrange them on the board. Making a sandwich and want some yummy flavor crunch? Open up a can of bread and butter pickles or giardiniera. Or if you simply have the munchies, open up a jar of pickled carrots or pickled beets and dig in!

    This homemade pickling spice is the perfect all-purpose blend for your pickling needs!

    What is Pickling Spice?

    Pickling spice is a blend of spices that is used for pickling vegetables. It is added to vinegar and water to make a pickling brine. Every canner and pickler needs a good homemade pickling spice recipe and I’ve developed a gourmet pickling blend that combines some seriously fabulous spices in just the right ratios to infuse your pickled veggies with incredible flavor.

    And it’s not just vegetables, this is also the pickling spice you’ll need to make your own corned beef and it will elevate your homemade corned beef to delicious flavor heights! I used this blend to make our corned beef for this past St. Patrick’s Day dinner and it was a hit. Check out the bottom of this post for info on how to use this homemade pickling spice.

    pickling spice recipe ingredients diy homemade gourmet blend all purpose best easy

    What is in Pickling Spice?

    There is no “one” way to make pickling spice. It can be as simple or as elaborate as you choose to make it. But you know me, I am all about FLAVOR and when I can find ways to maximize flavor I do it. No, that doesn’t mean that the recipe is any more difficult, it just means taking the time to source the additional ingredients. And I would only recommend you doing that if I felt the end result was worth it. And I am always of the opinion that you can’t have too many spices in your cabinet. Spices are the magic behind great tasting food! So let’s take a look at what goes into this gourmet pickling spice:

    • Black Peppercorns
    • Allspice Berries
    • Yellow and Brown Mustard Seeds – you can use one or the other if you don’t have both. Yellow is the classic choice for pickling with its mild flavor, and brown adds just a bit of robust punch.
    • Coriander Seeds
    • Dill Seeds – dill seeds pack more flavor than dill weed and are better suited for pickling, especially long-term storage.
    • Star Anise
    • Cloves – use whole cloves, not ground, to avoid making the brine murky.
    • Juniper Berries – the Germans and Swedes know how to incorporate these in their cooking and they’re sadly overlooked in many other countries. They contribute an old-fashioned flavor reminiscent of fruity citrus and pungent, piney spiciness almost bordering sweetness. If you don’t want to use these simply omit.
    • Cardamom Seeds
    • Red Pepper Flakes
    • Dried Ginger Root – Avoid using ginger powder as it will make the pickling brine murky and will cause your pickled vegetables to turn color over time. You can easily make your own dried ginger root by peeling and slicing it, spreading the slices out on a lined baking sheet, and dehydrating it in the oven at 170-180 F for a few hours until it’s dried out, let it cool, and then break it up into small pieces either by hand or pulsing it in a spice grinder.
    • Cinnamon Stick – avoid using ground cinnamon to prevent the brine from being murky and discoloring the vegetables.
    • Bay Leaves
    pickling spice recipe ingredients diy homemade gourmet blend all purpose best easy

    Homemade Pickling Spice Recipe

    Let’s get started!

    Break up the star anise, cinnamon stick and bay leaves into small pieces and set aside.

    For maximum flavor I like to toast the spices. In a dry skillet over medium heat, toast the whole spices (leave out the ginger, bay leaves and pepper flakes) until very fragrant. Be careful not to let them burn. Let cool completely.

    Combine all of the ingredients.

    pickling spice recipe ingredients diy homemade gourmet blend all purpose best easy

    Transfer the pickling spice to an airtight jar and store it in a cool, dark place. It will keep for several months.

    This makes roughly 1/2 cup of pickling spice.

    pickling spice recipe ingredients diy homemade gourmet blend all purpose best easy

    How to Use Pickling Spice

    Use this picking spice in any recipe that calls for it. As a general guideline for making pickled vegetables, follow this procedure:

    • To make the brine, use equal parts water and vinegar.
    • Depending on the recipe add sugar and salt for flavor and balance.
    • Combine the water, vinegar, salt and sugar in a pot and boil until the salt and sugar are dissolved.
    • Use 1 tablespoon of pickling spice for every quart of pickling brine. You can place a tablespoon of pickling spice in each quart jar, add the vegetables to be pickled, and pour the hot brine over them. Seal the jars and follow the recipe instructions for canning.

    This homemade pickling spice blend pairs wonderfully with any of the following vegetables: cucumbers, asparagus, carrots, beets, cauliflower, green beans, peppers, radishes, okra, zucchini, cabbage, beets, onions, and more.

    Pickling Spice for Corned Beef

    This homemake pickling spice makes an absolutely phenomenal corned beef! For a standard 5-pound brisket you’ll need 1/4 cup of pickling spice for the brine and then an additional tablespoon to add to the water when you cook the brisket.

    Enjoy!

    pickling spice recipe ingredients diy homemade gourmet blend all purpose best easy

    For more delicious homemade spice blends try my:

    pickling spice recipe ingredients diy homemade gourmet blend all purpose best easy

    Pickling Spice Recipe

    A gourmet pickling blend that will transform your vegetables into tangy, zesty, crunchy morsels of pure delight and also enable you to create the most delicious homemade corned beef!

    Prep Time 5 minutes

    Cook Time 5 minutes

    Total Time 10 minutes

    Servings 8

    Calories 29 kcal

    • In a dry skillet over medium heat, toast the whole spices (except for the ginger, bay leaves and pepper flakes) until very fragrant. Be careful not to let them burn. Let cool completely. Toasting the spices will greatly enhance their flavor.Combine all of the ingredients and store in an airtight jar in a dark, cool place. Will keep for several months. Makes roughly 1/2 cup pickling spice.
    Make your own dried ginger root by peeling and slicing it, spreading the slices out on a lined baking sheet, and dehydrating it in the oven at 170-180 F for a few hours until it’s dried out, let it cool, and then break it up into small pieces either by hand or pulsing it in a spice grinder.
    Avoid using the powdered form of any of these spices as it will make the pickle brine murky and discolor the vegetables.  

    Serving: 1tablespoonCalories: 29kcalCarbohydrates: 4gProtein: 1gFat: 2gSaturated Fat: 0.1gPolyunsaturated Fat: 0.4gMonounsaturated Fat: 1gSodium: 7mgPotassium: 82mgFiber: 2gSugar: 0.2gVitamin A: 94IUVitamin C: 1mgCalcium: 45mgIron: 1mg

    kimberly killebrew the daring gourmet

    Hi, I’m Kimberly Killebrew and welcome to Daring Gourmet where you’ll find delicious originals, revitalized classics, and simply downright good eats from around the world! Originally from Germany, later raised in England, world-traveled, and now living in the U.S., from my globally-influenced kitchen I invite you to tour the world through your taste buds!

    Read more about me…


    Source link

  • Super Juicy Oven Baked Hamburgers

    Super Juicy Oven Baked Hamburgers


    Yep, you read that right! Hamburgers baked in the oven are a breeze to make and ready to eat in under 30 minutes. The open-faced burgers are cooked right on the buns, so all that’s left for you to do is pile on the toppings.

    Baked hamburgers with cheese on cutting board

    These baked burgers were my dad’s specialty, especially for fast dinners, because they’re baked in the oven instead of on the grill, with no flipping or babysitting.

    When my dad cooked them, he was very precise, making even cuts of cheese squares to top these hamburgers to top french rolls or ciabatta. (We still call them hamburgers even though they’re topped with cheese because that’s what my dad does.)

    It all looks way too simple to taste as delicious as it does. The secret is the pat of butter atop each oven-baked hamburger that melts down into the burger meat co-mingling with Worcestershire sauce to create a juicy, lickable drip down each side of your burger-loving face.

    Heidi’s Tips for Recipe Success

    • Use ciabatta rolls for a crisped bottom that acts as sponge to soak up all the flavorful juices from the seasoned ground beef patties that are baked directly on the buns.
    • Use a burger press to shape the ground beef evenly.
    • Because ground beef shrinks as it cooks, form the patties to cover the buns to the edges.
    What's in Baked Hamburgers with cheese recipe ingredients

    What’s in This Recipe?

    • Lean ground beef — since the burgers cook on top of the buns, you’ll want to use lean ground beef or else they will taste greasy
    • Sourdough or ciabatta rolls — the burgers release a fair bit of juice while they bake, so you need a hearty roll underneath the patties
    • Worcestershire sauce — adds so much umami flavor to the burger meat
    • Garlic salt — seasons the burgers while infusing them with a light garlic flavor
    • Black pepper — freshly ground is preferred
    • Butter — the secret ingredient that makes for the juiciest, most succulent burgers
    • Cheddar cheese — we love sharp cheddar, but you can use any melting cheese you like (Colby Jack, pepper jack, gouda, etc.)
    Ground beef smashed into patties for hamburgers

    How to Bake Burgers in the Oven

    1. Preheat the oven. Before starting on the baked burgers, preheat the oven to broil and set the rack in the middle of the oven.
    2. Shape the patties. Divide the ground beef into eight portions and form each into a patty. I use a burger press to make even patties and press the beef to the edges of the buns.
    Baked hamburgers with worcestershire sauce and butter
    1. Assemble the burgers for baking. Place the rolls face up on a baking sheet and top each with a burger patty. Drizzle Worcestershire sauce, then garlic salt, pepper, and onion powder. Top with a pat of butter.
    Baked hamburgers on baking sheet plain and with cheese
    1. Bake, then add cheese. Bake the burgers for about 25 minutes, then top with a slice of cheese and return to the oven until it melts (about 3 minutes).

    Heidi’s Tip: If you prefer your baked hamburgers to be more well done, simply leave them in the oven for a couple extra minutes before topping them with cheese.

    1. Add your favorite toppings. Go crazy with the toppings or enjoy as is. I like simple ketchup and mustard, and that’s it.

    Toppings to Try

    Stick with the classic burger toppings or think outside the box when garnishing these insanely juicy open-faced baked hamburgers.

    DW’s Tip (aka Heidi’s dad): Instead of butter, slather the tops of the burgers with mayonnaise before baking. It adds juicy flavor in much the same way.

    Baked Hamburgers on baking sheet

    FAQs

    Can this recipe be made as turkey burgers?

    You might be able to, but I’ve only ever made these baked hamburgers with ground beef.

    If you do try to make these baked burgers as turkey burgers, you MUST cook the meat all the way through. You can eat ground beef medium-rare, but it’s unsafe to eat undercooked poultry.

    Or, make my Greek turkey burgers with tzatziki sauce instead!

    Can spices be added to the burger meat mixture?

    My dad has always made his baked hamburger patties using plain ground beef, so I’ve just never mixed spices into the burger patties before.

    But you can certainly mix in finely diced onion, jalapeño, various spices, and more.

    Can this recipe be made with regular hamburger buns?

    You need something sturdy beneath the burger patties that will soak up juices but not fall apart. I think regular hamburger buns would be too soft for this recipe, but ciabatta or sourdough is perfect.

    Storage Tips

    The hamburgers are best straight from the oven, but leftovers will last up to 2 days. The buns will soften and could become soggy as they sit in the fridge, so keep that in mind.

    Baked Hamburger with cheese on plate with chips and pickles

    What to Serve With Baked Hamburgers

    If you make this recipe, please let me know! Leave a ⭐️⭐️⭐️⭐️⭐️ rating on this recipe below and leave a comment, take a photo and tag me on Instagram with #foodiecrusheats.

    Baked hamburgers with cheese on cutting board
    Panna cotta topped with vibrant red berry sauce and a sprig of mint on a dark plate.
    4 hours 15 minutes

    Panna Cotta

    a beautiful slice of tiramisu on a white plate garnished with some shaved chocolate.
    20 minutes

    The Best Tiramisu

    cinnamon sugar donut twists freshly made on a piece of parchment paper.
    3 hours

    Cinnamon Sugar Donut Twists

Ricotta zeppole stacked in a parchment-lined basket, being dusted with powdered sugar, with coffee cups and jam in the background.

Frequently Asked Questions

Can I fill these donuts?

Absolutely. Slice them open like little sandwich buns and stuff with jam, Nutella, pastry cream—whatever makes your heart (and waistband) happy. Just make sure they’re cooled a bit first or you’ll have a hot mess on your hands. Literally.

Can I air fry them instead?

Not this recipe, no. The batter is way too soft and loose—you’d need a much thicker dough to even stand a chance. If you try to air fry this version, you’ll just end up with sad, flat blobs. Real talk: these were made to be fried the old-fashioned way. It’s faster, it tastes better, and your kitchen will smell like an Italian bakery instead of dashed dreams.

Can I make the batter ahead?

Nope. This is a mix-and-go situation. If you let the batter sit around, the baking powder will lose its mojo and your donuts will fry up sad and flat. You deserve fluffy.

How do I keep them fresh?

Short answer: you don’t. Zeppole are best eaten fresh—like, within an hour. If you have to save them, keep them loosely covered at room temperature and pop them in the oven at 350°F (175°C) for a few minutes to crisp back up. Just know… they’re never as good as that first glorious bite.

Can I freeze them?

Honestly? Not recommended. Fried donuts just don’t freeze well. They turn weirdly chewy and sad. If you must, freeze the raw batter in dollops on a baking sheet, then fry straight from frozen. But fresh is king here.

Stack of golden ricotta zeppole dusted with powdered sugar, with one cut open and filled with vibrant red raspberry jam.

Try These Delicious Donuts Next

Close-up of golden ricotta zeppole stacked high on a plate, dusted with powdered sugar, with one cut open revealing the airy center.

Easy Ricotta Zeppole (Italian Donuts)

Prep 15 minutes

Cook 15 minutes

Total 30 minutes

Fluffy Ricotta Zeppole, fried to golden perfection and buried under powdered sugar — ready in just 30 minutes!

Instructions 

  • In a large bowl, whisk together the flour, baking powder, salt, and sugar.

  • In a separate bowl, whisk the eggs, ricotta cheese, vanilla extract, and milk until smooth.

  • Gradually add the wet ingredients to the dry ingredients, mixing until just combined. The batter will be thick and sticky.

  • Heat about 2 inches of vegetable oil in a deep, heavy-bottomed pot or skillet to 350°F (175°C). Use a candy thermometer to maintain the temperature.

  • Using a small cookie scoop or two spoons, drop tablespoon-sized portions of the batter into the hot oil. Do not overcrowd the pot. Fry for 2-3 minutes per side, or until golden brown and puffed. Use a slotted spoon to turn them as they cook.

  • Remove the zeppole with a slotted spoon and drain them on a plate lined with paper towels.

  • Once slightly cooled, dust the zeppole generously with powdered sugar.

  • Serve warm, with optional sides like chocolate sauce, honey, or fruit preserves for dipping.

Notes

  1. Ricotta: Use full-fat ricotta. If it’s very wet, drain it a little in a fine mesh sieve so your batter isn’t too loose.
  2. Oil Temperature: Keep the oil steady at 350°F (175°C). Too cold = greasy. Too hot = burnt on the outside, raw inside. A cheap candy thermometer is worth it.
  3. Don’t overcrowd: Fry just a few at a time. Adding too many drops the oil temp fast and gives you sad, soggy donuts.
  4. Best served fresh: Zeppole are at their peak warm and fluffy, right after frying. They don’t store well—make them, eat them, no regrets.
  5. Optional fillings: Once cooled, slice and fill with jam, Nutella, or pastry cream for a next-level treat.

Nutrition Information

Serving: 1zeppoleCalories: 69kcal (3%)Carbohydrates: 10g (3%)Protein: 3g (6%)Fat: 2g (3%)Saturated Fat: 1g (6%)Polyunsaturated Fat: 0.2gMonounsaturated Fat: 1gTrans Fat: 0.01gCholesterol: 21mg (7%)Sodium: 114mg (5%)Potassium: 69mg (2%)Fiber: 0.3g (1%)Sugar: 1g (1%)Vitamin A: 73IU (1%)Vitamin C: 0.01mgCalcium: 46mg (5%)Iron: 1mg (6%)

Notice: Nutrition is auto-calculated for your convenience. Where relevant, we recommend using your own nutrition calculations.


[ad_2]
Source link

  • Social Media Round-Up Blog: April 2025

    Social Media Round-Up Blog: April 2025


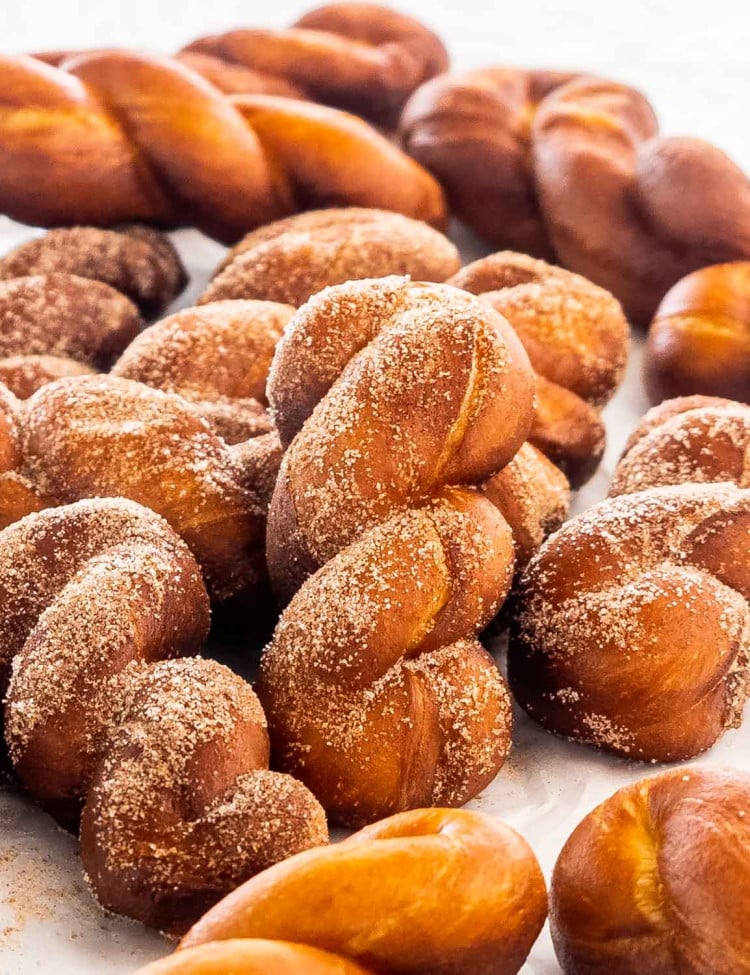
    We are so excited for longer days, more sunshine, and summer vibes ahead. It’s the perfect time to refresh your pantry and treats stash. Our Gluten-Free Product Roundup is filled with bread, sweets, and other delicious goodies we are loving right now. Just perfect for this new season ahead! 

    Flax4Life-March25-Recipe-2

    Flax4Life

    Flax4Life is a family-owned bakery that makes some of the best-tasting, nutrient-packed gluten-free treats out there—seriously, I crave them. All of their goodies are dairy-free, nut-free, and made with flax, which means they’re naturally full of fiber and healthy protein. Whether it’s their brownies, muffins, or cookies, I always feel good—physically and mentally—after enjoying them. Not only do they satisfy my sweet tooth, but I also know I’m supporting my heart, bones, digestion, and overall wellness with every bite.

    Shop Flax4Life now

    Canyon-Bakehouse-March25-Recipe-2

    Canyon Bakehouse

    Canyon Bakehouse is a total saving grace for bread lovers like me. I’m all about sandwiches year-round, but finding gluten-free bread that’s safe for celiacs and the right size for a real sandwich? That’s no easy task. It’s why I love Canyon Bakehouse—not just for their delicious breads, but for their dedication to making gluten-free eating feel just as satisfying as the real thing. They even have specialty loaves like sourdough and cinnamon raisin, which instantly take me back to childhood memories of toast with butter and sugar. It’s a sweet, nostalgic treat—only now it’s safe and celiac-friendly.

    Shop Canyon Bakehouse now

    Dr.-Liia-March25-Recipe-2

    Epilynx by Dr. Liia

    If you’re like me and have super sensitive skin—especially around the eyes—Epilynx by Dr. Liia is a total game changer. This luxurious yet affordable skincare and makeup line is completely gluten-free, nut-free, dairy-free, hypoallergenic, and vegan, making it perfect for anyone prone to irritation or allergic reactions. I often get swollen eyelids from hidden irritants in makeup and skincare, but with Epilynx, I can wear their eyeliner all day without a single itch or flare-up—even during the hot, sweaty summer months. Dr. Liia’s range has everything you need to glow safely and confidently, from richly pigmented eyeshadows and smooth lipsticks to skin-loving day creams and serums.

    Shop Epilynx by Dr. Liia

    Gluten-Free-Prairie-March25-Recipe-2

    Gluten-Free Prairie

    Gluten-Free Prairie is a family-owned company on a mission to create safe, delicious oat-based goodies without the risk of cross-contamination—something that’s all too common when oats are processed in facilities that also handle wheat. They go the extra mile by growing their oats in clean fields and using facilities that process only oats, ensuring everything is truly gluten-free. Their Sugar Cookie Mix is a fan favorite and an easy, fun way to bake safe treats for everyone this summer.

    Shop Gluten-Free Prairie now

    LivOn-Labs-March25-Recipe

    LivOn Labs

    Start getting the most out of your supplements with LivOn Labs. They create their vitamins with advanced liposomal technology to help bypass the digestive system and deliver nutrients straight to your bloodstream. This allows for better absorption, especially for those with celiac disease who may struggle to absorb nutrients through the gut. The gel-like formula is gentle on the stomach, free of artificial flavors, and highly effective. From magnesium to other essential nutrients, LivOn Labs makes it easy to support your body, boost your mood, and keep your brain relaxed and balanced—all summer long.

    Shop LivOn Labs now

    Oggi-Foods-March25-Recipe-1

    Oggi Foods

    Craving an easy frozen pizza night without sacrificing authentic Italian flavor? Oggi has you covered! Born from generations of family tradition in Naples, Italy, Oggi brings gourmet, gluten-free pizza to your table with classic techniques and next-level taste. Their pies are a true standout—with crispy crusts, bubbly cheese, and mouthwatering toppings that make it hard to believe they’re gluten-free.

    Shop Oggi Foods now

    Taste-Republic-March25-Recipe-2

    Taste Republic

    Taste Republic is on a mission to ensure everyone can enjoy pasta that actually tastes like pasta—no matter your dietary needs or lifestyle. They’ve created a game-changing line of gluten-free, grain-free options that don’t compromise on flavor or texture. Their cauliflower pasta is one of our favorites because it’s light, wholesome, and ready in minutes. The perfect base for anything from hearty sauces to fresh summer veggies. But what makes them truly special is their belief that everyone deserves access to great pasta. No. Matter. What.

    Shop Taste Republic now

    Odd-Bagel-April25-Recipe-2

    Odd Bagel

    Odd Bagel is on a mission to reinvent your bagel experience—gluten-free style. Crafted to deliver that iconic chewy crust and dense, satisfying bite of a traditional boiled bagel, these gems are perfect, straight from the fridge or freezer. Whether you’re keeping it simple with a schmear of cream cheese or building the ultimate sandwich, Odd Bagel brings all the flavor and texture you’ve been missing. One of our favorites? The Everything Bagel—loaded with sesame, poppy seeds, garlic, and onion for that crave-worthy combo you know and love.

    Shop Odd Bagel now

    Superfree-Bakehouse-Brownies-Recipe-(1)

    Superfree Bakehouse

    Superfree Bakehouse is created for those struggling with multiple food allergies—especially gluten. The entire product line is free from the top allergens, non-GMO, and made without preservatives, seed oils, or chemical additives! Who can beat that? Clean ingredients and real flavor, Superfree Bakehouse is always cooking and creating products easy and safe enough to share with everyone you love. Dive into some of their desserts, like these brownies and savor every bite, worry-free.

    Shop Superfree Bakehouse now

    ChildLife-Berry-Yogurt-Parfait-Recipe

    Childlife Essentials

    Childlife Essentials creates all-natural, gluten-free, and non-GMO formulas to help kids easily and safely absorb their vitamins. They have all the daily essentials, immune boosters, probiotics, herbs, and more. One of our favorites is their superstar pure DHA supplement to help support healthy brain growth and function for kids. It’s ready for the body to use and a great alternative to other oils that may lack taste, purity, or thorough testing.

    Shop Childlife Essentials now

    Top-Fox-March25-Recipe-2-(1)

    Top Fox

    Who doesn’t love a good snack? We certainly do, and so does Top Fox! They created clean, high-protein snacks to help fuel your on-the-go lifestyle. Their unique pop-roasted pumpkin seeds come in a variety of flavors, making it easy and tasty to share a healthy snack with others. Top Fox’s mission is to “make our world a better place, one snack at a time.”

    Shop Top Fox now

    GloryLand-Black-Rice-Noodle-Stir-Fry-Feature

    Gloryland

    Glorland is one of the first to introduce black rice to the mainstream market the best quality in the world. They are dedicated to creating products and a work environment safe and free from gluten. With ongoing research to create new and healthier alternatives to conventional noodles, but also delicious and nutritious. One of our favorites is the Black Rice Noodles to use for our soups, stir-fries, and noodles soups.

    Shop Gloryland now

    Singing-Dog-Vanilla-May25-SM-Photo-10

    Singing Dog Vanilla

    Singing Dog Vanilla, yes a silly name, but this is seriously good vanilla. They mean business when it comes to the quality. This all-natural, gluten-free vanilla is made using organic and sustainable farming methods that help support fair wages for families around the world.  It’s our favorite and top choice among professionals for good reason.  Its rich, pure flavor instantly elevates any recipe. With each drop of the finest vanilla on the planet, you’re not just baking–you’re making a difference.

    Shop Singing Dog Vanilla now


    Source link