Holly Nilsson is the creator of Spend With Pennies, where she creates easy, comforting recipes made for real life. With a passion for nostalgic flavors and simplified techniques, Holly helps busy home cooks create delicious meals that always work. She is also the author of “Everyday Comfort,” which promises to inspire even more hearty, home-cooked meals. See more posts by Holly
Rotisserie chicken is easy and versatile with crisp skin and juicy meat! This recipe can be cooked on a rotisserie spit, in the oven, or the air fryer.
Flavor: Juicy and tender with a smoky, savory seasoning and crispy skin.
Technique: Dry the skin well, season all over, and tie the legs for even cooking.
Time-Saving Tip: Mix the seasoning ahead of time and store it in a jar for a quick grab-and-go rub.
Freezing: You can freeze leftover cooked chicken for up to 3 months. Perfect for soups or casseroles later!
Ingredient Tips For Rotisserie Chicken
Chicken: Choose a whole chicken about 3.5 to 4 pounds with the skin intact. If cooking in an air fryer, be sure the whole chicken will fit.
Oil: A little oil helps the seasonings cling to the skin, making it extra crispy. Any oil or cooking spray works. Melted bacon grease will give rotisserie chicken a smoky flavor.
Seasonings: Use your favorite seasoning blend, my chicken seasoning, or keep it simple with seasoned salt.
Cutting Rotisserie Chicken
Always let rotisserie chicken rest after cooking so the juices can recirculate into the meat. Chicken should reach an internal temperature of 165°F before carving.
Storage and Leftovers
The best way to store leftover rotisserie chicken is to remove the meat from the carcass. Keep it in a covered container in the refrigerator for up to 4 days or frozen for up to 4 months.
Did you enjoy this easy Rotisserie Chicken? Leave a rating and a comment below!
5 from 80 votes↑ Click stars to rate now! Or to leave a comment, click here!
Rotisserie Chicken
This easy rotisserie chicken recipe uses simple spices and a whole chicken to create juicy, flavorful meat with crispy skin—perfect for meals all week long.
Prep Time 15 minutesminutes
Cook Time 1 hourhour12 minutesminutes
Resting Time 10 minutesminutes
Total Time 1 hourhour37 minutesminutes
Prevent your screen from going dark
In a small bowl, combine paprika, smoked paprika, garlic powder, onion powder. Add 1 teaspoon salt and ½ teaspoon pepper (more or less to taste) and mix well.
To prepare the chicken, dab the skin dry with paper towels.
Rub the outside of the chicken with olive oil and season generously with the spice mixture.
Gently fold the wings behind the chicken. Using kitchen twine, tie the legs together. Ensure the cavity is empty.
To Cook on a Rotisserie
Center the chicken on a rotisserie spit. If using a grill rotisserie, preheat to medium heat, 350°F. (see notes for oven directions).
Cook chicken for 18-22 minutes per pound, or until the chicken reaches 165°F on a meat thermometer. A 3.5lb chicken will cook for 60-80 minutes.
Once the chicken has reached the right temperature, turn off the heat and allow the chicken to rotate for 15 minutes without heat.
Remove from the rotisserie and serve.
To Roast in the Oven
Preheat oven to 450°F. Place chicken, breast-side up, in a cast iron skillet or in a small dish.
Roast 12 minutes, reduce heat to 350°F and cook an additional 60-70 minutes or until chicken reaches 165°F.
Rest 15 minutes before carving.
Air Fryer: To cook the chicken in the air fryer, season as directed above and follow our air fryer whole chicken recipe. Seasoning: Chicken can be seasoned with any spice mixture. You can cook more than one chicken at a time, just ensure chickens are not touching. Note: Read the directions for your exact rotisserie equipment for mounting directions. Electric rotisserie machines do not require preheating. Cooking Time: Cooking time can vary based on the size of the chicken and the cooking method (oven/rotisserie). Most small-sized chickens will cook in approximately an hour. For best results, use an instant-read thermometer and cook until chicken reaches 165°F. Leftover chicken can be stored in the fridge in an airtight container for up to 4 days.
Holly Nilsson is the creator of Spend With Pennies, where she creates easy, comforting recipes made for real life. With a passion for nostalgic flavors and simplified techniques, Holly helps busy home cooks create delicious meals that always work. She is also the author of “Everyday Comfort,” which promises to inspire even more hearty, home-cooked meals. See more posts by Holly
Rich, hearty, and packed with flavor—this homemade pasta sauce recipe would make a Nonna proud. A beefy sauce that is slow-simmered for a rich, savory taste. Serve it over pasta or bake it into lasagna.
Flavor: This sauce has a savory flavor with hints of herbs and a fresh tomato taste.
Skill level: Making pasta sauce is a great beginner recipe, with simple steps but it has so much flavor that it’s perfect for anyone to make!
Technique: I include a spice mix that I add to the meat, which is similar to the one I use in my homemade Italian sausage. It’s easy and adds an extra layer of flavor.
Budget tip: Add leftover veggies in Step 3 for an extra boost of flavor and nutrients.
Prep ahead: Pasta sauce freezes beautifully so double or triple the recipe for future meals.
Ingredient Tips For Pasta Sauce
Meat: I use ground beef in this recipe and mix in my own seasonings. Half of the meat can be replaced with Italian sausage.
Tomatoes: Tomatoes are the base of this sauce, I recommend a high-quality brand, I love San Marzano style tomatoes.
Sugar: A pinch sugar will balance the acidity from the tomatoes. Or, instead of sugar, add half a grated carrot to the sauce.
Seasonings: Dried Italian seasonings are added to the sauce in addition to the meat seasoning above. If adding fresh herbs, they should be added at the end of cooking so their delicate flavor doesn’t get cooked out.
Variations: Add sauteed mushrooms and onions in Step 3 or some shredded zucchini, chopped spinach, or kale for an extra bump in nutrition.
The great thing about this ground beef pasta sauce is that it’s so versatile and having some on hand for last-minute meals is a weeknight timesaver.
Besides topping a pile of spaghetti, use pasta sauce for meatball subs, lasagna, mix it with rice for stuffed peppers, or create a casserole with veggies and cheese.
Storing Leftovers
Leftover homemade pasta sauce can be kept in the refrigerator in a covered container for up to 4 days. Freeze portions in zippered bags for up to 3 months and thaw overnight in the refrigerator or reheat from frozen on medium heat on the stovetop.
Did you love this Homemade Pasta Sauce? Leave us a rating and a comment below!
4.99 from 58 votes↑ Click stars to rate now! Or to leave a comment, click here!
Ground Beef Pasta Sauce
This homemade pasta sauce is a rich, savory blend of ground meat, tomatoes, fresh herbs, and spices, simmered to perfection for a hearty meal.
Prep Time 20 minutesminutes
Cook Time 1 hourhour15 minutesminutes
Total Time 1 hourhour35 minutesminutes
Prevent your screen from going dark
In a medium bowl, combine ground beef with sage, fennel seeds, thyme, pepper, and allspice until well mixed.
Heat a large pot or Dutch oven over medium-high heat. Add the ground beef mixture, onion, and garlic, breaking up the meat with a spoon. Cook until browned, drain excess fat if needed.
Add the canned tomatoes with the liquid, tomato sauce, green bell pepper, water, Italian seasoning, bay leaves, sugar, and salt to the pot. Stir well to combine.
Bring the mixture to a boil. Reduce the heat and simmer uncovered for 1 hour or until the sauce has reached your desired consistency. Stir occasionally.
Once the sauce has thickened, stir in the chopped parsley and basil.
Remove bay leaves, taste and season with additional salt and pepper. Serve over hot pasta.
Meat seasoning: I add a seasoning similar to sausage seasoning into the meat. If preferred, half of the beef and be replaced with Italian sausage and you can skip the meat seasoning mixture. Tomatoes: While any type of canned tomatoes works well in this recipe, I love San Marzano tomatoes for their bright flavor. If using whole tomatoes, break them up with your hands as you add them to the sauce. Leftover pasta sauce can be stored in a covered container in the fridge for up to 4 days. Freeze cooled portions in zippered bags for up to 3 months. Thaw in the fridge or reheat from frozen on the stovetop over medium heat.
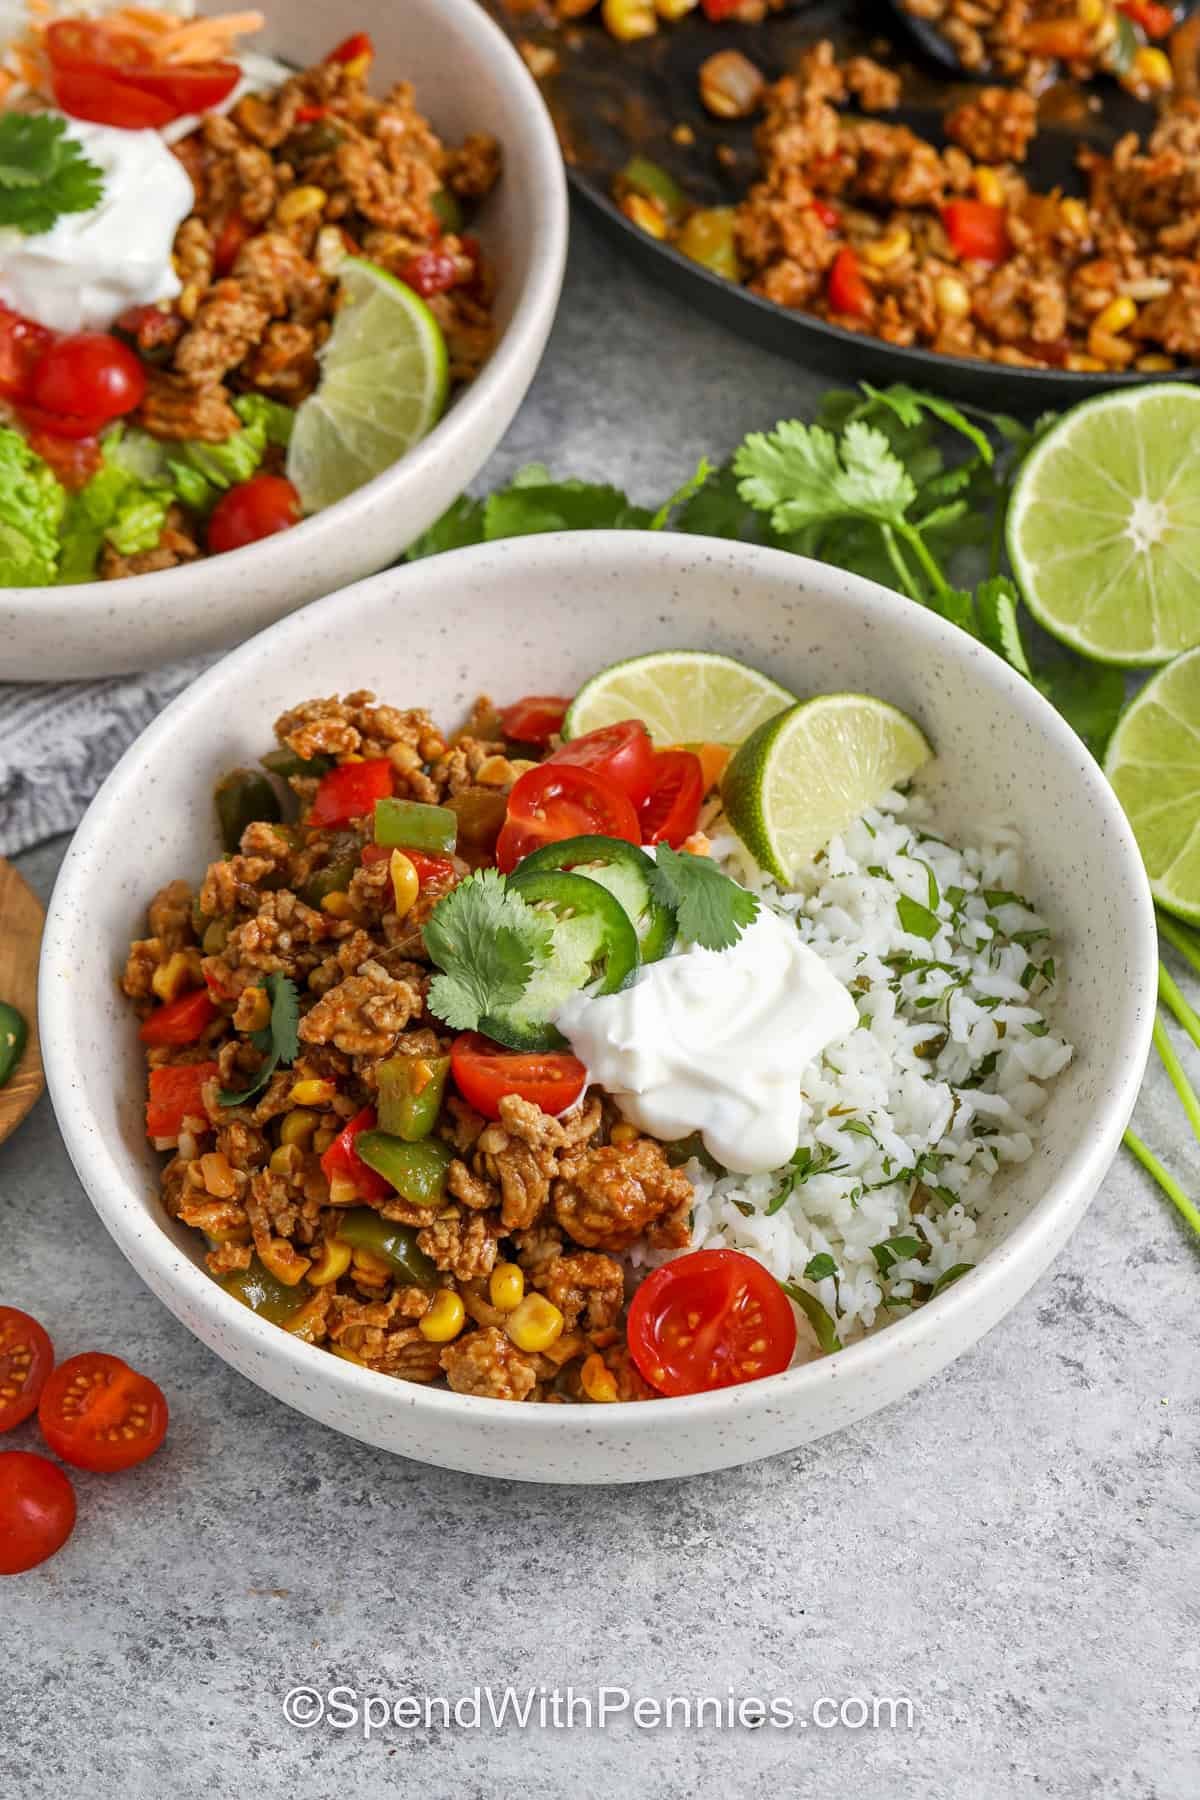
After you make your version of my Chicken Fajitas (remember, any variation is fine!), send a picture of your creation to cookingchallenge@spendwithpennies.com.
Make the recipe of the month (or a variation of it!).
Snap a photo of your creation.
Email photos to cookingchallenge@spendwithpennies.com by the last day of the month at 11:59 PM PST for a chance to win a $100 Amazon gift card.
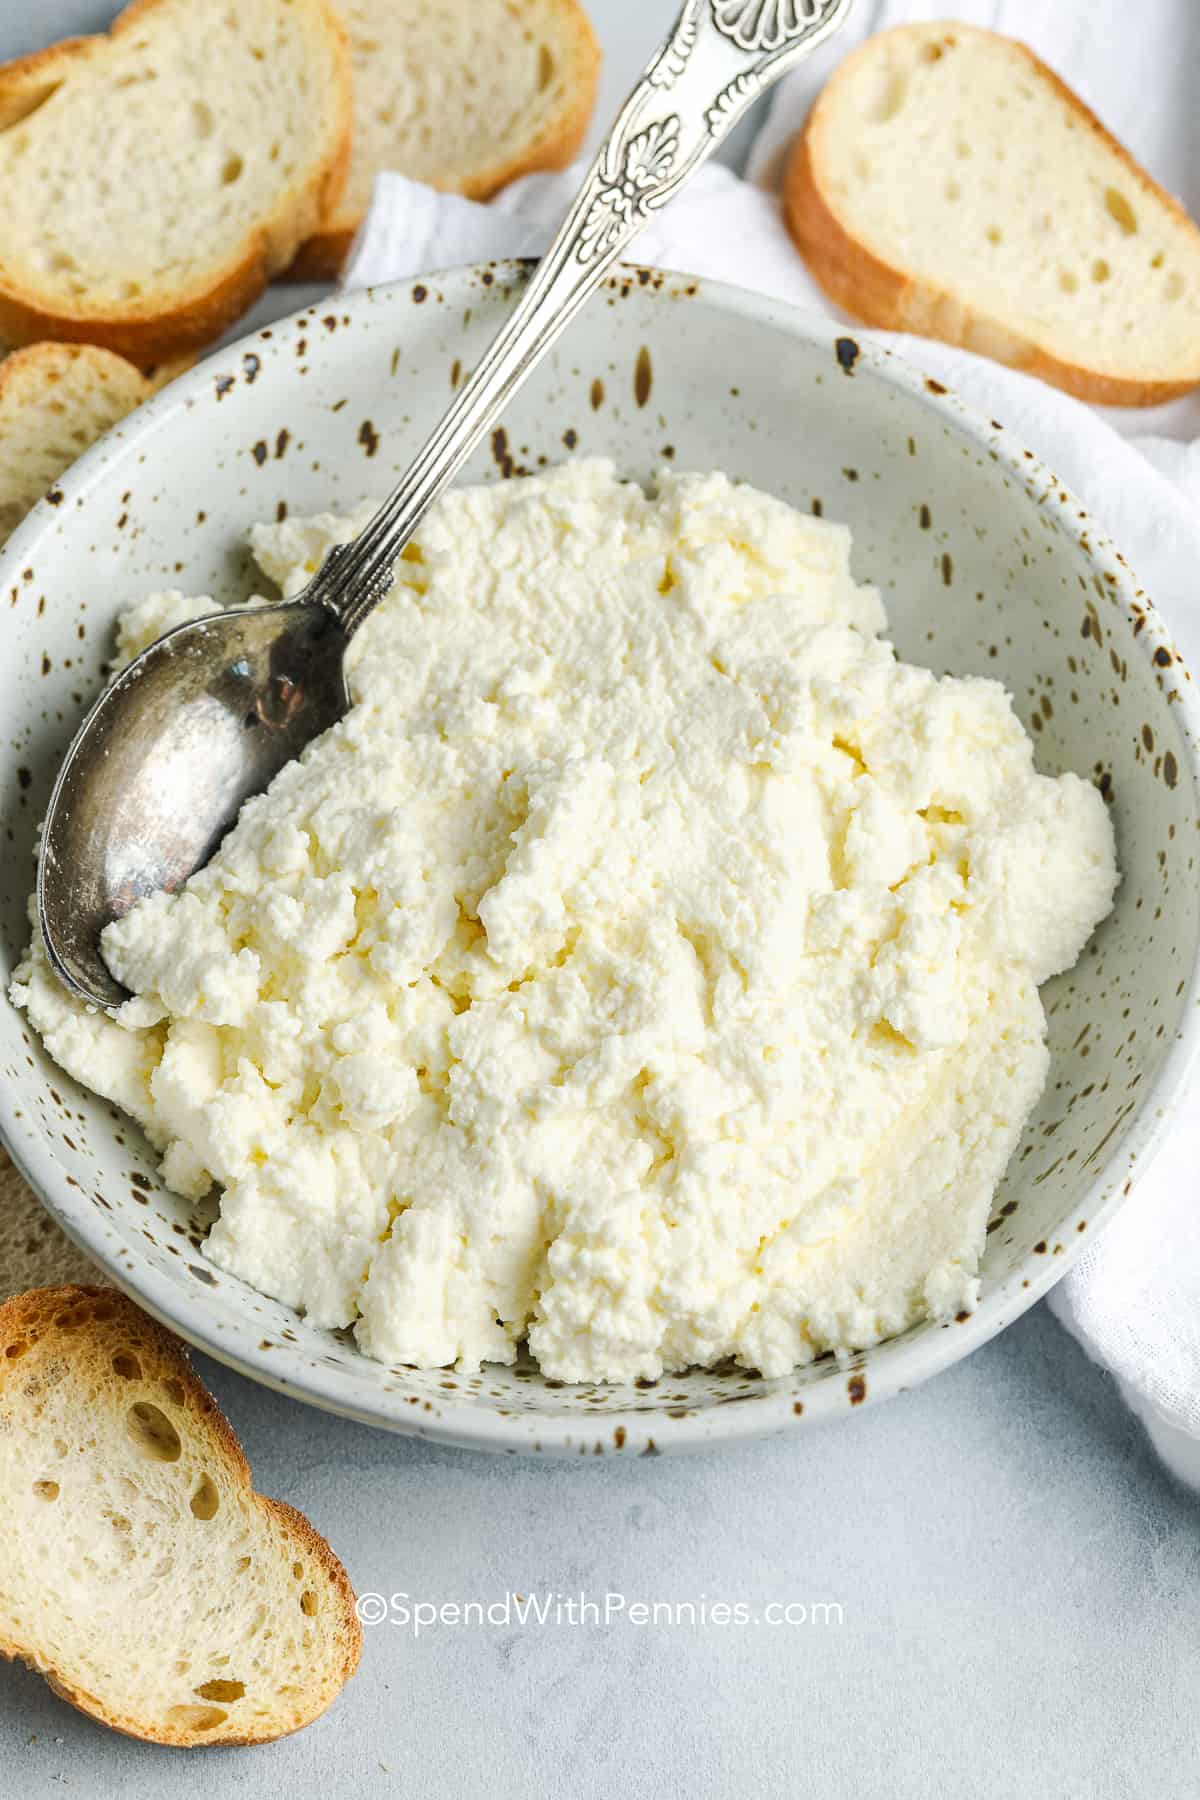
Did you know you can make homemade ricotta cheese with just 4 ingredients you likely have on hand? No special tools are required!
A Soft Homemade Cheese
Ricotta is Italian for ‘recooked’, and ricotta cheese is a soft curd cheese with a mild flavor and creamy texture.
It pairs well with bold flavors like tomato marinara, basil pesto, or roasted garlic. It’s also great with fruit and a drizzle of honey over crostini.
Ricotta vs. Cottage Cheese
While they can be used interchangeably in many recipes, cottage cheese is cheese curds, so the texture is more chunky, while ricotta is smoother. I find ricotta cheese to be a bit sweeter in flavor and richer.
What You’ll Need
Milk: The base of this ricotta cheese recipe is milk. I use cow milk, but it can also be made with goat, sheep, or buffalo milk. Do not use ultra-pasteurized milk (UHT).
Heavy cream: This gives ricotta its rich, creamy flavor.
Vinegar: Vinegar is the acidic ingredient that creates the curds. If you don’t have vinegar, use lemon juice.
Salt: Salt is added for flavor.
How to Make Homemade Ricotta Cheese
It’s so easy to make fresh ricotta cheese!
Boil milk, cream, and salt in a large pot (full recipe below).
Remove from the heat, stir in vinegar, and let it rest until it forms curds.
Strain the curds in a colander and enjoy your homemade cheese.
The liquid strained from the cheese is called whey. Leftover whey is great to add to baked goods like bread, pizza dough, or even mixed with pancake mix in place of water. Place the colander over a bowl to catch the whey.
Storage
Store ricotta cheese in the refrigerator for up to 5 days. It may need to be drained or stirred before using.
Did you love this Ricotta Cheese recipe? Leave a comment and a rating below.
4.99 from 55 votes↑ Click stars to rate now! Or to leave a comment, click here!
Homemade Ricotta Cheese (4 ingredients)
Homemade Ricotta Cheese is easy to make with ingredients you likely have on hand—no special tools required. It’s perfect for homemade pasta dishes and more!
Prep Time 5 minutesminutes
Cook Time 40 minutesminutes
Drain Time 45 minutesminutes
Total Time 1 hourhour30 minutesminutes
Prevent your screen from going dark
In a heavy-bottomed saucepan, heat milk, cream, and salt over medium heat while stirring. Cook just until the mixture comes to a boil.
Remove from the heat, add the vinegar, and stir to combine.
Let the mixture rest undisturbed for 30 minutes to allow curds to form.
Line a fine mesh strainer or colander with 2 layers of damp cheesecloth. Gently spoon the ricotta curds into the strainer.
Allow to drain for 30-45 minutes.
Homemade ricotta cheese will last up to 5 days if stored in an airtight container in the fridge.
Holly Nilsson is the creator of Spend With Pennies, where she creates easy, comforting recipes made for real life. With a passion for nostalgic flavors and simplified techniques, Holly helps busy home cooks create delicious meals that always work. She is also the author of “Everyday Comfort,” which promises to inspire even more hearty, home-cooked meals. See more posts by Holly
Holly Nilsson is the creator of Spend With Pennies, where she creates easy, comforting recipes made for real life. With a passion for nostalgic flavors and simplified techniques, Holly helps busy home cooks create delicious meals that always work. She is also the author of “Everyday Comfort,” which promises to inspire even more hearty, home-cooked meals. See more posts by Holly
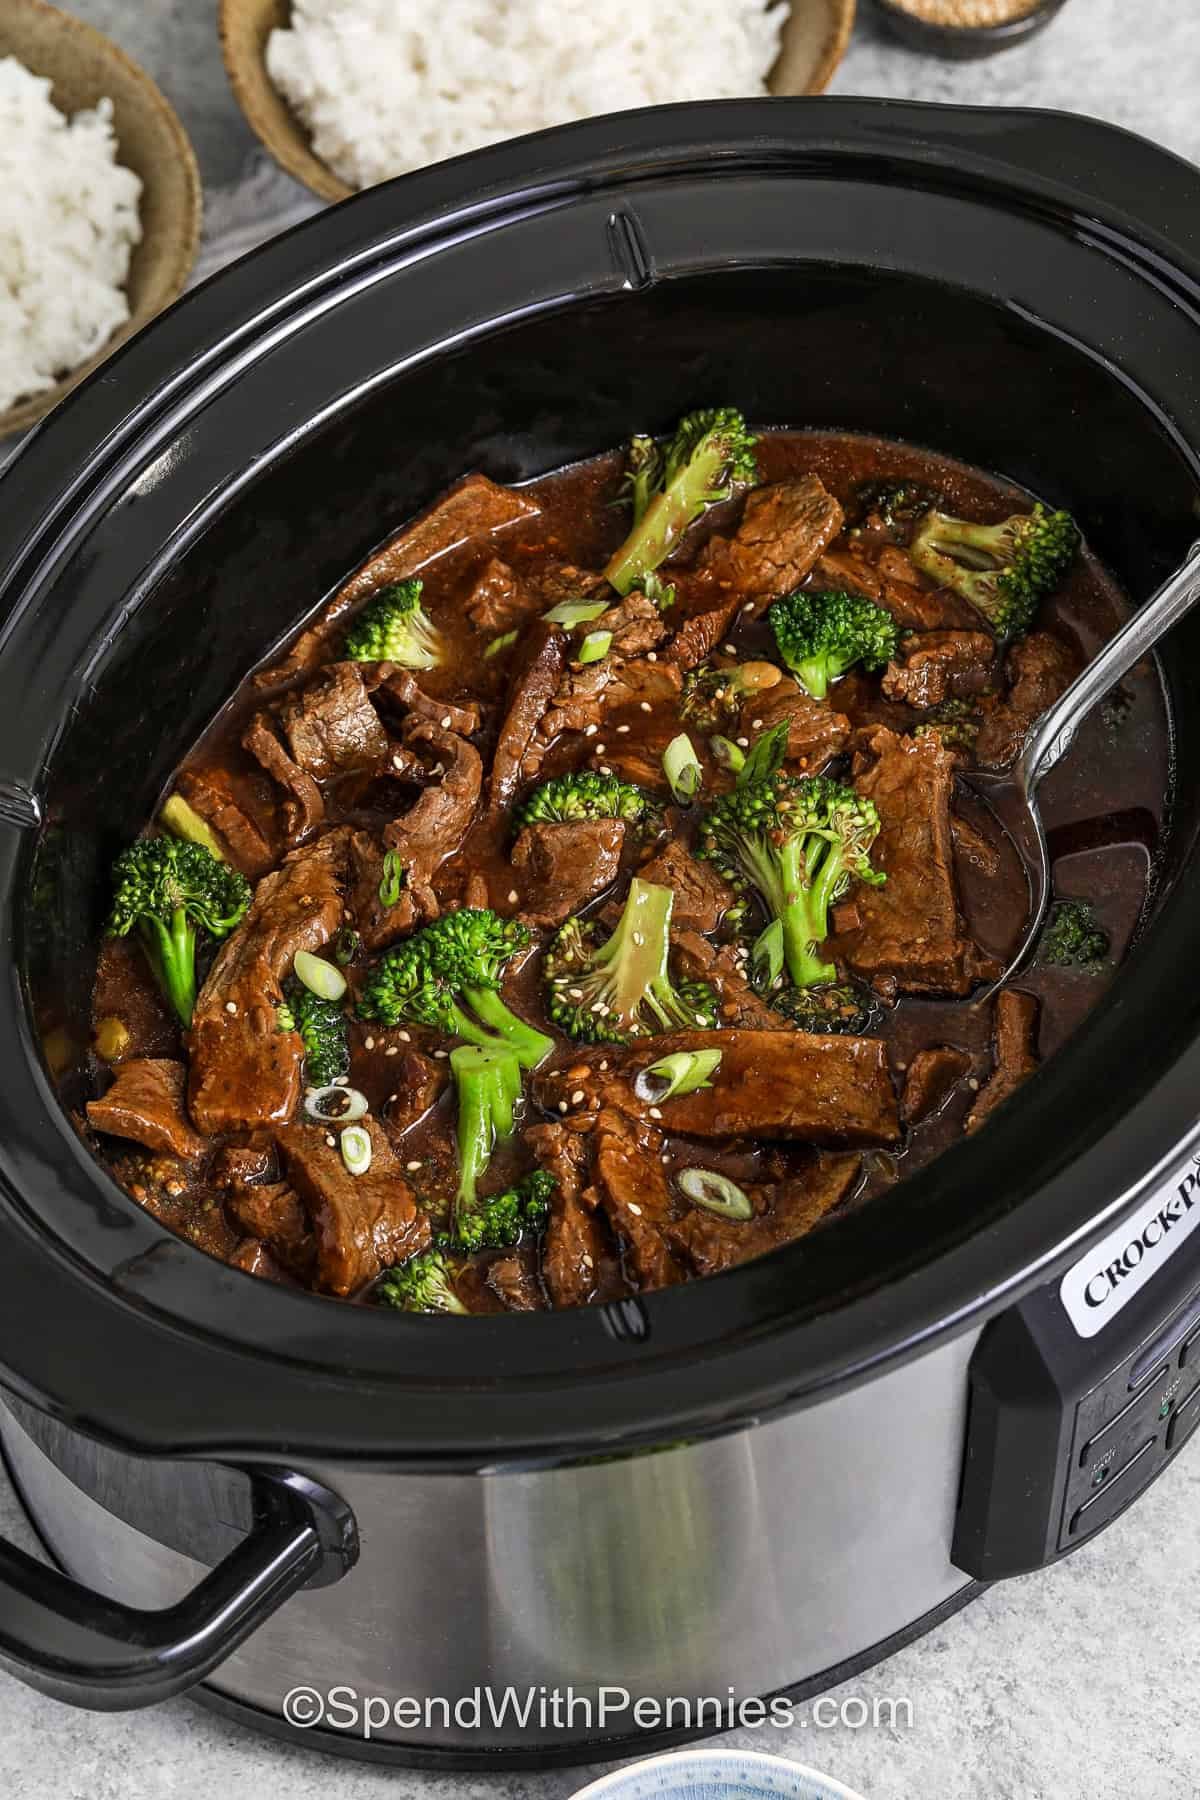
Skip the line up (and takeout prices) – this slow cooker beef and broccoli is a deliciously saucy meal that cooks perfectly tender in the slow cooker. Serve it over rice or noodles for a new weeknight favorite!
Flavor: Beef and broccoli is a Chinese menu staple for good reason. This version has tender beef in a sweet and savory sauce with hints of garlic and ginger.
Skill level: Super easy, no babysitting required! Add everything to the crock pot and let it work its magic.
Important Prep Note: For tender beef, be sure to cut slices across the grain of the flank steak. You’ll see long lines along the meat; cut across them.
Cooking Tip: For more tender broccoli, cook it in the slow cooker. If you prefer broccoli tender-crisp, steam it on the side and stir it in 15 minutes before serving.
Budget tip: Make it stretch by adding extra vegetables like bell peppers, julienned carrots, snow peas, or onions.
Beef: Flank steak or skirt steak is perfect in this recipe. You can also use chunks of beef stew meat.
Broccoli: Cut broccoli florets into bite-sized pieces, Frozen broccoli works (no need to thaw), but it will be softer than using fresh.
Hoisin sauce:Hoisin sauce is a Chinese barbecue sauce made from soybeans. It has a sweet, savory, and salty flavor and it’s great added to stir-fries or drizzled over chicken.
Variations: Add sliced green or red bell peppers, water chestnuts, baby corn, or peas to the slow cooker at the end of Step 4. Garnish with sliced almonds, green onions, or sesame seeds.
Quick Tips
Prep Ahead: Slice the beef and mix the sauce the night before; store them separately. In the morning, just toss everything into the slow cooker.
Shortcut: Microwave steam-in-bag broccoli until just crisp, then stir it into the crockpot.
Spice it up: Stir in a pinch of red pepper flakes or a drizzle of sriracha when adding the broccoli if you like a spicier take.
Leftovers and Storage
Store leftovers in an airtight container in the refrigerator for up to 4 days.
Keep portions in a zippered bag in the freezer for up to 4 months. Thaw overnight in the refrigerator and reheat in the microwave or on the stovetop before serving.
Did you enjoy this Slow Cooker Beef and Broccoli recipe? Be sure to leave a comment and rating below.
No ratings yet↑ Click stars to rate now! Or to leave a comment, click here!
Slow Cooker Beef and Broccoli
Tender bites of beef slowly simmer in a rich teriyaki-style sauce with fresh broccoli.
Prep Time 15 minutesminutes
Cook Time 1 hourhour30 minutesminutes
Total Time 1 hourhour45 minutesminutes
Prevent your screen from going dark
Cut the beef across the grain ¼-inch thick.
In the bottom of a 6-quart slow cooker, combine broth, soy sauce, hoisin sauce, brown sugar, sesame oil, garlic, and ginger.
Add the beef and stir to combine. Cover and cook on LOW for 1 ½ to 2 hours or until the beef is tender.
In a small bowl, combine cornstarch with 3 tablespoons of water. Stir it into the beef mixture. Add the broccoli, cover, and cook on HIGH for an additional 30 to 40 minutes or until the broccoli is tender.
Serve over rice.
For tender-crisp broccoli, the broccoli can be steamed separately. To steam the broccoli:
Place a steam basket or colander into a large saucepan.
Add broccoli and enough water to cover the bottom of the saucepan.
Bring to a boil, reduce heat to simmer.
Cover and cook for 5-7 minutes, or until the broccoli is tender-crisp when pierced with a fork.
Stewing beef: Stewing beef or cubed chuck can be used. Cook on low for 7 to 8 hours or until tender. Check for tenderness: Avoid overcooking the beef. Slow cookers can vary so check it early. If the beef is tender, add the broccoli. If it overcooks, the beef will fall apart.
Holly Nilsson is the creator of Spend With Pennies, where she creates easy, comforting recipes made for real life. With a passion for nostalgic flavors and simplified techniques, Holly helps busy home cooks create delicious meals that always work. She is also the author of “Everyday Comfort,” which promises to inspire even more hearty, home-cooked meals. See more posts by Holly