دسته: ناهار

  • $10 Best Buy Gift Cards Instant Win • Steamy Kitchen Recipes Giveaways

    $10 Best Buy Gift Cards Instant Win • Steamy Kitchen Recipes Giveaways


    This post may contain affiliate links. Please read our
    disclosure policy
    for more information.

    It’s time to treat yourself – no strings attached!

    At Steamy Kitchen, we love sharing delicious recipes, cool kitchen hacks, and the occasional surprise that brings a little joy to your day. And today? We’re turning up the fun with an Instant Win Giveaway you won’t want to miss!


    $10 bestbuy gift cards instant win

    What’s Up for Grabs?

    We’re giving away five $10 Best Buy Gift Cards — and yes, you can use it to grab that cool kitchen gadget, tech accessory, or even stock up on your favorite snacks. Best Buy has something for everyone, and this could be your lucky break!

    5 WINNERS will each receive:

    Why It’s So Fun: It’s an Instant Win!

    No long waits, no wondering if you won. The moment you enter and spin, you’ll find out if you’re a winner. We’re all about quick wins and big smiles!

    Whether you’re shopping for something fun or functional, this $10 gift card could be your next step toward the perfect purchase. So go on — take a chance and enter now!

    Because small wins can still spark big smiles.


    $10 Best Buy Gift Cards Instant Win

    Enter and spin below.


    This post may contain affiliate links. Please read our
    disclosure policy
    for more information.


    Source link

  • Best Croque Monsieur Recipe (+ tips)

    Best Croque Monsieur Recipe (+ tips)


    What is Croque Monsieur?

    Croque Monsieur is France’s version of a grilled ham and cheese sandwich—on steroids! This Parisian café classic starts with thick slices of bread layered with creamy béchamel sauce, Gruyère cheese, savory ham, a smear of Dijon, and even more melty cheese, then pan-fried and baked to golden bubbling perfection.

    It’s indulgent, satisfying, irresistibly crispy, cheesy, and comforting—perfect for brunch, lunch, or an effortlessly elegant dinner with a French twist!


    Source link

  • White Gravy Recipe (Country Gravy)

    White Gravy Recipe (Country Gravy)


    This post may contain affiliate links. See my disclosure policy.

    A Southern classic, this homemade white gravy recipe is a true taste of down-home comfort cooking. It’s a creamy béchamel-style American gravy that’s delicious served with everything from mashed potatoes and biscuits to pork chops and fried chicken! Made from scratch and ready in less than 10 minutes!

    white gravy recipe homemade country sauce from scratch how to make american southern bacon grease sausage drippings chicken fried steak

    Why You’ll Love It

    • It’s quick and easy. This white gravy recipe comes together in less than 10 minutes and it uses just a handful of ingredients, all of which are pantry staples.
    • It’s deliciously versatile. Wonderfully creamy, it pairs beautifully with everything from mashed potatoes and steamed or grilled vegetables to chicken fried steak and pork chops.

    White Gravy vs Country Gravy vs Sausage Gravy

    White gravy and country gravy are the same thing and the names are used interchangeably depending on the geographic region and family tradition. Sometimes the name country gravy is used to specifically denote the use of bacon grease instead of butter for the roux, though that isn’t always the case and white gravy can likewise use either. It’s also sometimes referred to as American gravy. A variation called sawmill gravy adds a little cornmeal for a gritty texture. Sausage gravy is white/country gravy that includes sausage and is classically served over buttermilk biscuits.

    Homemade White Gravy Ingredients

    This homemade white gravy recipe uses just a handful of staple ingredients. And the bacon grease is easy to make simply by frying up or baking some bacon and pouring the drippings in the bowl to save for when you’re ready to use it. Here’s what you’ll need:

    • Bacon Grease or Butter:  My personal preference is bacon grease hands down. It adds so much flavor. Where do you get bacon grease? Next time you make bacon, pour the grease into a bowl, cover and refrigerate until you need it to make this gravy.  It will keep for up to 3 months and can be frozen even longer. If you prefer you can use butter and this will also make it vegetarian-friendly. I always use unsalted because it gives me full control over the salt content. You can always add more salt if needed but it’s very difficult to fix something that’s over-salted.
    • All-Purpose Flour:  Whether using bacon grease or butter you’ll use equal parts of fat and flour to make the roux.
    • Milk: I use and recommend whole milk but you can use 2% if you prefer.
    • Heavy Cream: This adds incredible flavor and richness. But if you’re trying to cut down on calories, you can use milk only. I’ve tried it both ways and I can tell you that whole milk and cream make all the difference in flavor and texture.
    • Seasonings: Salt, pepper and a dash of cayenne are all you need. I use kosher salt and freshly ground black pepper. If you prefer a spicier gravy feel free to add more cayenne.
    white gravy recipe homemade country sauce from scratch how to make american southern bacon grease sausage drippings chicken fried steak

    How to Make White Gravy

    The process of making homemade white gravy is as simple as its ingredients. As with a traditional bechamel sauce, it starts by making a roux, which is a flour that is whisked into melted butter or bacon grease until smooth and allowed to cook for a few minutes to both cook off the flour flavor and to deepen the flavor of the gravy. Milk and cream are then whisked into the roux until smooth and thickened and then seasoned. The consistency of the gravy be made thicker by increasing the flour and butter when making the roux or made thinner by adding more milk or cream.

    Country Gravy Recipe Preparation Tips

    This is a very simple and easy gravy to make but here are a few tips for making the best tasting gravy, some storage and reheating tips, as well as some tips on how to avoid common problems:

    • For maximum flavor I recommend using bacon grease. You’ll need one tablespoon for every tablespoon of flour.
    • Why does my gravy taste like flour? The roux (which is the fat and flour mixture) wasn’t cooked long enough. Be sure to cook it, whisking frequently to prevent burning, until it turns a golden color. This not only cooks off the raw flour taste but it’s what gives your country gravy a rich flavor.
    • Use cold milk and cold heavy cream when adding it to the hot roux to ensure a perfectly smooth, lump-free gravy. Adding cold milk and cream gives you enough time to quickly whisk the ingredients together to dissolve before they begin to warm up and thicken.
    • If you like your gravy spicy, use extra cayenne pepper.
    • When reheating the white gravy, if it’s too thick stir in a little milk or cream to thin it out to the desired consistency. Start with less and add more as needed.
    • This country gravy can be made well in advance and will keep in the fridge for up to 4 days.
    • It can also be frozen for up to 3 months. Let it thaw in the fridge. Reheat on the stovetop over low heat or in the microwave on reduced power.

    White Gravy Recipe

    Let’s get started!

    Melt the bacon grease in a skillet over medium heat.

    melting bacon grease in skillet

    Add the flour and whisk continually until it is dissolved.

    making roux with flour and bacon grease

    Continue whisking until the mixture has turned a rich golden color, about 3 minutes. Be sure to whisk constantly to prevent the mixture from burning.

    making roux in skillet

    Add the milk and whisk until the mixture is smooth and thickened.

    adding milk to roux

    Add the heavy cream and whisk until incorporated.

    Add the salt, pepper and cayenne.

    adding cream and seasonings

    Let the gravy simmer for another minute.

    Add more salt and pepper to taste.

    white gravy recipe homemade country sauce from scratch how to make southern bacon grease sausage drippings chicken fried steak

    Storage and Freezing

    White gravy can be made in advance and will keep in the fridge for up to 4 days. It can be reheated over low heat on the stovetop or at reduce power in the microwave. If the gravy is too thick simply stir in a little milk or cream when you reheat it (start with less and add more as needed). White gravy can also be frozen for up to 3 months. Let it thaw slowly in the refrigerator and then reheat.

    What to Serve with White Gravy

    White gravy has a flavor profile that makes it very versatile. Here are just a few ways you can use it to get you started:

    Enjoy!

    country gravy recipe homemade white sauce from scratch how to make southern bacon grease sausage drippings chicken fried steak

    For more delicious homemade gravy recipes try my:

    country gravy recipe homemade white sauce from scratch how to make southern bacon grease sausage drippings chicken fried steak

    White Gravy Recipe (Country Gravy)

    A Southern classic, this homemade white gravy is a true taste of down-home comfort cooking! It’s ready in less than 10 minutes and is deliciously versatile.

    Cook Time 10 minutes

    Total Time 10 minutes

    Course condiment

    Cuisine American, Southern

    Servings 4

    Calories 230 kcal

    • 3 tablespoons bacon grease , recommended for best flavor (see note); can substitute butter (vegetarian-friendly)
    • 3 tablespoons all-purpose flour
    • 1 3/4 cup cold whole milk , see note
    • 1/4 cup cold heavy cream , see note
    • 1/2 teaspoon kosher salt , plus more to taste
    • 1/4 teaspoon freshly ground black pepper , plus more to taste
    • 1/8 teaspoon cayenne pepper , or more according to heat preference
    • Melt the bacon grease in a skillet over medium heat. Add the flour and whisk continually until it is dissolved. Continue whisking until the mixture has turned a rich golden color, about 3 minutes. Add the milk and whisk until the mixture is smooth and thickened. Add the heavy cream and whisk until incorporated. Add the salt, pepper and cayenne and let the gravy simmer for another minute. Add more salt and pepper to taste. Makes about 2 1/4 cups white gravy.
    Next time you make bacon, pour the grease into a bowl, cover and refrigerate until you need it to make this gravy.  It will keep for up to 3 months and can be frozen even longer.
    For the creamiest and most flavorful results I recommend using whole milk and heavy cream.  If you’d like to make a lower calorie version, you can substitute 2% milk and use half and half, or use all milk.  
    If you like you can add a teaspoon of a finely chopped fresh herb of your choice along with the other seasonings (I like fresh thyme).   

    Serving: 0.5cupCalories: 230kcalCarbohydrates: 10gProtein: 5gFat: 19gSaturated Fat: 10gPolyunsaturated Fat: 2gMonounsaturated Fat: 7gCholesterol: 40mgSodium: 351mgPotassium: 183mgFiber: 0.2gSugar: 6gVitamin A: 418IUVitamin C: 0.1mgCalcium: 143mgIron: 0.3mg

    Keyword Country Gravy, White Gravy

    kimberly killebrew the daring gourmet

    Hi, I’m Kimberly Killebrew and welcome to Daring Gourmet where you’ll find delicious originals, revitalized classics, and simply downright good eats from around the world! Originally from Germany, later raised in England, world-traveled, and now living in the U.S., from my globally-influenced kitchen I invite you to tour the world through your taste buds!

    Read more about me…


    Source link

  • Rustic Chicken Cacciatore (Oven-Baked One-Pot Comfort Food)

    Rustic Chicken Cacciatore (Oven-Baked One-Pot Comfort Food)


    This post may contain affiliate links. Please read my disclosure policy.

    This rustic Chicken Cacciatore is everything comfort food should be—tender, fall-off-the-bone chicken baked in a rich tomato and red wine sauce, with mushrooms, sweet bell peppers, and briny olives. One pot, big flavor, and the kind of cozy dinner that basically cooks itself while you pretend you’re in the Italian countryside.

    a serving of chicken cacciatore over noodles in a white bowl.

    The Best Chicken Cacciatore Recipe

    Chicken Cacciatore is one of those dishes that instantly makes me feel like I’ve got life together—even if I’m wearing pajama pants and the dogs are barking at nothing. It’s cozy, rustic, and full of flavor, but totally unfussy. One big pan, some basic ingredients, and the oven takes it from there.

    This is how I make it at home—bone-in chicken that practically falls off the bone, sautéed peppers and mushrooms, a splash of red wine (some for the pot, some for me), and olives tossed in at the end because we’re fancy like that. It smells like you’ve been simmering all day, but your stove knows better.

    freshly made chicken cacciatore in a blue pot.

    Chicken Cacciatore isn’t complicated, but there are a few things you should know before you start tossing things into the pan. This dish is all about building flavor in layers, using simple techniques that actually matter.

    ingredients needed to make chicken cacciatore.

    🍗 Use Bone-In, Skin-On Chicken

    Wings and drumsticks are perfect here. They stay juicy, they add richness to the sauce, and they handle long cooking like champs. Boneless breasts will dry out and don’t bring the same depth—save those for something faster.

    🔥 Don’t Skip the Sear

    Browning the chicken before it goes into the oven adds a ton of flavor. You don’t need to cook it through—just get that golden crust going. It makes a difference.

    🍄 Cook the Mushrooms First

    Yes, before the peppers. Mushrooms release moisture, and if you throw everything in together, they’ll steam instead of brown. I like to give them 5 minutes to cook down on their own first, then add the peppers after.

    🍷 Wine or No Wine?

    I use red wine because it gives the sauce depth and richness you can’t fake. But if you’re skipping alcohol, use low-sodium chicken broth and maybe a splash of balsamic vinegar to round things out.

    🫒 Don’t Add the Olives Too Early

    Olives go in at the end so they don’t get mushy or overpower the sauce. They’re meant to finish the dish—not take it over.

    ⏱️ This One’s a Slow Simmer

    The oven time is where the magic happens. Give it at least 45 minutes for the chicken to fully soak in that sauce. Want it falling-off-the-bone tender? Go for the full hour.

    This is a one-pan wonder, so once you’ve got everything prepped, the rest is mostly hands-off. Just build flavor in layers, pop it in the oven, and let it work its magic.

    process shots showing how to make chicken cacciatore.

    Heat the olive oil and butter in a large oven-safe skillet or Dutch oven. Add the chicken and season with salt and pepper. Sear for about 4 minutes per side until golden. No need to cook it through—it’ll finish in the oven. Transfer to a plate and set aside.

    process shots showing how to make chicken cacciatore.

    Add the garlic and onions to the same pan and cook for about 2 minutes until soft and fragrant. Don’t rush this step—it lays the foundation.

    process shots showing how to make chicken cacciatore.

    Toss in the mushrooms and cook for 5 minutes. Let them release their moisture and start to brown. Then add the bell peppers and sauté for another couple of minutes just until they soften slightly.

    process shots showing how to make chicken cacciatore.

    Stir in the turmeric, oregano, bay leaves, red wine, tomato paste, and diced tomatoes. Bring everything to a gentle boil, scraping up all those browned bits from the bottom of the pan. 

    process shots showing how to make chicken cacciatore.

    Nestle the seared chicken pieces back into the sauce. Cover with a lid and transfer the whole pan to the oven. Bake at 400°F for 45 minutes to 1 hour, depending on how tender you like your chicken.

    freshly made chicken cacciatore in a blue pot.

    Once it’s out of the oven, top with the Kalamata olives and sprinkle with fresh parsley. Serve it over noodles, rice, or creamy polenta. And don’t forget the crusty bread for mopping up that sauce.

    a serving of chicken cacciatore over noodles in a white bowl.

    Frequently Asked Questions

    Can I use boneless chicken?

    You can, but bone-in, skin-on chicken brings way more flavor and stays juicy while it bakes. Boneless thighs will work if you’re short on time, but I’d skip the breasts.

    Can I make this without wine?

    Yep. Swap the wine for low-sodium chicken broth and add a splash of balsamic or red wine vinegar for a little acidity and richness.

    What kind of wine should I use?

    Go for a dry red wine—Chianti, Pinot Noir, or even Cabernet Sauvignon work great. Use something you’d drink (not cooking wine) but don’t stress—just keep it dry, not sweet.

    What kind of olives are best?

    I love Kalamata olives for their bold flavor, but green or Castelvetrano work too. Just wait to add them at the end so they don’t go mushy or take over the sauce.

    Can I make it ahead of time?

    Absolutely. This dish gets even better after a day in the fridge. Make it up to 2 days ahead and reheat gently on the stove or in a 350°F oven.

    Can I freeze Chicken Cacciatore?

    Yes, minus the olives if possible. Freeze in an airtight container for up to 3 months. Thaw overnight in the fridge, then reheat gently until warmed through.

    freshly made chicken cacciatore in a blue pot.

    Storage & Reheating

    Fridge:

    Store leftovers in an airtight container for up to 4 days. The flavors get even better overnight, so don’t be surprised if it tastes even richer the next day.

    Freezer:

    Chicken Cacciatore freezes well—just leave the olives out if you’re making it specifically to freeze (they can go a bit mushy). Store in a freezer-safe container for up to 3 months. Thaw overnight in the fridge.

    To Reheat:

    Warm gently on the stovetop over medium-low heat, or reheat in a 350°F oven until heated through. Add a splash of broth or water if the sauce has thickened too much in the fridge.

    a serving of chicken cacciatore over noodles in a white bowl.

    Try These Chicken Recipes Next

    freshly made chicken cacciatore in a blue pot.

    Chicken Cacciatore

    Prep 10 minutes

    Cook 1 hour 10 minutes

    Total 1 hour 20 minutes

    This rustic Chicken Cacciatore is comfort food at its finest—juicy bone-in chicken simmered in a rich tomato and red wine sauce with mushrooms, sweet peppers, and briny olives. All baked in one pot for deep flavor and easy cleanup.

    Instructions 

    • Preheat oven to 400°F.

    • Add the olive oil and butter to a large oven-safe skillet with a lid, and heat until butter has melted. 

    • Add the chicken to the skillet and season generously with salt and pepper. Fry the chicken on both sides until golden, about 4 min per side. The chicken doesn't have to be cooked through, as it will continue cooking while in the oven. Transfer the chicken to a plate and set aside.

    • Add the garlic and onions to the skillet and saute for 2 minutes until the onion is translucent and the garlic becomes aromatic. Add the chopped mushrooms and cook for 5 min until the mushrooms cook down then add the peppers.

    • I like to cook my mushrooms first, but you could add the mushrooms and peppers all at once. Stir and cook for a couple more minutes until the peppers soften a bit.

    • Add the turmeric, oregano, bay leaves, red wine, tomato paste, and diced tomatoes. Stir well and bring to a boil. 

    • Add the chicken back to the pot, cover with a lid and place in the oven. Bake for 45 minutes to an hour.

    • Top with whole Kalamata olives and garnish with fresh parsley before serving.

    • Serve over noodles, rice or polenta.

    Notes

    1. Chicken: I use a mix of wings and drumsticks, but any bone-in, skin-on pieces work. Thighs are great too. Boneless chicken will cook faster, but it won’t have the same depth of flavor.
    2. Mushrooms First: Cooking the mushrooms before the peppers helps them brown and build flavor instead of steaming.
    3. Wine Swaps: Chianti, Pinot Noir, or any dry red works. No wine? Use low-sodium chicken broth + a splash of balsamic or red wine vinegar.
    4. Make It Ahead: Perfect for prepping ahead. Store in the fridge for up to 4 days—flavors deepen and the sauce gets even better overnight.
    5. Deglaze the pan. When adding the wine and other liquid ingredients make sure to scrape the bottom of the pan to loosen all the browned bits. This will make the cacciatore more flavorful.

    Nutrition Information

    Serving: 1servingCalories: 354kcal (18%)Carbohydrates: 14g (5%)Protein: 22g (44%)Fat: 21g (32%)Saturated Fat: 6g (38%)Polyunsaturated Fat: 3gMonounsaturated Fat: 10gTrans Fat: 0.2gCholesterol: 103mg (34%)Sodium: 712mg (31%)Potassium: 877mg (25%)Fiber: 4g (17%)Sugar: 6g (7%)Vitamin A: 1196IU (24%)Vitamin C: 90mg (109%)Calcium: 75mg (8%)Iron: 3mg (17%)

    Notice: Nutrition is auto-calculated for your convenience. Where relevant, we recommend using your own nutrition calculations.

    freshly made chicken cacciatore in a blue pot.

    Did You Make This?

    We love seeing what you made! Tag us on Instagram at @jocooks or hashtag #jocooks so we can see your creations!

    Originally shared Sept 17, 2013.

    [ad_2]
    Source link

  • How Long Kimchi Can Last and How To Store It Properly • Steamy Kitchen Recipes Giveaways

    How Long Kimchi Can Last and How To Store It Properly • Steamy Kitchen Recipes Giveaways


    This post may contain affiliate links. Please read our
    disclosure policy
    for more information.

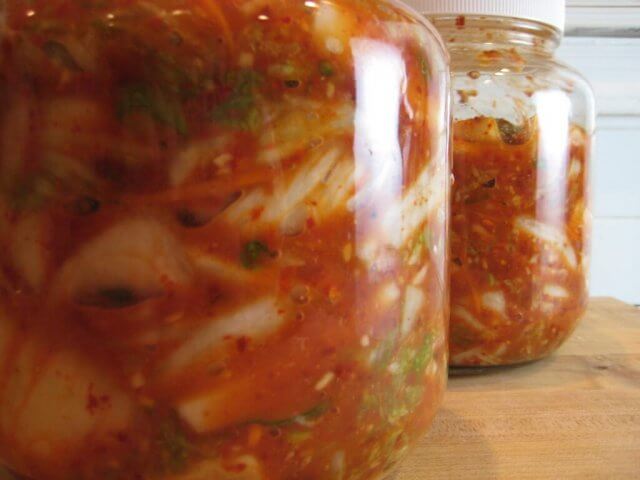
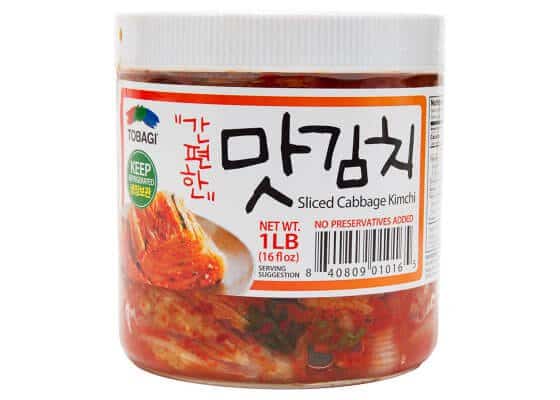
    You bought or made a metric ton of kimchi, and now you’re starting into the abyss of your fridge, pondering the age-old question: “How long can I hang onto this stuff before it turns into a science experiment?” Yep, been there, done that. But fear not, my fellow fermenter, because we’re about to dive into how to keep your kimchi kimchi’ing. (Didn’t know that was a verb, did you? It’s not, but I like it, so we’re usin’ it.)

    Kimchi

    How Long Does Kimchi Last?

    If you wanna get right down to the nitty gritty and talk about the shelf life of kimchi, let’s do it!

    So how long does it last? Well, it depends on where you store it:

    At Room Temp: Kimchi left at room temp will last about 1 week after opening. 

    In the Fridge: Kimchi stored in the fridge lasts significantly longer than room temp kimchi. 3 to 6 months, to be specific, and it will continue to ferment there, so the longer you leave it, the more sour it will become. If you like kimchi when it’s milder and crunchier, you might not enjoy it after the 3 month mark, as it tends to become mushier and more sour.

    ​Of course, there’s lots more info that goes into kimchi’s shelf life than just this. So let’s dive deep (into a pool of kimchi) and swim through the facts. Ready?


    learn how to make kimchi fried rice recipe

    What is Kimchi?

    At its core, kimchi is a living testament to the wonders of fermentation, and it’s also teeming with beneficial bacteria, which is what gives it its signature tangy kick. But let’s start at the beginning and talk about the history of this delectable dish. Back in the day, when South Korea was just a blip on the historical radar, home cooks were whipping up batches of kimchi to survive some very bone-chilling winters and the food became part of their cultural heritage. Armed with napa cabbage and a variety of spices, they created a dish that would stand the test of time.

    These days, there are many different types of kimchi. From the classic napa cabbage kimchi to the more adventurous radish oi sobagi, there’s a kind for every palate. And don’t even get me started on the vessels used to ferment this goodness. Earthenware pots have been the go-to choice since, like, forever. Kimchi is kinda like a time capsule of flavor. Whenever you’re chowing down on its tangy goodness, you’re basically tasting history.


    Kimchi

    Health Benefits of Kimchi

    Kimchi isn’t just a sidekick. When it comes to boosting your immune system, it’s the star of the show! With its army of good bacteria and vitamin-packed goodness, it’s a great shield against pesky colds and sniffles. Let’s talk about some of kimchi’s main benefits:

    • Rich in probiotics, such as Lactobacillus, which promotes gut health
    • Aids digestion by balancing gut flora
    • Packed with vitamin C, potassium, and calcium
    • Low-calorie and low-fat content
    • Strengthens the immune system
    • Enhances nutrient absorption


    Kimchi in ramen

    Factors that Affect the Shelf Life of Kimchi

    Now, let’s talk about some of the factors that can make or break your kimchi’s shelf life. 

    • The Type of Kimchi: Are you dealing with grocery store kimchi? Or a homemade batch prepared the traditional way? While both have their merits, homemade kimchi contains fewer preservatives, meaning it may have a shorter shelf life than its store-bought counterpart. 
    • Ingredients: The beauty of kimchi lies in its simplicity. The main ingredient is cabbage, then salt, and spices (and love of course). But if you’re getting creative with your kimchi concoctions, be mindful of ingredients like fish sauce and shrimp paste, which can alter both flavor and shelf life. 
    • Storage Methods: Airtight container is the name of the game. Whether you’re using mason jars, kimchi containers, or some good ol’ fashioned Tupperware, make sure your container of choice seals in flavor and keeps out unwanted odors. You’ll also want to keep it out of direct sunlight.
    • Use-by Dates: While kimchi is known for its long shelf life, be sure to pay attention to any expiration dates on your store-bought kimchi, cuz nobody wants to gamble with questionable kimchi.


    jars of kimchi

    Signs of Spoilage

    As much as we love kimchi, there comes a time when we must bid farewell to this fermented treasure. Here are some telltale signs that your kimchi is past its prime:

    • Unpleasant Odor: While kimchi is known for its pungent aroma, any kind of sour smell may mean that it’s gone bad. Trust your nose. If the smell of kimchi is off, it’s best to toss it.
    • Texture Change: Fresh kimchi should have a crisp, crunchy texture. If you notice mushiness or sliminess, your kimchi has started to deteriorate.
    • Visible Mold: Spotting mold growth on the surface of your kimchi is a clear indicator of spoilage. Definitely toss it!
    • Off-putting Taste: Kimchi should have a tangy, slightly spicy flavor with hints of fermentation. If it has a super sour, bitter, or funky taste, it’s time to bid it adieu.

    When it comes to foodborne illness, kimchi is considered low-risk due to its high acidity and beneficial bacteria content. However, consuming spoiled kimchi can still lead to gastrointestinal issues, so it’s best to err on the side of caution. When in doubt, throw it out!


    Kimchi in a jar

    How to Maximize the Shelf Life of Kimchi

    Now that you know how to identify spoiled kimchi, let’s talk about the best ways to maximize its shelf life:

    • Choose the Right Container: Keep it in an airtight jar like glass or a special kimchi container (meant for fermented foods) to keep air and moisture out. This will keep spoilage at bay and maintain the flavor of your kimchi. It will also keep its healthy bacteria healthy!
    • Mind the Temperature: Opt for the fridge over room temperature.  A cool place will slow down the fermentation process and extend its shelf life.
    • Refrain from Any Additives: Stick to traditional kimchi recipes and avoid introducing additives that may affect the fermentation process or accelerate spoilage. Keep it simple!
    • Freezing Tips: If you have leftover kimchi, consider freezing it for later use. Pack your kimchi into freezer-safe containers, leaving room for expansion, and label with the date. Frozen kimchi can last for 12 to 18 months in the freezer, but we recommend eating it within the first 3 months for the best quality.
    • Safe Thawing Methods: When thawing frozen kimchi, let your refrigerator gradually do the work to preserve its texture and flavor. Avoid quick thawing methods like microwaving. It can affect the quality of the kimchi.
    • Labeling: Keep track of the age of your kimchi by labeling your containers with the date of preparation or purchase. This will help you keep tabs on its freshness and allow you to enjoy it at peak freshness.


    Kimchi hot dog

    Endless Kimchi Possibilities

    Here are a few different ways to add Kimchi to everyday dishes. You can use kimchi straight from the jar or mash it into a kimchi paste for easy spreading!

    • Kimchi Quesadillas: Spread a layer of kimchi between tortillas and add a little shredded cheese for a zesty twist on the classic quesadilla.
    • Kimchi Tacos: Fill taco shells with cooked protein, like grilled chicken, ground beef, or tofu, and top with kimchi for an amazing taco experience.
    • Kimchi Soup: Add kimchi to a pot of broth with vegetables and protein for a yummy, satisfying soup.
    • Kimchi Hot Dogs: Kimchi on hot dogs might sound strange, but trust us. It’ll have you coming back for seconds!

    Check out our popular recipe Kimchi Ramen.


    FAQs

    How long does it take for kimchi to ferment?

    The fermentation process for kimchi typically ranges from a few days to a few weeks, depending on temperature and ingredients. Some kimchi enthusiasts prefer their kimchi freshly made, while others enjoy the complex flavors that develop in the kimchi over time.

    Can I store kimchi at room temperature?

    While kimchi is traditionally fermented at room temp before being moved to the fridge, storing it at room temperature for an extended period of time can over-ferment and possibly spoil your kimchi. It’s best to store kimchi in the fridge to maintain its freshness and flavor.

    Can I use a plastic container to store kimchi? 

    While plastic containers or plastic bags can be used to store kimchi, it’s important to choose ones that are airtight to prevent air and moisture from reaching your kimchi. Glass jars, mason jars, and specialized kimchi containers like the e-jen container are also popular choices for storing kimchi.


    Crazy for Kimchi!

    We hope you enjoyed this ultimate guide to storing kimchi and that you’re now equipped to be a kimchi storing masterrrr! 

    Now, we want to hear from you! Do you have any tips for storing kimchi? What’s your favorite kimchi dish? Got any great kimchi recipes or some unique things you put it on? Whatever you favorite way to enjoy kimchi, we’d love to hear about it! Share your thoughts in the comments below. Let’s keep the convo going and continue to explore this wonderful fermented food together.

    Until next time, happy fermenting! 🥬✨

    This post may contain affiliate links. Please read our
    disclosure policy
    for more information.

    Did you try this recipe? Please leave a star rating in the recipe card below and leave a review in the comment section! I always appreciate your feedback and I know other readers do, too!

    Stay in touch with me in our Facebook group, on Pinterest or follow me on Instagram! Sign up for my email list, too where we chat all things recipes, tips, giveaways, and more!


    Source link

  • Marshmallow Fruit Dip – Carlsad Cravings

    Marshmallow Fruit Dip – Carlsad Cravings


    If you’re looking for the creamiest, dreamiest fruit dip that always disappears first at the party, this is it! As a go-to dip expert at parties and potlucks, I’ve added a few game-changing twists—like vanilla Greek yogurt, orange juice concentrate, and vanilla extract—for extra flavor and depth. The result is a light, ultra-luscious, tangy-sweet dip that’s miles beyond the basic version and pairs beautifully with just about everything. BONUS- lots of variations included!

    up close of dipping a strawberry in fruit dip showing how creamy it is
     

    Why You’ll Love Our Fruit Dip With Marshmallow Fluff

    This recipe is my FAVORITE—I can’t get enough, and neither can anyone else! I doubled it for a huge gathering, and every last speck was gone. Everyone asked if it was on the site yet—it is NOW! Here’s why this will be your new foolproof, go-to fruit dip!

    • Extra creamy and dreamy: The combo of marshmallow fluff, cream cheese, and yogurt creates a silky-smooth texture that’s light yet luscious.
    • Never lumpy! This common complaint among other recipes is solved by using extra soft cream cheese and beating it before adding the rest of the ingredients.
    • Flavor upgrade: A splash of vanilla extract and orange juice concentrate add bright, fresh layers so the dip isn’t overly sweet.
    • Greek yogurt magic: Vanilla Greek yogurt adds sweet and tangy silkiness so the dip doesn’t taste like one-note cream cheese or marshmallow fluff.
    • Make-ahead friendly: Whips up in minutes and stays delicious in the fridge for days—perfect for parties or snacking all week.
    • Endlessly adaptable and dippable: I’ve included lots of variations like using strawberry cream cheese and dipping options like fruit, pretzels, graham crackers, and more.
    top view of fruit dip recipe served on a platter with a variety of fruits

    Cream Cheese Fruit Dip Recipe Ingredients

    Let’s take a closer look at what you need to make this recipe (measurements in the printable recipe card at the bottom of the post):

    • Marshmallow fluff: The star of the show! It brings that sweet and light texture with body that makes this dip totally irresistible.
    • Cream cheese: Use block cream cheese and not spreadable to add tang, body, and richness that balances the sweetness of the fluff. Feel free to use a flavor like strawberry, too!
    • Use full-fat for the creamiest, richest dip—it holds better in texture and flavor. With adjusted expectations, you can use ⅓ less fat.
    • Greek vanilla yogurt: Be sure to use Greek vanilla yogurt, not plain, because it tends to be thicker.
    • Frozen orange juice concentrate: This secret ingredient brightens the whole dip with a citrusy zing. Keep a can in your freezer and scoop out as needed. To thaw the 1 ½ tablespoons, microwave for about 15econds.
    • Vanilla extract: Enhances the overall flavor with warm, aromatic depth. Use more or less to taste.
    top view of fruit dip ingredients: marshmallow fluff, cream cheese, vanilla yogurt, vanilla extract, orange juice concentrate

    How to Make Cream Cheese Fruit Dip

    Let’s take a closer look at how to make this recipe with step-by-step photos (full recipe in the printable recipe card at the bottom of the post):

    • Step 1: Soften Cream Cheese. Cube the cream cheese, spread it on a plate, and microwave for 20-25 seconds, until very soft.  Transfer it to a large bowl, then beat until very smooth.  
    showing how to make fruit dip by softening cream cheese, then beating it until smooth
    • Step 2: Add Ingredients. Add the yogurt, thawed orange juice concentrate, and vanilla extract and beat until smooth.
    showing how to make fruit dip by beating in the vanilla yogurt, vanilla and orange juice concentrate
    • Step 3: Fold in the fluff. Fold in the fluff until combined, noting the more you stir, the more air you release—resulting in a dip that’s less light and fluffy.
    showing how to make fruit dip by folding in the marshmallow fluff
    • Chill:  Cover and refrigerate for at least 2 hours, but best if overnight.  Serve with assorted fruits and dippers. Store in the refrigerator for 3-5 days.
    showing how to serve cream cheese fruit dip garnished with chocolate chips and orange zest

    TIPS for making Fruit Dip

    • The cream cheese needs to be VERY SOFT, otherwise there will be lumps when mixing.
    • Fold in the fluff: The more you stir, the more air is released, resulting in a dip that’s less light and fluffy. Use a spatula and not a whisk, and fold just to combine- it’s okay if there are a few white streaks.
    • Adjust consistency: Folding in the fluffy will create a fluffier dip. For a silky smooth, thinner dip, beat the fluff into the other ingredients.
    • Adjust sweetness to taste: Add additional orange juice concentrate or orange or lemon zest if the dip is too sweet.
    • Chill overnight for best results: After mixing, the dip will be warm and thinner due to the softened cream cheese. To thicken and allow the flavors to meld, refrigerate for at least 4 hours, but overnight is best.
    • If you’re short on time: Pop the dip in the freezer for 60 minutes, stirring at 30 minutes. Stir and refrigerate or serve after 60 minutes.
    • Dress it up: For a fun twist, garnish with a sprinkle of cinnamon, crushed nuts, mini chocolate chips, orange zest, or shredded coconut.

    Marshmallow Fluff Fruit Dip Variations

    Here are some delicious variations to customize your fruit dip to match your cravings or occasion:

    • Use Lemon Instead of the OJ Concentrate: Use 1-2 teaspoons of lemon zest or the next best option is 1 teaspoon of lemon extract.
    • Flavored Cream Cheese: Use strawberry, blueberry, or honey walnut cream cheese to instantly transform the flavor without adding extra ingredients.
    • Flavored Jell-O: Add 1-2 tablespoons of the dry powder (to taste) for a pop of color and flavor. Flavors such as strawberry, raspberry, lime, cherry, orange and peach would be tasty.
    • Berry Bliss: Mix in crushed raspberries or diced strawberries for a fruity flavor boost and pretty pink hue.
    • Tropical Treat: Mix in some cream of coconut (used in drinks, NOT coconut cream-see Amazon HERE) and/or a splash of pineapple juice for a beachy twist.
    • Chocolate Dream: Stir in cocoa powder or chocolate syrup for a rich, dessert-like dip. Top with mini chocolate chips.
    • Nutella Twist: Omit the yogurt and add Nutella (softened) for a rich, chocolate-hazelnut dip that’s irresistible with strawberries, bananas, and apples.
    • Peanut Butter Fluff: Swirl in a spoonful of creamy peanut butter for a sweet and salty combo, especially delicious with apples and pretzels.
    • Spiced Up: Add a pinch of cinnamon or pumpkin pie spice for cozy, warm flavors—perfect for fall with apples.
    top view of fruit dip recipe served on a platter with a variety of fruits

    How to Serve Cream Cheese Fruit Dip

    This fruit dip is perfect for parties, potlucks, or everyday snacking—just spoon it into a bowl and surround it with your favorite dippers for an irresistible spread. It pairs beautifully with both fresh fruit and fun treats such as:

    Fruit

    • Strawberries
    • Pineapple chunks
    • Melon cubes
    • Blueberries
    • Kiwi slices
    • Orange slices
    • Apricot slices
    • Grapes
    • Banana slices

    Treats

    • Graham crackers
    • Vanilla wafers
    • Shortbread cookies
    • Pretzels
    up close of dipping a strawberry in fruit dip with cream cheese showing how creamy it is

    WANT TO TRY THIS Fruit Dip RECIPE?

    PIN IT to your recipe BOARD TO SAVE FOR LATER!

    FIND ME ON PINTEREST FOR MORE GREAT RECIPES!  I AM ALWAYS PINNING :)!

    ©Carlsbad Cravings by CarlsbadCravings.com

    Save This Recipe To Your Recipe Box

    You can now create an account on our site and save your favorite recipes all in one place!

    • 7 oz. marshmallow fluff
    • 8 oz. full fat block cream cheese
    • 1/3 cup Greek vanilla yogurt
    • 1 1/2 Tablespoons frozen orange juice concentrate, thawed
    • 1 teaspoon vanilla extract
    • Optional Garnishes: Orange zest, mini chocolate chips, granola
    • Dipper Ideas: Strawberries, pineapple, grapes, cantaloupe, sliced bananas, apple slices, kiwi slices, Graham crackers, vanilla wafer cookies, pretzels, etc.
    • Soften Cream Cheese: Cube the cream cheese, spread it on a plate, and microwave for 20-25 seconds, until very soft. Transfer it to a large bowl, then beat until very smooth using a hand mixer.
    • Add Ingredients: Add the yogurt, thawed orange juice concentrate, and vanilla extract, and beat until smooth.

    • For a silkier, thinner dip (not fluffy-pictured): Transfer the fluff to a bowl and microwave for 10 seconds. Beat the fluff into the other ingredients until smooth.

    • For a fluffier dip: Fold in the fluff until combined, noting the more you stir, the more air is released, resulting in a dip that’s less fluffy.

    • Chill: Cover and refrigerate for at least 2 hours, but best if overnight. Serve with assorted fruits and dippers. Store in the refrigerator for 3-5 days.

    FLAVOR VARIATIONS

    • Use Lemon Instead of the OJ Concentrate: Use 1-2 teaspoons of lemon zest, or the next best option is one teaspoon of lemon extract.
    • Flavored Cream Cheese: Use strawberry, blueberry, or honey walnut cream cheese to instantly transform the flavor without adding extra ingredients.
    • Flavored Jell-O: Add 1-2 tablespoons of the dry powder (to taste) for a pop of color and flavor. Flavors such as strawberry, raspberry, lime, cherry, orange and peach would be tasty.
    • Berry Bliss: Mix in crushed raspberries or diced strawberries for a fruity flavor boost and pretty pink hue.
    • Tropical Treat: Mix in some cream of coconut (used in drinks, NOT coconut cream-see Amazon HERE) and/or a splash of pineapple juice for a beachy twist.
    • Nutella Twist: Omit the yogurt and add Nutella (softened) for a rich, chocolate-hazelnut dip that’s irresistible with strawberries, bananas, and apples.
    • Peanut Butter Fluff: Swirl in a spoonful of creamy peanut butter for a sweet and salty combo, especially delicious with apples and pretzels.
    • Spiced Up: Add a pinch of cinnamon or pumpkin pie spice for cozy, warm flavors—perfect for fall with apples.

    Did You Make This Recipe?

    Tag @CarlsbadCravings and Use #CarlsbadCravngs

    Leave a Review, I Always Love Hearing From You!


    Source link
  • Elote Seasoning Recipe – The Daring Gourmet

    Elote Seasoning Recipe – The Daring Gourmet


    This post may contain affiliate links. See my disclosure policy.

    Celebrate the flavors of one of Mexico’s most popular street foods, elotes, in the form of this homemade Elote Seasoning recipe that is quick and easy to make and will add life, flavor, and fiesta to your foods! Highly versatile, its combination of smoky, spicy, sweet, tangy and salty is delicious on everything from grilled chicken and salmon to scrambled eggs and popcorn!

    elote seasoning recipe homemade traditional mexican elotes spice blend trader joe's copycat

    Mexican Street Corn Seasoning

    You already know that I’m huge advocate of making homemade seasoning blends and this elote seasoning is no exception. Making your own gives you full control over what’s in it (and what isn’t), is fully customizable (adjusting the level of salt and spiciness, swapping out ingredients, etc), is cheaper to make, and is much fresher and more vibrant tasting!

    One of my favorite Mexican seasoning blends, this homemade elote seasoning is wonderfully versatile and positively bursting with smoky, zesty, tangy, savory flavors! And if you’re looking for unique edible gift ideas, this is a great one!

    What is Elote Seasoning?

    You may be familiar with “Trader Joe’s Everything But the Elote Seasoning”. This is my take on it, but with even more flavor. Elote seasoning is a spice blend that is inspired by a traditional Mexican snack called elotes, or Mexican street corn. While you won’t find “elote seasoning” in Mexico, what you’ll find is grilled corn on the cob that is seasoned with chilies, cumin, cilantro, lime juice and cotija or queso fresco cheese. That combination of smoky, sweet, spicy, savory, salty and herbaceous flavors is captured in this dried elote seasoning blend that you can conveniently grab and shake onto a variety of foods. It’s a fun way to harness that famous flavor profile in everything from roast chicken to popcorn!

    elotes mexican street corn grilled

    Elote Seasoning Ingredients

    Mexican street corn (or elotes) feature a blend of sweet, smoky, spicy, herby, and salty. They’re sprinkled with a variety of ground chilies, cumin, salt, cilantro, lime juice and cotija or queso fresco cheese and then roasted on the grill. My elote seasoning recipe captures these flavors in a dried spice blend form that you can easily grab and shake onto your foods to capture that famous flavor. Here is what you’ll need to make it:

    • Chili Powder:  This is your standard mild chili powder that you can find in any store.
    • Guajillo or Ancho Chili Powder: I like to add a variety of chili blends for flavor complexity but if you don’t have guajillo chili powder or ancho chili powder you can substitute more of the regular chili powder. If you have another chili variety, add that!
    • Paprika: Adds color and an earthy sweetness.
    • Chipotle Powder: This adds the smoky component of the blend. Chipotle powder is made from smoked and ground jalapeno peppers. If you don’t have chipotle powder you can substitute smoked paprika. For my DIY’ers, see my tutorial on How to Make Chipotle Peppers and then grind some to use in this blend.
    • Cayenne Pepper:  If you’re using chipotle powder you won’t need the extra heat (unless you want more heat) but if you’re using smoked paprika, the cayenne will provide that added kick.
    • Parmesan cheese:  This mimics the flavor of the cotija and adds that wonderful “umami” element to the blend. If you’re vegan or dairy free, you can substitute nutritional yeast.
    • Cumin: Adds a slightly sweet, nutty flavor.
    • Garlic Powder: This adds a wonderful earthy umami component and rounds out the elote seasoning.
    • Dried cilantro:  Adds a bright citrusy-peppery flavor. Cilantro is the signature herb used for making elotes but it is a polarizing herb (it’s literally a gene thing; if you have the gene it tastes like soap). If you’re one of those people who can’t tolerate it, you can substitute oregano. You can find dried cilantro in the spice section of most grocery stores or you can easily make your own by dehydrating some fresh cilantro in the oven at 170-180F until dried and flaky and then crumble it with your fingers.
    • Dried Lime Zest: A key flavor component in Mexican street corn, you don’t want to miss out on this. Don’t worry about special ordering it, it’s so easy to make and I’ll show you how below.
    • Cane Sugar:  This mimics the sweetness of the corn and provides balance.
    • Salt:  I use kosher or sea salt. Depending on how you’re planning on using this blend, you can add more or less salt, or omit it entirely.
    elote seasoning ingredients homemade copycat trader joe's

    Elote Seasoning Recipe

    Let’s get started!

    First you’ll need to make the dried lime zest. Preheat the oven to 170-180F/75-80C.

    Zest one lime, lay the zest out on a plate and stick it in the oven for 15-20 minutes. Remove and let it cool completely, then crumble it up finely with your fingers.

    how to make dried lime zest

    Measure the ingredients and place them into a bowl or jar.

    elote seasoning recipe homemade traditional mexican elotes spice blend trader joe's copycat

    Stir the spices or shake the jar until combined. Done!

    Store the elote seasoning in a glass jar with an airtight lid.

    elote seasoning recipe homemade traditional mexican elotes spice blend trader joe's copycat

    Store in the fridge where it will keep for up to a month or at room temperature where it will keep for up to a week.

    elote seasoning recipe homemade traditional mexican elotes spice blend trader joe's copycat

    How to Use It

    One of the things I love about elote seasoning is its versatility. There are so many creative ways that you can use it. Here are just a few ideas to get you started:

    Storing Tips

    Unless you’re using the spice blend right away, be sure to use dehydrated and not fresh parmesan (dehydrated is the stuff in the canisters stored at room temp). If storing at room temp I recommend using the elote seasoning within a week. If you store it in the fridge, it will keep for up to a month.

    elote seasoning recipe homemade traditional mexican elotes spice blend trader joe's copycat

    For more homemade seasoning blends from around the world try my:

    elote seasoning recipe homemade traditional mexican elotes spice blend trader joe's copycat

    Elote Seasoning Recipe

    This Elote Seasoning captures the life and flavor of one of Mexico’s most famous street foods, elotes, in the form of a convenient spice blend you can add to a variety of foods for a delicious flavor kick!

    Prep Time 5 minutes

    Dehydrating Time (Lime Zest) 15 minutes

    Total Time 20 minutes

    Course Seasoning Blend

    Cuisine Mexican

    Servings 16

    Calories 8 kcal

    • To make the lime zest (this can be done days in advance): Preheat the oven to 170-180F/75-80C.Zest one lime, lay the zest out on a plate and stick it in the oven for 15-20 minutes. Remove and let it cool completely, then crumble it up finely with your fingers.
    • Place all of the ingredients in a bowl or in a jar and stir or shake to thoroughly combine. Store in a glass jar with an airtight lid in the fridge where it will keep for up to a month. At room temperature it should be used within a week. Makes about 1/3 cup seasoning.

    Storage:  Unless you’re using the spice blend right away, be sure to use dehydrated and not fresh parmesan (dehydrated is the stuff in the canisters stored at room temp). If storing at room temp I recommend using the elote seasoning within a week. If you store it in the fridge, it will keep for up to a month. 

    Serving: 2teaspoonsCalories: 8kcalCarbohydrates: 1gProtein: 0.4gFat: 0.4gSaturated Fat: 0.1gPolyunsaturated Fat: 0.1gMonounsaturated Fat: 0.1gCholesterol: 0.2mgSodium: 99mgPotassium: 41mgFiber: 1gSugar: 0.4gVitamin A: 617IUVitamin C: 0.2mgCalcium: 10mgIron: 0.4mg

    kimberly killebrew the daring gourmet

    Hi, I’m Kimberly Killebrew and welcome to Daring Gourmet where you’ll find delicious originals, revitalized classics, and simply downright good eats from around the world! Originally from Germany, later raised in England, world-traveled, and now living in the U.S., from my globally-influenced kitchen I invite you to tour the world through your taste buds!

    Read more about me…


    Source link

  • Easter Bread – Jo Cooks

    Easter Bread – Jo Cooks


    This post may contain affiliate links. Please read my disclosure policy.

    Let’s be honest, I don’t need an excuse to bake bread—but if Easter gives me a reason to bust out a golden braided loaf, I’m going for it. This Braided Easter Bread looks fancy (your relatives will be impressed), but it’s surprisingly simple to pull off—and the payoff is huge. Soft, rich, slightly sweet, and totally slather-worthy with butter and jam.

    Sliced Easter bread on a wooden cutting board.

    We grew up with homemade Easter bread on the table—usually made by hand, with lots of strong opinions about braiding technique. These days, I let the mixer do the hard work, but the result still brings that same cozy nostalgia to the holiday table—with far less mess on the counter.

    Before You Start – Tips, Ingredients & Secrets

    ingredients needed to make easter bread.
    • Let’s talk yeast. We’re using active dry yeast, so it needs to be proofed. That quick 5-minute wait in warm water with a bit of sugar is your way of checking that the yeast is alive and ready to work its magic. If it doesn’t foam, toss it—it’s either expired or just moody.
    • Flour power. You’ll need around 6½ cups of all-purpose flour, but start with 6 cups and add more as needed. You’re aiming for a slightly sticky dough that pulls away from the sides of the bowl—not something that sticks to your elbows. If it’s super dry, it’ll give you dense bread. We want fluffy and light.
    • Butter matters. Melted unsalted butter adds richness, and yes, you’re using a whole cup—don’t panic. This is Easter bread, not a salad. The butter makes the crumb incredibly tender, so don’t skimp.
    • Eggs = richness + structure. This dough uses five eggs, which is part of what makes it so soft, rich, and yellow-toned. Room temperature eggs mix better, so pull them out early.
    • Knead like you mean it. Whether you use a stand mixer or your hands, knead for a solid 5–7 minutes until smooth and elastic. Your dough should feel soft and a bit tacky but not wet. And yes, your arms will thank you later.
    • The rise needs warmth. Dough loves a cozy, draft-free spot. I like to use my oven with the light on or place the bowl near a sunny window. If your kitchen is chilly, give it a little extra time—it should double in size before shaping.
    • To braid or not to braid? Braiding looks beautiful, and it’s not hard once you try it. Divide the dough into 3 strands per loaf, roll them into logs, and braid like you’re making a friendship bracelet. Just thicker. And with more carbs.
    • Egg wash = bakery shine. Brush the loaves with a beaten egg before baking for that gorgeous golden finish. Sprinkle with sesame or poppy seeds for a little extra texture and visual flair.
    • Loaf pan or freeform? Totally your call. Loaf pans give you a taller, more structured loaf. Freeform on a baking sheet lets that braid shine. Just grease your pans or line your sheet with parchment.
    front shot of Easter bread with the end sliced off.
    process shots showing how to make easter bread.

    In the bowl of your stand mixer, combine the active dry yeast with lukewarm water and a bit of sugar. Stir and let it sit for about 5 minutes. You want to see some foam—that’s your yeast saying “I’m alive!”

    process shots showing how to make easter bread.

    Add the rest of the sugar, warm milk, melted butter, eggs, salt, and 6 cups of flour to the bowl. Using your dough hook, mix on low speed until the dough starts pulling away from the sides. Add more flour, a tablespoon at a time, if it’s too sticky. You’re aiming for a soft, slightly tacky dough that still cleans the sides of the bowl. Let it knead for 5–7 minutes.

    process shots showing how to make easter bread.

    Transfer the dough to a greased bowl, spray the top of the dough with cooking spray, then cover the bowl with plastic wrap. Let it rise in a warm, draft-free spot until doubled in size—about 1 hour. This is a great time to make a coffee and stare at your rising dough like a proud parent.

    process shots showing how to make easter bread.

    Punch down the dough, then divide it in half. For each half, divide into 3 equal pieces, roll them into long ropes, and braid like you’re on Great British Bake Off. Pinch the ends to seal. You can place them on parchment-lined baking sheets or into greased 12-inch loaf pans.

    process shots showing how to make easter bread.

    Cover and let the loaves rise again until puffy and nearly doubled in size, about 30 minutes. They should look nice and plump—like they’ve had a very relaxing nap.

    process shots showing how to make easter bread.

    Brush the tops generously with egg wash, then sprinkle with sesame seeds (or poppy seeds if you’re feeling fancy). Bake at 350°F (175°C) for about 30 minutes, or until deep golden brown and your kitchen smells like a bakery.

    Let the bread cool in the pans for about 10 minutes, then transfer to a wire rack. Slice when it’s warm but not hot—trust me, patience is hard here but worth it.

    overhead shot of two loaves of braided Easter bread on a cooling rack.

    Frequently Asked Questions

    What is considered lukewarm water for yeast?

    Lukewarm means around 100°F to 110°F (38°C to 43°C)—warm to the touch but not hot. If it feels like bathwater, you’re good. Too hot and you’ll kill the yeast (RIP little guys), too cold and they’ll just sit there doing nothing.

    Can I make the dough ahead of time?

    Absolutely. After the first rise, cover and refrigerate the dough overnight. Let it come to room temp before shaping and continuing with the second rise. Perfect if you’re planning ahead for brunch or just want to sleep in (relatable).

    How do I decorate Easter bread?

    Traditionally, you can press colored Easter eggs (raw or hard-boiled) into the braid before baking. Just nestle them into the dough after shaping. You can also get fancy with colored sprinkles or use poppy or sesame seeds for that classic bakery look. Optional—but highly encouraged for extra Easter flair.

    Can I freeze the bread?

    Yes! Once fully cooled, wrap the loaf tightly in plastic wrap and foil, then freeze for up to 2 months. Thaw at room temp and warm in the oven before serving. It reheats beautifully.

    How long does it stay fresh?

    This bread is best within 2–3 days at room temperature. Store it in an airtight container or bread bag. If it starts to dry out? French toast to the rescue.

    Can I add raisins or citrus zest?

    Totally! Add a handful of raisins, dried cranberries, or a bit of orange/lemon zest to the dough before kneading. It gives it a little extra sweetness and makes it more traditional in some European variations.

    4 Slices of Easter bread being cut from the loaf on a wooden cutting board.

    Try These Delicious Bread Recipes Next

    4 Slices of Easter bread being cut from the loaf on a wooden cutting board.

    Easter Bread

    Prep 45 minutes

    Rising time 1 hour 15 minutes

    Cook 30 minutes

    Total 2 hours 30 minutes

    This Braided Easter Bread is a soft, rich, golden loaf with just a touch of sweetness. Beautifully braided, buttery, and perfect for Easter brunch or any special occasion.

    Instructions 

    • Add the yeast, ½ cup of water, and 2 teaspoons of the sugar to the bowl of your mixer, stir and let it sit for 5 minutes until the yeast starts to activate and foam.

    • Add the remaining sugar, milk, melted butter, eggs, salt and 6 cups of the flour. Use the dough hook to mix on low speed, until the dough basically comes clean from the side of the bowl. Add the remaining flour as needed. I used the full 6½ cups of flour. The dough should be sticky but it should come clean from the side of the bowl. Make sure to mix for about 5 to 7 minutes.

    • Spray a large bowl with cooking spray, place the dough in the bowl and spray the dough itself with a bit of cooking spray. Cover the bowl with plastic wrap. Let the dough rise in a warm, draft-free environment until doubled in size, about 40 minutes to an hour. Once doubled in size, punch it down to release some of the air out.

    • Divide the dough in half. I prefer to braid these loaves, but you can also just roll out each piece of dough into a loaf and place it into greased loaf pans. I prefer to do a 3 strand braid. To do so cut each half into 3 pieces, and roll each piece into long strips about a foot long. Braid and repeat with remaining dough.

    • Preheat the oven to 350°F.

    • You can either place them on a baking sheet lined with parchment paper, or if you have 12-inch loaf pans, grease them well with cooking spray and place the loaves in them. Let them rise a second time until doubled in size in a warm, draft-free environment. Should take about 30 minutes.
    • Brush the loaves with the egg wash all over. Sprinkle with sesame seeds or poppy seeds. Bake the bread for 30 minutes or until golden brown. If using loaf pans, let them cool for 10 minutes in the pans before transferring them to a cooling rack to finish cooling.

    Notes

    1. Don’t rush the rise: Give that dough time to double in size both times—rushing it will give you dense bread, and no one wants that on a holiday.
    2. Yeast 101: Make sure your yeast foams during proofing. If it doesn’t, start over. It’s the backbone of this whole operation.
    3. Braid your way: Traditional 3-strand braid works great, but if you’re feeling confident (or reckless), try a 4- or 6-strand for extra flair. YouTube is your friend.
    4. Loaf pan vs baking sheet: Loaf pans = structured, tall loaves. Baking sheet = freeform, bakery-style braid. Both delicious.
    5. Make it festive: Tuck a few dyed Easter eggs into the braid (just don’t eat the raw ones after baking). Or go sweet with icing drizzle post-bake.
    6. Leftovers? Don’t waste them. Use slices for French toast, bread pudding, or even a sweet breakfast sandwich. Trust me, it’s chef’s kiss.

    Nutrition Information

    Serving: 1sliceCalories: 234kcal (12%)Carbohydrates: 31g (10%)Protein: 6g (12%)Fat: 10g (15%)Saturated Fat: 5g (31%)Polyunsaturated Fat: 1gMonounsaturated Fat: 3gTrans Fat: 0.3gCholesterol: 67mg (22%)Sodium: 170mg (7%)Potassium: 74mg (2%)Fiber: 1g (4%)Sugar: 5g (6%)Vitamin A: 313IU (6%)Vitamin C: 0.02mgCalcium: 33mg (3%)Iron: 2mg (11%)

    Notice: Nutrition is auto-calculated for your convenience. Where relevant, we recommend using your own nutrition calculations.

    4 Slices of Easter bread being cut from the loaf on a wooden cutting board.

    Did You Make This?

    We love seeing what you made! Tag us on Instagram at @jocooks or hashtag #jocooks so we can see your creations!

    Originally Published January 2012.


    [ad_2]
    Source link

  • Electric Pressure Washer Giveaway • Steamy Kitchen Recipes Giveaways

    Electric Pressure Washer Giveaway • Steamy Kitchen Recipes Giveaways


    This post may contain affiliate links. Please read our
    disclosure policy
    for more information.

    Happy Monday, Steamy Kitchen Fam!

    Make outdoor cleaning effortless with the Electric Pressure Washer — your new go-to for tackling everything from grimy patios to dusty cars.

    Electric Pressure Washer Giveaway

    With 4 quick-connect nozzles, a 25-foot hose, and a built-in 16.9 oz soap tank, you’ll have all the tools you need to clean with ease. The powerful 4800PSI pressure and 2.9GPM flow cut through dirt fast—perfect for patios, pools, cars, and more.

    And that bold orange design? Tough to ignore and easy to love.

    This week, we’re giving one away!
    Enter the Steamy Kitchen Electric Pressure Washer Giveaway for your chance to win this high-performance pressure washer—absolutely free.


    Electric Pressure Washer Giveaway

    Enter to win below.


    This post may contain affiliate links. Please read our
    disclosure policy
    for more information.


    Source link