دسته: آشپزی

  • Easy Cheesy Frito Chili Pie Recipe

    Easy Cheesy Frito Chili Pie Recipe


    This website may contain affiliate links and advertising so that we can provide recipes to you. Read my disclosure policy.

    Not to be dramatic, but Frito Chili Pie might have saved my sanity. Zero whining, zero leftovers, it was a total dinner miracle. Crunchy, flavorful and ridiculously easy… you need this in your life ASAP.

    Overhead shot of Frito chili pie garnished with cilantro and jalapeños.

    Crunchy, Saucy, Totally Addictive

    • Big flavor, little effort: Layers of savory chili, crunchy Fritos, and melty cheese are all the things your kids love! It couldn’t be easier, and it tastes amazing!
    • Made-From-Scratch or Made-in-Minutes: This recipe has you make your own chili from scratch. But, if you need dinner on the table now? Grab your favorite canned chili and call it a win.

    Frito Chili Pie Ingredients
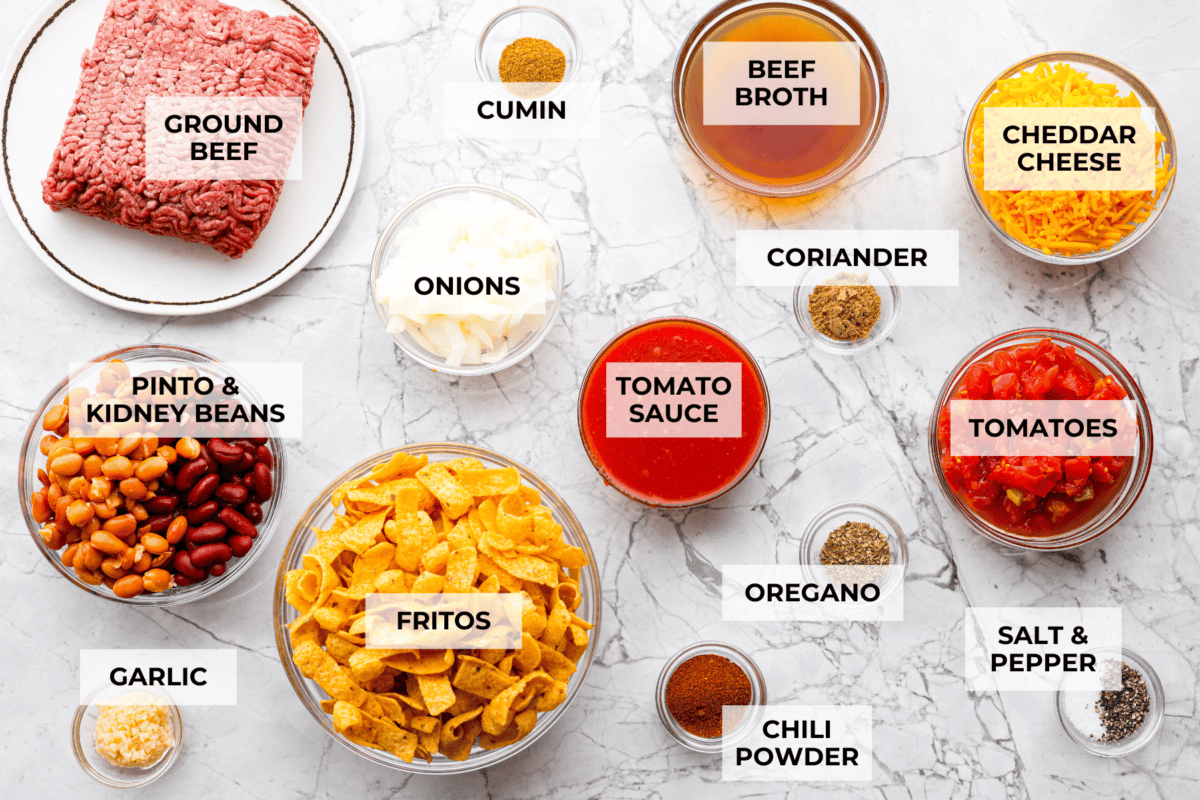
    Overhead shot of labeled ingredients.
    • Short on Time? Use Canned Chili instead! You can either make the chili from scratch using this recipe or keep things quick and easy by swapping in two (14-ounce) cans of your favorite store-bought chili.
    • Customize This Recipe: One of my favorite things about homemade chili is how easy it is to customize — you can mix in extra veggies, leave the beans out, adjust the spices, swap ground turkey for beef, or tweak it any way you like!

    How to Make Frito Chili Pie

    Frito chili pie is not just for Texans! Just whip up the tasty chili (or crack open a couple cans if you’re keeping it easy), layer it over crunchy chips, add plenty of cheese, and pop it in the oven.

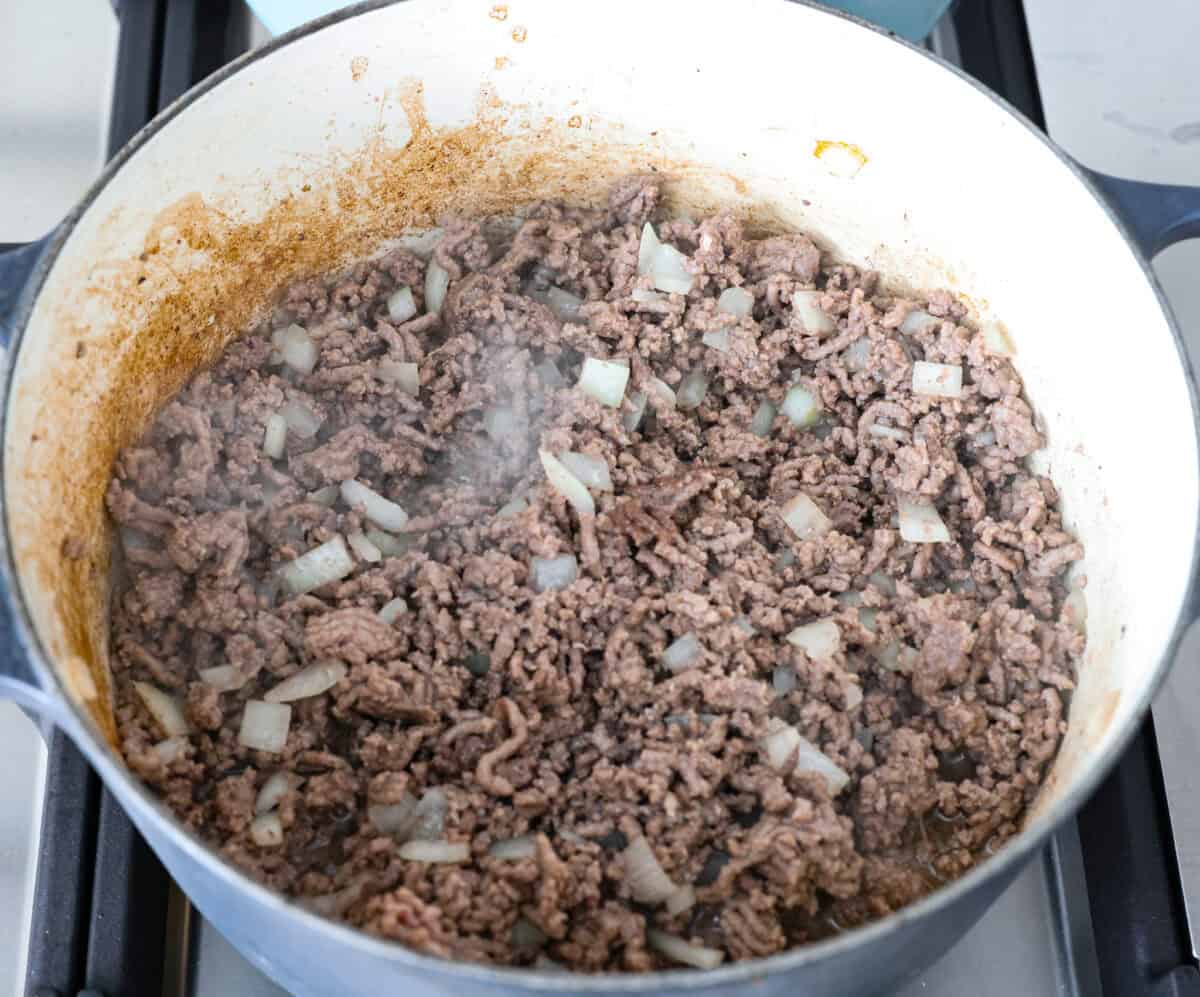
    1. Cook the Meat: Heat a pot over medium-high heat on the stove, add the ground beef and diced onion to the pot. Cook for 8 minutes until the meat is browned and the onions are tender.
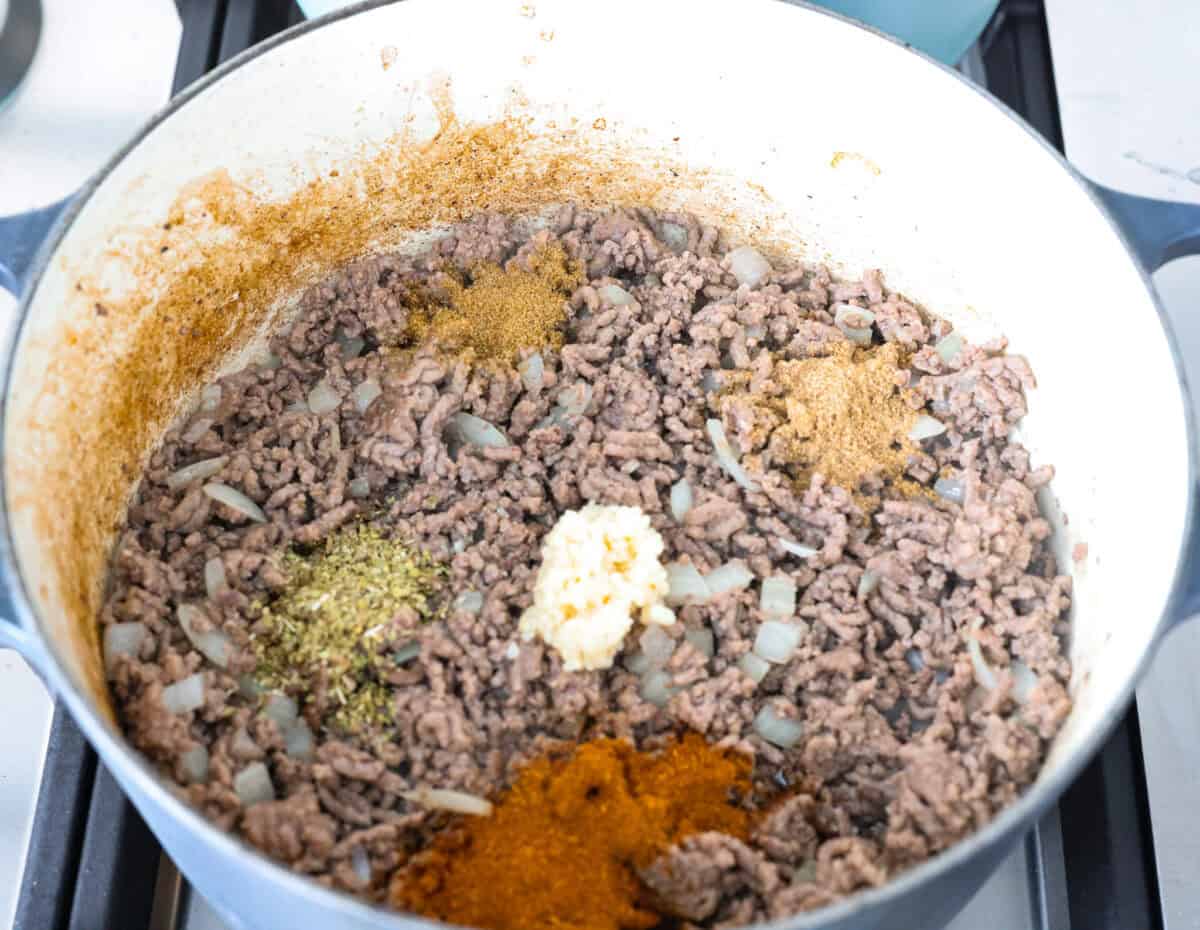
    2. Add Seasonings: Add the garlic, chili powder, oregano, ground cumin, coriander, salt, and pepper to the meat mixture, then stir to combine. Cook for one more minute.
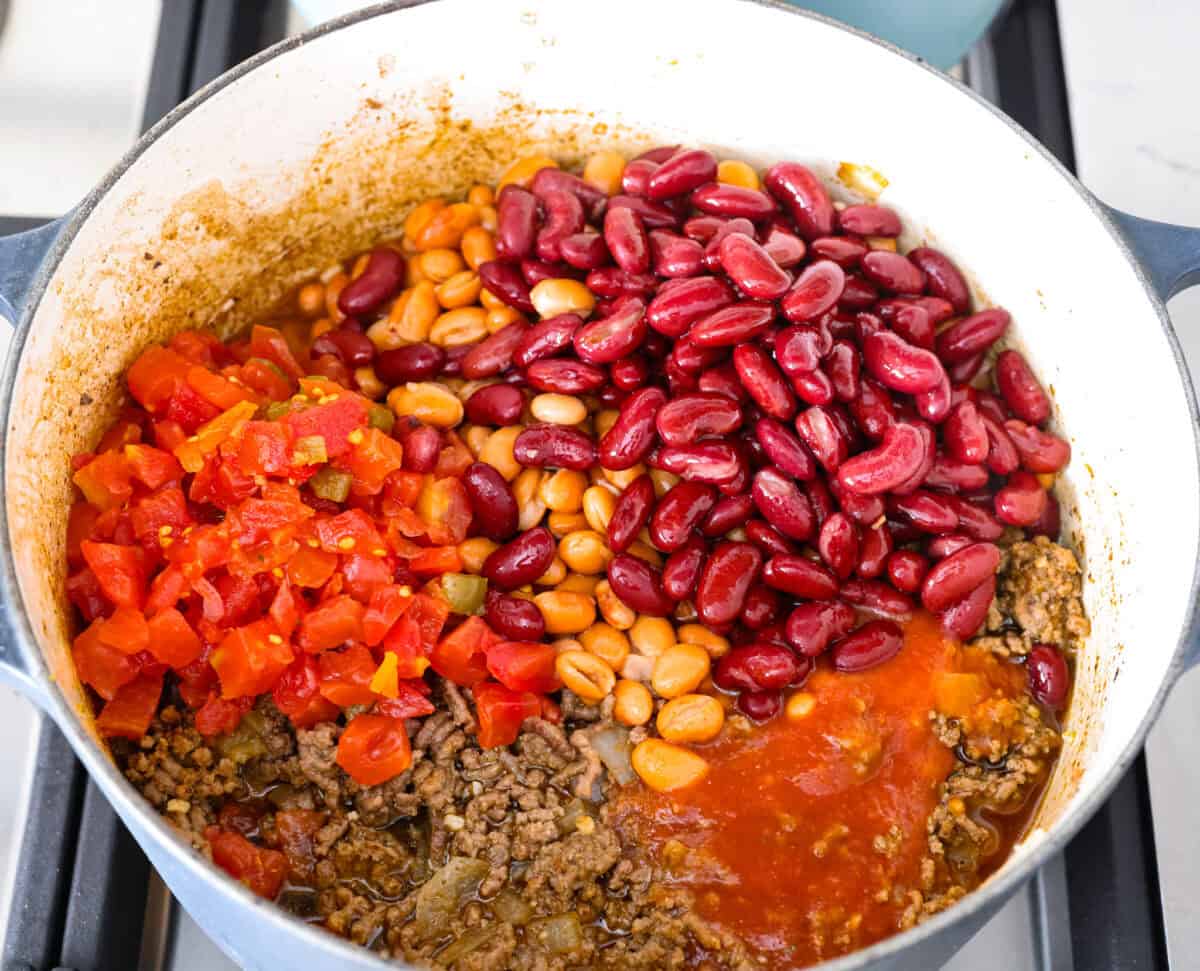
    3. Add Tomatoes and Beans: Add in the beef broth, tomato sauce, Rotel tomatoes, pinto beans, and kidney beans, then stir and simmer for another 5 minutes to heat through.
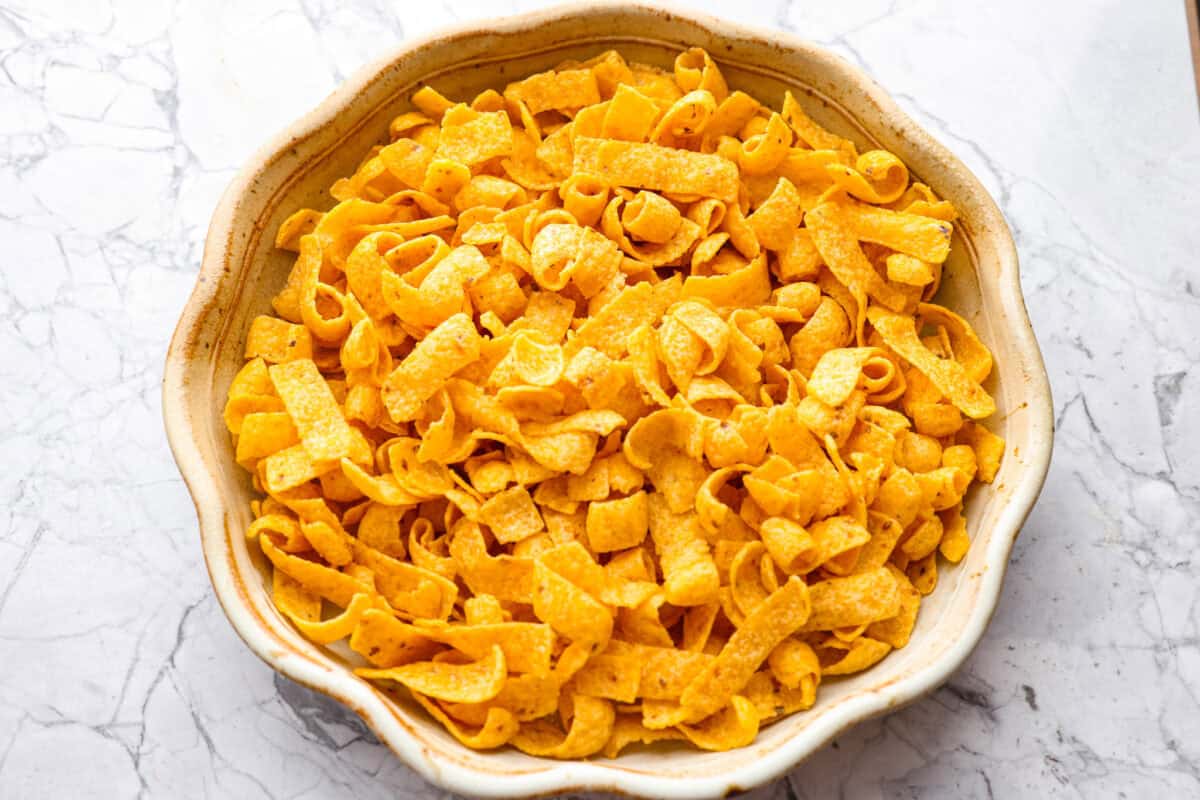
    4. Prep Pie Pan: Spray a 2-inch deep 9-inch pie pan with non-stick cooking spray and dump the bag of Fritos chips into the pan.
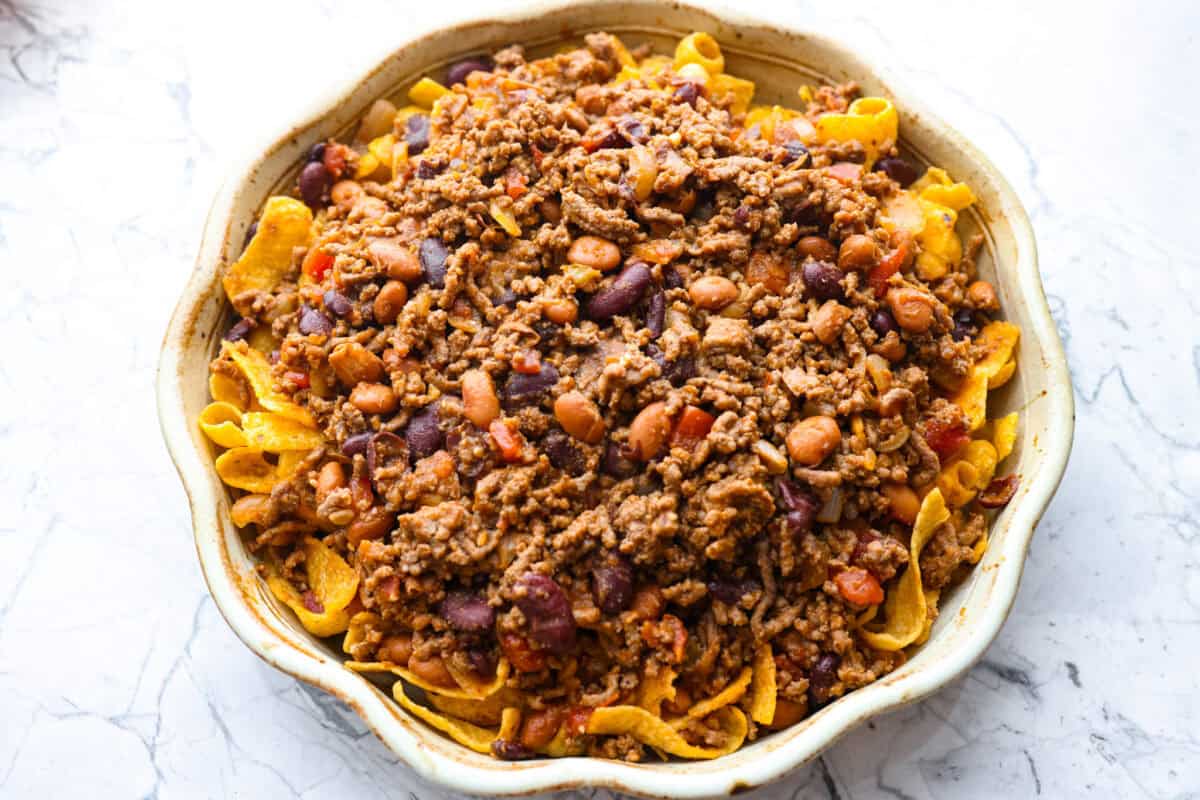
    5. Assemble: Pour the chili evenly over the Fritos in the pie pan.
    6. Bake with Cheese: Top with shredded sharp cheddar cheese. Broil the pie on HIGH in the oven for 2-3 minutes until the cheese is melted and bubbling. Remove from the oven and then serve fresh.
    Alyssa’s Pro Tip

    No deep pie pan? No problem. You can either split the Frito Chili Pie ingredients between two pans, use a 9×13 dish, or serve the extra chili on the side!

    Close up shot of Frito chili pie.

    Storing Leftovers

    • In the Fridge: I recommend enjoying this dish fresh; storing it will make the chips go soggy. But you can store leftovers in the fridge in an airtight container for 5 days.
    • In the Freezer: To freeze, store separately in an airtight container, and keep it frozen for up to a month.

    More Delicious Chili Recipes

    The great thing about this recipe is that you can add all of the toppings you want. cilantro, salsa, guacamole, jalapeños, and green onions. Here are some more chili recipes you can have fun with different toppings!

    Pin this now to find it later

    Pin It

    Prevent your screen from going dark

    • Spray a 2-inch deep 9-inch pie pan with non-stick cooking spray and dump the 1 (9-ounce) bag original Fritos chips into the pan.

    • Heat a pot over medium-high heat on the stove, add the 1 pound ground beef and 1 cup diced onion to the pot. Cook for 8 minutes until the meat is browned and the onion is tender.

    • Add the 3 teaspoons minced garlic, 1 tablespoon chili powder, 2 teaspoons oregano, 1 teaspoon cumin, 1 teaspoon coriander, 1 teaspoon salt, and ½ teaspoon pepper to the meat mixture and stir to combine. Cook for one more minute.

    • Add in the 1 cup beef broth, 1 (8-ounce) can tomato sauce, 1 (10-ounce) can Rotel tomatoes, 1 (15-ounce) drained and rinsed can pinto beans, and 1 (15-ounce) drained and rinsed can kidney beans. Stir and cook for another 5 minutes to heat through.

    • Pour the chili evenly over the Fritos in the pie pan.

    • Top with 1 ½ cups shredded sharp cheddar cheese. Broil the pie on HIGH in the oven for 2-3 minutes until the cheese is melted and bubbling. Remove from the oven and serve fresh.

    Calories: 272kcalCarbohydrates: 16gProtein: 22gFat: 13gSaturated Fat: 6gPolyunsaturated Fat: 1gMonounsaturated Fat: 4gTrans Fat: 0.4gCholesterol: 58mgSodium: 599mgPotassium: 496mgFiber: 5gSugar: 1gVitamin A: 523IUVitamin C: 3mgCalcium: 195mgIron: 4mg

    Nutrition information is automatically calculated, so should only be used as an approximation.



    Source link

  • Easy Homemade BBQ Seasoning | The Recipe Critic

    Easy Homemade BBQ Seasoning | The Recipe Critic


    This website may contain affiliate links and advertising so that we can provide recipes to you. Read my disclosure policy.

    My homemade BBQ seasoning brings bold, smoky flavor to just about anything! It’s the perfect blend of sweet, savory, and just a little kick, ready to shake onto chicken, veggies, ribs, and more.

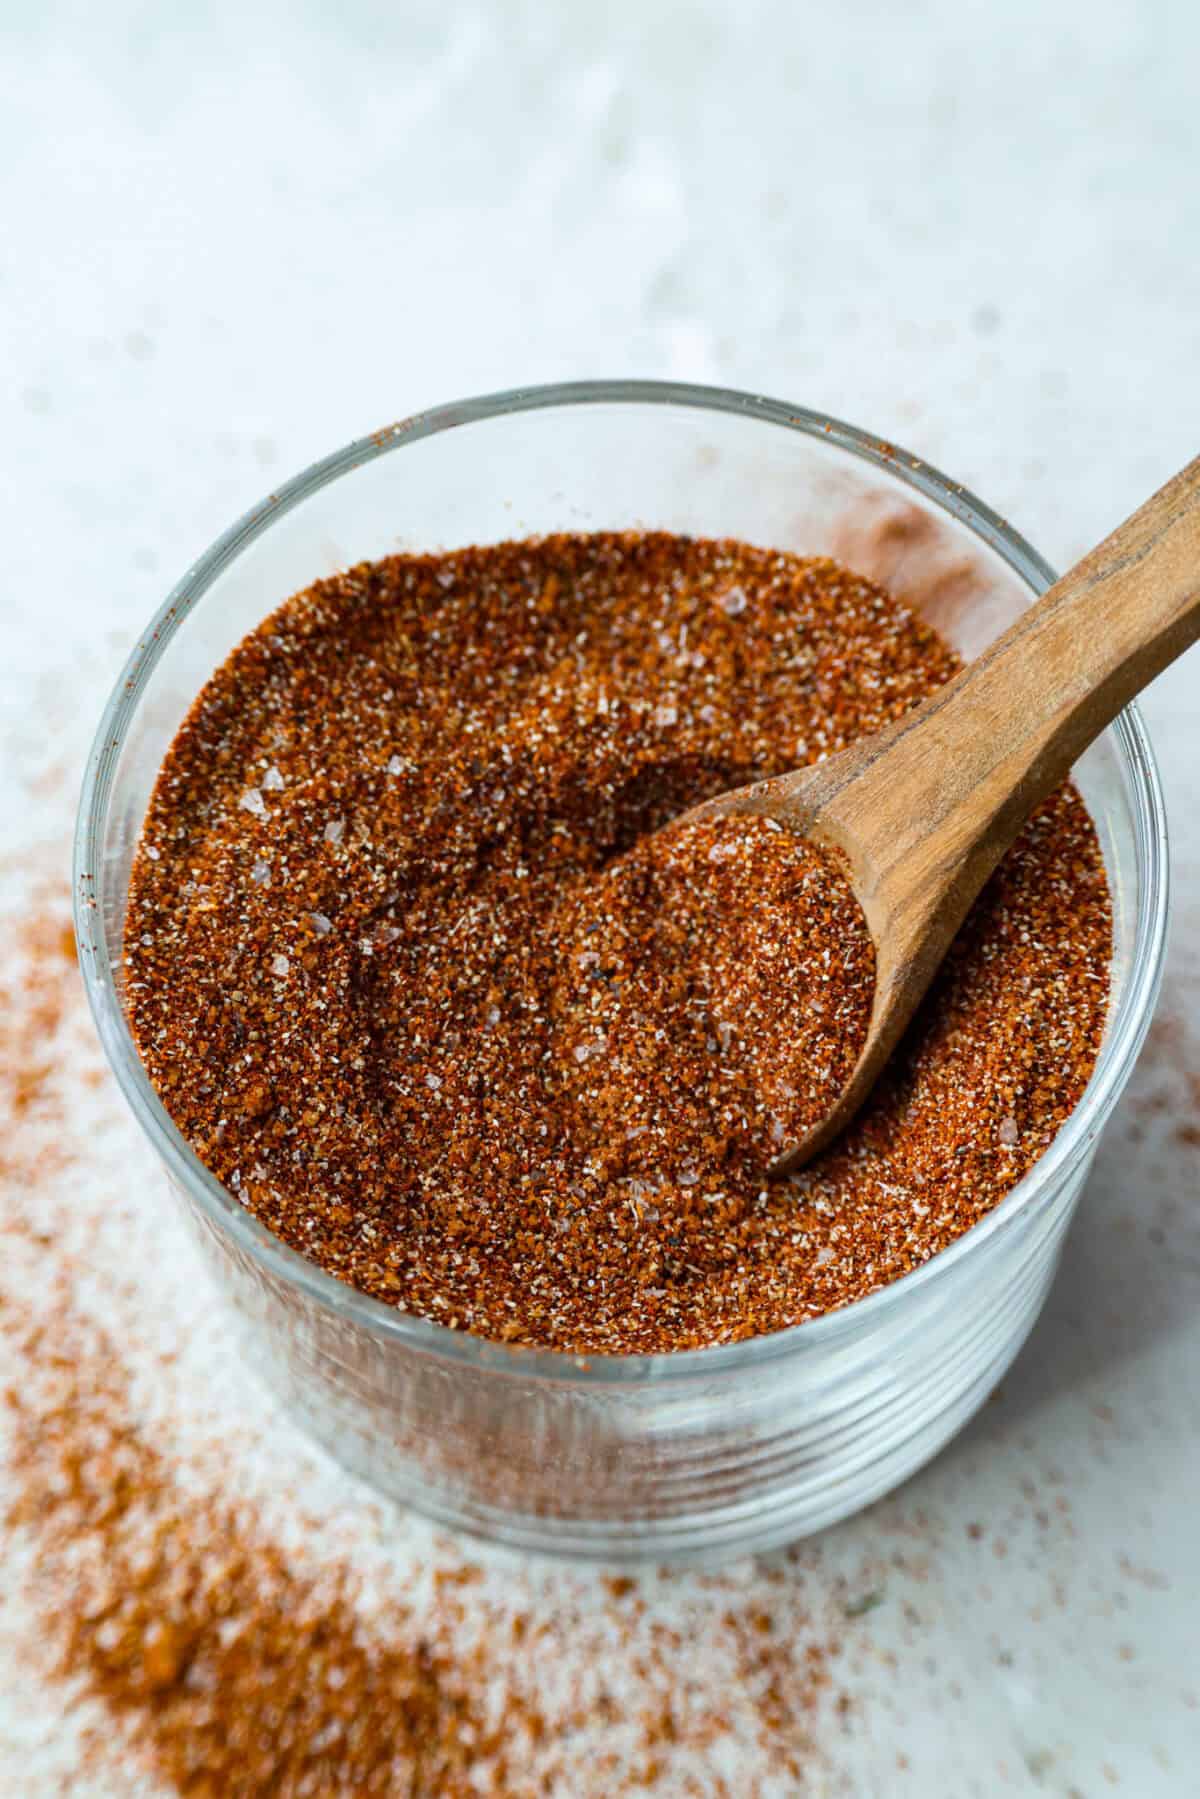
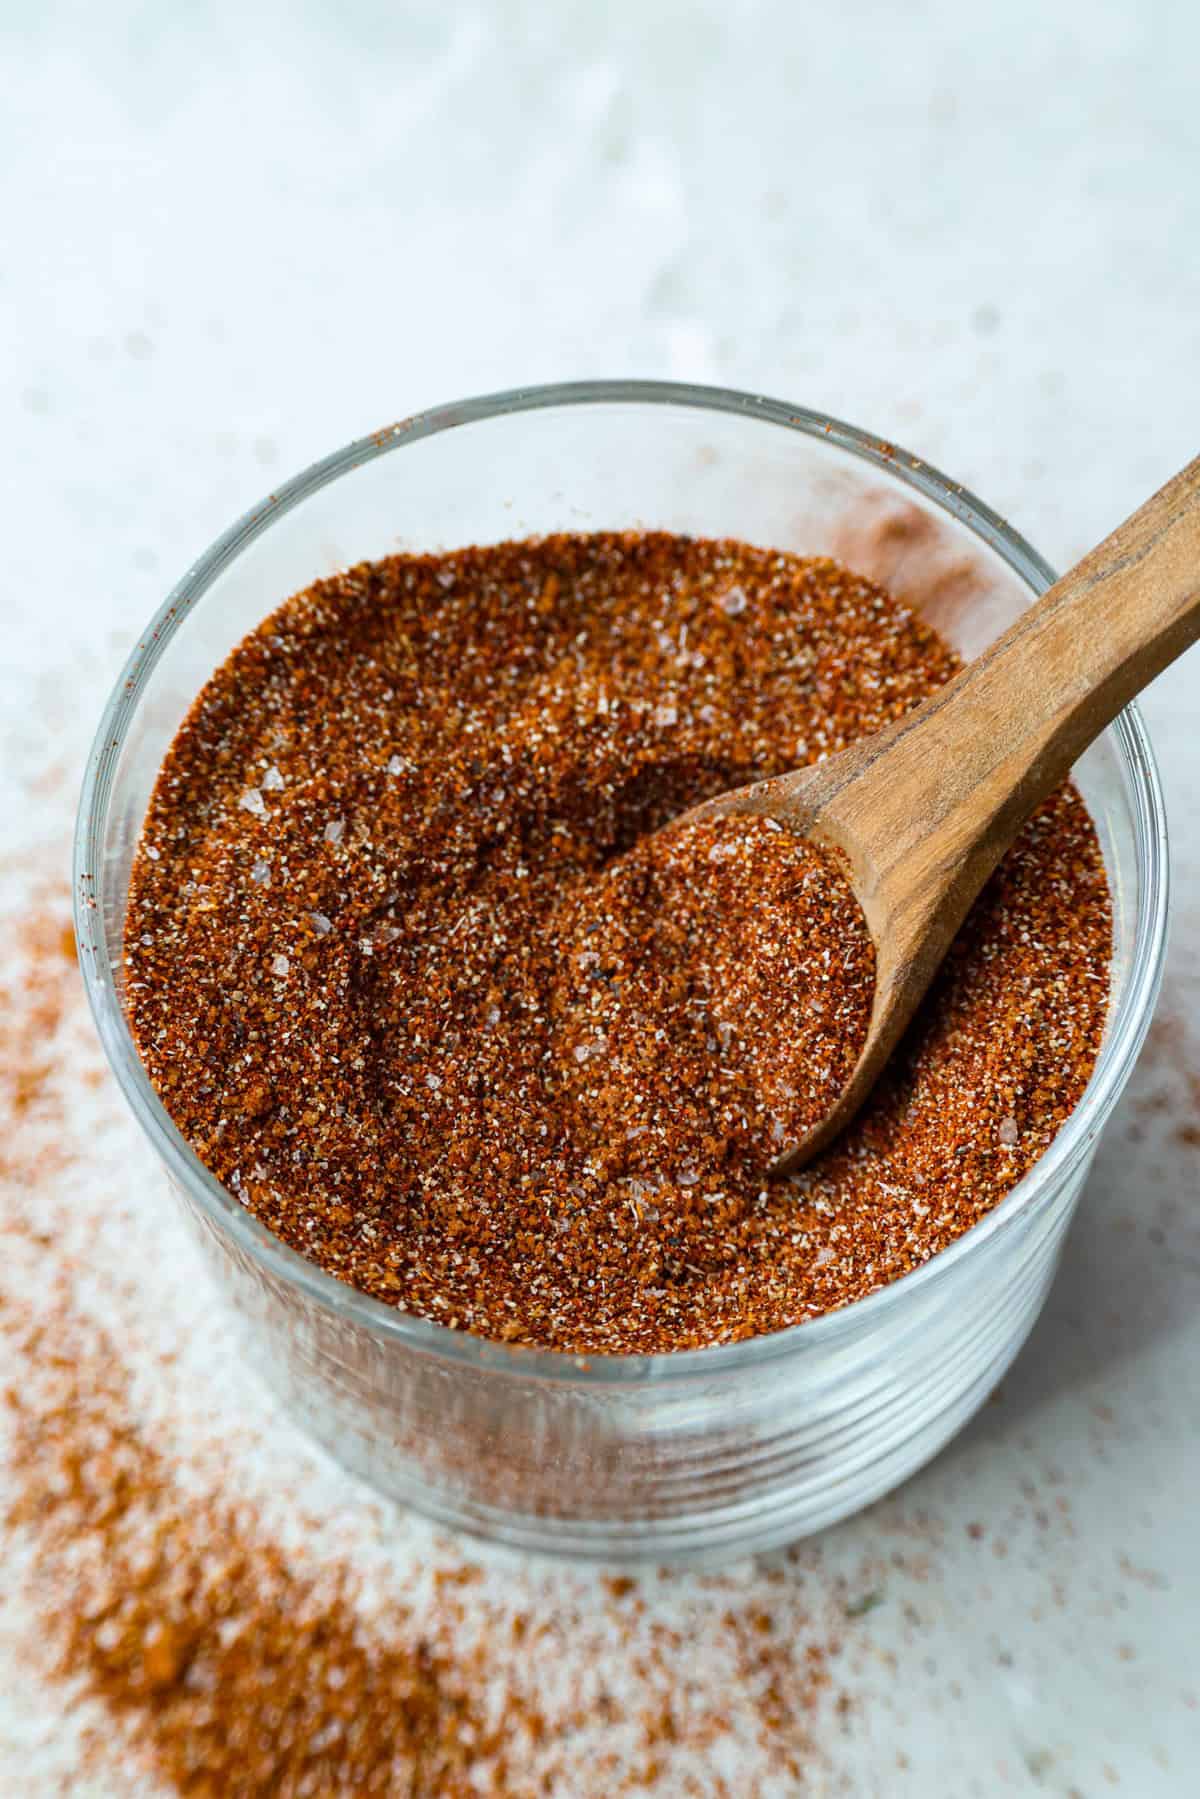
    Overhead shot of a jar of homemade BBQ seasoning with a small wooden spoon.

    Why You’ll Want to Keep This on Hand

    • Big flavor, few ingredients: Just a few pantry spices turn into a tasty blend that you can use all BBQ season long!
    • Totally customizable: Dial up the heat or sweetness to make it your own.
    • Use it on EVERYTHING: Perfect for grilling, roasting, or seasoning snacks like popcorn and roasted nuts!

    BBQ Seasoning Ingredients

    Overhead shot of labeled ingredients.
    • Paprika: Use smoked paprika for a more smoky flavor.
    • Sugar: Brown sugar adds a sweet balance, but feel free to cut it back if you want more spice than sweet in your bbq rub.
    • Spice level: This blend’s got a little kick—skip or reduce the cayenne pepper if you’re not into the heat.

    How to Make BBQ Seasoning

    Get ready to level up your grilling game! This easy BBQ seasoning mix comes together in minutes and brings rich, smoky depth with a touch of sweetness to everything you add it to!

    1. Add Spices: In a small bowl, add paprika, brown sugar, kosher salt, chili powder, garlic powder, onion powder, black pepper, and cayenne pepper.
    2. Mix: Whisk all of the ingredients together until evenly mixed, then store in an airtight container.

    How to Store Homemade Seasoning

    This is great to have in the spice cabinet to add great flavor to so many different recipes.

    • Storing: Store your homemade seasoning in a spice jar or an airtight container in a cool, dark place.
    • How long does BBQ Seasoning Last? If you make sure it is in an airtight container, it will keep at room temperature for 1 year.

    Two steaks seasoned with homemade bbq seasoning.

    How Do I Use BBQ Seasoning?

    This spice blend is great for meat rubs, seasoning vegetables, steak, pork, shrimp, and more. Here are a few more options for you to try!

    Pin this now to find it later

    Pin It

    Prevent your screen from going dark

    • In a small bowl, add 3 tablespoons paprika, 2 tablespoons brown sugar, 1 tablespoon kosher salt, 1 tablespoon chili powder, 2 teaspoons garlic powder, 2 teaspoons onion powder, 1 teaspoon black pepper, and ½ teaspoon cayenne pepper.

    • Whisk all of the ingredients together until evenly mixed. Store in an airtight container.

    Calories: 27kcalCarbohydrates: 6gProtein: 1gFat: 1gSaturated Fat: 0.1gPolyunsaturated Fat: 0.3gMonounsaturated Fat: 0.1gSodium: 892mgPotassium: 103mgFiber: 2gSugar: 3gVitamin A: 1643IUVitamin C: 0.3mgCalcium: 16mgIron: 1mg

    Nutrition information is automatically calculated, so should only be used as an approximation.


    Source link

  • The BEST Creamy Lemon Orzo Recipe

    The BEST Creamy Lemon Orzo Recipe


    This website may contain affiliate links and advertising so that we can provide recipes to you. Read my disclosure policy.

    Fresh lemons make me so happy! They’re bright, cheerful, and lift me out of the winter rut. Add that citrusy sunshine to a creamy pasta, and you get this dreamy Creamy Lemon Orzo! Simple, rich, and bursting with feel-good flavor.

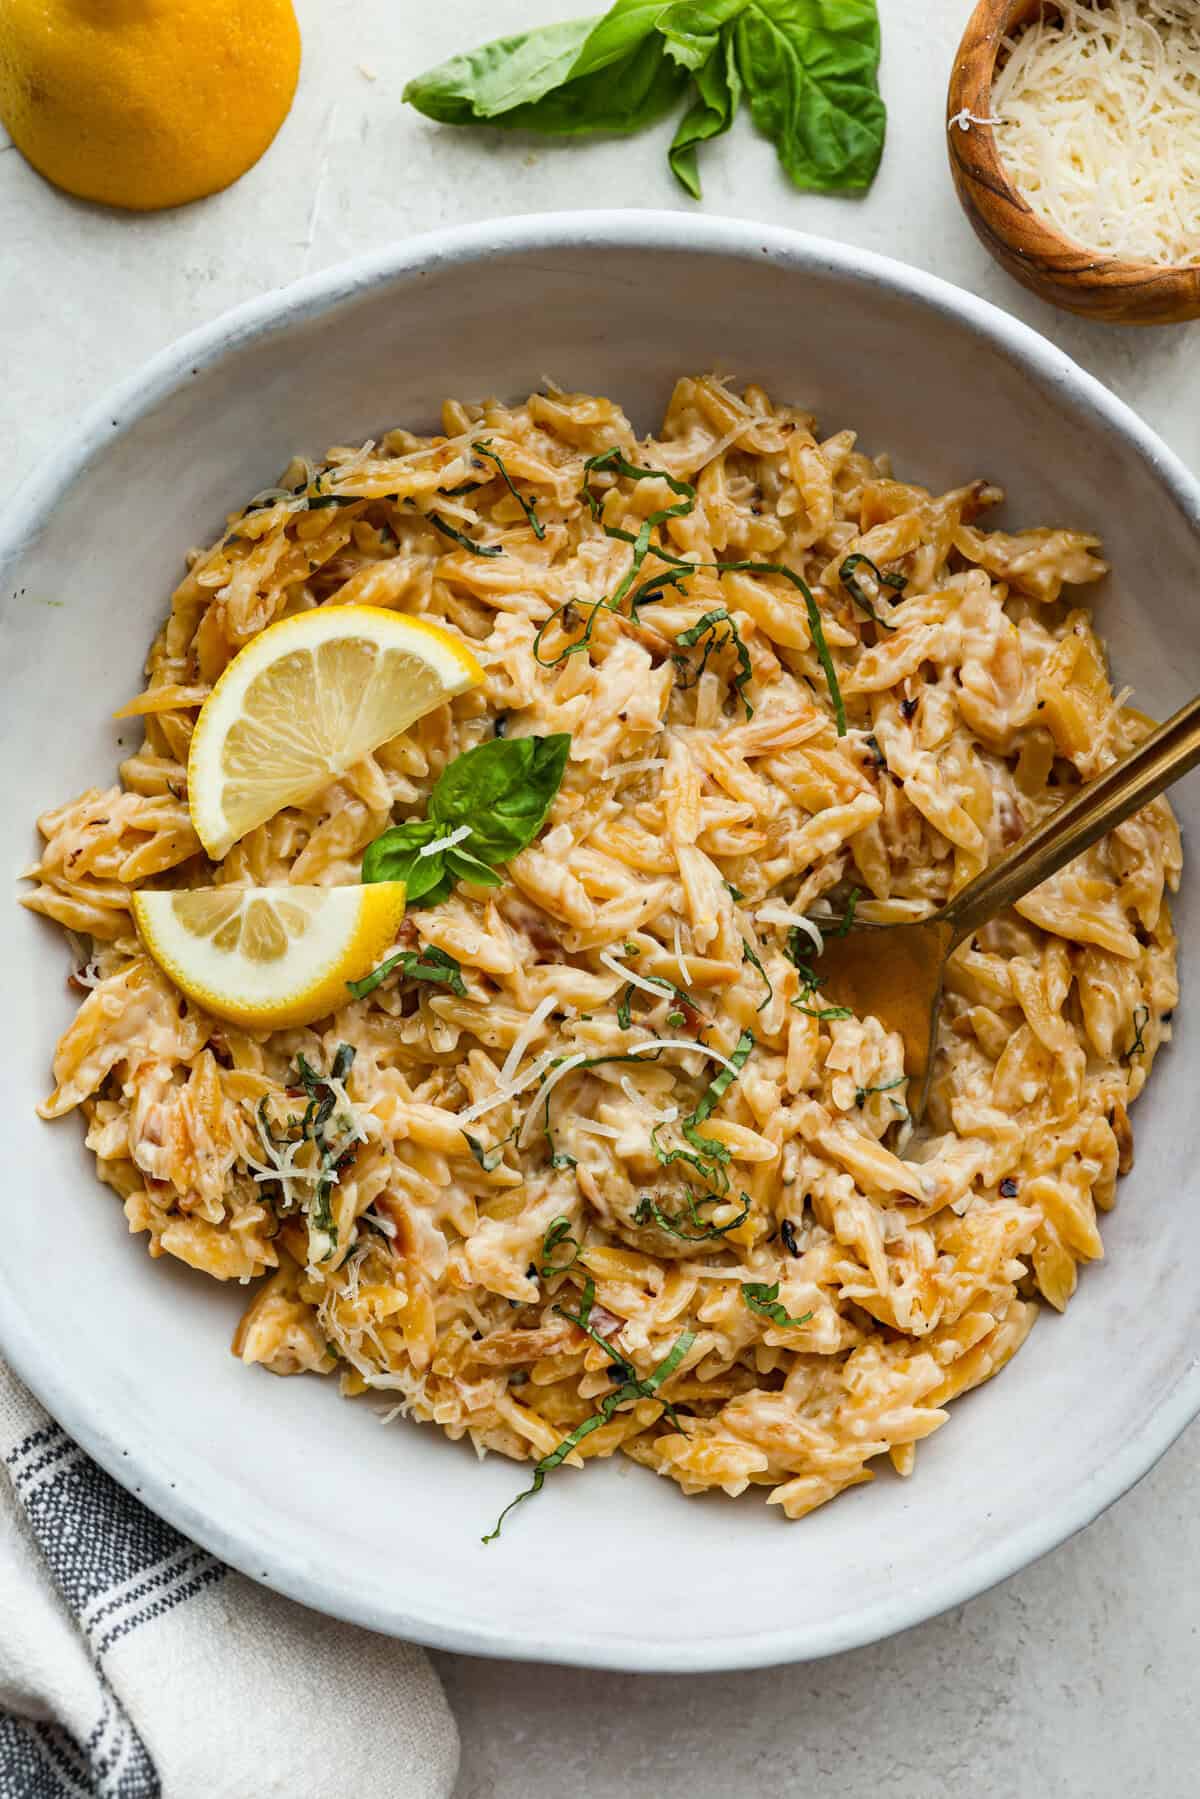
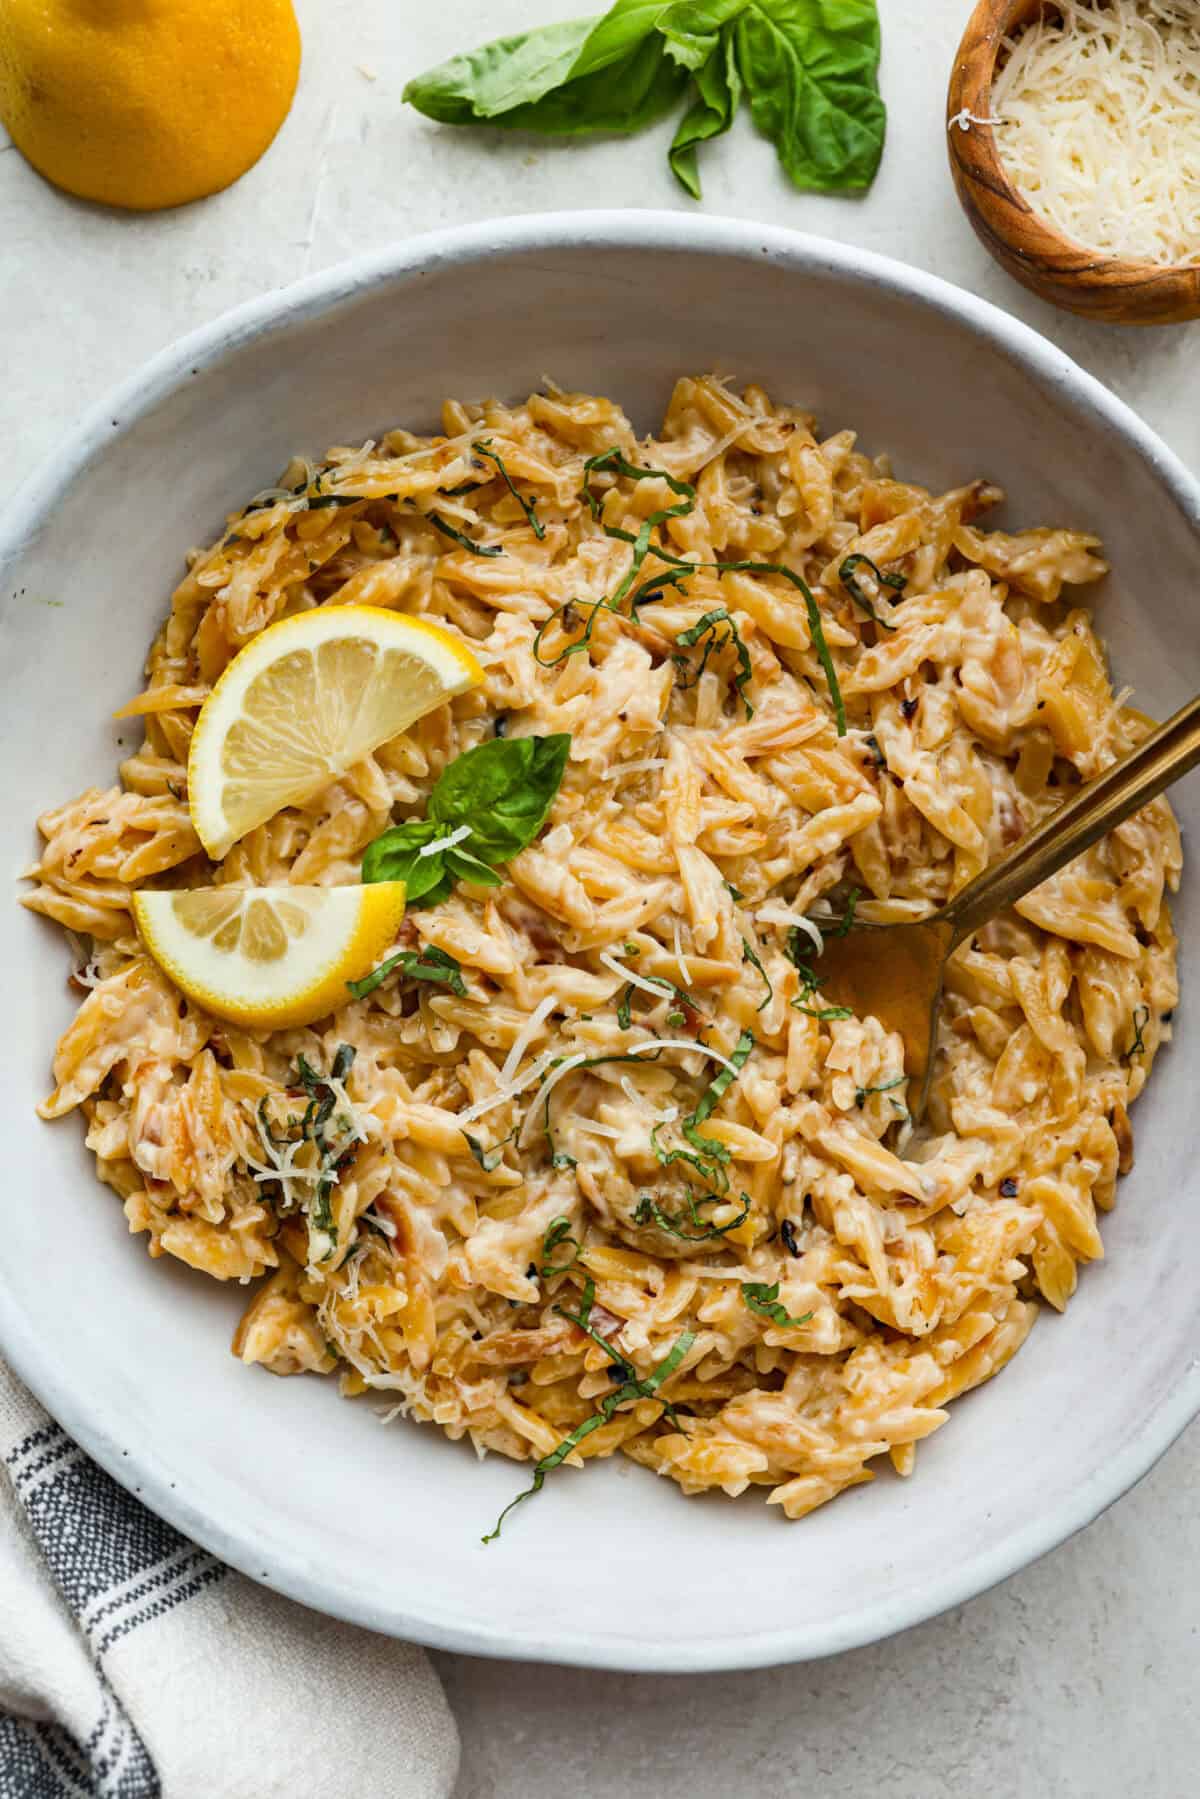
    Overhead shot of plated creamy lemon orzo.

    Why This Orzo Understood the Assignment!

    • One Pan Simplicity: I know you need minimal cleanup meals, and this dish is made in one pan and done in under 30 minutes. I’ve got you!
    • Cozy, Creamy, Family Favorite: With rich heavy cream and fresh lemon, this dish feels fancy but is still totally family-friendly! Everyone always asks for seconds.
    •  Light Pasta Dish: Even though this dish is pasta, the lemon makes it light and bright, and not so heavy.

    Creamy Lemon Orzo Ingredients

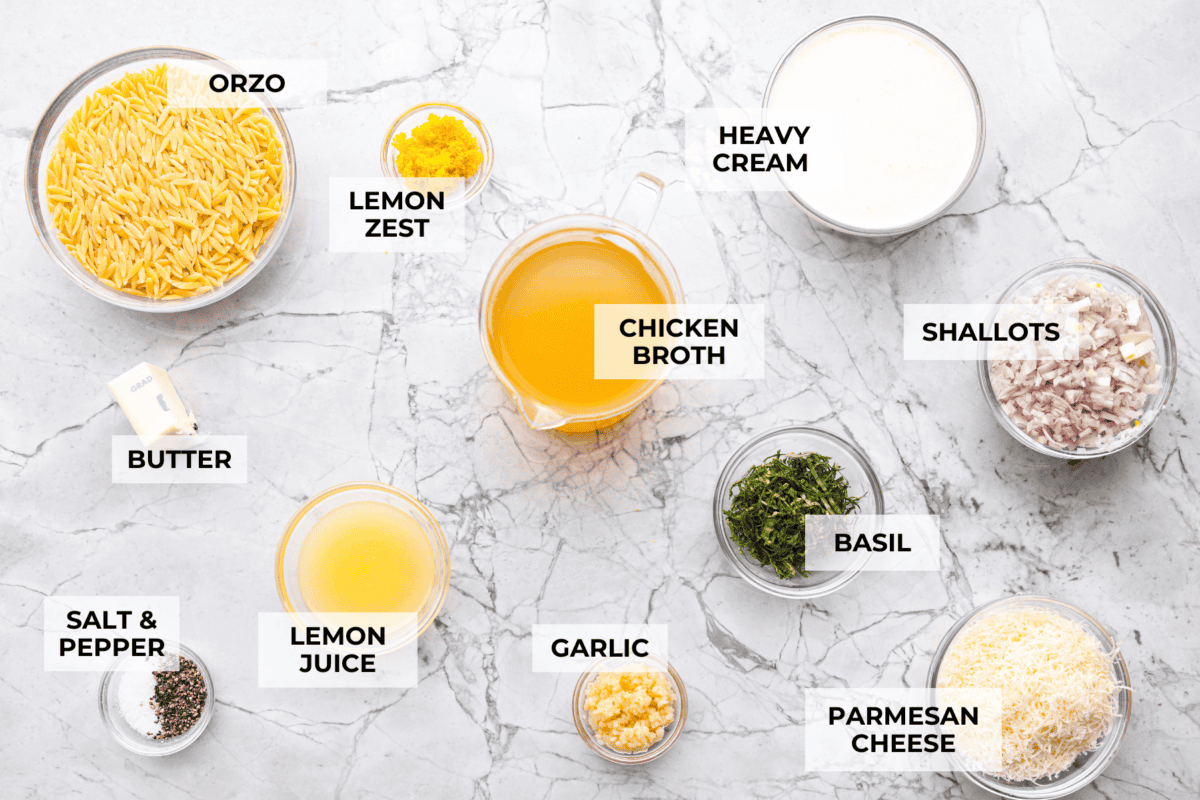
    Overhead shot of labeled ingredients.
    • Parmesan: I used freshly shredded Parmesan for bold flavor. Pre-shredded works, but fresh makes all the difference in this simple dish.
    • Fresh Vs. Dry Basil: You can use 2 teaspoons of dried basil in place of fresh, but fresh brings way more flavor.
    • Heavy Cream Substitution: I recommend full-fat heavy cream for the creamiest texture. Half and half works, but it won’t be quite as rich.

    How to Make Creamy Lemon Orzo

    You know I’m all about making your weeknights easier! This creamy lemon orzo is one of those gems that comes together fast, with simple ingredients and the best flavor in every bite.

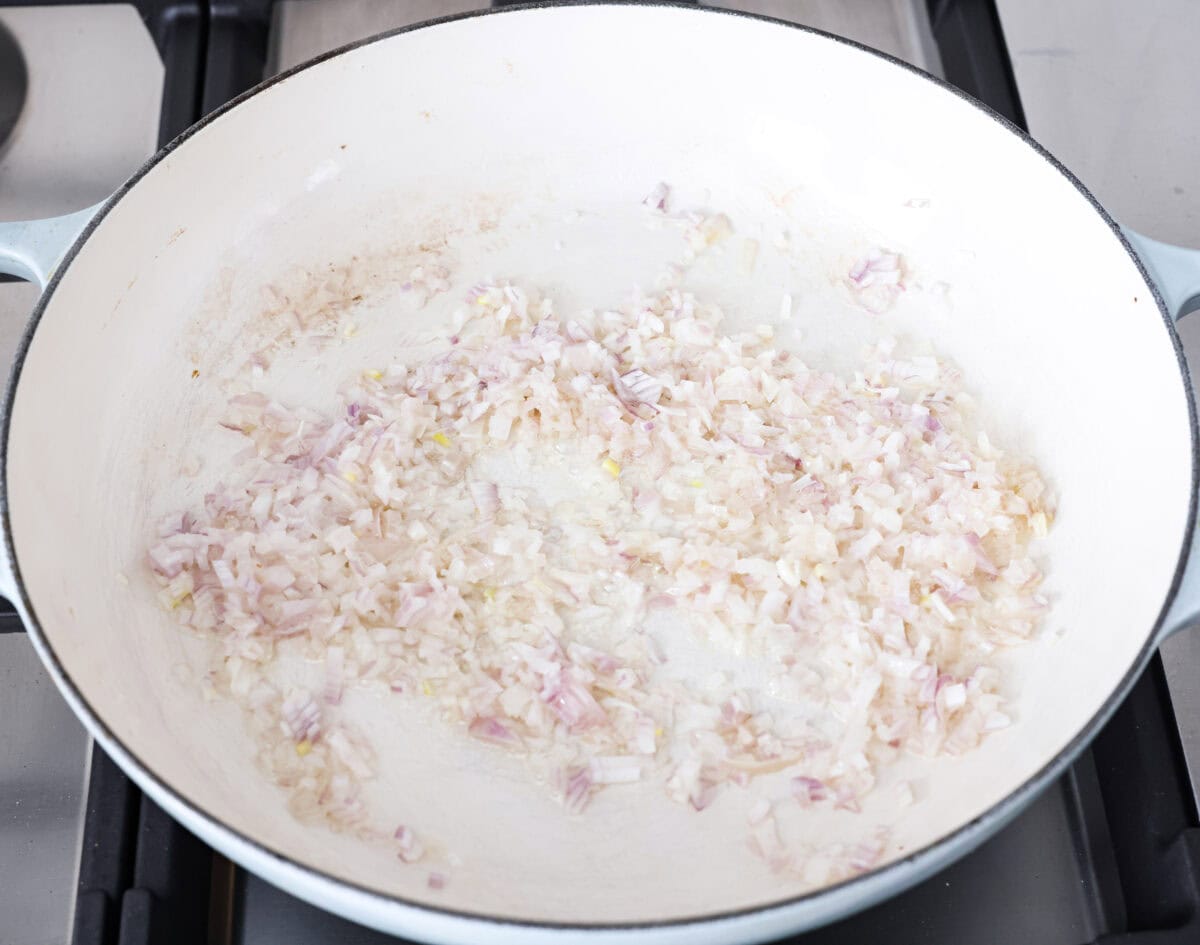
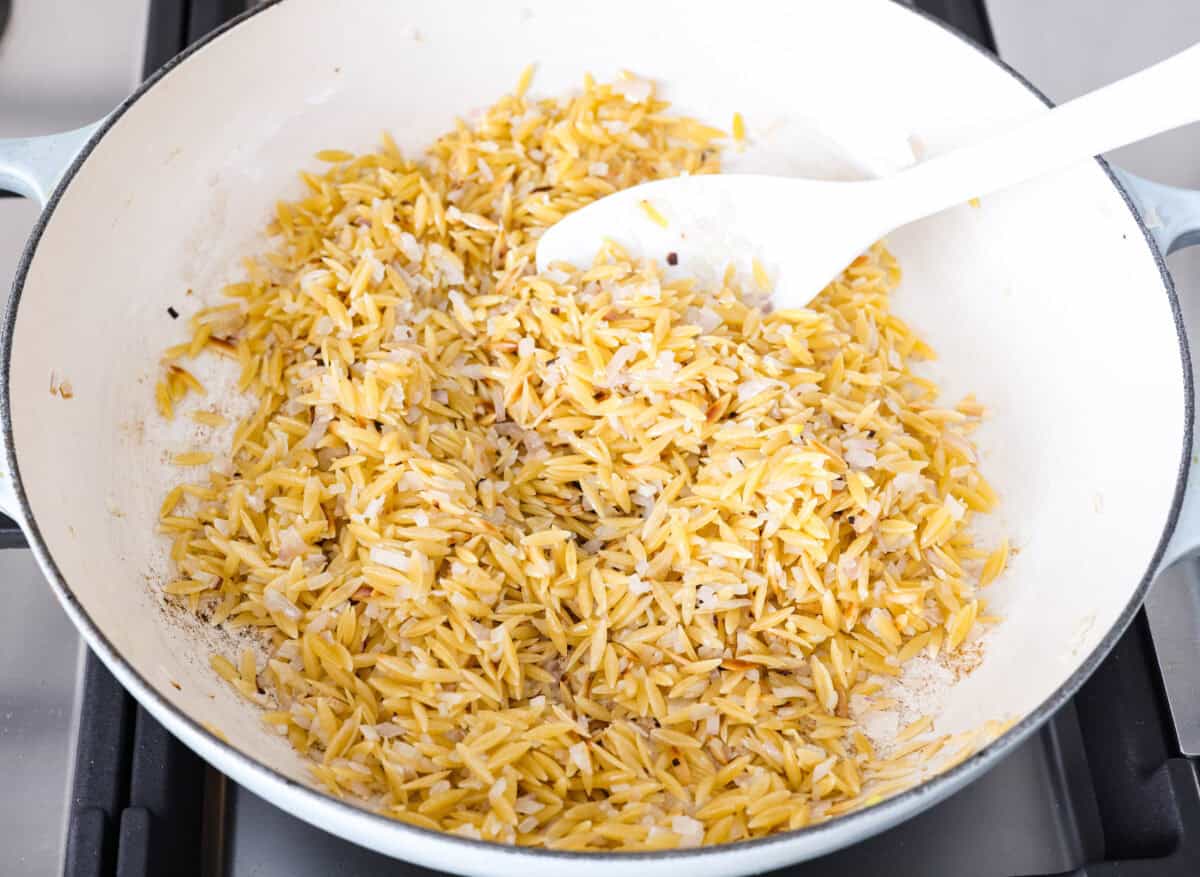
    1. Cook Shallots: Heat the butter in a large pan over medium-high heat, then add in the shallots and cook, stirring frequently, for 3 minutes.
    2. Toast Orzo: Add the orzo to the pan and continue to cook, stirring occasionally, for 5 minutes, to lightly toast the orzo. Add the garlic and lemon zest to the pan and cook for 1 minute, until fragrant. Whisk in the chicken broth, heavy cream, lemon juice, salt, and pepper.
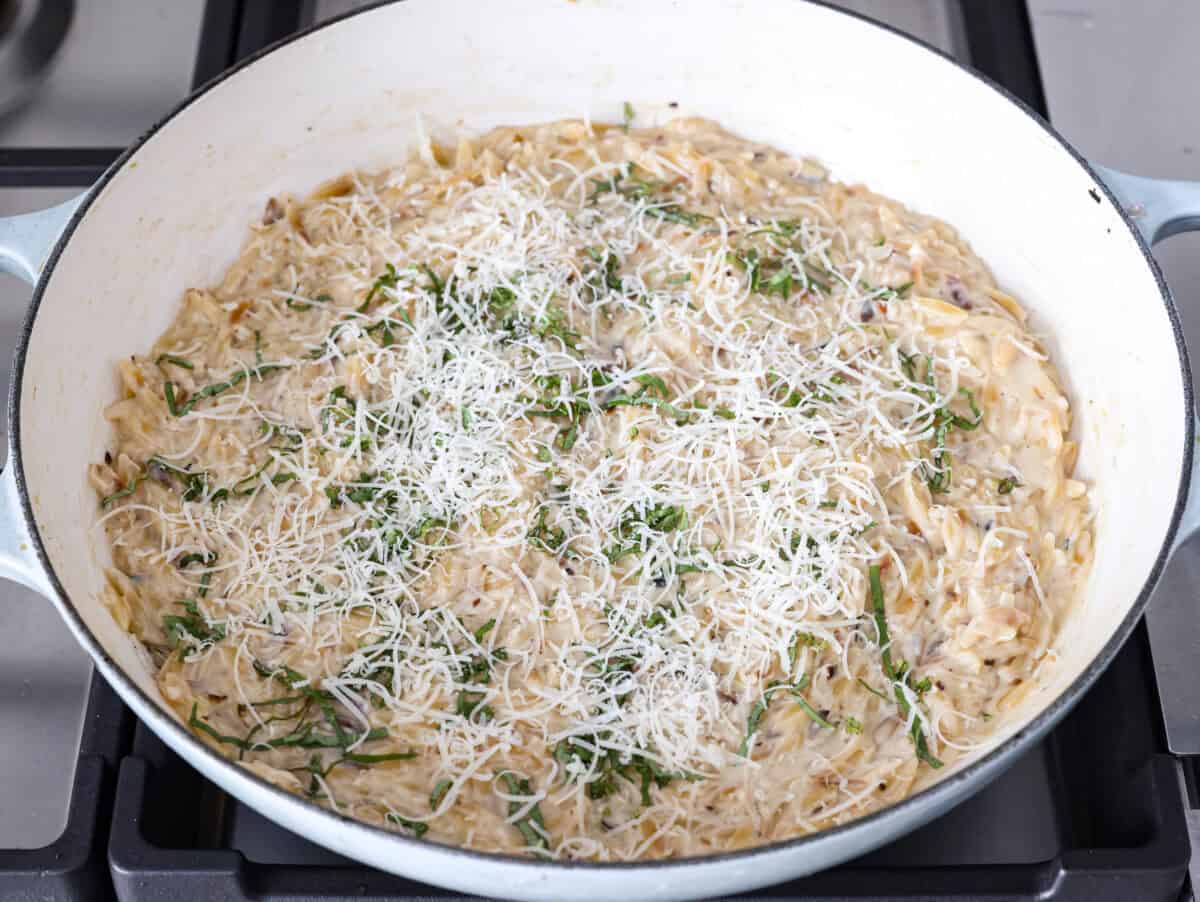
    3. Cook, Stirring Frequently: Bring the liquid to a boil, then reduce the heat to medium-low and simmer the pasta for 8-10 minutes. Stir frequently to keep the pasta from sticking to the pan. Once the pasta is tender and the liquid has cooked down, sprinkle the dish with parmesan cheese and basil and then serve warm.

    How to Store Leftovers

    • In the Fridge: Store creamy lemon orzo leftovers in an airtight container in the fridge for up to 4 days. 
    • In the Freezer: Store completely cooled leftovers in a freezer-safe container in the freezer for up to 3 months.

    Cooked creamy lemon orzo in a skillet.

    What to Serve With Lemon Orzo

    This creamy lemon orzo pairs beautifully with just about anything—chicken, steak, pork, baked cod, even shrimp! Make these items below for an amazing meal. Your family will think you went all out (but we’ll know the truth).

    Pin this now to find it later

    Pin It

    Prevent your screen from going dark

    • Heat the 2 tablespoons salted butter in a large pan over medium-high heat. Add in the 2 minced shallots and cook, stirring frequently for 3 minutes.

    • Add the 1 ½ cups orzo to the pan and continue to cook, stirring occasionally for 5 minutes, to lightly toast the orzo.

    • Add the 3 minced cloves garlic and 1 tablespoon lemon zest to the pan and cook for 1 minute, until fragrant. Whisk in the 2 cups chicken broth, 1 cup heavy cream, 3 tablespoons lemon juice, 1 teaspoon salt, and ½ teaspoon pepper.

    • Bring the liquid to a boil, then reduce the heat to medium-low and simmer the pasta for 8-10 minutes, stirring frequently to keep the pasta from sticking to the pan.

    • Once the pasta is tender and the liquid has cooked down, sprinkle the dish with ½ cup freshly shredded Parmesan cheese and 2 tablespoons freshly chopped basil and serve.

    Calories: 358kcalCarbohydrates: 33gProtein: 9gFat: 21gSaturated Fat: 13gPolyunsaturated Fat: 1gMonounsaturated Fat: 5gTrans Fat: 0.2gCholesterol: 64mgSodium: 868mgPotassium: 199mgFiber: 2gSugar: 3gVitamin A: 811IUVitamin C: 6mgCalcium: 122mgIron: 1mg

    Nutrition information is automatically calculated, so should only be used as an approximation.


    Source link

  • Cucumber Lime Agua Fresca – Minimalist Baker Recipes

    Cucumber Lime Agua Fresca – Minimalist Baker Recipes


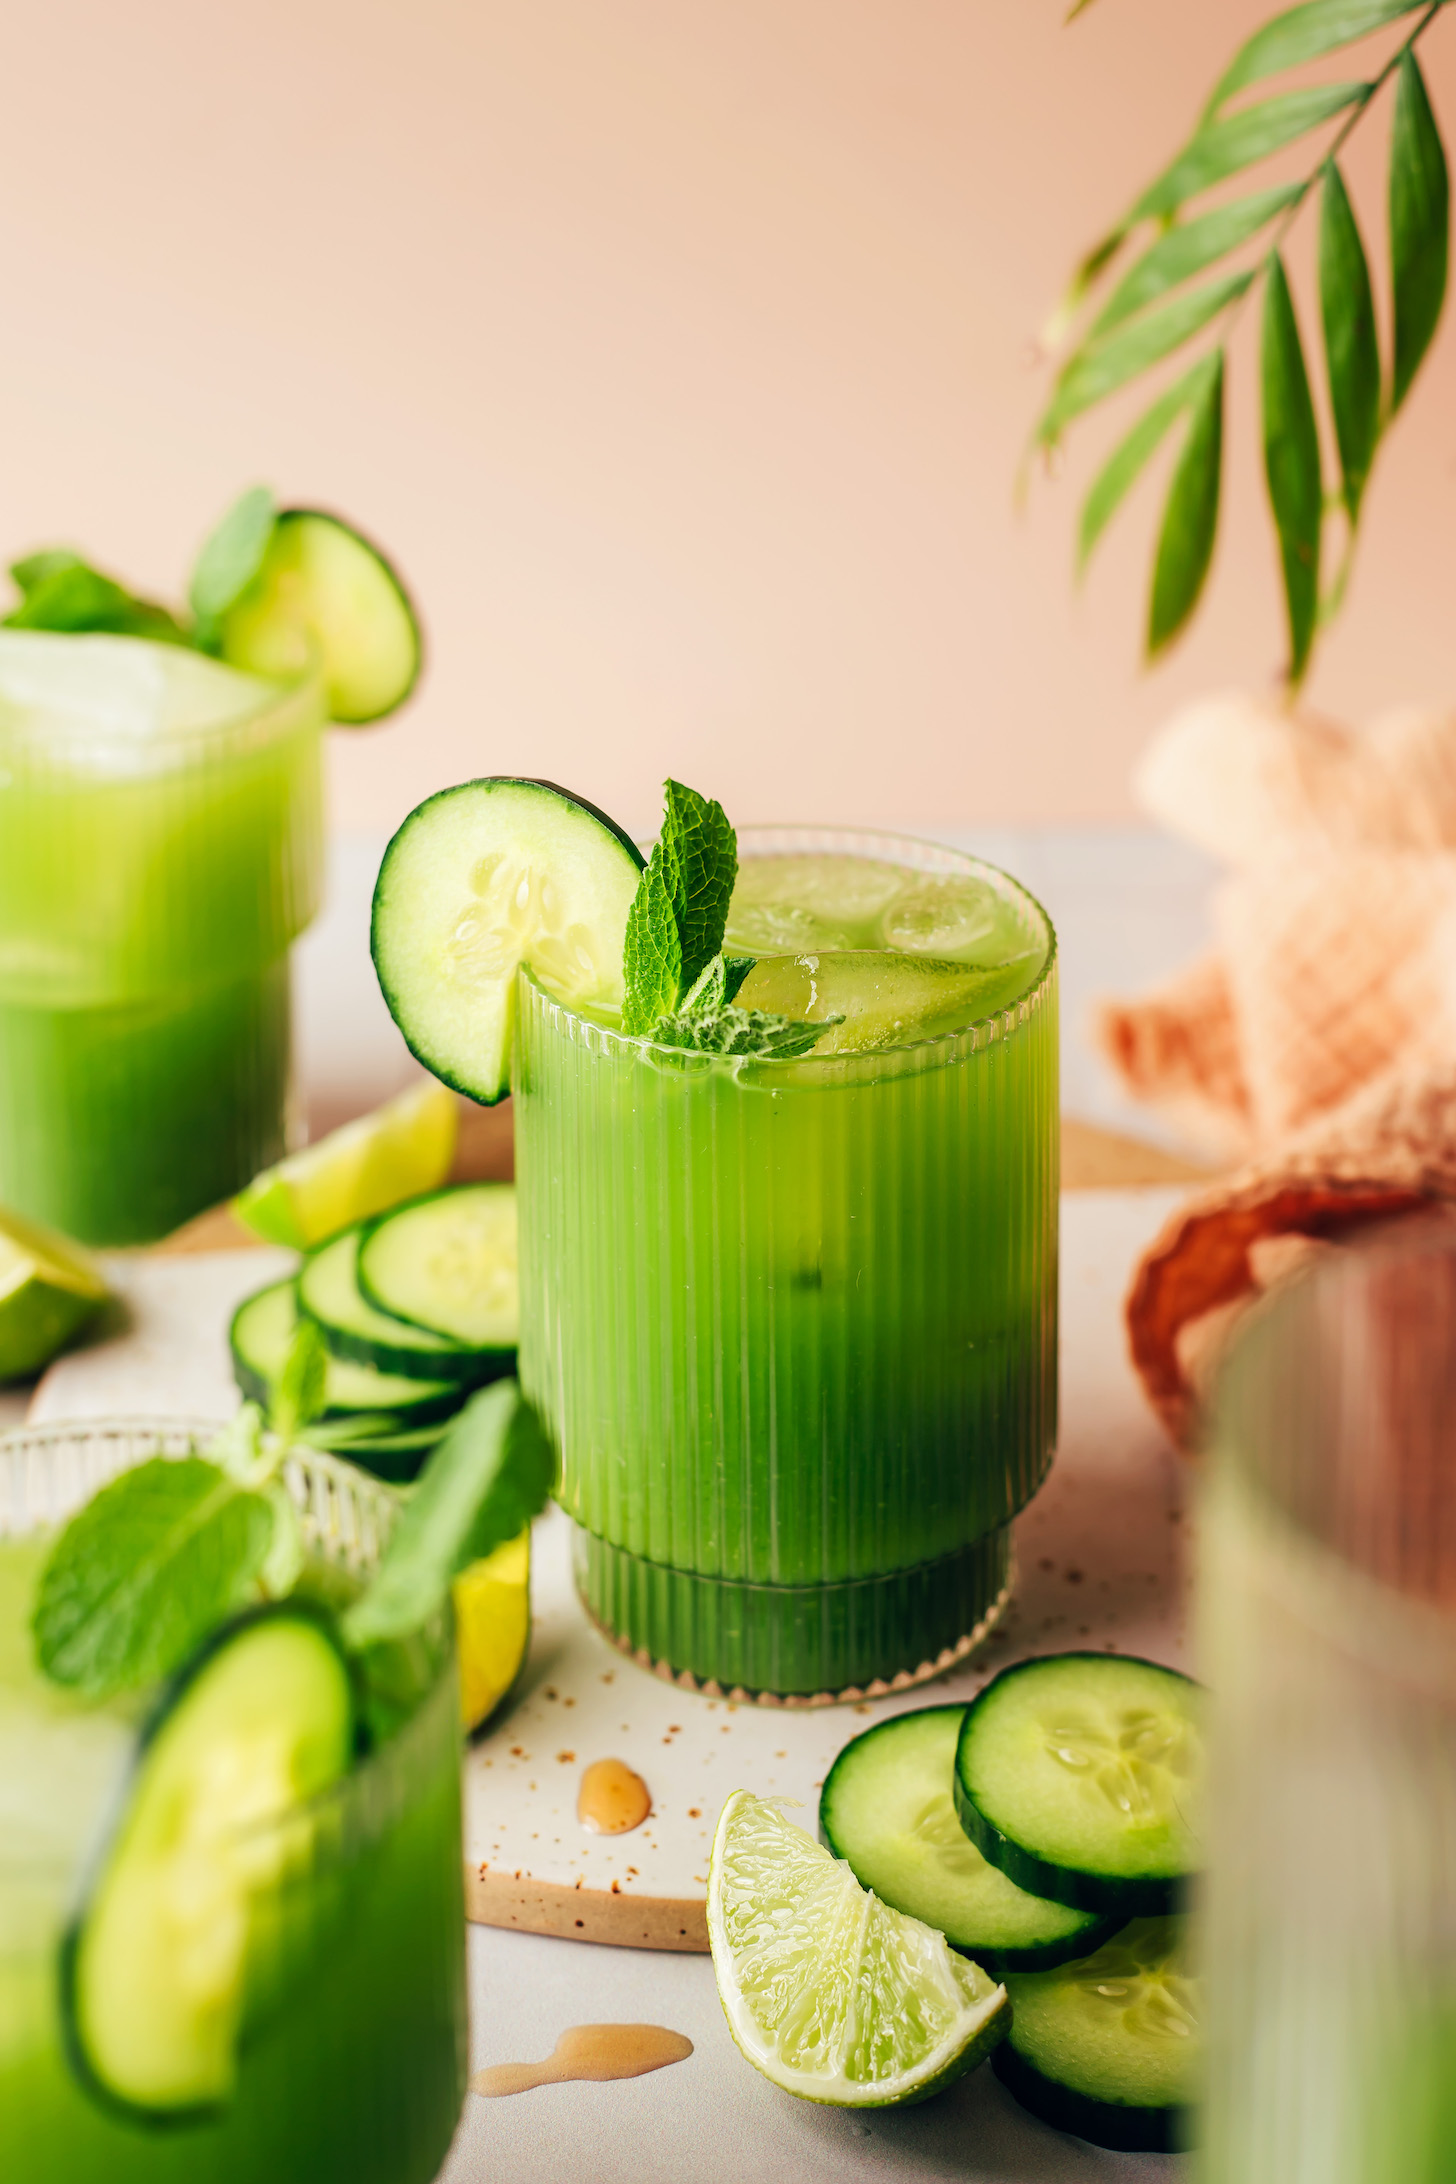
    Glasses of cucumber lime agua fresca with cucumber slices on the rims and garnished with fresh mint

    Staycation, anyone? One sip in and this cucumber lime agua fresca will have you feeling in full vacation mode. Made with just 3 ingredients in 10 minutes, it couldn’t be simpler or more refreshing! 

    It’s the ultimate hydrating sip, poolside drink, and also perfect for making in large batches for sharing. Let’s get refreshed!

    Fresh mint, maple syrup, lime wedges, and sliced cucumbers

    What is an Agua Fresca?

    An agua fresca (which translates to “fresh water”) is a refreshing drink widely popular in Central and South America, Mexico, and parts of the Caribbean. It’s typically a combination of water and sugar mixed with fruit, flowers, or other flavorful ingredients.

    It’s thought that the making of agua frescas may go back centuries and that they may have originally been created by the Aztec people. The following is our inspired, naturally sweetened take based on one we tried in Mexico.

    How to Make a Cucumber Lime Agua Fresca

    This agua fresca employs the subtle, cooling, and thirst-quenching goodness of one of our favorite veggies: cucumber! The best part? You don’t even have to peel them. Just wash, chop, and toss in the blender!

    Pouring water into a blender over cucumber slices and fresh mint

    Along with the cucumber, lime juice adds bright fruitiness while agave nectar (or maple syrup) adds a touch of sweetness. Mint is optional but highly recommended!

    Straining a blended cucumber lime mixture through a fine mesh strainer

    After combining the ingredients with water, it’s as easy as blend, strain, and serve. Easy peasy, lime squeezy! That’s how it goes, right?

    Overhead shot of several glasses filled with our cucumber lime agua fresca recipe

    We hope you LOVE this agua fresca, friends! It’s:

    Refreshing
    Subtly sweet
    Hydrating
    Quick & easy
    & Vacay in a cup!

    It’s the ultimate summer drink for parties, poolside, and beyond!

    More Refreshing Summer Drinks

    If you try this recipe, let us know! Leave a comment, rate it, and don’t forget to tag a photo @minimalistbaker on Instagram. Cheers, friends!

    Side view of glasses of cucumber lime agua frescas with sliced cucumbers and fresh mint

    Prep Time 10 minutes

    Total Time 10 minutes

    Servings 4 (~1 cup servings)

    Course Beverage

    Cuisine Gluten-Free, Mexican-Inspired, Vegan

    Freezer Friendly 1 month

    Does it keep? 1-2 Days

    Prevent your screen from going dark

    • 3 cups water
    • 2 medium cucumbers, roughly chopped (2 medium cucumbers yield ~4 cups or 450 g chopped)
    • 3 medium limes (3 medium limes yield ~1/4 cup or 60 ml juice)
    • 2-3 Tbsp agave nectar or maple syrup
    • 1 small handful fresh mint leaves (optional but highly recommended // 1 small handful yields ~15-20 leaves)
    • Ice cubes (for serving)
    • Before blending, we recommend tasting your cucumbers to see if the peel is bitter. We left our peels on for vibrant color and flavor, but bitter peels should be removed.

    • Add all ingredients to a blender (starting with the lesser amount of agave or maple syrup) and blend until completely smooth. Pour through a fine mesh strainer over a large bowl or measuring cup to remove pulp, using a spoon to move it around and speed up straining as needed. Taste and adjust, adding more agave or maple syrup for sweetness or more lime juice for tartness.

    • Serve chilled, over ice. Leftovers keep for 1-2 days in the refrigerator, or can be frozen into ice cubes or popsicle molds!

    *Nutrition information is a rough estimate calculated with the lesser amount of agave nectar and without optional ingredients.

    Serving: 1 cup Calories: 53 Carbohydrates: 13.2 g Protein: 0.8 g Fat: 0.2 g Saturated Fat: 0 g Polyunsaturated Fat: 0.04 g Monounsaturated Fat: 0 g Trans Fat: 0 g Cholesterol: 0 mg Sodium: 3 mg Potassium: 177 mg Fiber: 1.3 g Sugar: 9.2 g Vitamin A: 23 IU Vitamin C: 9 mg Calcium: 19 mg Iron: 0.3 mg


    Source link

  • Gluten-Free Lemon Poppy Seed Muffins (Vegan)

    Gluten-Free Lemon Poppy Seed Muffins (Vegan)


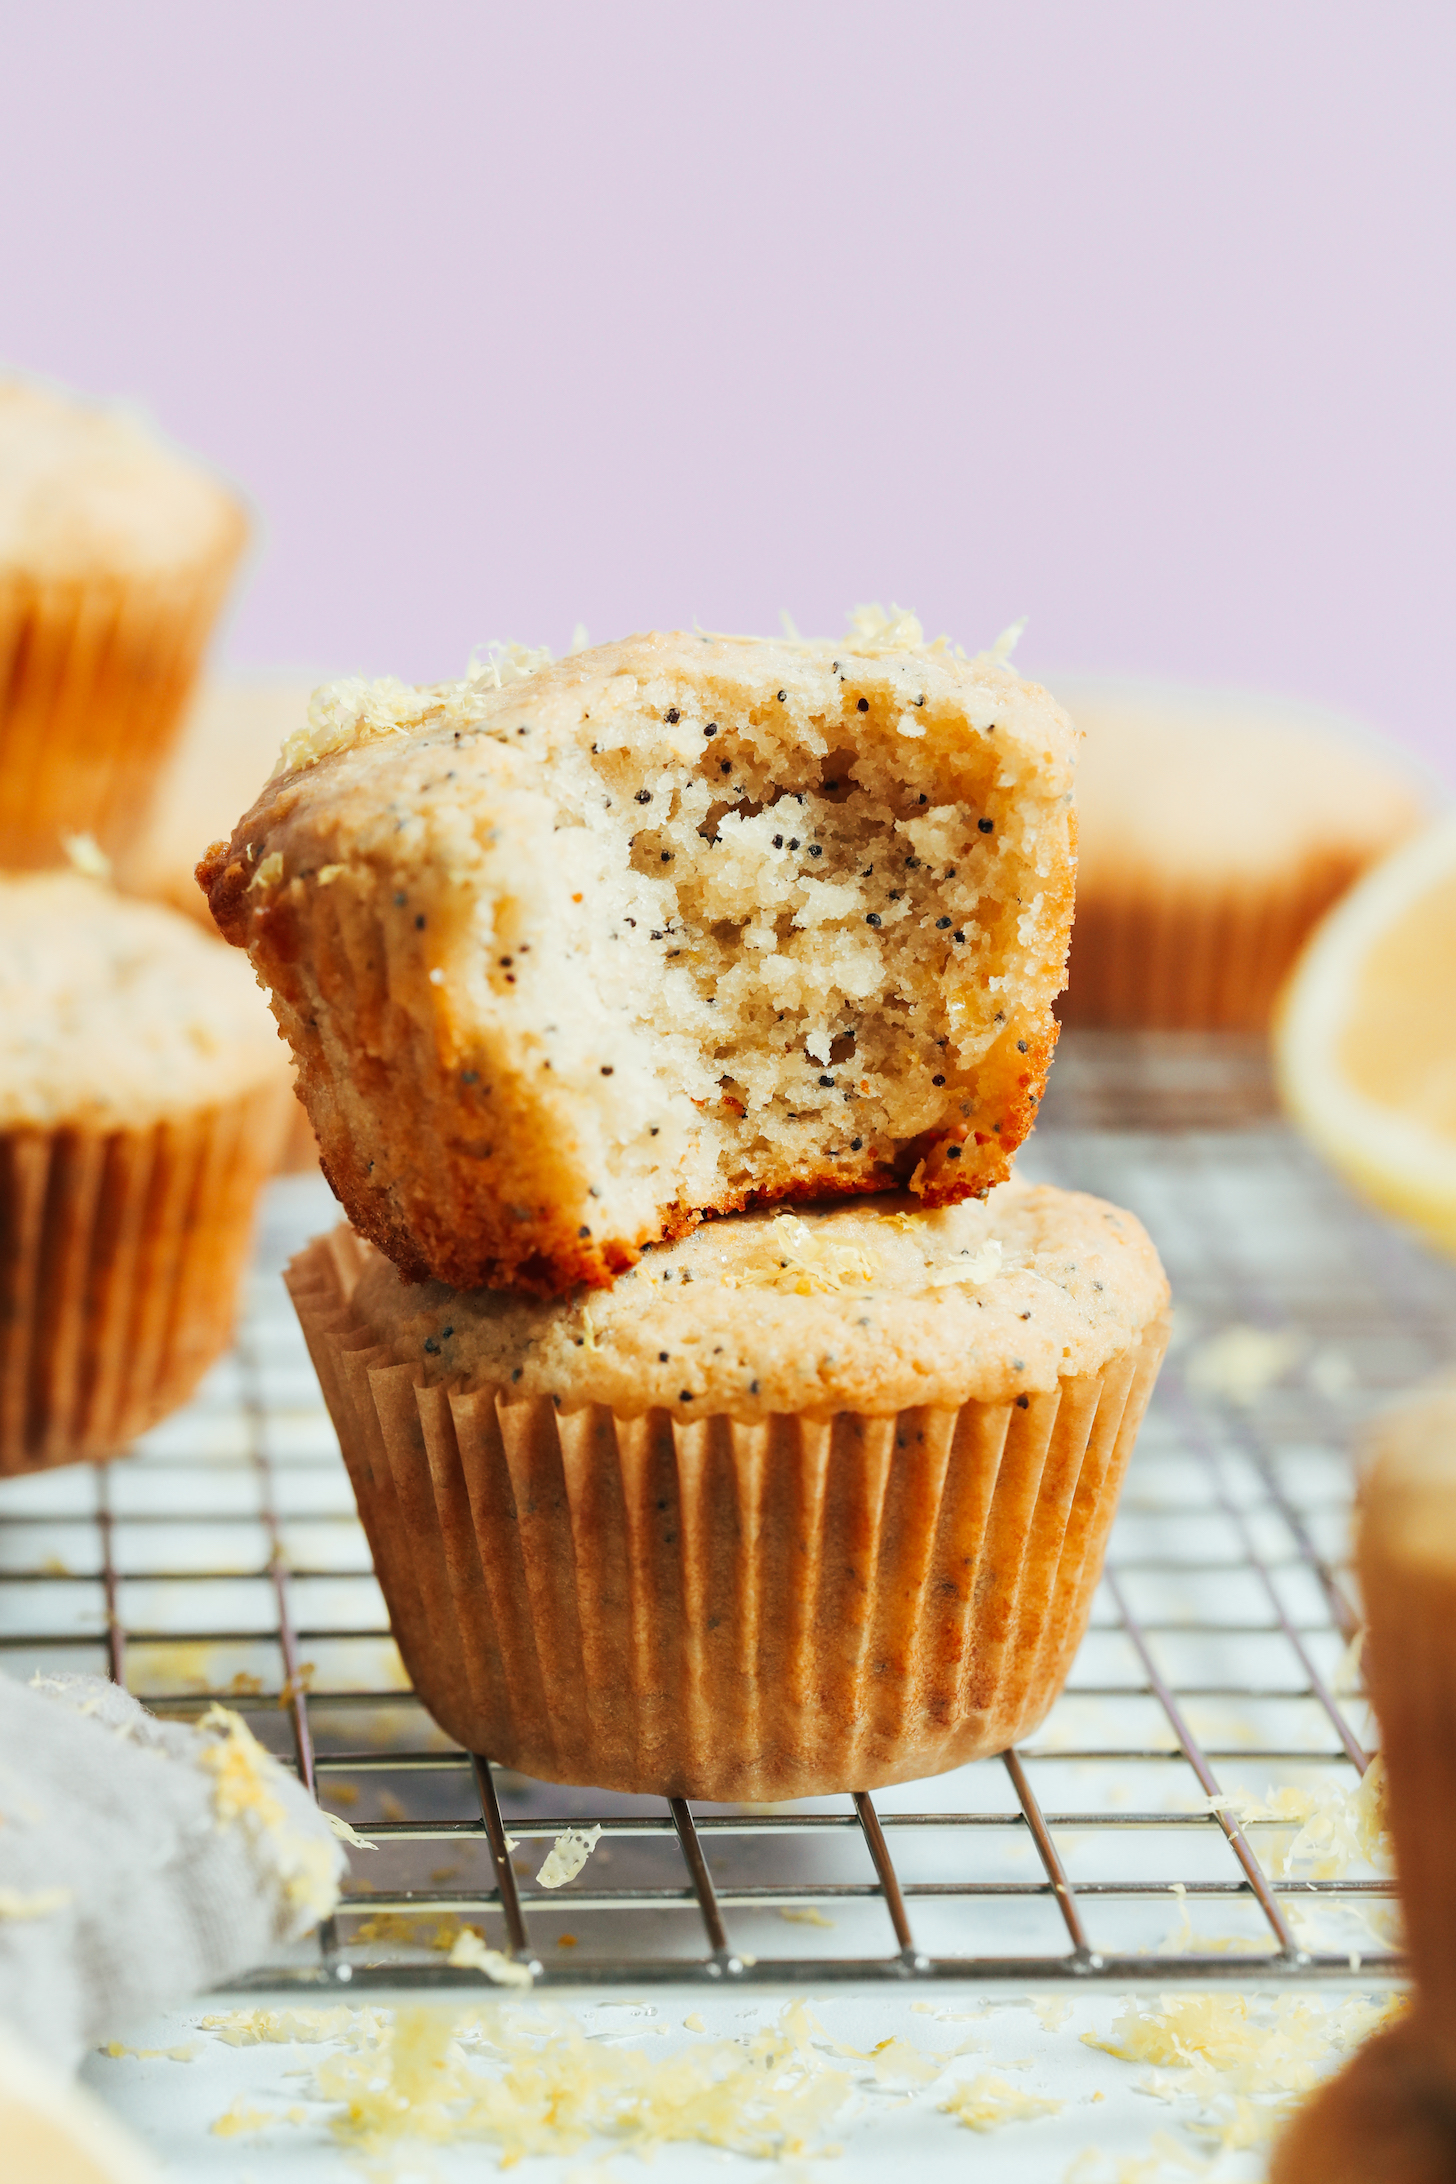
    Stack of vegan gluten-free lemon poppy seed muffins with the inner texture showing where a bite was taken out of one muffin

    Friends, prepare to level up your muffin game with these undetectably vegan and gluten-free lemon poppy seed muffins! They’re perfectly sweet, tender, FLUFFY, and bursting with bright, lemony goodness. 

    Made in just 1 bowl, they’re just as fun to make as they are to eat! Let’s get baking!

    Almond flour, gluten-free flour blend, vegan butter, lemon, cane sugar, baking soda and powder, poppy seeds, applesauce, and vanilla

    How to Make Vegan Gluten-Free Lemon Poppy Seed Muffins

    These super FLUFFY muffins begin with using an electric mixer to cream together the vegan butter, cane sugar, and lemon zest. This adds air (to create fluffiness) and infuses the butter with BIG lemon flavor.

    Using a hand mixer to cream the sugar and butter with lemon zest

    Next comes applesauce for moisture and a generous amount of lemon juice because we aren’t messing around when we say BIG lemon flavor! It just wouldn’t be a lemon poppyseed muffin without it. Vanilla extract is key, too, for quintessential muffin flavor!

    Then it’s time for the dry ingredients: Almond flour keeps these muffins light and cakey, our GO-TO gluten-free blend adds structure, baking powder and baking soda give them major rise, sea salt adds flavor, and poppyseeds add a pleasant crunch.

    Using a hand mixer to whip the batter

    The last step: Divide your batter between muffin liners and bake until fluffy with lightly golden edges. And for best texture, try to wait for your muffins to cool before digging in! We know — it’s hard. But these are worth the wait!

    Using an ice cream scoop to scoop muffin batter into a muffin tin

    We hope you LOVE these lemon poppy seed muffins! They’re:

    Fluffy
    Bright
    Tender
    Super lemony
    & Undetectably vegan + gluten-free!

    Enjoy them for brunch, snack, or dessert, or take them to gatherings to see if you can impress even your gluten-loving friends (we think you will)!

    More Lemony Recipes

    If you try this recipe, let us know! Leave a comment, rate it, and don’t forget to tag a photo @minimalistbaker on Instagram. Cheers, friends!

    Vegan gluten-free lemon poppyseed muffins on a cooling rack

    Prep Time 15 minutes

    Cook Time 30 minutes

    Total Time 45 minutes

    Servings 12 (Muffins)

    Course Dessert, Snack

    Cuisine Gluten-Free, Vegan

    Freezer Friendly 1 month

    Does it keep? 3 Days

    Prevent your screen from going dark

    • 2/3 cup cane sugar* (ensure organic for vegan-friendly)
    • 1/3 cup softened vegan butter (we used Miyoko’s)
    • 3 Tbsp lemon zest (4-5 lemons yield ~3 Tbsp zest)
    • 1/4 cup applesauce (unsweetened)
    • 1/4 cup lemon juice
    • 1 tsp vanilla extract
    • 1 cup almond flour (we like Wellbee’s)
    • 1/2 cup dairy-free milk (plain, unsweetened // we used almond milk)
    • 1 ¼ cup MB 1:1 GF Blend (or all-purpose flour if not GF // see notes for other options)
    • 1 ½ tsp baking powder
    • 1/4 tsp baking soda
    • 1/4 tsp sea salt
    • 1 ½ Tbsp poppy seeds
    • Preheat your oven to 350 degrees F (176 C) and line a standard muffin tin with 12 muffin liners (we like these), or lightly grease.
    • To a medium mixing bowl (or the bowl of a stand mixer), add the cane sugar, softened vegan butter, and lemon zest. Mix with an electric stand mixer or handheld mixer until light and fluffy, about 2 minutes.
    • Next add applesauce, lemon juice, and vanilla extract and beat on medium until well combined and slightly fluffy. The mixture may look curdled, which is fine. This will sort itself out in the next step!

    • Now add almond flour and beat until smooth and well incorporated. Next add in the milk and mix on low until fully combined. Finally, add the gluten-free flour blend, baking powder, baking soda, sea salt, and poppy seeds. Mix on medium until light and fluffy with the poppy seeds evenly distributed.

    • Divide the batter evenly between the 12 muffin liners and bake for 30-34 minutes, until lightly golden on the edges. When a toothpick is inserted into a muffin it should come out almost clean with just a crumb or two left behind. For the best possible texture, let the muffins cool completely before enjoying.

    • Best when fresh, but they can be stored at room temperature in an airtight container for up to 3 days or in the freezer for up to 1 month.

    *Cane sugar is important for flavor, structure, and color in this recipe. We don’t recommend subbing coconut sugar.
    *If using our original DIY Gluten-Free Flour Blend or a similar store-bought brand such as Bob’s Red Mill 1:1 Baking Flour, we suggest using slightly more of it. Results will vary.
    *Nutrition information is a rough estimate.

    Serving: 1 muffin Calories: 207 Carbohydrates: 27.9 g Protein: 3.5 g Fat: 10 g Saturated Fat: 4 g Polyunsaturated Fat: 1.5 g Monounsaturated Fat: 3.1 g Trans Fat: 0 g Cholesterol: 0 mg Sodium: 177 mg Potassium: 114 mg Fiber: 1.9 g Sugar: 12.6 g Vitamin A: 14 IU Vitamin C: 4 mg Calcium: 95 mg Iron: 0.8 mg


    Source link

  • Creamy Tuscan Shrimp Pasta (Dairy-Free)

    Creamy Tuscan Shrimp Pasta (Dairy-Free)


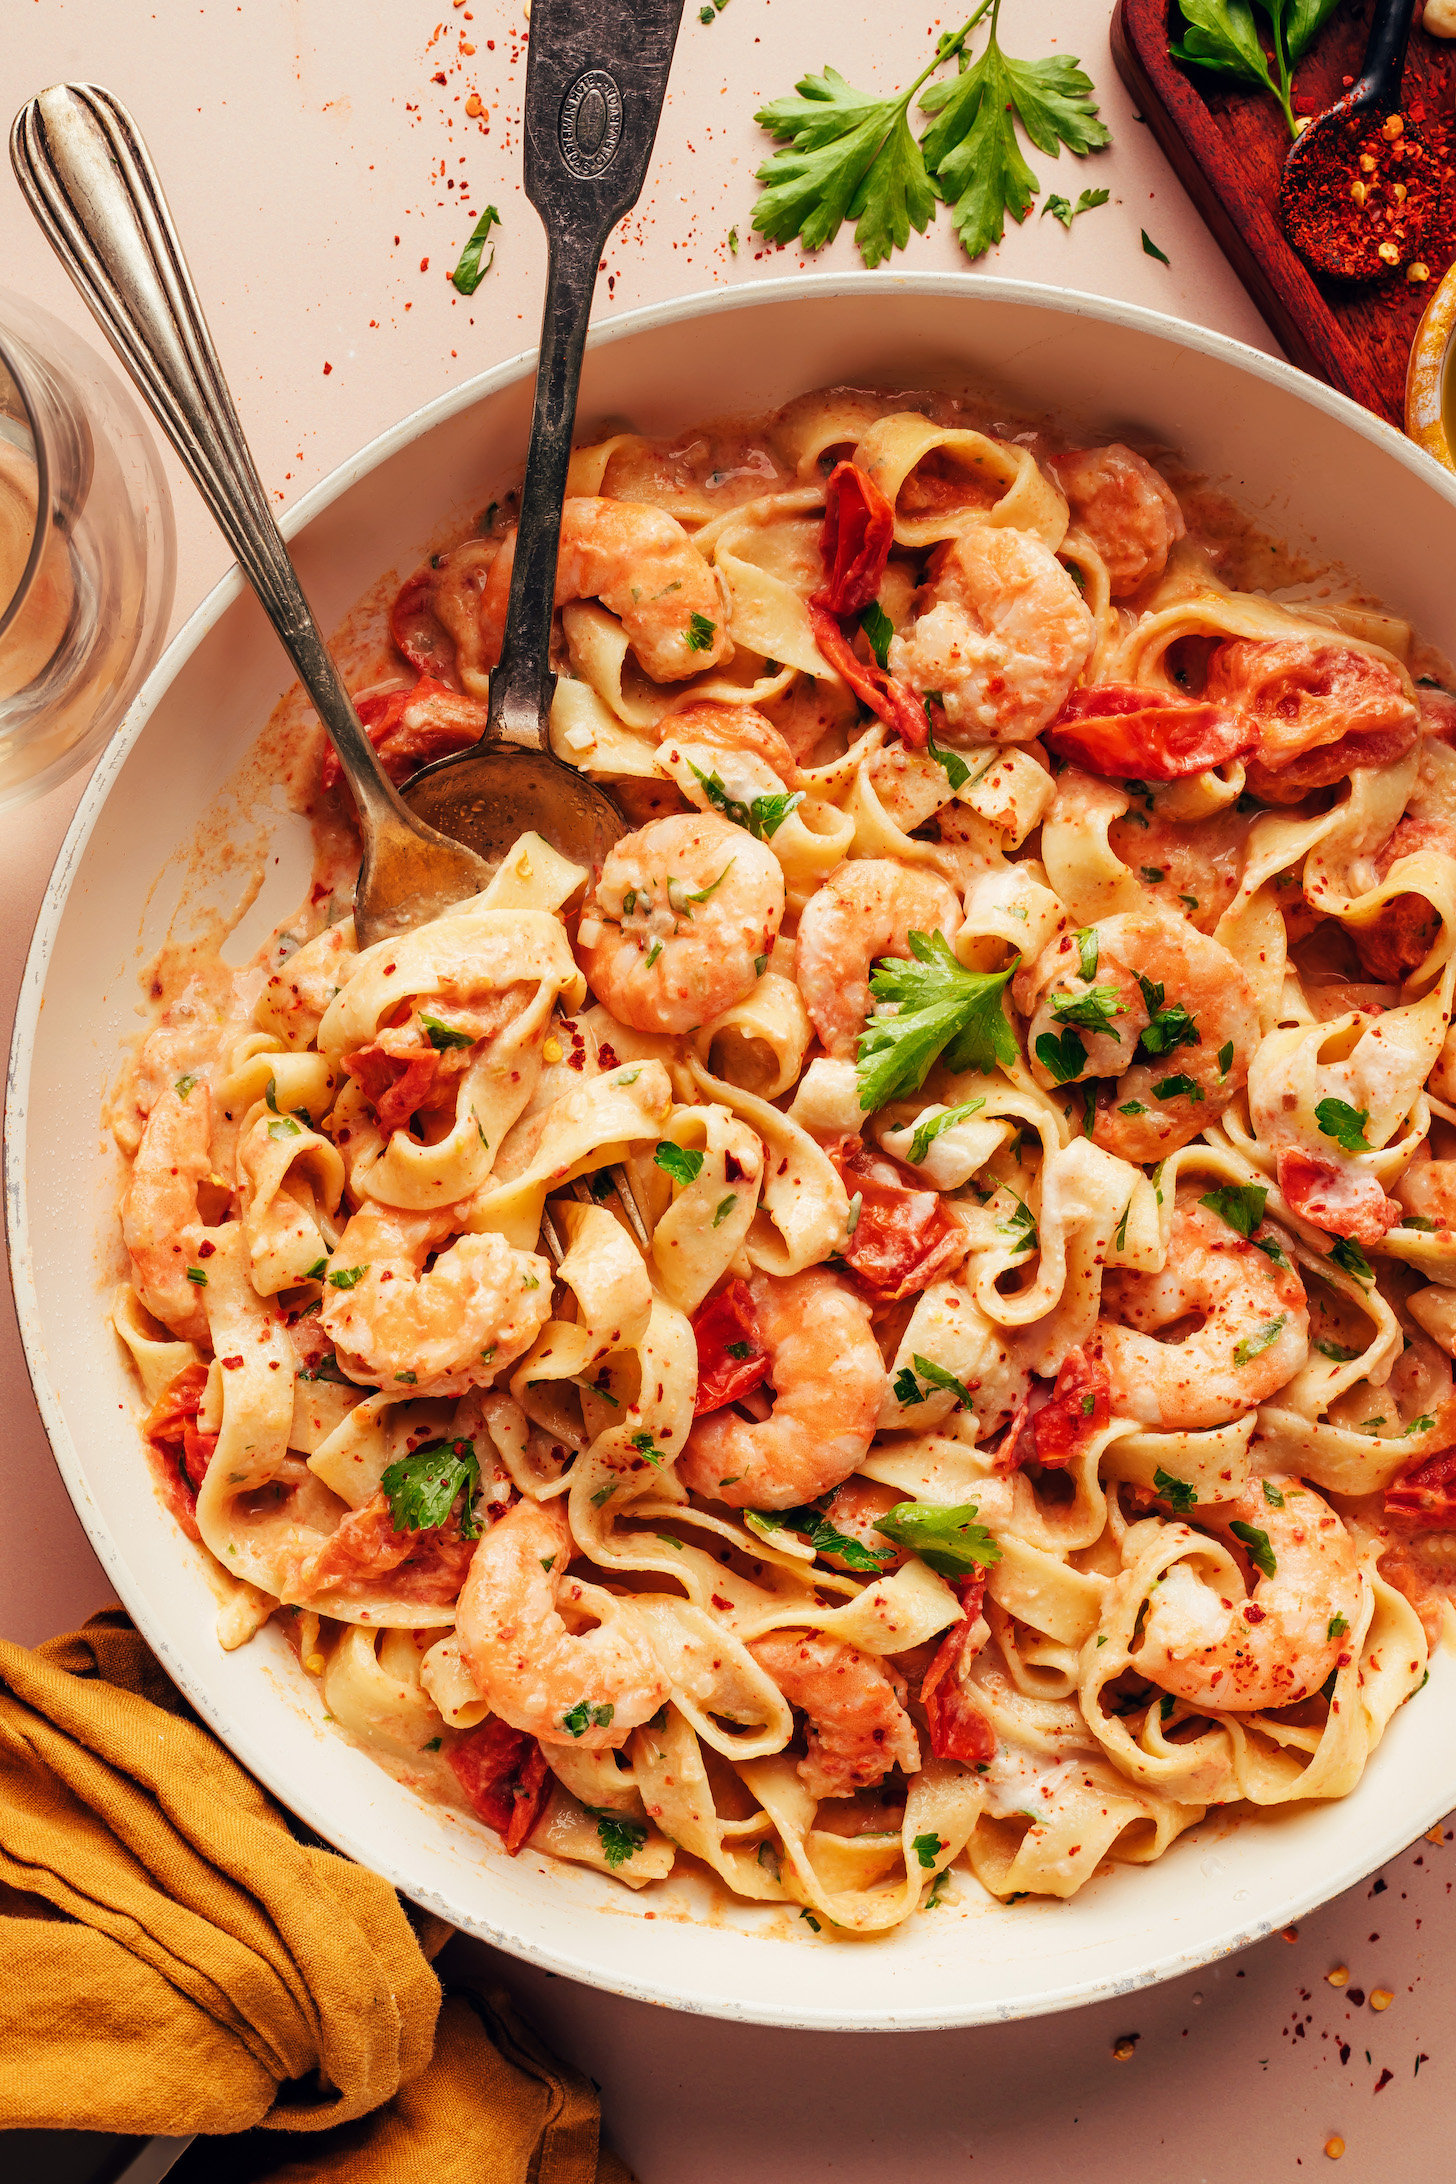
    Serving spoons resting in a skillet of our dairy-free Tuscan shrimp pasta recipe

    Weekend flavor meets weeknight ease: 30-minute Tuscan-style shrimp pasta! This CREAMY, dairy-free dish is rich, garlicky, and bursting with bright tomato flavor.

    It’s impressive enough to wow any guests but simple enough that you’ll want to make it again and again! Let us show you how it’s done!

    How to Make Dairy-Free Shrimp Pasta

    This EASY shrimp pasta starts with cooking your favorite pasta (we like gluten-free fettuccine) and soaking some cashews for dairy-free creaminess.

    Cooking raw shrimp in a skillet with sautéed garlic and shallot

    Next come the perfectly cooked shrimp! The trick is to sauté shallots, garlic, and red pepper flakes for flavor, then add raw shrimp and cook until pink and slightly curled up. The timing will depend on the size of the shrimp and other factors, but we find 2 minutes per side is usually the magic number for shrimp that’s tender, fully cooked, and not rubbery.

    Cooked shrimp in a skillet with sautéed shallot and garlic

    Then it’s on to the bright, creamy tomato sauce! Inspired by our fan-favorite Creamy Italian White Bean Skillet Meal, cherry tomatoes cook with white wine, red pepper flakes, and salt until the tomatoes are soft and burst open.

    Pouring cashew cream into a skillet of burst tomatoes

    Then we add homemade cashew cream and the sauce becomes creamy and develops a thick, luxurious texture!

    Sprinkling fresh parsley over pasta

    Lastly, add in your cooked pasta, garnish with fresh parsley or basil, and dinner is served!

    Large serving dish of our creamy dairy-free Tuscan shrimp pasta

    We can’t wait for you to try this shrimp pasta! It’s:

    Creamy
    Bright
    Saucy
    Rich
    Flavorful
    Comforting
    & Easy to make!

    This dish is satisfying on its own or paired with sautéed greens, roasted broccoli, green salad, or garlic bread.

    More Dairy-Free Pasta Recipes

    If you try this recipe, let us know! Leave a comment, rate it, and don’t forget to tag a photo @minimalistbaker on Instagram. Cheers, friends!

    Fork with a close up bite shot of pasta swirled on a fork with shrimp

    Prep Time 10 minutes

    Cook Time 20 minutes

    Total Time 30 minutes

    Servings 4 Servings

    Course Entrée

    Cuisine Dairy-Free, Gluten-Free (optional), Italian-Inspired

    Freezer Friendly No

    Does it keep? 2-3 Days

    Prevent your screen from going dark

    CASHEW CREAM

    • 1/2 cup raw cashews, soaked
    • 1 ¼ cup water (plus more for soaking cashews)

    PASTA

    • 1 (8 oz.) box fettuccine or spaghetti (we like Jovial fettuccine // ensure gluten-free as needed)
    • 1 lb raw shrimp*, peeled and deveined with tails removed (thaw and pat dry if frozen*)
    • 2 Tbsp olive oil
    • 2 medium shallots, minced (2 shallots yield ~80 g or 1/2 cup)
    • 6-8 medium cloves garlic, minced (6-8 cloves garlic yield ~1/4 cup or 50 g)
    • 3/4-1 tsp red pepper flakes
    • 5 cups cherry tomatoes, left whole
    • 3/4 cup dry white wine (we like a lighter white like Sauvignon Blanc // or sub water)
    • 3/4-1 tsp sea salt (plus more to taste)
    • 1/2 cup chopped fresh parsley (or basil)
    • Add cashews to a heatproof bowl and cover with hot water by at least 1-2 inches. Let them soak while you get started on everything else. Soaking makes the cashew cream neutral-flavored and extra creamy, but (in a pinch) you can skip this step if using a powerful blender such as a NutriBullet or Vitamix.
    • Bring a large pot of water to a boil. Once boiling, add your pasta and cook according to the package directions.

    • If using frozen shrimp, see notes for defrosting instructions.

    • Meanwhile, heat a large skillet over medium heat. Once hot, add olive oil, shallots, and garlic and cook for 3-4 minutes until softened. Add the red pepper flakes and cook until fragrant (~1 minute). Add the shrimp and cook for 1-3 minutes on each side — until they turn pink and curl up (2 minutes per side is usually perfect!). They will cook quickly and cook time will depend on how hot your pan is. We like to let them curl up completely on the first side, then flip and cook until the underside is pink. To avoid under cooking, you want them to have a vibrant pink color (not translucent) and feel firm when pierced with a fork, but avoid overcooking or they will get rubbery! Remove the shrimp from the pan, place them on a plate, and set aside.

    • Add the cherry tomatoes, white wine, and salt to the same (relatively empty) pan (it’s okay if the sautéed shallots and garlic remain). Cover and cook on medium-high heat for 5-10 minutes or until the tomatoes have burst.

    • Meanwhile, make the cashew cream. Drain the cashews and add them to a high-speed blender with the water. Blend on high until smooth and creamy.
    • Remove the lid from the tomatoes and use the back of your spoon or spatula to further break them down. Turn the heat to medium-low and stir in the cashew cream. Let the sauce cook down for about 2 more minutes. Taste and adjust flavor as needed, adding more salt for overall flavor or red pepper flakes for heat. Add the shrimp back into the mixture and stir to coat. Turn off the heat and stir in the chopped parsley (or basil) and cooked pasta (keep separate if preparing in advance).

    • Serve immediately garnished with dairy-free parmesan cheese, red pepper flakes, or extra parsley and/or basil (all optional). Best served fresh but can be stored in an airtight container in the refrigerator for up to 2-3 days. Not freezer friendly.

    *We prefer using raw (vs. cooked) shrimp because it absorbs the flavors of the garlic and shallots while cooking. If using pre-cooked shrimp, we suggest adding it in step 3 very briefly (~20-30 seconds), then remove from the heat and proceed.
    *To quickly defrost frozen shrimp, place in a colander and run cold water over it for ~3 minutes, until no longer frozen. If it’s not defrosted (soft) after 3 minutes, allow to soak in cold water for up to 20-30 minutes, checking it and replacing the water after 5-10 minutes. Once thawed, drain and pat dry with a paper towel.
    *This dish pairs well with roasted broccoli, red bell pepper, and onion. To prepare the veggies, cut 1 head of broccoli into florets, 1/2 red bell pepper into 2-inch pieces, and 1/4 onion into 1/2-inch slices. Add to a parchment-lined baking sheet and toss with 1 Tbsp olive oil. Sprinkle generously with garlic powder, salt, and black pepper. Bake at 400 F (204 C) for ~15 minutes, until the veggies are tender and browned on the edges.
    *Inspired by our Creamy Italian White Bean Skillet Meal.
    *Nutrition information is a rough estimate calculated with Jovial brown rice fettuccine, the lesser amount of red pepper flakes, and without optional ingredients.

    Serving: 1 serving Calories: 535 Carbohydrates: 62.9 g Protein: 29.7 g Fat: 16.4 g Saturated Fat: 2.3 g Polyunsaturated Fat: 2.2 g Monounsaturated Fat: 8.9 g Trans Fat: 0 g Cholesterol: 175 mg Sodium: 1148 mg Potassium: 1024 mg Fiber: 5.8 g Sugar: 8.1 g Vitamin A: 722 IU Vitamin C: 30 mg Calcium: 127 mg Iron: 3.3 mg


    Source link

  • Easy Raspberry Compote (Naturally Sweetened)

    Easy Raspberry Compote (Naturally Sweetened)


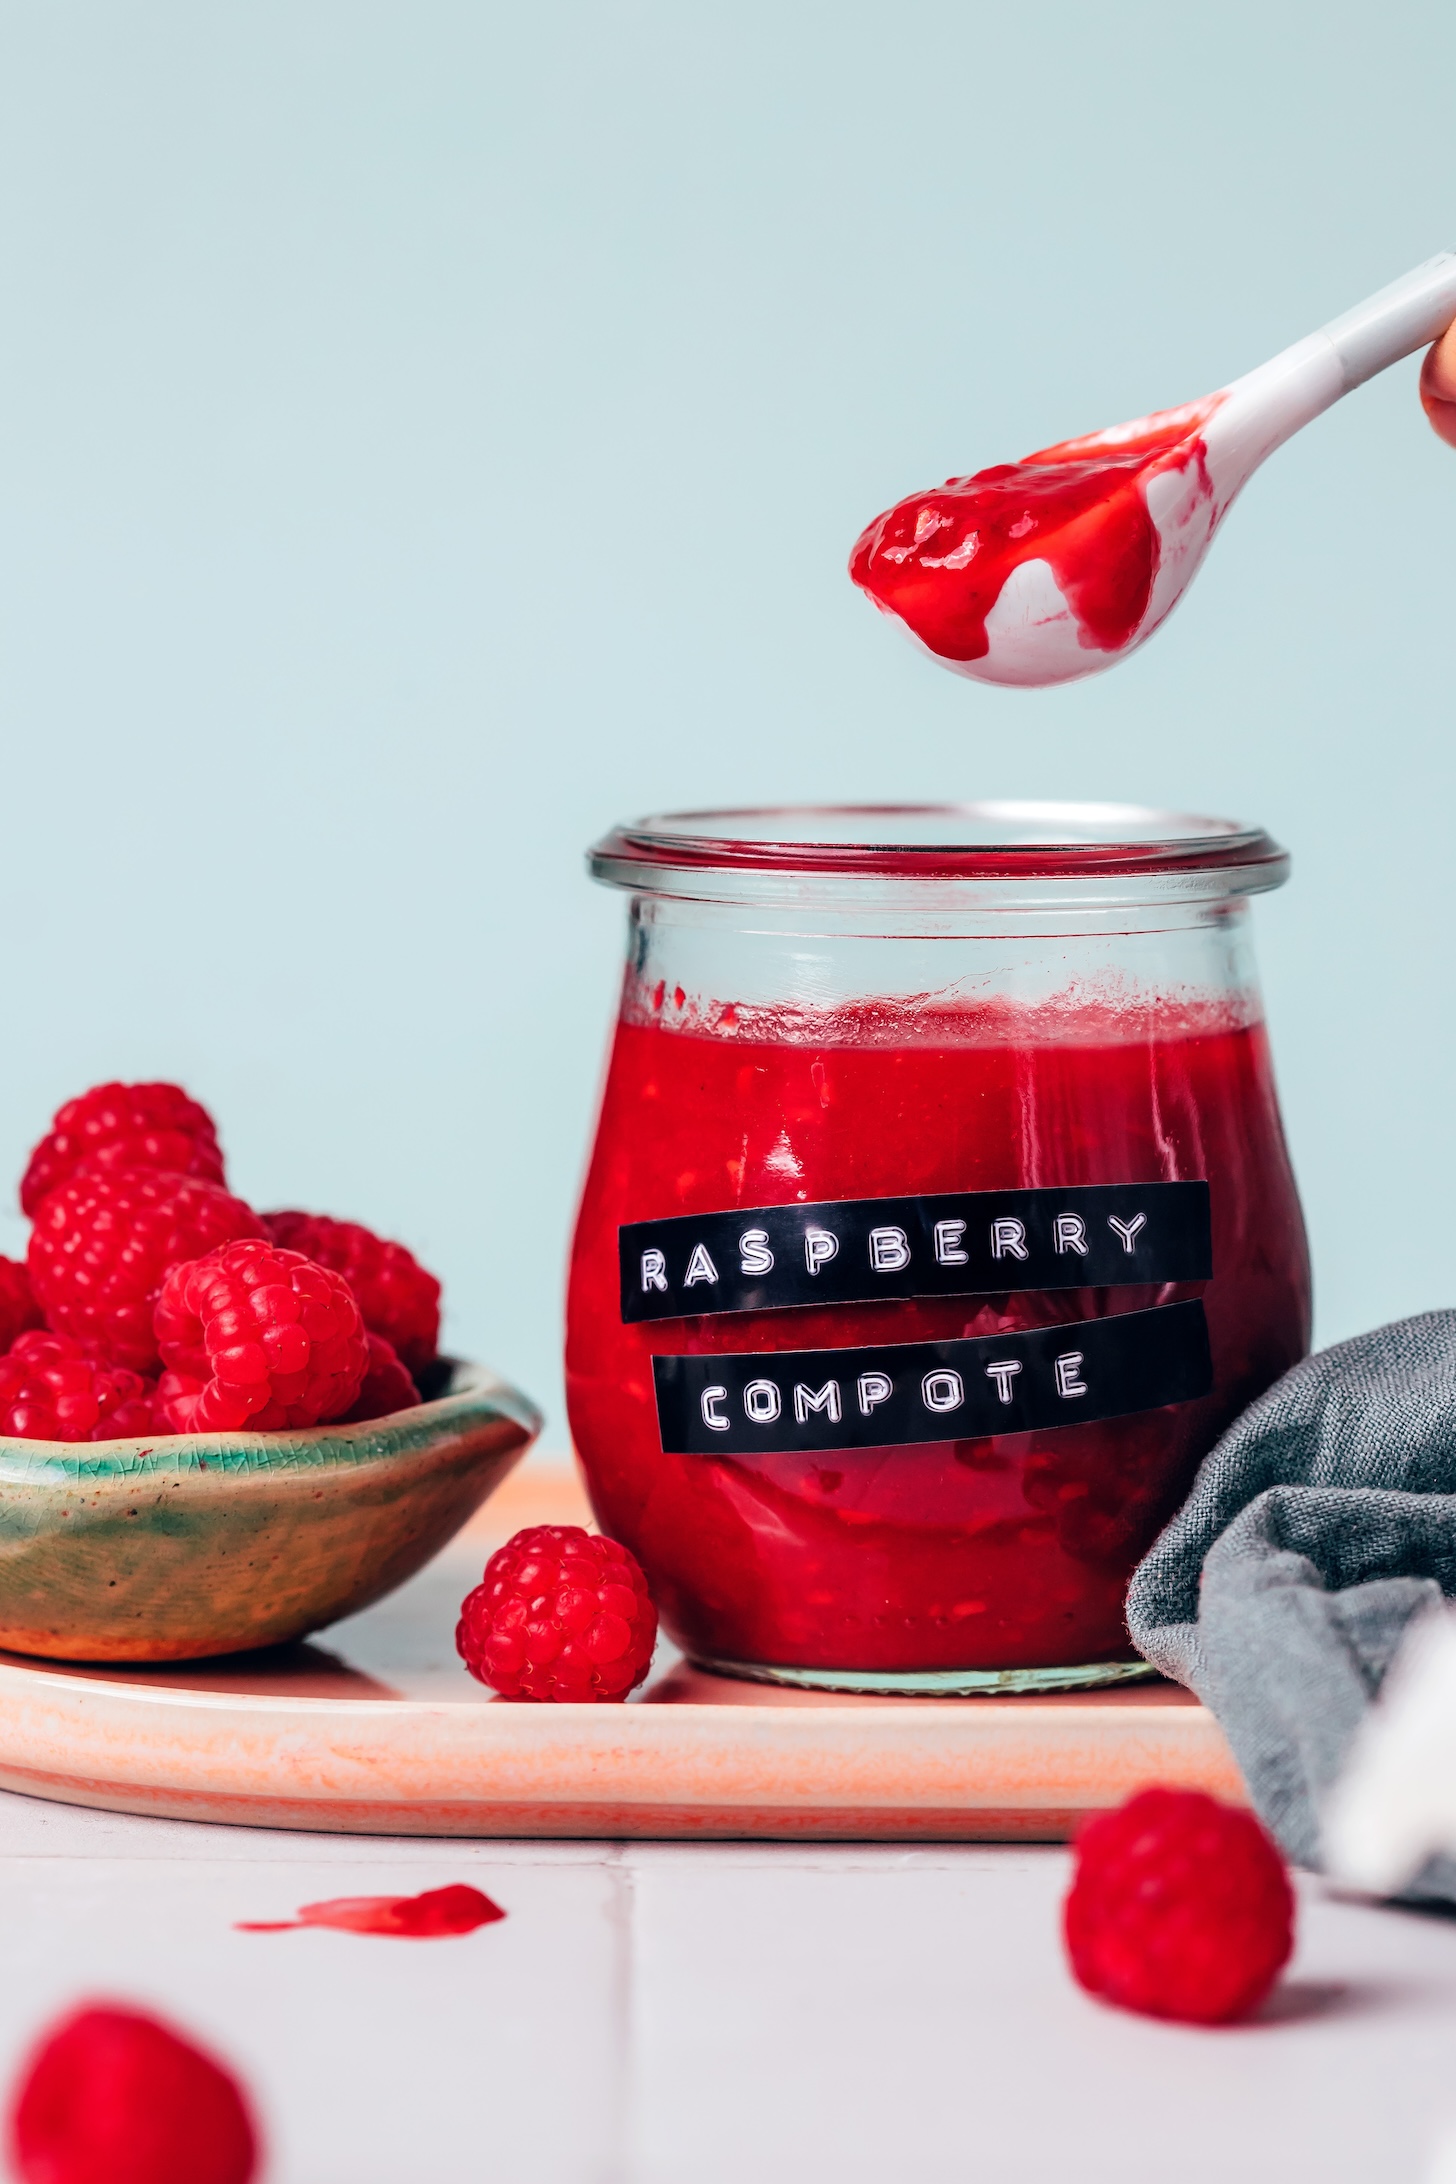
    Spoonful of raspberry compote over a jar of compote with fresh raspberries next to it

    Looking to add a burst of flavor to your favorite breakfasts and desserts? Say hello to Raspberry Compote! This simple, 2-ingredient, 15-minute berry sauce adds delicious, tart-sweet flavor to everything from cheesecakes to pancakes & waffles, crepes, ice cream, and so much more.

    Whether you have an abundance of fresh raspberries or want to make a warm sauce with frozen berries during the cooler months, this recipe has you covered. Let’s dive in and make some raspberry magic!

    Plate of fresh raspberries with a spoonful of sea salt and bowl of maple syrup next to it

    What is Compote?

    Compote (the French word for stewed fruit) refers to fruit that’s been cooked until it’s warm and tender. It originated in medieval Europe and was traditionally made by cooking down fruit with water, sweetener, and spices.

    Our inspired, naturally sweetened version is made with raspberries and is about as simple as it gets! It results in a similarly thick stewed fruit mixture in which the raspberry flavor shines.

    How to Make Raspberry Compote

    This EASY raspberry compote requires just 2 ingredients: raspberries (fresh or frozen) and maple syrup. There’s no need to add water to this compote since the maple syrup provides just enough liquid to get things bubbling.

    Pouring maple syrup into a saucepan of fresh raspberries

    The raspberries and maple syrup are heated in a saucepan and mashed with a spoon or potato masher, causing the berries to begin releasing their liquid.

    Using a potato masher to mash raspberry compote in a saucepan

    After simmering for about 10 minutes, the mixture becomes thicker with an intensified raspberry flavor. A pinch of salt is optional at this point for subtle flavor balance.

    Saucepan of homemade raspberry compote next to ingredients used to make it

    The final steps thicken the compote even more! While it thickens as it cools, we like to make it even thicker (and free from seeds) by passing some (or all) of it through a fine mesh strainer.

    Bowls of raspberry compote with and without seeds and a strainer used for removing the seeds

    For cheesecakes, a fully smooth and strained compote is nice. For pancakes and waffles, we prefer to strain just half!

    Bowl of fresh raspberries next to a jar of raspberry compote

    We can’t wait for you to try this compote! It’s:

    Perfectly tart-sweet
    Vibrant
    Fruity
    Naturally sweetened
    Quick & easy
    & SO versatile!

    With minimal effort, you have a delicious topping ready for all your pancakes, waffles, crepes, French toast, oats, cheesecake, and so much more!

    More Raspberry Recipes

    If you try this recipe, let us know! Leave a comment, rate it, and don’t forget to tag a photo @minimalistbaker on Instagram. Cheers, friends!

    Using a spoon to add raspberry compote on top of a stack of crepes

    Prep Time 5 minutes

    Cook Time 10 minutes

    Total Time 15 minutes

    Servings 8 (2-Tbsp servings)

    Course Condiment, Sauce

    Cuisine Gluten-Free, Oil-Free, Vegan

    Freezer Friendly 1 month

    Does it keep? 1 Week

    Prevent your screen from going dark

    • 3 cups raspberries (fresh or frozen)
    • 1/4 cup maple syrup
    • 1 pinch sea salt (optional)
    • Place raspberries and maple syrup in a small saucepan and bring to medium heat.

    • Once bubbling, reduce heat slightly and use a wooden spoon or potato masher to muddle and mash the fruit.
    • Continue cooking over medium-low heat (uncovered) for 10-12 minutes, mashing occasionally to combine until the volume is reduced to about half and it’s slightly thickened. Turn off the heat and adjust the flavor as needed, adding more maple syrup for sweetness and the optional pinch of salt to balance the flavor and reduce any bitterness.

    • Remove from the heat and let cool slightly. It will thicken more as it cools, but it can be enjoyed warm or at room temperature. If you prefer your compote without seeds, you can strain it after cooling. We like straining half of the compote (it minimizes the crunch from the seeds but ensures the compote is thick with a noticeable raspberry appearance). To strain, set a fine mesh strainer over a bowl, pour the compote into the strainer, and stir with a spoon to encourage it to move through the strainer.
    • Enjoy with oats, pancakes, waffles, crepes, French toast, cheesecake, and more! Leftover compote will keep in the refrigerator for 1 week or in the freezer for 1 month. We like to freeze in an ice cube tray to make it easy to defrost small amounts. When ready to use, reheat in the microwave or on the stovetop until warm.

    Serving: 1 (two-tablespoon) serving Calories: 48 Carbohydrates: 11.8 g Protein: 0.5 g Fat: 0.3 g Saturated Fat: 0 g Polyunsaturated Fat: 0.17 g Monounsaturated Fat: 0.03 g Trans Fat: 0 g Cholesterol: 0 mg Sodium: 1.6 mg Potassium: 87 mg Fiber: 2.8 g Sugar: 7.9 g Vitamin A: 2 IU Vitamin C: 11 mg Calcium: 21 mg Iron: 0.3 mg


    Source link

  • Creamy Mocha Chia Pudding – Minimalist Baker Recipes

    Creamy Mocha Chia Pudding – Minimalist Baker Recipes


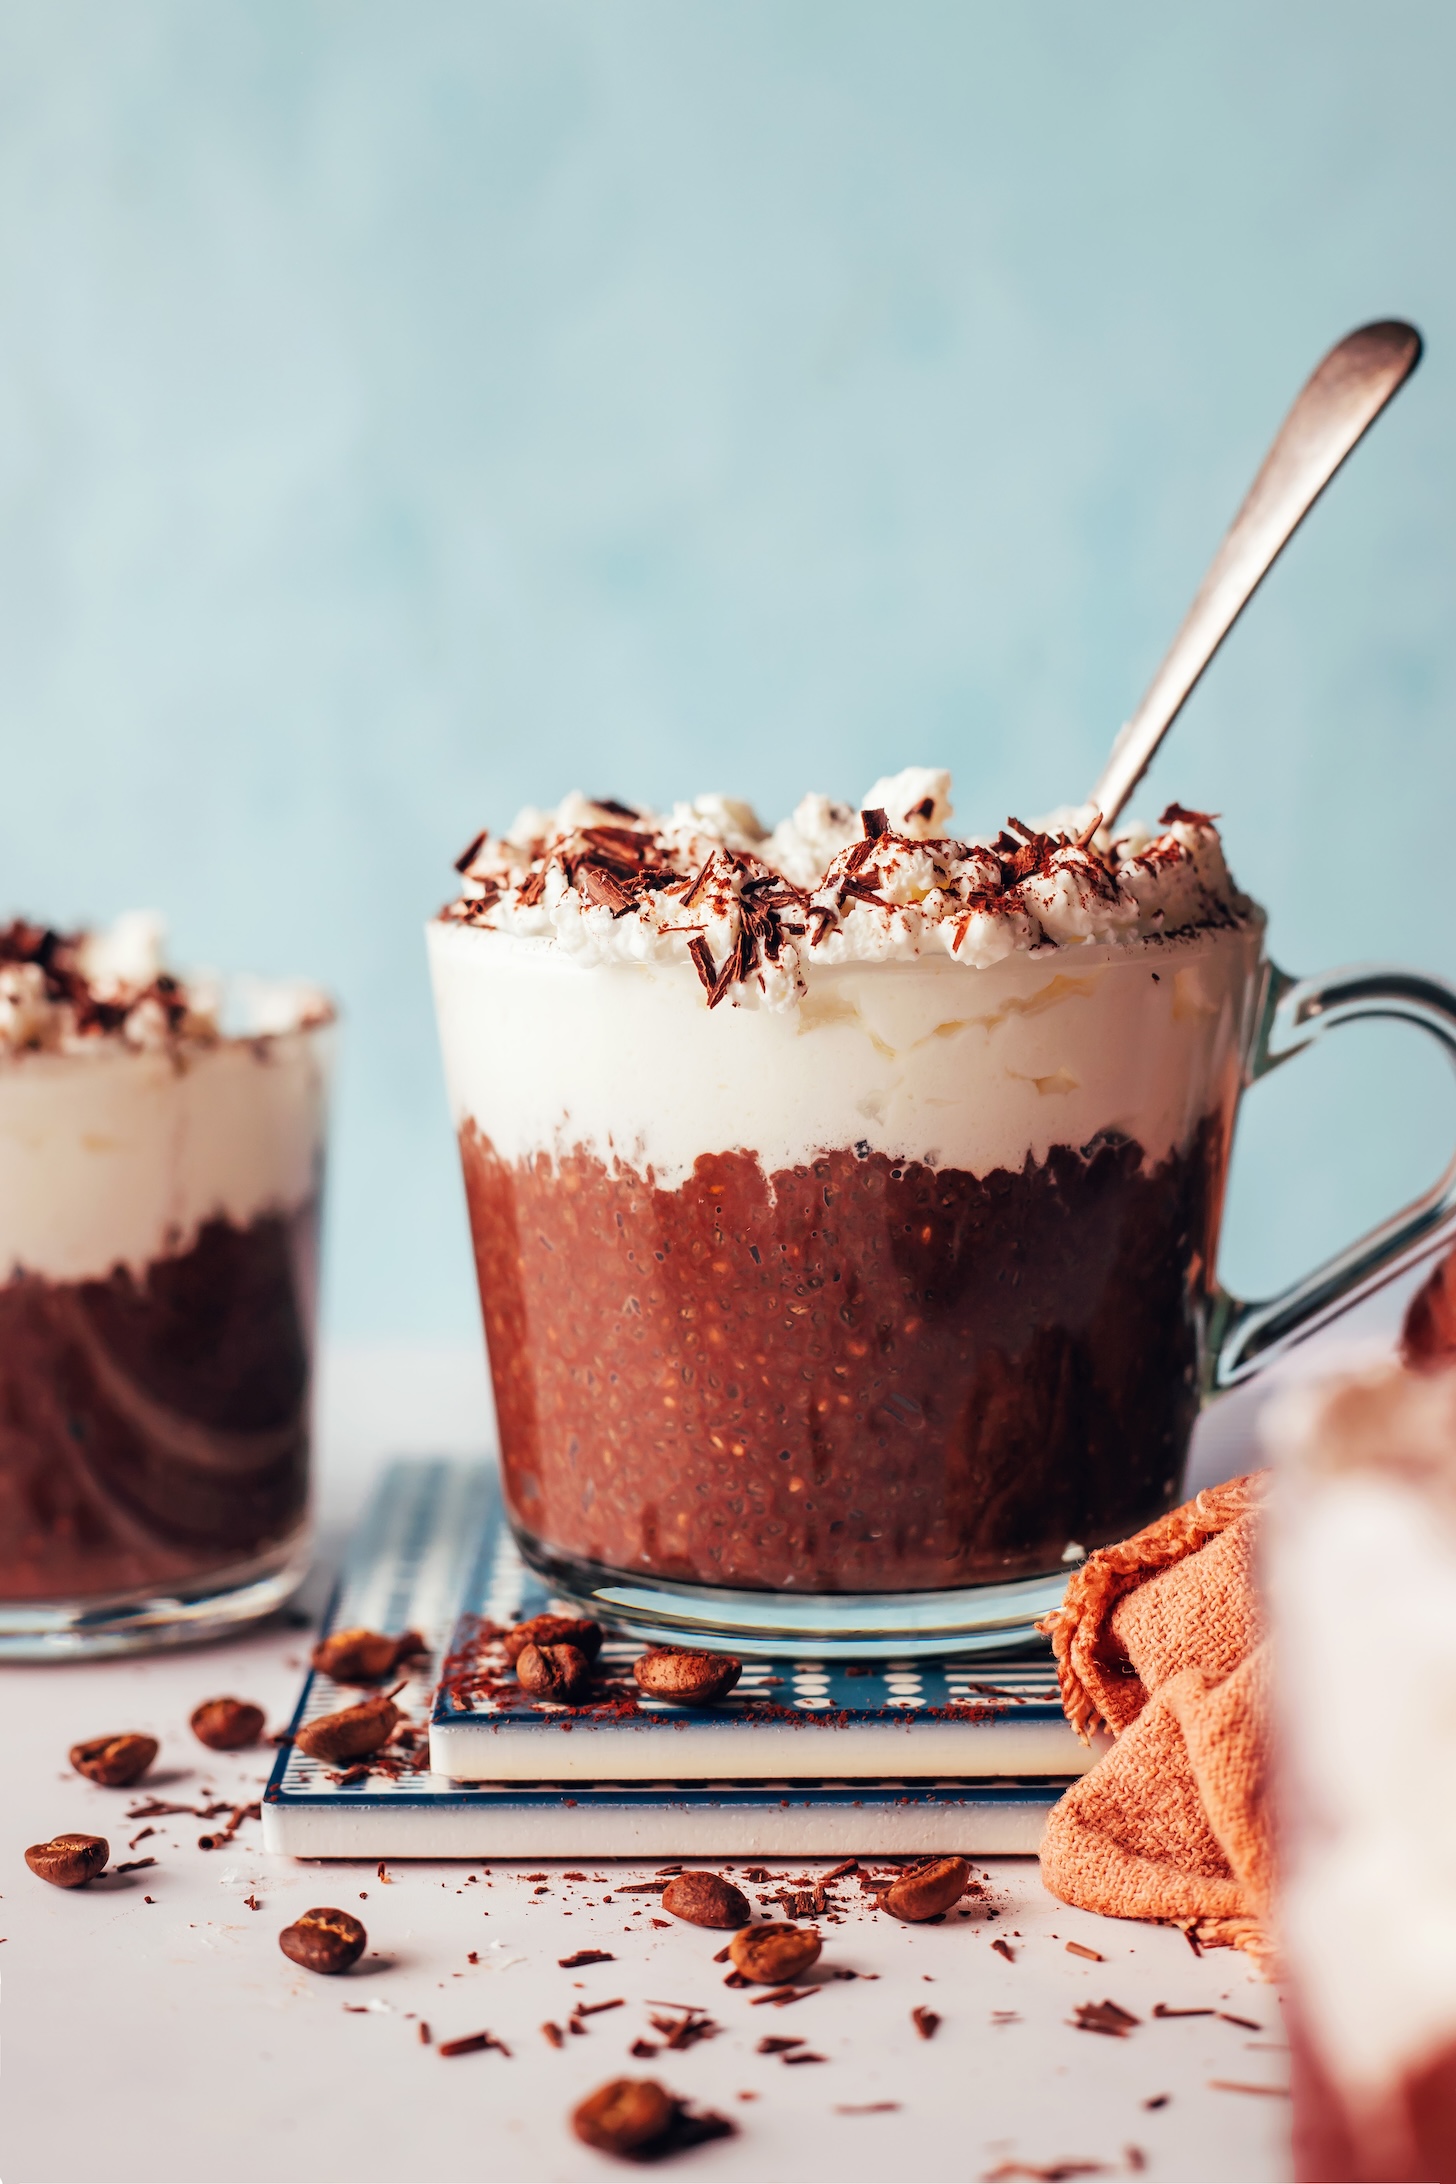
    Mug of mocha chia pudding topped with coconut whipped cream and shaved chocolate

    For those days when you’re needing an extra skip in your step, try this Mocha Chia Pudding! It’s a rich, creamy, chocolaty, energizing, fiber-packed breakfast or snack.

    It’s also easy to make with just 1 bowl, 7 ingredients, and 5 minutes hands-on prep time required! We think it’ll become a new grab-and-go, meal prep-friendly staple in your kitchen. Get your coffee brewing, let’s make chia pudding!

    Chia seeds, cocoa powder, vanilla, sea salt, maple syrup, dairy-free milk, and coffee

    After brewing your coffee using your preferred method (we like cold brew or pour-over) and letting it cool slightly, it’s mocha chia pudding time!

    You’ll need your mocha staples including coffee, cocoa powder (for chocolate flavor), sweetener (we like maple syrup), and your milk of choice (we like a combination of almond + coconut milk). Vanilla extract and a pinch of sea salt further enhance the flavor.

    Pouring dairy-free milk into a bowl of chia seeds and cocoa powder

    Simply whisk everything together until you’ve got your “mocha”! Then you’re ready to turn it into chia pudding by adding the fiber- and nutrient-rich chia seeds.

    Bowl of thick, chocolaty mocha chia pudding

    As it sits, the chia seeds will thicken the mixture. It’s best to give it an extra stir after about 15 minutes to break up any stubborn clumps of chia seeds. In an hour (or less), snack time is on!

    Using a spoon to add coconut whipped cream on top of a mug of chocolate coffee chia pudding

    We think you’re going to LOVE this chia pudding! It’s:

    Creamy
    Rich
    Chocolaty
    Coffee-infused
    Lightly sweetened
    Make-ahead friendly
    & Packed with fiber (8+ grams per serving)!

    Enjoy your mocha chia pudding on its own or top with coconut whipped cream, cinnamon, and cocoa powder (or shaved dark chocolate) for extra decadence!

    More Recipes for Mocha Lovers

    If you try this recipe, let us know! Leave a comment, rate it, and don’t forget to tag a photo @minimalistbaker on Instagram. Cheers, friends!

    Spoon in a glass of mocha chia pudding topped with coconut whipped cream

    Prep Time 50 minutes

    Total Time 50 minutes

    Servings 4 (~1/2 cup servings)

    Course Breakfast, Snack

    Cuisine Gluten-Free, Grain-Free, Vegan

    Freezer Friendly No

    Does it keep? 4-5 Days

    Prevent your screen from going dark

    • 3/4 cup brewed coffee
    • 1 cup dairy-free milk (plain, unsweetened // we used half almond milk + half canned light coconut milk // or use other milk of choice — a mix of a richer + a lighter milk is nice)
    • 3-5 Tbsp maple syrup
    • 2 Tbsp cocoa powder
    • 3/4 tsp vanilla extract
    • 1 pinch sea salt
    • 1/2 cup chia seeds
    • If you don’t already have brewed coffee, prepare it at this time using your preferred method (we like cold brew or pour-over). Set aside to cool slightly (warm or room temperature are okay, or you can make it ahead and use chilled).
    • To a mixing bowl (or container with a lid), add dairy-free milk, brewed coffee, the lesser amount of maple syrup, cocoa powder, vanilla extract, and sea salt. Whisk vigorously, side to side is best, to combine and break up any clumps of cocoa powder. If there are any stubborn clumps, you can transfer to a blender to fully combine. Taste and adjust, adding more maple syrup for sweetness.

    • Then add the chia seeds and mix until well combined. Cover and refrigerate for 45-60 minutes (or overnight). We recommend stirring again around the 15-minute mark to break up any big clumps. The chia pudding should be very thick and creamy. If it’s not, give it another stir and/or add more chia seeds, stir, and refrigerate for another hour or so. If you prefer a thinner pudding, you can stir in more dairy-free milk.

    • Once pudding has fully set, divide between serving containers and serve with (all optional!) coconut whipped cream and a dusting of cocoa powder and cinnamon. Leftover pudding will keep covered in the refrigerator for up to 4-5 days. Not freezer friendly.

    *Prep time does not include brewing coffee.
    *Nutrition information is a rough estimate calculated with half almond milk and half light canned coconut milk, the lesser amount of maple syrup, and without optional ingredients.

    Serving: 1 (half-cup serving) Calories: 169 Carbohydrates: 21.1 g Protein: 4 g Fat: 8.8 g Saturated Fat: 2.8 g Polyunsaturated Fat: 4.8 g Monounsaturated Fat: 0.8 g Trans Fat: 0 g Cholesterol: 0 mg Sodium: 46 mg Potassium: 197 mg Fiber: 8.1 g Sugar: 10 g Vitamin A: 1.5 IU Vitamin C: 0.3 mg Calcium: 200 mg Iron: 3.8 mg


    Source link