نویسنده: post bot

  • Hatch Chile Deviled Eggs | Gluten Free & More

    Hatch Chile Deviled Eggs | Gluten Free & More


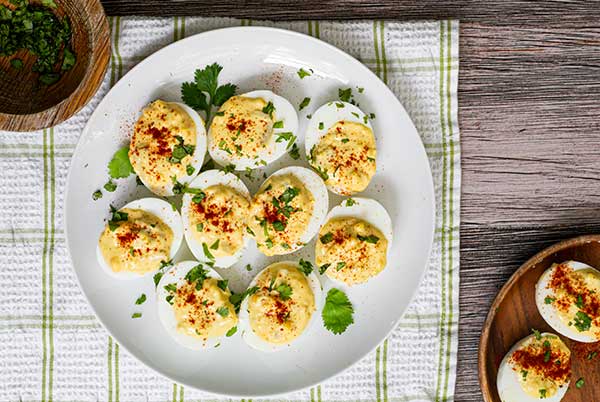
    Hatch Chile Deviled Eggs: A Spicy Twist on a Classic Party Favorite

    After Easter, it’s not uncommon to find yourself with a fridge full of hard-boiled eggs. But even if you don’t have leftovers on hand, these Hatch Chile Deviled Eggs are worth making from scratch. They’re a bold, flavor-packed upgrade to the traditional deviled egg—and an instant hit at any party or gathering.

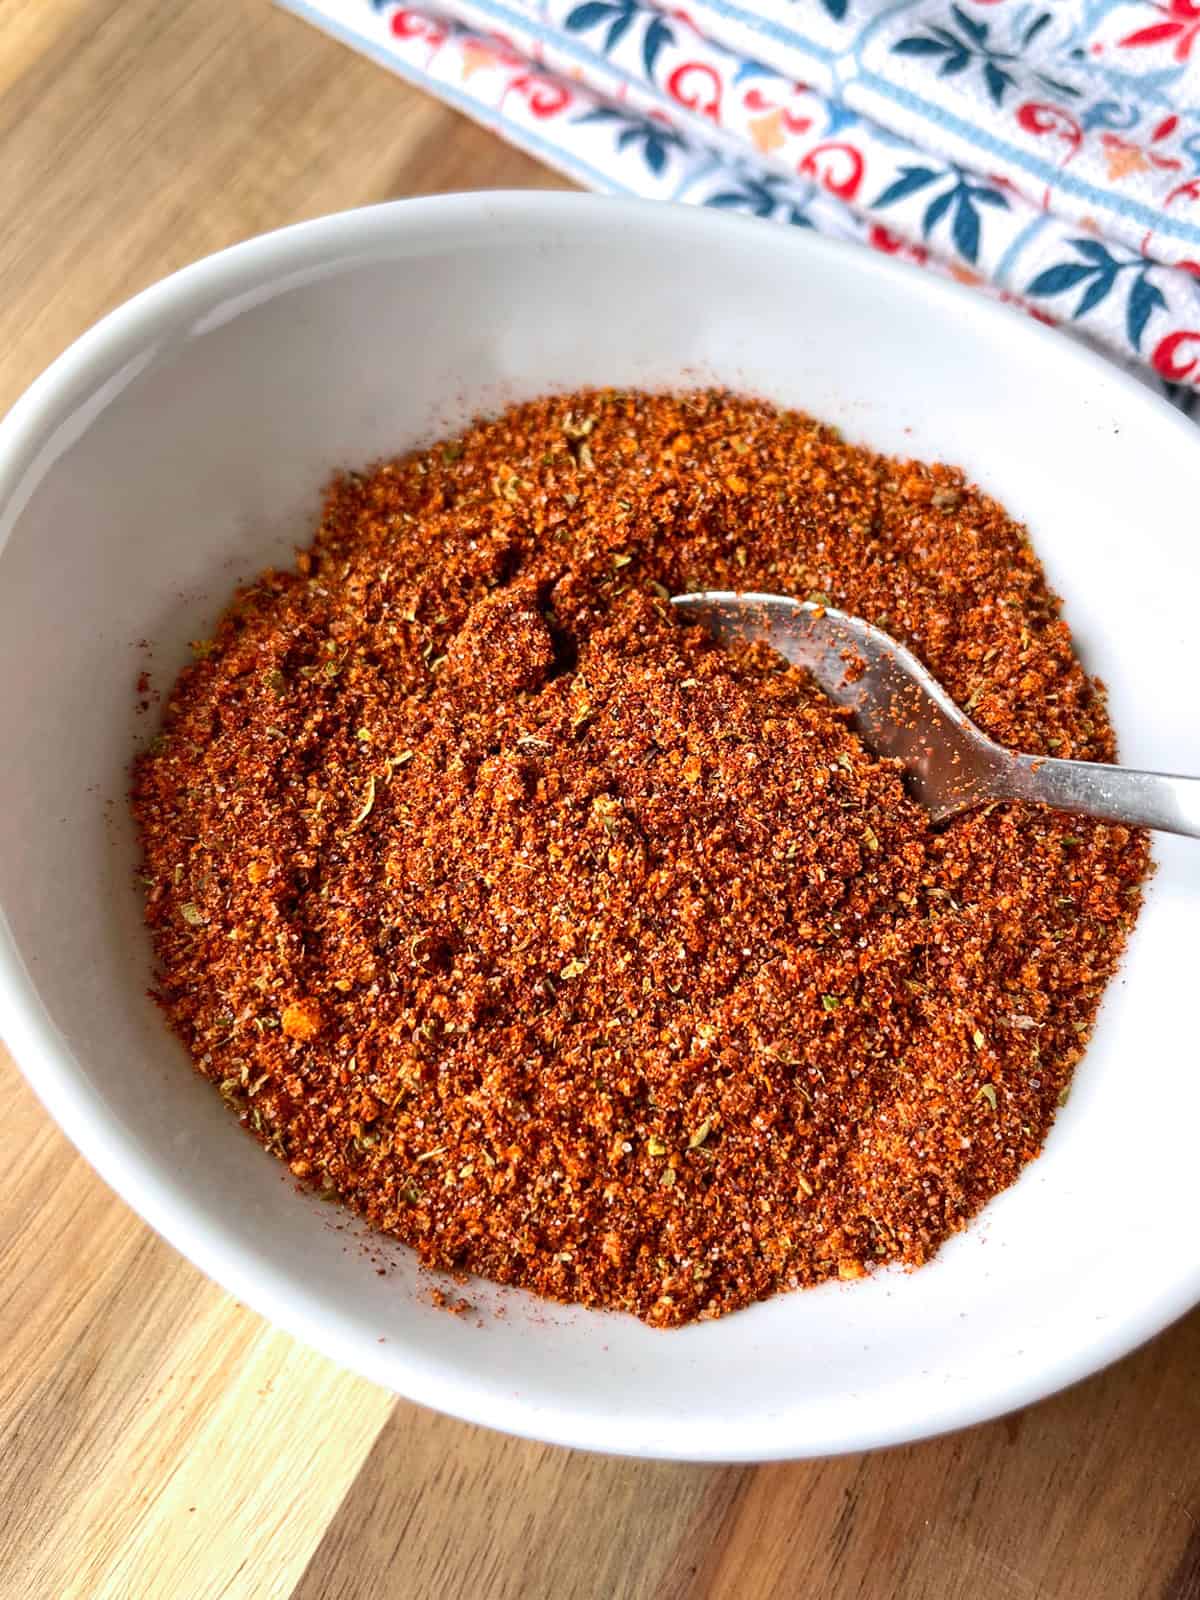
    What makes them special? A can of Hatch diced green chiles (mild or hot—your call) adds smoky heat and Southwestern flair, while a dash of cumin and hot sauce brings just the right amount of kick. Creamy, tangy, and perfectly spiced, the filling is both unexpected and addictive.

    These deviled eggs are naturally gluten-free, dairy-free, and party-perfect. Whether you’re hosting a spring brunch, prepping appetizers for a BBQ, or just looking for a way to dress up your egg stash, this fun twist is sure to disappear fast. Garnish with paprika and fresh cilantro, and you’ve got a dish that’s as eye-catching as it is delicious!

    Hatch-Chile-Deviled-Eggs-Ingredients-1

    What You Need:

    • 12 hardboiled eggs, peeled and cooled
    • ½ cup mayonnaise
    • 1 (4-ounce) can Hatch Diced Green Chiles, mild or hot, drained
    • 1 teaspoon Dijon mustard
    • ½ teaspoon kosher or fine sea salt (or to taste)
    • ¼ teaspoon ground cumin
    • 2–3 dashes hot sauce
    • Paprika, to garnish
    • Fresh cilantro leaves, to garnish

    Hatch-Chile-Deviled-Eggs-Mixing-Filling-2

    Mixing the Filling & Assembling the Eggs

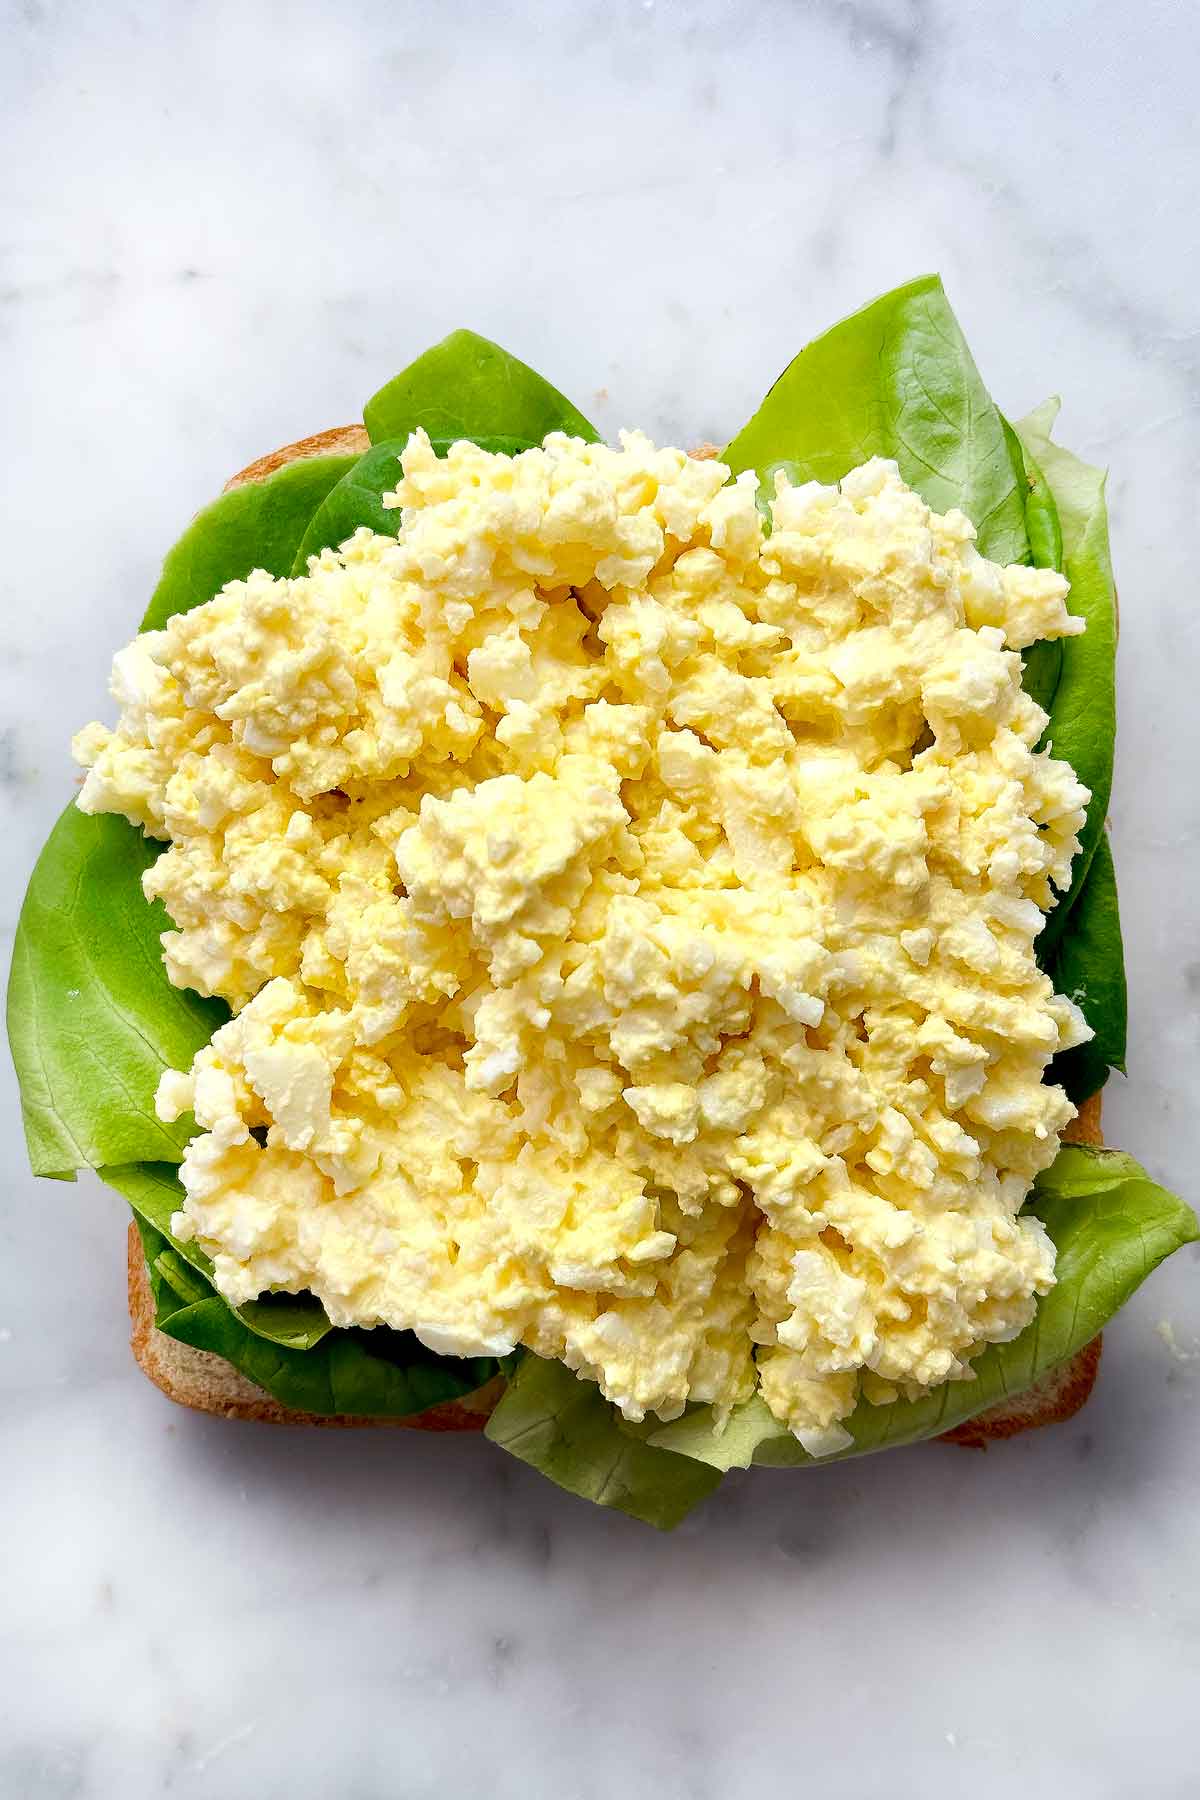
    Once your eggs are peeled and cooled, slice them in half lengthwise and gently remove the yolks into a bowl. Mash the yolks with a fork until smooth, then stir in the mayonnaise, green chiles, mustard, salt, cumin, and hot sauce. The result should be creamy and well blended, with a spicy, savory punch.

    Use a spoon or piping bag to neatly fill the egg whites with the yolk mixture. For an extra pro touch, use a star tip on your piping bag to create a decorative swirl. Chill the eggs until ready to serve, and don’t forget the final sprinkle of paprika and fresh cilantro leaves to finish them off.

    Hatch-Chile-Deviled-Eggs-Recipe-2

    Pro Tip: How to Make the Perfect Hardboiled Egg

    Start with cold water and place your eggs in a single layer in a saucepan. Cover them with water by about an inch, then bring to a boil over medium heat. Once the water reaches a gentle boil, cover the pot, turn off the heat, and let the eggs sit for 10–12 minutes. Transfer them immediately to an ice bath to cool—this not only stops the cooking process but also makes peeling much easier.

    Hatch-Chile-Deviled-Eggs-Recipe

    Whether you’re using up Easter eggs or making these for a special occasion, Hatch Chile Deviled Eggs are a crowd-pleasing twist that brings the heat in all the right ways.


    Hatch Chile Deviled Eggs

    Servings: 24

    Calories: 72kcal

    Author: Gluten Free & More

    Nutrition Facts

    Hatch Chile Deviled Eggs

    Amount Per Serving

    Calories 72
    Calories from Fat 54

    % Daily Value*

    Fat 6g9%

    Saturated Fat 1g5%

    Trans Fat 0.01g

    Polyunsaturated Fat 2g

    Monounsaturated Fat 2g

    Cholesterol 95mg32%

    Sodium 130mg5%

    Potassium 38mg1%

    Carbohydrates 1g0%

    Fiber 0.1g0%

    Sugar 0.3g0%

    Protein 3g6%

    Vitamin A 139IU3%

    Vitamin C 2mg2%

    Calcium 15mg2%

    Iron 0.4mg2%

    * Percent Daily Values are based on a 2000 calorie diet.


    Disclaimer: All nutrition facts on Gluten Free & More are meant only as a guide and may differ depending on product brands used or ingredient substitutions. Some errors may occur, so you are encouraged to confirm the recipe’s ingredient and nutrition suitability for your own diet.

    Have you tried this recipe? Give it a star rating and let us know your thoughts in the Ratings & Reviews section below.


    Source link

  • Friday Faves : April 11, 2025

    Friday Faves : April 11, 2025


    Hey, hey! It’s Friday!

    Turkey Sandwich foodiecrush.com

    My husband and I will be attending our local Boys and Girls Club fundraiser this weekend. I love a good fundraiser, especially the silent auction, where I love to know the money raised from the goodies I’m bidding on go straight to the cause. Some give sororities a bad rap, but that’s where my philanthropic habits began. In college, as a member of Chi Omega, I discovered the value of volunteering and service to others. Still, those beliefs run deep for me, and I’ve taught my daughter the same. Whether it’s raising funds and awareness for women and children or donating time and necessities for animal rescue, I do what I can because volunteering and giving to those in need feels good mentally and physically. Plus, I’ve met some of the best friends of my life doing so! You have to give to get :).

    We have officially entered sandwich season, and this is the method to my sandwiching madness.

    Study says that eating this nutrient every day can slow down biological aging, and my neurolgist agrees! But since it’s hard to get enough in your diet unless you eat this meal just about every day (which is why I set myself up on a monthly delivery order), this supplement is the one my doctor and I use.

    Did you watch the White Lotus finale? There’s been plenty of discourse on whether it ended good or bad, but I was moved, got teary, and I agree … We should all be Lauries.

    Did you hear? Los Angeles’s new wildlife freeway is making the tangle of traffic slightly more bearable. We have a similar bridge here in Utah, a success story that’s saved wildlife and human lives. Nature is cool when we work with it.

    The egg shortage has inspired some new-fangled ideas: Easter-dyed potatoes? Are we sure about this?

    The latest buzzword is PROTEIN. Are you getting enough?

    And a high-protein buddha bowl to get you on your way.

    I’m calling it now…This chicken recipe is about to start a trend. That crispy basil BRINGS IT!

    I’ve always put cottage cheese in my lasagna, so naturally, this cottage cheese-baked rigatoni made me turn my head and say, heyyyyy baby!

    Stuffed tofu!!?! I am so into that idea!

    This is the only way I like to eat lamb. Yum.

    These chocolate chip cookies are my daughter’s fave, but I’m always open to trying another tasty looking recipe. That wrinkly, rippled, doughy look does it for me.

    I never would have thought to add red wine to chocolate cake, but oh my does it look good.

    What a fantastic-sounding shrimp recipe that’s ready in just 15 minutes.

    Easter hot cross buns with lemon!

    More citrus abounds in this key lime cake. Pass the tequila and salt, please!

    This classic recipe is bringing chicken back to 1970! And I love it!

    I know my husband is going to want to make these bits of steak bites.

    I’m not one for useless kitchen gadgets, but these are cute and will protect your counters, too.

    These strawberry candles would be cute on your Easter table.

    Ready to plant pots for summer? These resin planters look like concrete but are light so they’re easy to move around.

    I bought a new pair of my favorite garden shears, and I wish I’d looked online first because they’re almost 40% less than what I paid.

    Lots of good tips in here –> The $0 garden hacks to save your beds.

    These Tokyo trainers are so cute for summer, and I love how slim they are.

    And, the more I go for walks wearing these sneakers, the more I love them. I may have to get another pair. There’s so many fun color combos.

    Wow, now THIS is a beautifully creative way to decorate your Easter eggs.

    Okay, and that’s it for this week! Enjoy a warm and delicious weekend and cook something good!

    We send good emails. Subscribe to FoodieCrush and have each post plus exclusive content only for our subscribers delivered straight to your e-mail box.

    Follow me on InstagramFacebook, and Pinterest for more FoodieCrush inspiration.

    As always, thank you for reading and supporting companies I partner with, which allows me to create more unique content and recipes for you. There may be affiliate links in this post of which I receive a small commission. All opinions are always my own.


    Source link

  • Gluten-Free Lemon Poppy Seed Muffins (Vegan)

    Gluten-Free Lemon Poppy Seed Muffins (Vegan)


    Stack of vegan gluten-free lemon poppy seed muffins with the inner texture showing where a bite was taken out of one muffin

    Friends, prepare to level up your muffin game with these undetectably vegan and gluten-free lemon poppy seed muffins! They’re perfectly sweet, tender, FLUFFY, and bursting with bright, lemony goodness. 

    Made in just 1 bowl, they’re just as fun to make as they are to eat! Let’s get baking!

    Almond flour, gluten-free flour blend, vegan butter, lemon, cane sugar, baking soda and powder, poppy seeds, applesauce, and vanilla

    How to Make Vegan Gluten-Free Lemon Poppy Seed Muffins

    These super FLUFFY muffins begin with using an electric mixer to cream together the vegan butter, cane sugar, and lemon zest. This adds air (to create fluffiness) and infuses the butter with BIG lemon flavor.

    Using a hand mixer to cream the sugar and butter with lemon zest

    Next comes applesauce for moisture and a generous amount of lemon juice because we aren’t messing around when we say BIG lemon flavor! It just wouldn’t be a lemon poppyseed muffin without it. Vanilla extract is key, too, for quintessential muffin flavor!

    Then it’s time for the dry ingredients: Almond flour keeps these muffins light and cakey, our GO-TO gluten-free blend adds structure, baking powder and baking soda give them major rise, sea salt adds flavor, and poppyseeds add a pleasant crunch.

    Using a hand mixer to whip the batter

    The last step: Divide your batter between muffin liners and bake until fluffy with lightly golden edges. And for best texture, try to wait for your muffins to cool before digging in! We know — it’s hard. But these are worth the wait!

    Using an ice cream scoop to scoop muffin batter into a muffin tin

    We hope you LOVE these lemon poppy seed muffins! They’re:

    Fluffy
    Bright
    Tender
    Super lemony
    & Undetectably vegan + gluten-free!

    Enjoy them for brunch, snack, or dessert, or take them to gatherings to see if you can impress even your gluten-loving friends (we think you will)!

    More Lemony Recipes

    If you try this recipe, let us know! Leave a comment, rate it, and don’t forget to tag a photo @minimalistbaker on Instagram. Cheers, friends!

    Vegan gluten-free lemon poppyseed muffins on a cooling rack

    Prep Time 15 minutes

    Cook Time 30 minutes

    Total Time 45 minutes

    Servings 12 (Muffins)

    Course Dessert, Snack

    Cuisine Gluten-Free, Vegan

    Freezer Friendly 1 month

    Does it keep? 3 Days

    Prevent your screen from going dark

    • 2/3 cup cane sugar* (ensure organic for vegan-friendly)
    • 1/3 cup softened vegan butter (we used Miyoko’s)
    • 3 Tbsp lemon zest (4-5 lemons yield ~3 Tbsp zest)
    • 1/4 cup applesauce (unsweetened)
    • 1/4 cup lemon juice
    • 1 tsp vanilla extract
    • 1 cup almond flour (we like Wellbee’s)
    • 1/2 cup dairy-free milk (plain, unsweetened // we used almond milk)
    • 1 ¼ cup MB 1:1 GF Blend (or all-purpose flour if not GF // see notes for other options)
    • 1 ½ tsp baking powder
    • 1/4 tsp baking soda
    • 1/4 tsp sea salt
    • 1 ½ Tbsp poppy seeds
    • Preheat your oven to 350 degrees F (176 C) and line a standard muffin tin with 12 muffin liners (we like these), or lightly grease.
    • To a medium mixing bowl (or the bowl of a stand mixer), add the cane sugar, softened vegan butter, and lemon zest. Mix with an electric stand mixer or handheld mixer until light and fluffy, about 2 minutes.
    • Next add applesauce, lemon juice, and vanilla extract and beat on medium until well combined and slightly fluffy. The mixture may look curdled, which is fine. This will sort itself out in the next step!

    • Now add almond flour and beat until smooth and well incorporated. Next add in the milk and mix on low until fully combined. Finally, add the gluten-free flour blend, baking powder, baking soda, sea salt, and poppy seeds. Mix on medium until light and fluffy with the poppy seeds evenly distributed.

    • Divide the batter evenly between the 12 muffin liners and bake for 30-34 minutes, until lightly golden on the edges. When a toothpick is inserted into a muffin it should come out almost clean with just a crumb or two left behind. For the best possible texture, let the muffins cool completely before enjoying.

    • Best when fresh, but they can be stored at room temperature in an airtight container for up to 3 days or in the freezer for up to 1 month.

    *Cane sugar is important for flavor, structure, and color in this recipe. We don’t recommend subbing coconut sugar.
    *If using our original DIY Gluten-Free Flour Blend or a similar store-bought brand such as Bob’s Red Mill 1:1 Baking Flour, we suggest using slightly more of it. Results will vary.
    *Nutrition information is a rough estimate.

    Serving: 1 muffin Calories: 207 Carbohydrates: 27.9 g Protein: 3.5 g Fat: 10 g Saturated Fat: 4 g Polyunsaturated Fat: 1.5 g Monounsaturated Fat: 3.1 g Trans Fat: 0 g Cholesterol: 0 mg Sodium: 177 mg Potassium: 114 mg Fiber: 1.9 g Sugar: 12.6 g Vitamin A: 14 IU Vitamin C: 4 mg Calcium: 95 mg Iron: 0.8 mg


    Source link

  • Ham and Bean Soup – Spend With Pennies

    Ham and Bean Soup – Spend With Pennies


    About the author

    Holly Nilsson is the creator of Spend With Pennies, where she creates easy, comforting recipes made for real life. With a passion for nostalgic flavors and simplified techniques, Holly helps busy home cooks create delicious meals that always work. She is also the author of “Everyday Comfort,” which promises to inspire even more hearty, home-cooked meals.
    See more posts by Holly

    Follow Holly on social media:

    pinterest facebook twitter instagram


    Source link

  • 30-Minute Thai Beef Curry | foodiecrush.com

    30-Minute Thai Beef Curry | foodiecrush.com


    This 30-minute Thai beef curry recipe features tender slices of steak and a medley of vegetables swimming in a fragrant red curry sauce. Everything gets cooked in the same skillet for layers upon layers of flavor — and fewer dirty dishes!

    Thai Beef Curry in skillet

    Making restaurant-quality Thai red curry at home requires just one skillet, a handful of basic ingredients, and 30 minutes of your time. Seriously, that’s it!

    The red curry sauce is just spicy enough to let you know that, hey, I’m eating curry, but the heat level is still family-friendly.

    This is an easy recipe to customize using whatever veggies you have in the fridge. Bell peppers, onion, and green beans are my go-to’s when I want crisp-tender perfection, but use what you have!

    Heidi’s Tips for Success

    • I’ve tested this recipe with a few different cuts of beef, and top sirloin steak is the winner. It’s got a bit more marbling than standard sirloin, which translates to big beef flavor and lots of moisture.
    • Some curry pastes pack in more heat than others. We thought 1 tablespoon was the perfect amount for a nice kick of heat, but you can add more or less depending on how spicy you like your curry.
    • The peppers and onions stir-fry quickly, so have a plate nearby to whisk them off the stove as soon as they’re crisp-tender. You want to maintain some texture to avoid a mushy curry.
    What's in Thai Beef Curry recipe ingredients

    What’s in This Recipe?

    The full recipe, with amounts, can be found in the recipe card below.

    • Top sirloin steak — Remains more tender and juicy than regular sirloin steak, but you can use the two interchangeably in this recipe.
    • Coconut milk — Choose a full-fat, canned variety for maximum creaminess.
    • Lime juice — A little acidity wakes up the curry and balances out the rich coconut milk.
    • Fish sauce — Is full of salty, pungent, umami flavor. It will not make your curry taste like fish. This is the secret ingredient that will make your homemade Thai beef curry taste like it came from a restaurant.
    • Brown sugar — Some sweetness is key to rounding out the flavors of the sauce.
    • Red curry paste — Some Thai curry pastes are spicier than others, so start with 1 tablespoon as instructed and add more if needed.
    • Canola oil — Has a high smoke point, which is important when stir-frying. Feel free to replace with coconut oil.
    • Vegetables — I used thinly sliced onion, bell pepper, and green beans, but use your favorites.
    • Thai basil + peanuts — The perfect garnishes for an authentic tasting red beef curry. Thai basil is the slightly spicy cousin to Italian basil; you can use both in this recipe, but Thai basil is best.
    Vegetables cooking in skillet next to skillet with curry sauce

    How to Make Thai Beef Curry

    1. Stir-fry the vegetables. You want the skillet to be nice and hot before you add the oil and vegetables. If you sliced the onion and peppers thinly, they should only need about 3 minutes to reach that perfect crisp-tender stage. Remove them to a plate to prevent them from cooking further.
    2. Make the curry sauce. Cook the red curry paste in a little oil to release some of its flavors and wake up all those spices. Once you stir in the coconut milk, lime, brown sugar, and fish sauce, the mixture needs to simmer for about 5 minutes to thicken up.
    Thai Beef Curry cooking in skillets side by side
    1. Cook the beef. Return the veggies to the skillet, then add the raw steak. The sliced steak will cook in about 2 minutes, so don’t walk away from the stove!
    2. Garnish and serve. Sprinkle a generous amount of Thai basil and chopped peanuts over the beef curry before digging in.

    FAQs

    Can I add other vegetables?

    If you have a little extra time on your hands, try adding cubed butternut squash or sweet potato instead of green beans for a sweet and spicy flavor. Both should be simmered with the curry sauce until tender (about 15 to 20 minutes).

    Otherwise, you could stir-fry any combination of broccoli, bok choy, sugar snap peas, etc.

    Can I use a different type of curry paste?

    I bet you could use yellow or green curry paste, if desired. Yellow curry paste is more mild, and green curry paste is milder still.

    Thai Beef Curry in bowl with rice

    Storage Tips

    Curry is one of the few dishes that gets better with age! Let any leftover beef curry cool before transferring it to an airtight container. It should last up to 5 days in the fridge without issue.

    What to Serve With Beef Coconut Curry

    If you make this recipe, please let me know! Leave a ⭐️⭐️⭐️⭐️⭐️ rating below, leave a comment to tell us what you think, and tag me on Instagram @foodiecrush.

    Thai Beef Curry in skillet