نویسنده: post bot

  • Sheet Pan Salmon with Infused Pesto

    Sheet Pan Salmon with Infused Pesto


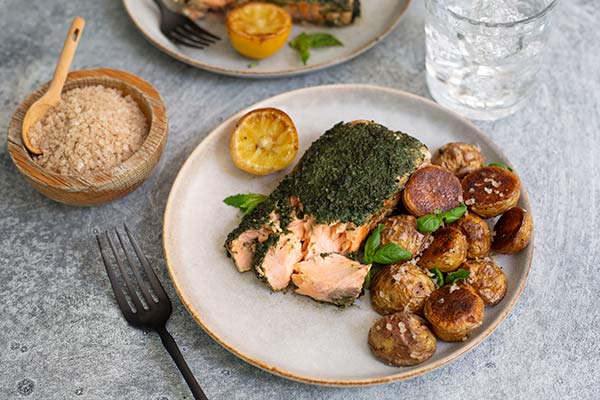
    When dinner is this easy and this good for you, it’s a win all around. This Sheet Pan Salmon with Spirulina Infused Pesto is more than just a beautiful, vibrant meal—it’s packed with powerhouse ingredients that deliver on both flavor and wellness. The best part? It all comes together on one pan, making cleanup a breeze.

    This recipe blends the heart-healthy omega-3s of salmon with the nutrient density of spirulina, a blue-green algae known for its protein, iron, and antioxidant content. Add in fresh herbs, lemon, and fiber-rich potatoes, and you’ve got a meal that supports immune health, boosts energy, and leaves you feeling nourished and satisfied.

    Gluten-Free-Sheet-Pan-Salmon-with-Spirulina-Infused-Pesto-Ingredients-1

    What You Need:

    • 1 pound baby Yukon gold potatoes, cut in half
    • 1 tablespoon plus ⅓ cup olive oil
    • Kosher or fine sea salt
    • Freshly ground black pepper
    • 1 cup fresh basil leaves
    • 1 cup fresh mint leaves
    • ¼ cup walnuts
    • 1 tablespoon BareOrganics Spirulina Powder
    • Zest and juice of 1 lemon
    • 2 cloves garlic, peeled and smashed
    • 1 lemon, cut in half
    • 1 pound center cut salmon

    Why This Meal Loves You Back:

    • Salmon: A fantastic source of lean protein and omega-3 fatty acids that support heart and brain health.
    • Spirulina: This plant-based superfood is rich in protein, B vitamins, and antioxidants, and may help support immune function and reduce inflammation.
    • Basil & Mint: Fresh herbs that offer natural antibacterial properties and help aid digestion.
    • Walnuts: Packed with healthy fats and plant-based omega-3s, plus they add a great crunch to the pesto.
    • Lemon: A natural detoxifier and vitamin C booster that brightens both the flavor and nutritional value.
    • Yukon Gold Potatoes: Full of potassium and fiber, they provide satisfying comfort without refined carbs.

    Gluten-Free-Sheet-Pan-Salmon-with-Spirulina-Infused-Pesto-on-Pan-3

    This recipe is ideal for busy weeknights but elegant enough for guests—and with all that color and nutrition, it looks as good as it tastes. A vibrant, feel-good dinner made simple. What more could you ask for?

    Sheet-Pan-Salmon-with-Spirulina-Infused-Pesto-Recipe

    Sheet Pan Salmon with Spirulina Infused Pesto

    Prep Time15 minutes

    Cook Time40 minutes

    Servings: 2

    Calories: 309kcal

    Author: Gluten Free & More

    • Preheat oven to 425°F.

    • Place the potatoes in a mixing bowl, add olive oil, 1 teaspoon of salt, and ½ teaspoon of pepper, and toss to coat. Spread onto a rimmed baking sheet in a single layer and roast for 20 minutes or until they begin to brown.

    • While the potatoes are roasting, make the pesto. Place the basil, mint, walnuts, spirulina, lemon zest, lemon juice, and garlic in a food processor and pulse until coarsely chopped. With the machine running, slowly add the ⅓ cup olive oil. Taste and adjust seasoning with salt and pepper if needed.

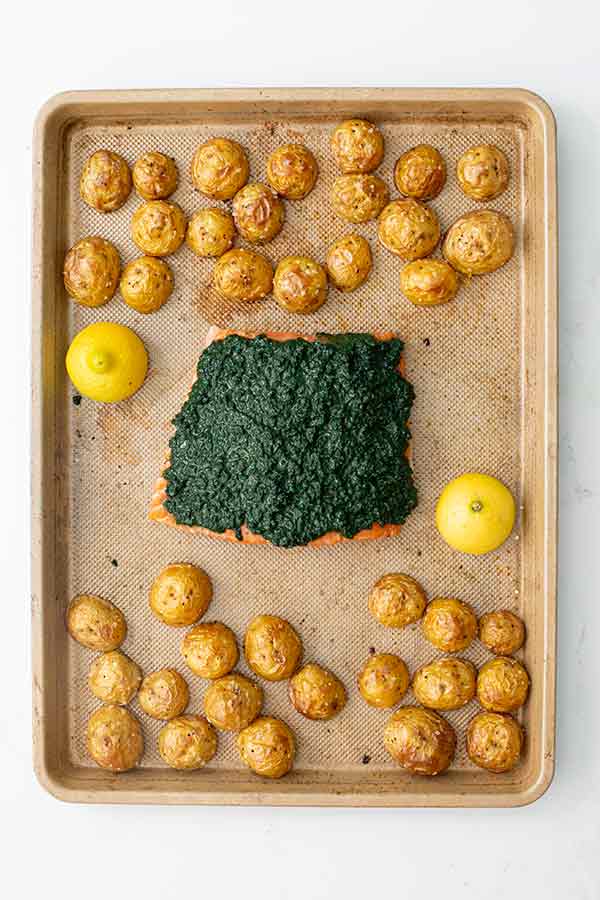
    • Remove the potatoes from the oven, leaving the oven on. Using a spatula, push the potatoes to the sides and place the salmon in the middle of the pan, skin side down, sprinkle with salt and pepper. Spread the pesto on top of the salmon. Place the cut lemon on the pan, cut side down. Put back in the oven for 12 – 15 minutes or until the potatoes are browned and tender and the salmon flakes easily.

    Nutrition Facts

    Sheet Pan Salmon with Spirulina Infused Pesto

    Amount Per Serving

    Calories 309
    Calories from Fat 90

    % Daily Value*

    Fat 10g15%

    Saturated Fat 1g5%

    Polyunsaturated Fat 7g

    Monounsaturated Fat 1g

    Sodium 23mg1%

    Potassium 1269mg36%

    Carbohydrates 51g17%

    Fiber 10g40%

    Sugar 4g4%

    Protein 9g18%

    Vitamin A 1608IU32%

    Vitamin C 84mg102%

    Calcium 137mg14%

    Iron 4mg22%

    * Percent Daily Values are based on a 2000 calorie diet.


    Source link

  • Best Croque Monsieur Recipe (+ tips)

    Best Croque Monsieur Recipe (+ tips)


    What is Croque Monsieur?

    Croque Monsieur is France’s version of a grilled ham and cheese sandwich—on steroids! This Parisian café classic starts with thick slices of bread layered with creamy béchamel sauce, Gruyère cheese, savory ham, a smear of Dijon, and even more melty cheese, then pan-fried and baked to golden bubbling perfection.

    It’s indulgent, satisfying, irresistibly crispy, cheesy, and comforting—perfect for brunch, lunch, or an effortlessly elegant dinner with a French twist!


    Source link

  • Crispy Fried Shrimp Po Boys

    Crispy Fried Shrimp Po Boys


    Juicy fried shrimp is loaded into crusty French bread rolls and piled high with lettuce, tomato, and pickles. Slather on some tartar sauce, and you’ve got the shrimp po boy sandwich of your dreams.

    Three Shrimp Po Boys with tomato and lettuce and pickles

    Eating deep fried shrimp po boys aren’t for the faint of heart (or high of blood pressure).

    New Orleans’ legend has it that the sandwich was created to feed streetcar workers during a 1920s strike. The restaurant owner behind this cheap and cheerful sandwich would call out “here comes another poor boy!” whenever someone stopped by for a meal — and the name stuck.

    A shrimp po boy is made by stuffing crusty French bread with succulent seasoned fried shrimp, lettuce, pickles, and tomato. A generous amount of tartar sauce is the rich and creamy glue that holds everything together.

    I know you’d rather be sipping a Hurricane in The Big Easy right now, but until you can book that plane ticket this deep fried shrimp po boy will have to tide you over.

    Heidi’s tips for recipe success

    • Season the shrimp well for maximum Cajun flavor. I use a homemade blend of paprika, basil, thyme, garlic, and cayenne but you can use a store-bought blend if you prefer.
    • Bread all of the shrimp and have them ready to go before you start frying. They take just a few minutes to cook perfectly golden and crispy on the outside, while staying tender and juicy on the inside.
    • Make assembly quick and easy by preparing the tartar sauce and toppings in advance then keep the shrimp warm in a 200°F oven until ready to serve.
    What's in Shrimp Po Boy sandwiches ingredients

    What’s in This Recipe?

    The full recipe, with amounts, can be found in the recipe card below.

    • Shrimp — choose medium-sized shrimp, which have 41 to 60 shrimp per pound
    • Yellow cornmeal — the secret ingredient to creating that crispy, crackly deep fried coating around the shrimp
    • All-purpose flour — browns beautifully in the oil and helps the cornmeal stick to the shrimp
    • Dried herbs and spices — the fried shrimp is loaded with Cajun flavor by using a combo of sweet paprika, basil, thyme, garlic, cayenne pepper, salt, and black pepper
    • Eggs — coat the shrimp in beaten egg before dredging in the seasoned flour mixture
    • Oil — choose a neutral oil with a high smoke point, otherwise it will burn and your shrimp will be no bueno (I always use canola oil)
    • French rolls — crusty on the outside, pillowy soft on the inside
    • Tartar sauce — instead of the more traditional remoulade, I slather the rolls with creamy homemade tartar sauce
    • Toppings — keep it simple with crunchy iceberg lettuce, sliced tomato, and dill pickles

    Ingredient Swaps and Substitutions

    • Flour — a gluten-free all-purpose flour should work if you need to keep the shrimp gluten-free
    • French rolls — swap with a loaf of actual French bread (NOT a baguette)
    • Tartar sauce — use your favorite homemade or store-bought remoulade for a more traditional taste of New Orleans
    • Yellow cornmeal — can be substituted with white cornmeal, but the corn flavor won’t be as pronounced
    Fried shrimp ingredients next to pot of oil

    How to Make Fried Shrimp Po Boys

    1. Prep the shrimp. Shell, devein, and rinse the shrimp. Pat dry with paper towels to remove any excess moisture.
    2. Prep the dipping stations. In one bowl, beat the eggs. In another bowl, combine the flour, cornmeal, and seasonings.
    3. Preheat the frying oil. Pour about 3 inches of oil into a large Dutch oven. Turn the heat to medium-high and be patient while the oil warms up.

    Heidi’s Tip: Shrimp can become tough and dry if overcooked. To avoid this, you need to fry them briefly at a high heat (350ºF).

    Fried shrimp in oil
    1. Bread the shrimp. Working with just five or six shrimp at a time, dip them in the beaten egg and then dredge through the flour mixture. Place on a parchment-lined baking sheet, then repeat until the shrimp have all been breaded.
    2. Deep fry until golden. Again, working with just a few shrimp at a time, slide them gently into the hot oil. Fry until golden brown, flipping only once. This should only take about 2 minutes total.

    Heidi’s Tip: I like to transfer the fried shrimp to a 200ºF oven to keep them warm while I continue deep frying in small batches. This keeps them crispy without overcooking them.

    Fried shrimp on baking sheet next to Shrimp Po Boys sandwich fixings
    1. Assemble and dig in. Pile the fried shrimp into toasted French bread rolls slathered with tartar sauce. Layer with as much lettuce, tomato, and pickle as you like.

    Recipe Tips

    • Prep the tartar sauce and toppings in advance. To make assembly easier day-of, whisk together the tartar sauce a day or two ahead of time. Slice the tomato and lettuce and refrigerate in separate containers until ready to use.
    • Choose larg(er) shrimp. Medium shrimp are perfect for po boy sandwiches because they’re not so large that they take forever to fry, but they’re also not so small that they overcook easily.
    • Use a cooking thermometer. Without one, you run the risk of frying the shrimp in oil that’s too cold (the breading would soak up the oil and become gummy rather than crispy) or too hot (the breading would likely burn and the shrimp might overcook).
    • Deep fry and eat ASAP. Fried shrimp po boys are best straight from the hot oil. Over time, the shrimp lose their crispiness and it’s tough to revive that crunch later on.
    Shrimp Po Boy sandwich on plate

    Storage Tips

    Store the po boy fixings and shrimp in separate containers. The shrimp will last up to 5 days in the fridge, but they’ll lose their crispy texture fairly quickly.

    What to Serve With Shrimp Po Boys

    If you make this recipe, please let me know! Leave a ⭐️⭐️⭐️⭐️⭐️ rating below, leave a comment to tell us what you think, and tag me on Instagram @foodiecrush.

    Three Shrimp Po Boys with tomato and lettuce and pickles

    This Korean cucumber salad tastes spicy, sweet, and fresh with each crisp and crunchy bite. It takes just 5 minutes to make and is delicious to eat as a simple side dish or tangy salad.

    Spicy Korean Cucumber Salad with gochujang in bowl

    My cucumber-obsessed husband makes this spicy Korean Cucumber Salad recipe (Oi Muchim) at least once a week. We were introduced to it years ago when eating Korean BBQ when each tangy bite with a bit of heat turned us into instant fans. It’s a typical part of the banchan (small side dishes) served with the main Korean meal and is so good that we always ask for more.

    This cucumber salad recipe takes 5 minutes to make and is ready to eat in just 30 minutes or can be refrigerated for hours before serving. In our recipe, thin-skinned cucumbers are mixed with rice vinegar, sesame oil, garlic, and ginger. For the spicy kick, we use either chili crisp or gochugaru (Korean chili flakes) to deliver the heat.

    Salting the cucumbers draws out moisture, keeping them snappy and crisp. As the salad sits, the released water mixes with the seasoned vinegar to create a spunky, perfectly balanced dressing that mellows the heat of the chili’s spice. These babies are addicting!

    Heidi’s Tips for Recipe Success

    • Salt the cucumbers, toss them well, then rest for 5-10 minutes before rinsing and adding the rest of the ingredients. This trick coaxes out their moisture, giving the Korean pickled cucumbers a fresh and snappy bite that won’t go soggy.
    • Prepare the salad at least 30 minutes to 1 hour before serving for the flavors to meld and infuse.
    • Use Persian, Korean, or English cucumbers. They have fewer seeds and thinner skin so there’s no peeling involved.
    What's in Spicy Korean Cucumber Salad with gochujang ingredients

    Korean Cucumber Salad Ingredients

    The full recipe, with amounts, can be found in the recipe card below.

    • Thin-skinned cucumbers — look for Persian cucumbers, English cucumbers, or Korean cucumbers with minimal seeds and no need to peel!
    • Kosher salt — the larger crystals pull moisture from the cucumbers, providing a quick, brined cure to keep them crisp
    • Seasoned rice vinegar — this slightly sweet Japanese vinegar adds tangy notes that aren’t too acidic
    • Toasted sesame oil — adds a nutty, savory note
    • Garlic — pressed smooth, it imparts another zesty layer of flavor
    • Ginger — grate fine to add a peppery pop
    • Chili crisp or gochugaru — use one or the other (or try a combo of both) to provide the warming chili flavor that’s distinct to this dish

    Ingredient Swaps and Substitutions

    • Cucumbers — if using a regular garden variety, peel, slice in half lengthwise, and remove the seeds before chopping
    • Chili crisp or gochugaru — we use them interchangeably or try this salad using a combo of both, just be sure to taste test for spiciness! Gochugaru paste, gochujang, or sambal olek also provide a spice kick.
    • Seasoned rice vinegar — try apple cider vinegar or plain rice vinegar with 1 teaspoon granulated sugar

    Heidi’s Add-ins: Feel free to add chopped green onion, slivered carrot, or chopped cilantro for more fresh flavor. For a nutty crunch, sprinkle with toasted sesame seeds. And while not authentic, a generous dose of everything bagel seasoning is pretty tasty, too.

    Salt on cucumbers in bowl with spicy cucumber salad ingredients in another bowl

    How to Make Spicy Korean Cucumbers

    • Salt the cucumbers. Cut into ¼-inch coins then add half to a bowl. Season with ½ teaspoon kosher salt. Add the rest of the cucumbers and season with the remaining salt. Let sit for 5-10 minutes.
    • Rinse the cucumbers. Rinse the salt from the cucumbers under cold water. Pat dry with a paper towel (or tea towel) and return to the bowl.
    • Add the seasonings. Add the chili crisp (or gochugaru), sesame oil, garlic, and ginger.

    Heidi’s Tip: I like to mix this salad the old-school way, in a bowl with a spoon. However, my husband adds the ingredients to a container with a fitted lid, covers it tight, and shakes it to combine — a useful tactic to let it all out after a hard day :)

    Vinegar added to Spicy Korean Salad ingredients in bowls
    • Drizzle with the seasoned rice vinegar and mix. Fold the ingredients together until well coated.
    • Let it rest. Refrigerate the salad for 30 minutes (up to 6 hours) before serving. This allows the flavors to mingle and infuse their spiced tang.
    Spicy Korean Cucumber Salad with gochujang in bowl

    FAQ

    Can I use regular cucumbers in this salad?

    Thin-skinned, seedless cucumbers are best in this salad for texture, size, and color—the green skin really adds to the dish! However, if using garden-variety cucumbers, peel them first, cut in half lenghtwise, and remove the seeds before slicing.

    Can I use table salt instead of kosher salt to crisp the cucumbers?

    In my book, no. Kosher salt’s larger, flakier crystals draw moisture out of cucumbers better than the fine grains of table salt that dissolve too quickly. Iodized table salt also gives a metallic aftertaste that can overpower the cucumber flavor.

    What’s the difference between chili crisp and gochugaru

    Chili crisp is a savory, oil-based condiment with crunchy bits of fried chili, garlic, onions, and other ingredients
    Gochugaru is a powder or flakes made from dried Korean red peppers that’s less hot than many other chili flakes

    Storage Tips

    This Korean cucumber salad will last in an airtight container in the fridge for 2-3 days, but it’s at its crispest within 1-2 days. We keep a batch in the fridge for as long as they’ll last without getting eaten — up to a week. Just know the cucumbers become softer as the days go by.

    Heidi’s Tip: The cucumbers let off more water the longer they sit, creating a tangy dressing. I like to drizzle it on my lunch time salads as a dressing or over white rice served with my Chili Crisp Salmon.

    Spicy Korean Cucumber Salad with gochujang in bowl

    What to Serve With Korean Cucumber Salad

    If you make this recipe, please let me know! Leave a ⭐️⭐️⭐️⭐️⭐️ rating below, leave a comment to tell us what you think, and tag me on Instagram @foodiecrush.

    Spicy Korean Cucumber Salad with gochujang in bowl

    Easy Korean Cucumber Salad (Oi Muchim)

    This easy Korean cucumber salad tastes spicy, sweet, tangy, and fresh. It takes just 5 minutes to make, or can be refrigerated for up to 6 hours (or more) before serving.

    Print

    Course Salad

    Cuisine Korean

    Keyword cucumber salad, Korean cucumber salad

    Prep Time 5 minutes

    Resting Time 30 minutes

    Total Time 35 minutes

    Servings 8

    Calories 54kcal

    Ingredients 

    • 1 pound Persian cucumbers, English cucumbers, or Korean cucumbers
    • 1 teaspoon kosher salt
    • 3 tablespoons chili crisp, or 1-2 teaspoons gochugaru to taste
    • 2 tablespoons toasted sesame oil
    • 2 teaspoons pressed garlic, or grated or finely minced
    • 1 teaspoon grated ginger
    • ¾ cup seasoned rice vinegar

    Instructions

    • Slice the cucumbers into ¼-inch coins, discarding the ends. Add half the cucumbers to a medium bowl and sprinkle with ½ teaspoon kosher salt. Add the remaining cucumbers and sprinkle with the rest of the salt. Toss well so all of the cucumbers are coated with salt. Set aside for 5-10 minutes.

    • Transfer the cucumbers to a colander and rinse them well. Drain, pat dry with paper towels or a tea towel, then add them back to the bowl. Add the chili crisp (or gochugaru if using), sesame oil, garlic, and ginger. Add the rice vinegar and toss well, thoroughly coating the cucumbers. Cover with plastic wrap or a lid and refrigerate for 30 minutes to 6 hours. Toss and taste for seasoning before serving.

    Notes

    This cucumber salad will last in an airtight container in the fridge for 2-3 days, but it’s at its crispest within 1-2 days.

    Nutrition

    Calories: 54kcal | Carbohydrates: 4g | Protein: 1g | Fat: 4g | Saturated Fat: 1g | Polyunsaturated Fat: 2g | Monounsaturated Fat: 1g | Sodium: 342mg | Potassium: 146mg | Fiber: 1g | Sugar: 1g | Vitamin A: 949IU | Vitamin C: 2mg | Calcium: 22mg | Iron: 1mg

    More Cucumber Salad Recipes

    We send good emails. Subscribe to FoodieCrush and have each post plus exclusive content only for our subscribers delivered straight to your e-mail box.

    Follow me on Instagram, Facebook, and Pinterest for more FoodieCrush inspiration.

    As always, thank you for reading and supporting companies I partner with, which allows me to create more unique content and recipes for you. There may be affiliate links in this post of which I receive a small commission. All opinions are always my own.


    [ad_2]
    Source link