نویسنده: post bot

  • Easy Refried Beans – Mel’s Kitchen Cafe

    Easy Refried Beans – Mel’s Kitchen Cafe


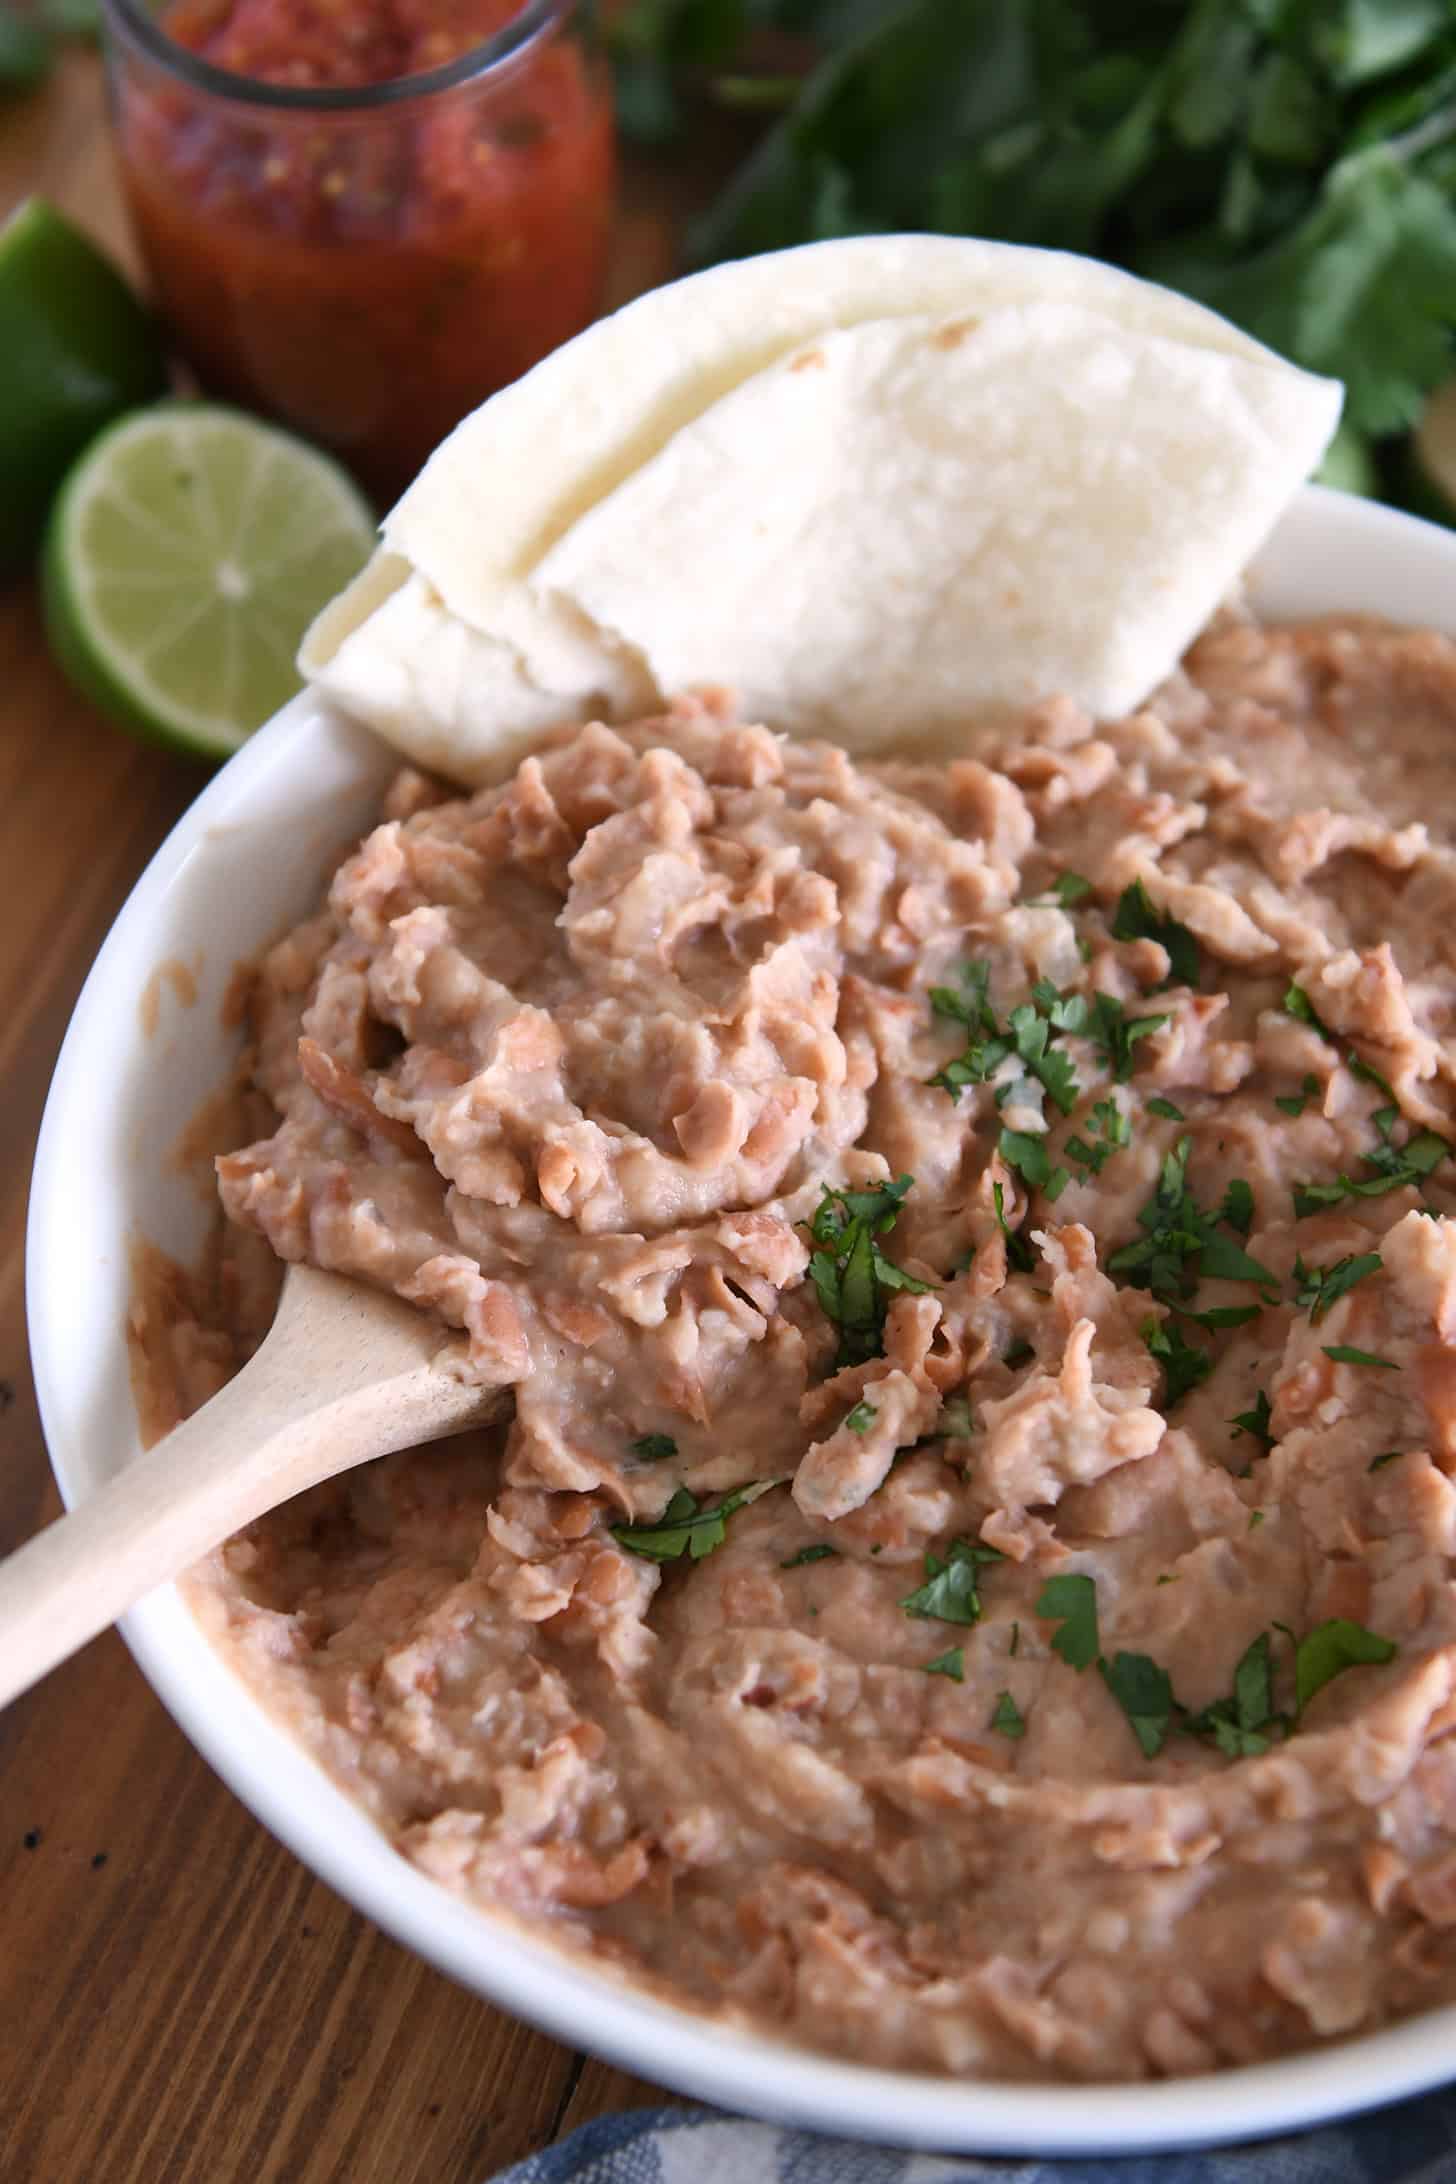
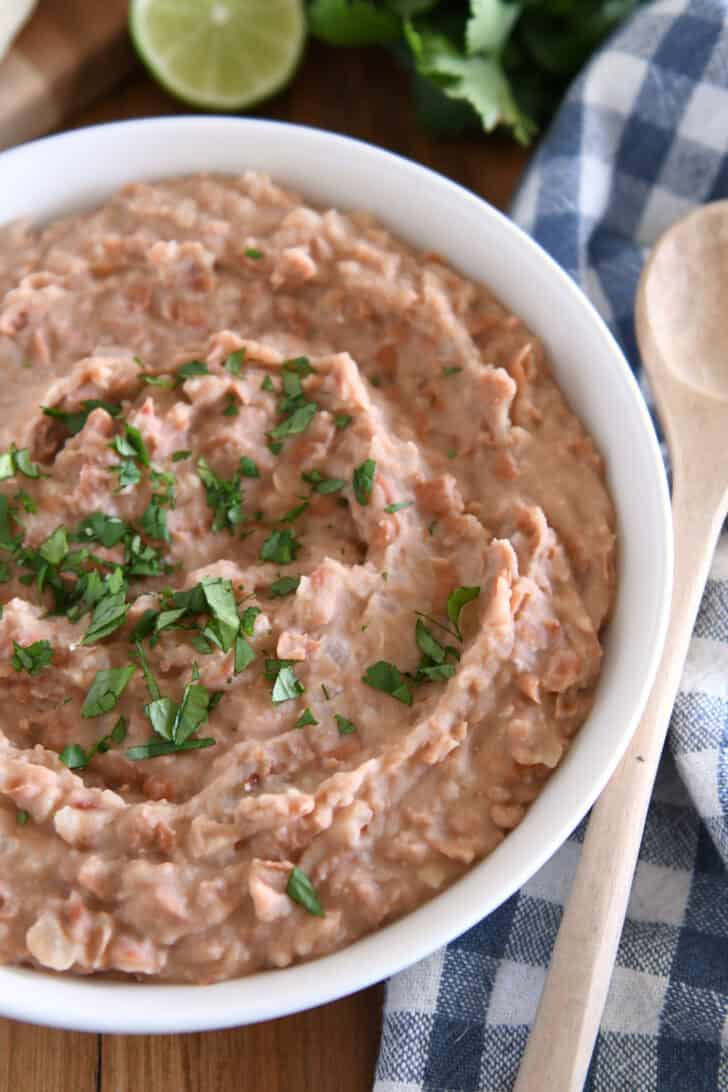
    Make delicious, better-than-restaurant refried beans in 20 minutes or less! These easy refried beans are creamy, flavorful and make the perfect side dish.

    Homemade refried beans are SO GOOD, but making them from dried beans is a long process. Now you can have all the tastiness of refried beans in a fraction of the time!

    White bowl with creamy refried beans, cilantro, tortillas and wooden spoon.

    How to Make Easy Refried Beans

    The key to making these easier refried beans is using canned pinto beans.

    Now before you ask yourself (or me) why on earth you’d use canned beans to make refried beans if you could just open up a can of refried beans, let me tell you why. ⤵️

    Because these simple and quick refried beans are about a thousand times yummier than any can of refried beans I’ve ever met. And why are they yummier? ⤵️ ⤵️

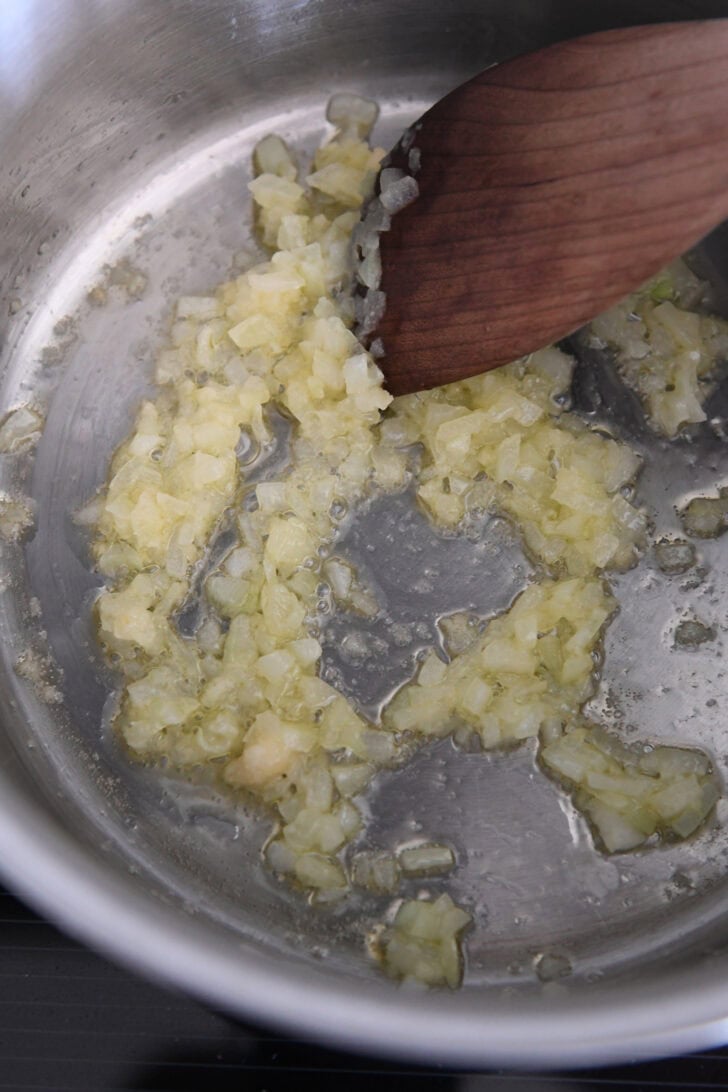
    1. We’re building layers of flavor by sautéing garlic and onions in the first step.
    2. Rinsed and drained beans get a quick simmer with a few extra, important ingredients that continue building a more complex flavor profile.
    3. YOU control the consistency of the finished refried beans when you mash them in the last step.

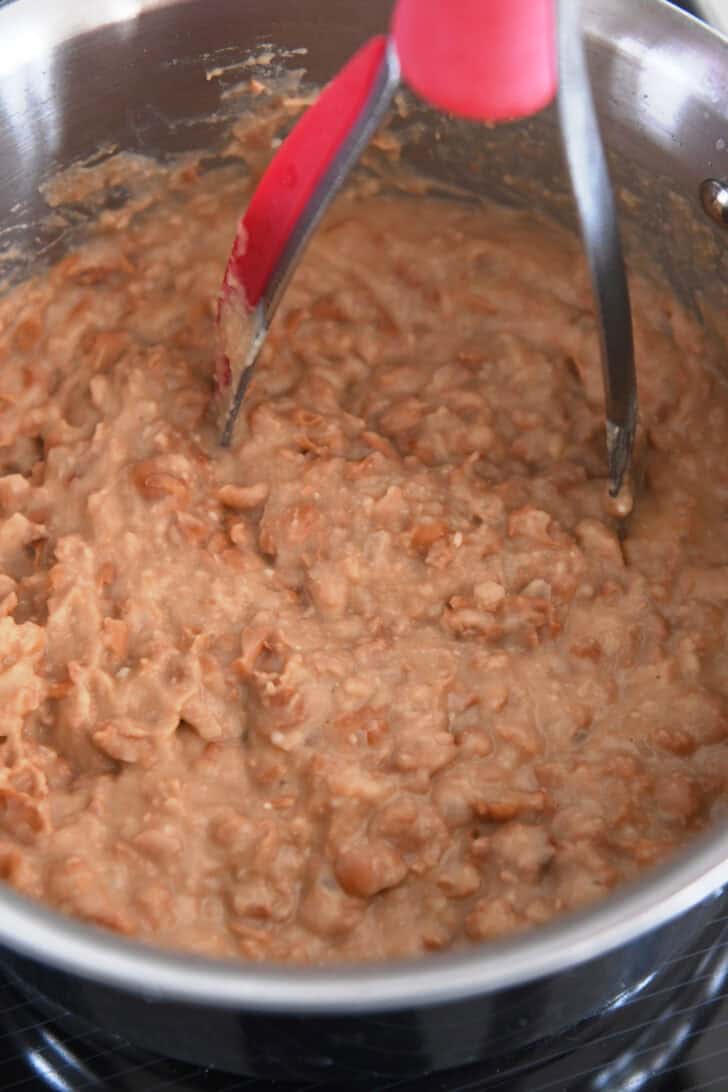
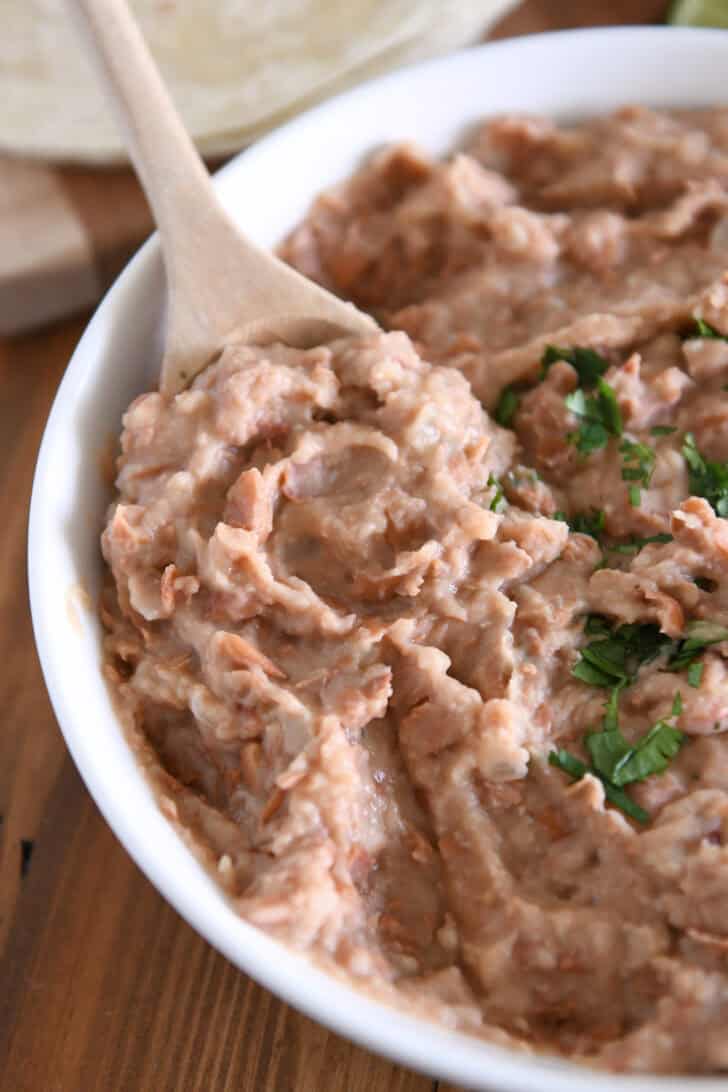
    The finished refried beans can be as smooth or as chunky as you like. For a super smooth consistency, get in there with an immersion blender.

    Otherwise, a potato masher is the perfect tool for turning the soft beans into refried beans with some texture.

    Additionally, you can add a bit of hot water at the end if you’d like the beans less thick. Basically, what I’m saying is: YOU HAVE ALL THE CONTROL HERE. Use it wisely. 😉

    Easy creamy refried beans in white bowl with fresh cilantro.

    Best Refried Beans Ever

    Listen, I love this classic pressure cooker refried beans recipe that uses dried beans. (And so do hundreds of you.)

    But there have been times when I don’t have the time (or the dried beans) to make that recipe happen. So I took notes from that recipe and transferred the yummy flavors to these easy refried beans, and WOW, they are so, so good.

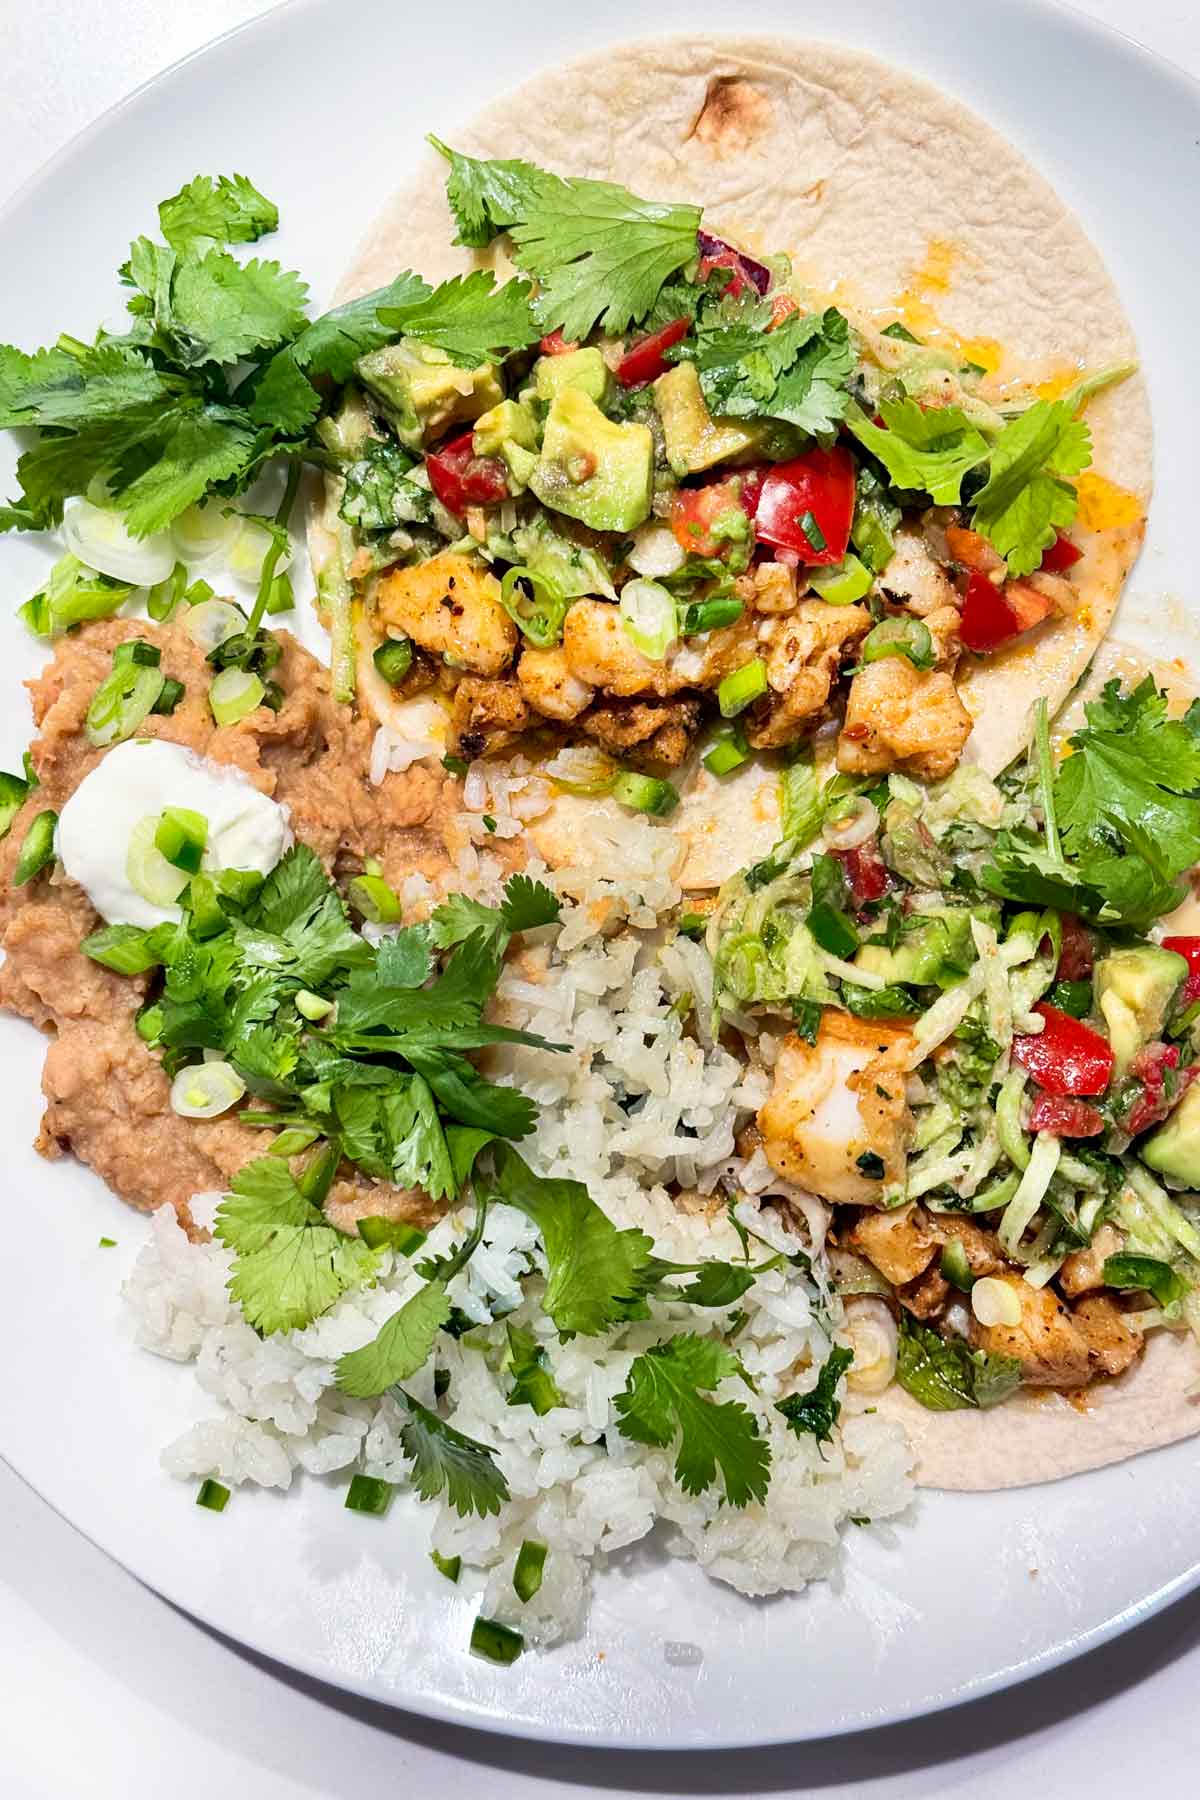
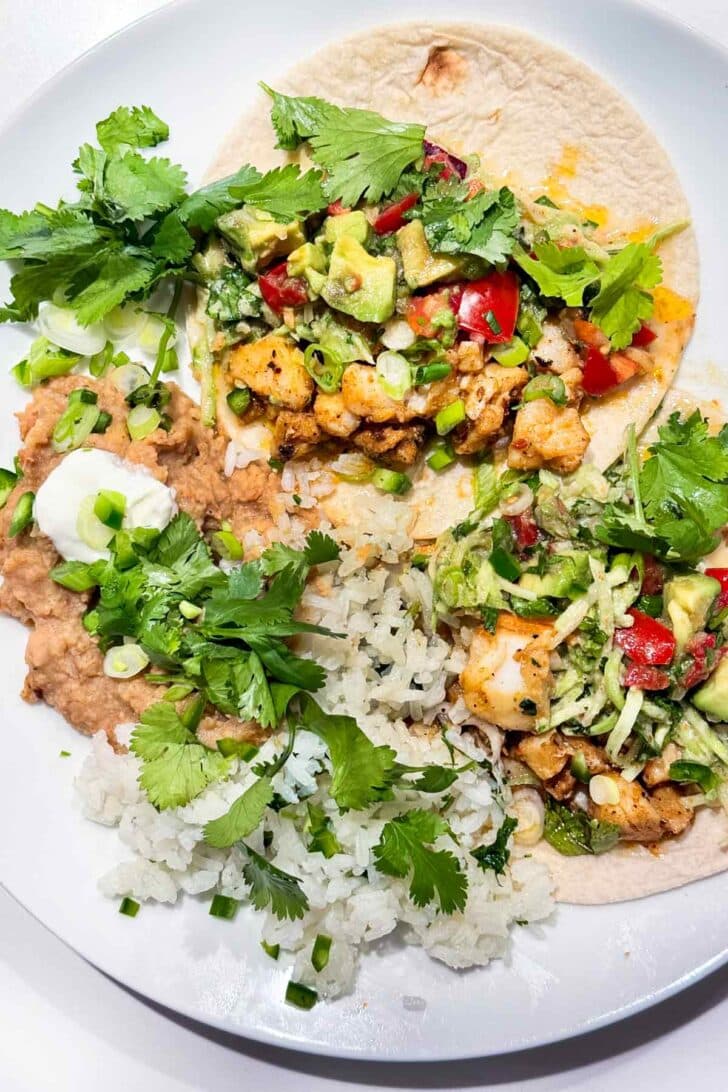
    They are perfect as a side dish for many a Mexican-inspired meal. And they make the most excellent super fast bean and cheese burrito/quesadilla thingies (yeah, the kind you whip up in two seconds and throw in the microwave – YUM).

    This is such a great recipe to have in your back pocket when you need really, really good refried beans and you need them now!

    Wooden spoon scooping serving of refried beans from white bowl.

    One Year AgoBrown Butter Chocolate Chip Muffins
    Two Years Ago: Amazing Peanut Butter Oatmeal Chocolate Chip Cookies {Dairy-Free + Egg-Free}
    Three Years AgoChocolate Chip Blended Oatmeal Cookies
    Four Years Ago: Butterscotch Rice Krispie Treats
    Five Years Ago: Sticky Coconut Chicken 
    Six Years AgoMel’s Buddha Bowls {With Super Tasty Peanut Sauce}
    Seven Years AgoMandarin Spinach Bowtie Pasta Salad with Teriyaki Dressing 
    Eight Years Ago: The Best Ground Beef or Turkey Tacos {20-Minute Meal}
    Nine Years Ago{Pressure Cooker or Stovetop} Chicken Coconut Curry
    Ten Years Ago: Amazing Key Lime Cheesecake

    Top down view of white bowl with easy refried beans, cilantro and tortillas.

    Easy Refried Beans

    • 1 tablespoon olive oil
    • ¼ cup finely chopped onion
    • 2 cloves garlic, finely minced
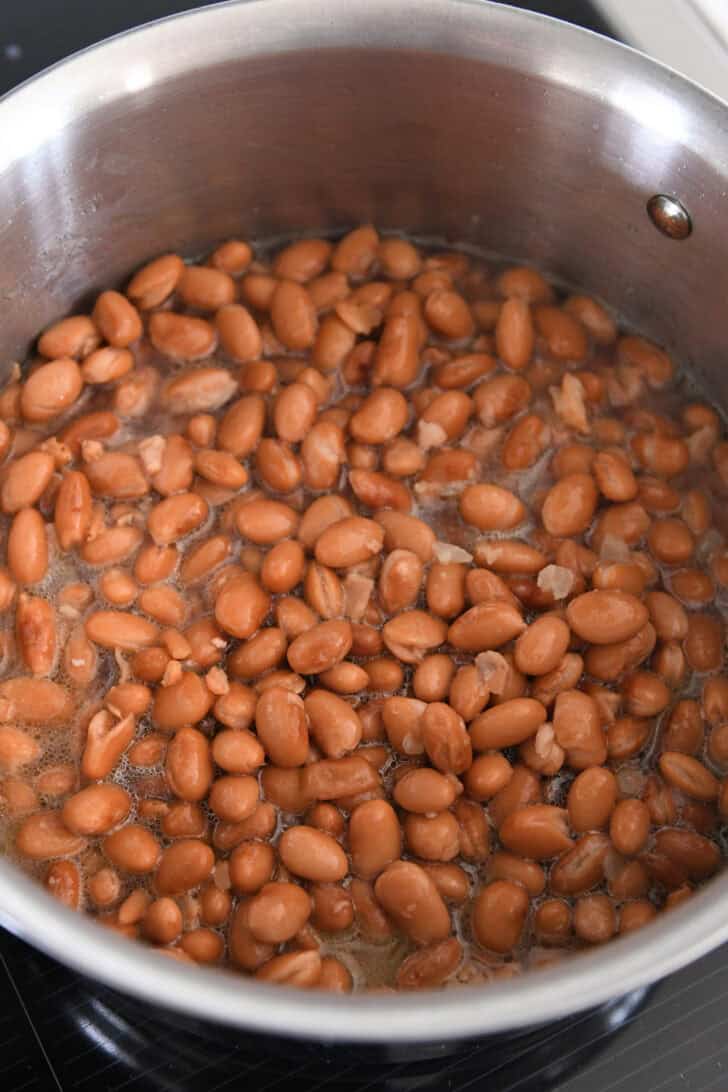
    • 2 cans (15-ounces each) pinto beans, rinsed and drained
    • 1 cup water
    • 2 teaspoons white vinegar
    • ¼ teaspoon salt

    Prevent your screen from going dark

    • In a medium saucepan, heat the olive oil over medium heat. Add the onion and garlic and sauté for 2 to 3 minutes until the onions are translucent.

    • Add the drained beans, water, vinegar, and salt. Bring to a simmer. Cover the pot and cook at a gentle simmer for 5 minutes (check once or twice to make sure the beans aren’t sticking to the bottom of the pot; moderate heat as needed).

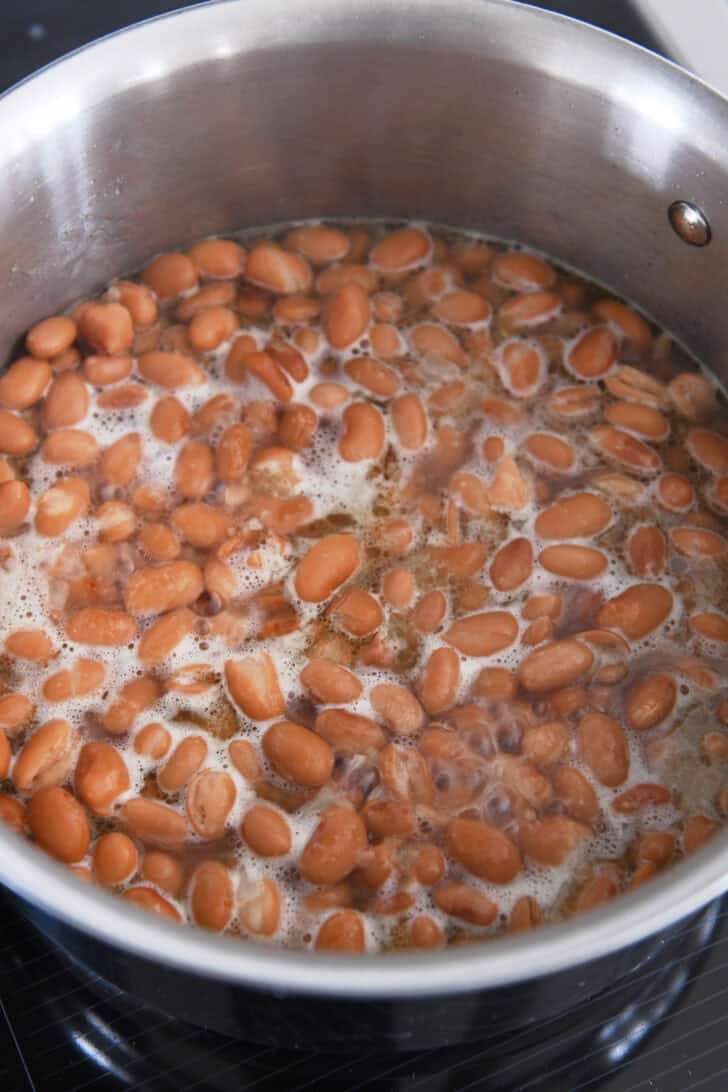
    • Uncover and cook 2 to 3 minutes longer until thick and syrupy.

    • Use a potato masher to mash the beans to desired consistency. Add additional salt to taste, if needed.

    • Water can be added a little at a time to adjust consistency, if needed. Serve warm.

    Additions: a finely diced jalapeno can be added with the onions and garlic for heat. 

    Serving: 1 serving, Calories: 31kcal, Carbohydrates: 1g, Protein: 0.2g, Fat: 3g, Saturated Fat: 0.4g, Sodium: 119mg, Fiber: 0.2g, Sugar: 0.4g

    Recipe Source: from Mel’s Kitchen Cafe

    Disclaimer: I am a participant in the Amazon Services LLC Associates Program, an affiliate advertising program designed to provide a means for me to earn fees by linking to Amazon.com and affiliated sites. As an Amazon Associate I earn from qualifying purchases.


    Source link

  • Chili Crisp | Gluten Free & More

    Chili Crisp | Gluten Free & More


    The Fiery Flavor Booster You’ll Want on Everything

    If you haven’t jumped on the chili crisp train yet, consider this your official boarding call. This fiery, crunchy, flavor-packed condiment has gone from cult favorite to pantry staple—and it shows no signs of slowing down. From trendy restaurants to home kitchens, chili crisp is having a major moment. And now, with this easy homemade version, you can join the movement and elevate just about any dish with a spoonful of bold, addictive heat.

    What makes this version so special? It’s got everything we love about chili crisp: crispy shallots and garlic, a gentle tingle from optional Szechuan peppercorns, and layers of umami from gluten-free tamari and a touch of miso. A splash of Marukan Seasoned Gourmet Rice Vinegar adds balance and brightness, making each bite sing. The best part? You can adjust the spice level to make it just right for your palate.

    And the uses? Endless. Drizzle it over avocado toast, scrambled eggs, or grain bowls. Stir it into soups and noodles for an instant flavor upgrade. Spoon it over roasted veggies, tofu, or even vanilla ice cream if you’re feeling bold—yes, really. Once you’ve made your own batch, you’ll find yourself reaching for it again and again.

    This homemade chili crisp isn’t just a food trend—it’s a flavor revolution you can stir up right in your own kitchen. Trust us: your taste buds will thank you.

    Chili-Crisp-Recipe

    https://www.youtube.com/watch?v=cbK0gIakRRg

    Chili Crisp

    Prep Time10 minutes

    Cook Time15 minutes

    Servings: 1.5 Cups

    Calories: 183kcal

    Author: Gluten Free & More

    • In a small saucepan, heat ½ cup avocado oil over medium-low heat.

    • Add ¼ cup minced shallots and cook, stirring frequently, until golden brown and crispy (about 5 minutes).

    • Add 4 minced garlic cloves and cook for another 1 to 2 minutes, until fragrant and lightly golden.

    • Remove from heat and immediately stir in ¼ cup crushed red pepper flakes, 1 teaspoon smoked paprika, and 1 teaspoon ground Szechuan peppercorns (if using).

    • Let sit for 30 seconds to bloom the spices.

    • Stir in 3 tablespoons Marukan Seasoned Gourmet Rice Vinegar, 2 tablespoons gluten-free tamari, 2 tablespoons coconut sugar, 1 teaspoon miso paste, and ½ teaspoon sea salt.

    • Mix well and let cool to room temperature.

    • Transfer to a glass jar and store in the fridge for up to 2 weeks.

    • The flavor deepens over time—stir before using!

    Nutrition Facts

    Chili Crisp

    Amount Per Serving

    Calories 183
    Calories from Fat 54

    % Daily Value*

    Fat 6g9%

    Saturated Fat 1g5%

    Polyunsaturated Fat 3g

    Monounsaturated Fat 1g

    Sodium 2919mg122%

    Potassium 1023mg29%

    Carbohydrates 32g11%

    Fiber 16g64%

    Sugar 7g8%

    Protein 10g20%

    Vitamin A 12354IU247%

    Vitamin C 6mg7%

    Calcium 172mg17%

    Iron 8mg44%

    * Percent Daily Values are based on a 2000 calorie diet.

    Disclaimer: All nutrition facts on Gluten Free & More are meant only as a guide and may differ depending on product brands used or ingredient substitutions. Some errors may occur, so you are encouraged to confirm the recipe’s ingredient and nutrition suitability for your own diet.

    Have you tried this recipe? Give it a star rating and let us know your thoughts in the Ratings & Reviews section below.


    Source link

  • Cilantro Lime Shrimp – Spend With Pennies

    Cilantro Lime Shrimp – Spend With Pennies


    About the author

    Holly Nilsson is the creator of Spend With Pennies, where she creates easy, comforting recipes made for real life. With a passion for nostalgic flavors and simplified techniques, Holly helps busy home cooks create delicious meals that always work. She is also the author of “Everyday Comfort,” which promises to inspire even more hearty, home-cooked meals.
    See more posts by Holly

    Follow Holly on social media:

    pinterest facebook twitter instagram


    Source link

  • Olivier Salad – The Daring Gourmet

    Olivier Salad – The Daring Gourmet


    This post may contain affiliate links. See my disclosure policy.

    A favorite throughout Eastern Europe and beyond for more than 150 years, this Olivier Salad recipe, also known as Russian Salad, features the most delicious combination of flavors and textures for a winning salad that is perfect for everything from a casual picnic to an elegant dinner party!

    olivier salad recipe russian potato authentic traditional old fashioned olivye ham cucumbers peas peppers capers eggs

    Russian Salad

    While reading Amor Towles’ A Gentleman in Moscow, I couldn’t help but be drawn in by the descriptions of the lavish dinner parties of the pre-revolution Russian aristocracy. As both an ardent foodie and a food history geek, I start to get excited when authors describe food scenes and various dishes of the eras, whether set in guilded age America, the golden age of Paris or, in this case, the era of the Russian tsars. My curiosity always leads to further exploration and research of the classic dishes from those times and settings, and this time it led me to a dish once considered a pinnacle of Russian high society gastronomy. No, it’s not borscht, beef stroganoff or chicken stroganoff (though they are fabulous). It’s something called the Olivier Salad.

    What is Olivier Salad?

    Dating back more than 150 years, Olivier Salad is a nostalgic dish with a long history. In its heyday you would find it served at the most prestigious restaurants and hotels in Moscow and at the center of upscale dinner parties and celebrations. In its simplest form, which is how it’s known today, it is a creamy mayonnaise-based salad of diced potatoes, vegetables, pickles, eggs and ham. But traditionally it was far more opulent. Let’s take a look at its intriguing history.

    The time was the 1860’s and the setting the Hermitage restaurant in Moscow where the French chef Lucien Olivier created what would become the restaurant’s signature dish. His creation was a carefully guarded secret (competing restaurant chefs in the city would go on to attempt to replicate it and capitalize on the fame) but originally included hazel grouse (of the grouse bird family), veal tongue, caviar, crayfish tails, aspic, lettuce, potatoes, capers and olives in a creamy mayonnaise-based sauce.

    hermitage restaurant russian salad recipe origin olivier

    The other local restaurant chefs who tried replicating Lucien Olivier’s famous Russian salad couldn’t quite get the sauce right, noting that something was missing. It was later revealed that the original sauce included something very similar to Worcestershire sauce which gave the dressing a rich and flavorful umami component. (And it’s definitely included in my recipe!)

    Over time many of these ingredients either fell out of popularity, were just too expensive or became difficult to source, and so over time were replaced by more accessible substitutes. Eventually ham or chicken chicken replaced the grouse, boiled eggs replaced the crayfish, and the capers and olives were replaced by green peas and pickled cucumbers.

    Olivier Salad remains a popular dish throughout much of Eastern Europe where parties and holidays are incomplete without it and where each household has a slightly different take on it. Different countries also have their own variations of the dish, for example in Croatia diced apples are commonly added, Romania often uses chopped beef, in Bulgaria salami is a popular choice, in Turkey pickled beets are commonly included, and variations in Poland often include pickled herring. It’s even popular in Iran where it’s usually made with chicken and in Spain where it’s called ensaladilla rusa (Russian salad) where it’s often made with tuna.

    olivier salad recipe russian potato authentic traditional old fashioned olivye ham cucumbers peas peppers capers eggs

    Olivier Salad Ingredients

    As mentioned earlier, there is no “one way” to make Olivier salad. Every household and every country where it’s served has their own variation. And none of them match the original version from the 1860’s (see the discussion above about its history). But the ingredients I’m using to make my Russian salad are pretty standard for how you’ll find it served in many places along with a couple of additional touches to enhance flavor and texture as well some ingredients that usually no longer included in most recipes but that hearken back to the flavor notes of the original recipe (e.g., capers and Worcestershire sauce).

    Salad Ingredients

    • Potatoes – tome recipes call for starchy potatoes like Russets, but unless you want more of a mashed potato salad I strongly recommend using a firm yellow potato variety like Yukon Gold. Yellow potatoes hold their shape after cooking, making them ideal for salads like this.
    • Carrots – this adds sweetness and color.
    • Diced Ham – whether you’re using leftover ham or dicing up ham steaks, I love the flavor of smoked ham in this salad. Alternatively you can use chicken (rotisserie chicken is convenient and flavorful) or European bologna (which is similar in texture and flavor to mortadella), You can add any cooked, chopped chicken breast you have on hand; rotisserie chicken or a canned chicken work well. Some variations in other countries use diced beef, sausage, pickled herring or tuna. If you’re going for a vegetarian Olivier salad, omit the meat.
    • Sweet Peas – you can use canned (rinse and drain), frozen (thaw and drain) or fresh (be sure to cook first).
    • Hard-Boiled Eggs – these add a key creaminess and flavor.
    • Onion – I like to use yellow onion for some of that mild contrasting sharpness, but you can use sweet onion if you prefer and can also reduce the amount of the added sugar in the dressing.
    • Dill Pickles – these add a wonderful flavor and crunch. For the best flavor I strongly recommend using European pickles, e.g. German pickles (they’re ridiculously expensive on Amazon but you can find them at World Market and I’ve seen them in some Walmart locations that have a Euro section). They are milder and sweeter than American dill pickles but not nearly as sweet as bread and butter pickles and with a different flavor profile.
    • Optional Add-Ins: Diced English cucumber for added crunch, sweet corn or yellow bell pepper for a splash of color, added texture and sweetness. Diced apple is used in some countries for added sweetness and crunch. Olives were included in the original 1860’s version for their briney flavor and can likewise be added.

    Dressing Ingredients

    Not to be confused with Russian dressing (an American creation popularly used on the Reuben sandwich), the dressing for Russian salad or Olivier salad is very different. Here’s what you’ll need:

    • Mayonnaise – the creamy base ingredient of the dressing.
    • Sour Cream – this adds a bit of tanginess to cut through the mayonnaise and adds balance and a touch of freshness. I like the texture and flavor of sour cream in this salad but you can substitute Greek yogurt if you prefer.
    • Dijon Mustard – this adds a ton of flavor depth and a welcome hint of sharpness.
    • Worcestershire Sauce – The earliest published recipe from 1894 in a Russian magazine said that the original recipe contained something called mogul or kabul sauce, which is similar to Worcestershire sauce. It’s a key ingredient that adds depth of flavor. Like music that’s all treble without the bass, food lacking in umami is rather bland. Worcestershire sauce provides some of that much needed bass.
    • Green Onions / Scallions – these add a mild peppery flavor note and a pop up of color.
    • Fresh Dill – this adds that fresh herbaceous touch. I love dill and grow lots of it every year in my garden, but I know that not everyone is a fan of it and you can substitute parsley if you prefer.
    • Salt, Black Pepper and Sugar – To tie everything together.
    olivier salad recipe russian potato authentic traditional old fashioned olivye ham cucumbers peas peppers capers eggs

    Olivier Salad Recipe

    This salad is easy to make, it just requires a good amount of chopping and dicing. To make this popular Russian potato salad you’ll follow these steps:

    • Cook the diced potatoes and carrots until tender, then drain and let cool while you prepare the other ingredients.
    • Prepare the dressing by stirring all of the ingredients together in a bowl until combined.
    • Place all of the salad ingredients in a large bowl, pour over the dressing, and stir to thoroughly combine. Cover and chill in the fridge for at least an hour before serving.
    • This can be served as a side dish in a bowl or on a plate, or it can be served molded for a fancier presentation as a starter. So that it holds together better you may need to use slightly less mayonnaise (this all depends on the variety of potato used, how long the salad sits before serving and how much of the excess liquid the potatoes absorb, how well drained some of the ingredients were, etc). To mold the salad you can lightly spray the inside of a measuring cup or dedicated mold with oil, press the salad into the mold, then invert onto the serving plate. You can garnish it with a sprig of dill or parsley.

    Make Ahead and Storage

    The ingredients can all be prepped a day in advance but if you’re making this ahead of time, ideally wait until a couple of hours or so before serving to add the dressing to the salad. Leftover Olivier Salad will keep in the fridge for 3-4 days.

    olivier salad recipe russian potato authentic traditional old fashioned olivye ham cucumbers peas peppers capers eggs

    For more delicious salad recipe from around the world try my:

    olivier salad recipe russian authentic traditional old fashioned olivye ham cucumbers peas peppers

    Olivier Salad

    A favorite throughout Eastern Europe and beyond for more than 150 years, Olivier Salad is a winning combination of flavors and textures and is perfect for everything from a casual picnic to an elegant dinner party!

    Prep Time 20 minutes

    Cook Time 5 minutes

    Total Time 25 minutes

    Course Appetizer, Salad, Side Dish

    Cuisine Eastern European, Russian

    Servings 10

    Calories 344 kcal

    • For the Salad:
    • 2 pounds Yukon Gold potatoes , or other yellow potato variety (these hold their shape and won’t become mushy like Russets)
    • 3 large carrots
    • 1 small yellow onion , can use sweet onion if preferred
    • 1 1/2 cups peas , canned (15 ounces, rinsed and drained), frozen (thawed and drained) or fresh (cooked)
    • 1 pound smoked ham , cut into 1/2 inch cubes (can substitute rotisserie chicken or European bologna if preferred)
    • 4-5 hard-boiled eggs , diced
    • 2/3 cup diced dill pickles (about 3-4 pickles) , for best flavor strongly recommend using European/German pickles (check World Market, some Walmart locations)
    • 2 tablespoons capers , rinsed and drained
    • 1/3 cup sweet corn or diced yellow bell pepper , optional
    • For the Dressing:
    • 1 cup good mayonnaise
    • 1/4 cup sour cream , can substitute Greek yogurt if preferred
    • 2 green onions/scallions , chopped (or equivalent chives)
    • 1-2 tablespoons chopped fresh dill or parsley , plus some sprigs for garnish
    • 1 tablespoon Dijon mustard
    • 1 1/2 teaspoons Worcestershire sauce
    • 1 1/2 teaspoons kosher salt
    • 1/2 teaspoon freshly ground black pepper
    • 1/2 teaspoon sugar
    • Peel and dice the potatoes into 1/2 inch cubes. Peel and dice the carrots into 1/4 inch cubes. Boil them together until cooked and tender but not mushy, 3-5 minutes. Drain and let cool.

    • Combine the dressing ingredients in a bowl and stir to combine. Add more salt, pepper and sugar to taste.

    • Place all of the salad ingredients in a large bowl, pour over the dressing, and stir to thoroughly combine. Cover and chill for at least an hour before serving.Olivier Salad will keep in the fridge for 3-4 days.

    Make Ahead:  The ingredients can all be prepped a day in advance but if you’re making this ahead of time, ideally wait until a couple of hours or so before serving to add the dressing to the salad. 

    Calories: 344kcalCarbohydrates: 23gProtein: 14gFat: 22gSaturated Fat: 4gPolyunsaturated Fat: 11gMonounsaturated Fat: 6gCholesterol: 109mgSodium: 1238mgPotassium: 697mgFiber: 4gSugar: 4gVitamin A: 3429IUVitamin C: 29mgCalcium: 57mgIron: 2mg

    Keyword Olivier Salad, Russian Potato Salad, Russian Salad


    kimberly killebrew the daring gourmet

    Hi, I’m Kimberly Killebrew and welcome to Daring Gourmet where you’ll find delicious originals, revitalized classics, and simply downright good eats from around the world! Originally from Germany, later raised in England, world-traveled, and now living in the U.S., from my globally-influenced kitchen I invite you to tour the world through your taste buds!

    Read more about me…


    Source link

  • Gluten Free Cocktail Recipe for Cozy Nights

    Gluten Free Cocktail Recipe for Cozy Nights


    As spring teases us with sunny afternoons and cool, lingering nights, there’s something undeniably comforting about wrapping your hands around a warm gluten-free cocktail at the end of the day. Enter the Barenjager Honey Bourbon Hot Toddy—a soothing, gently spiced nightcap that’s perfect for those in-between-season evenings.

    Hot-Toddy-Ingredients

    Made with Barenjager Honey Bourbon, this toddy brings together the cozy heat of bourbon with the natural sweetness of honey in one smooth sip. A splash of fresh lemon juice and warming spices like clove and star anise add depth and brightness, making every mug feel like a gentle hug.

    It’s more than just a drink—it’s a ritual. Whether you’re curled up with a book, winding down after a long day, or sharing a quiet moment with someone you love, this toddy sets the mood for rest and relaxation. The scent alone—steamy citrus and aromatic spice—feels like spring easing winter out the door.

    So when the chill lingers just a little too long, reach for this warming classic. It’s the perfect companion for a slow, cozy spring night.

    Cheers!

    Honey-Bourbon-Hot-Toddy-Recipe

    Barenjager Honey Bourbon Hot Toddy

    Servings: 2

    Calories: 136kcal

    Author: Gluten Free & More

    Nutrition Facts

    Barenjager Honey Bourbon Hot Toddy

    Amount Per Serving

    Calories 136
    Calories from Fat 9

    % Daily Value*

    Fat 1g2%

    Saturated Fat 0.1g1%

    Polyunsaturated Fat 0.2g

    Monounsaturated Fat 0.1g

    Sodium 13mg1%

    Potassium 176mg5%

    Carbohydrates 11g4%

    Fiber 3g12%

    Sugar 3g3%

    Protein 1g2%

    Vitamin A 28IU1%

    Vitamin C 59mg72%

    Calcium 44mg4%

    Iron 1mg6%

    * Percent Daily Values are based on a 2000 calorie diet.

    Disclaimer: All nutrition facts on Gluten Free & More are meant only as a guide and may differ depending on product brands used or ingredient substitutions. Some errors may occur, so you are encouraged to confirm the recipe’s ingredient and nutrition suitability for your own diet.

    Have you tried this recipe? Give it a star rating and let us know your thoughts in the Ratings & Reviews section below.


    Source link

  • Sheet Pan Lemon Honey Garlic Chicken

    Sheet Pan Lemon Honey Garlic Chicken


    This post may contain affiliate links. Please read my disclosure policy.

    Sheet Pan Lemon Honey Garlic Chicken — juicy strips of chicken, caramelized peppers, sticky-sweet honey garlic sauce… and only one pan to clean. Weeknight win.

    sheet pan lemon honey garlic chicken on a white serving platter.

    There are days I feel like cooking… and then there are days I open the fridge, see chicken, and immediately regret not ordering takeout. This recipe was born on one of those nights. One pan. Zero thinking. Big flavor. And almost no cleanup.

    It’s sweet from the honey, garlicky in the best way, a little tangy from the lemon, and just fancy enough that you can sprinkle feta on top and pretend you planned it. I’ve made it more times than I can count lately, mostly when I’m too tired to be impressive, but still want dinner to taste like I tried.

    sheet pan lemon honey garlic chicken on a sheet pan.
    ingredients needed to make sheet pan lemon honey garlic chicken.
    • Cut the chicken into strips. Yes, strips. Not chunks, not cubes. Strips cook fast, soak up more sauce, and give you those golden edges we love. Bonus: they look like you did something fancy.
    • Use what you’ve got. No red bell pepper? Use yellow, green, or whatever’s hiding in the veggie drawer. This recipe isn’t precious, it’s flexible. Mushrooms, zucchini, even thin green beans all work.
    • Fresh lemon > bottled. I know you’ve got that plastic lemon in the fridge door. Put it down. The zest alone is worth using a real lemon. It makes the whole dish pop.
    • Don’t overcrowd the pan. If everything’s piled on top of each other, you’ll end up steaming the chicken instead of roasting it. Give it space to crisp up and caramelize. No one likes soggy sheet pan dinners.
    • Feta on top = salty magic. Don’t mix it in before baking. Crumble it over at the end so it stays tangy and creamy. You’re welcome.

    Here’s how I make it:

    Crank it to 400°F (200°C) and line a baking sheet with parchment paper so cleanup doesn’t ruin your night.

    process shots showing how to make lemon honey garlic chicken on a sheet pan.

    In a big bowl, whisk together the olive oil, honey, minced garlic, lemon zest, Italian seasoning, salt, and pepper. It should smell like you know what you’re doing, because you do. Add the chicken strips and bell peppers to the bowl. Give everything a good toss so it’s coated in that glossy, sticky marinade. You want every bite to taste like flavor, not just the first one.

    process shots showing how to make lemon honey garlic chicken on a sheet pan.

    Spread it all out on your sheet pan. No overlapping, this isn’t a chicken pile. Bake for 20–25 minutes, or until the chicken hits 165°F (75°C) and the edges start to caramelize. That’s when the magic happens.

    process shots showing how to make lemon honey garlic chicken on a sheet pan.

    Let it sit for 5 minutes, it keeps the chicken juicy and gives you a second to feel proud of yourself. Then crumble feta over the top and serve it with lemon wedges. Boom. Dinner.

    This one’s become a regular in our dinner rotation, because it just works. Easy, quick, and that sweet lemon-garlic glaze? Still gets me every time. If it didn’t hold up, it wouldn’t be on the blog. Simple as that.

    Frequently Asked Questions

    Can I use chicken thighs instead of breasts?

    Absolutely. Boneless, skinless thighs work great and stay super juicy. Just cut them into strips like the recipe calls for and you’re good to go.

    What vegetables can I swap in?

    Whatever you’ve got. Zucchini, mushrooms, onions, broccoli, cherry tomatoes, this is a clean-out-the-fridge kind of dish. Just make sure everything’s cut to cook evenly with the chicken.

    I don’t like feta. Can I skip it?

    I mean… you can, but I’ll silently judge you. Feta adds that salty, creamy, tangy magic that pulls the whole thing together. But hey, if you must, swap in goat cheese or Parmesan. Just know the feta is doing a lot of the heavy lifting here.

    Can I make it ahead of time?

    Totally. You can mix the marinade and chicken the night before and keep it in the fridge. Just dump it all on a sheet pan and bake when you’re ready.

    How spicy is it?

    Not at all, as written, it’s kid-and spice-wimp friendly. Want heat? Add red pepper flakes or a drizzle of chili oil.

    lemon honey garlic chicken with rice on a white plate.

    Storage + Reheating

    Fridge:

    Leftovers? Lucky you. Store them in an airtight container for up to 3 days.

    Freezer:

    Yes, you can freeze it. Just let it cool completely, then stash it in a freezer-safe container. It’ll keep for up to 3 months, just don’t forget about it back there.

    To Reheat:

    Microwave works fine for a quick fix, but if you want that roasted edge back? Pop it in a 350°F (175°C) oven for 10–12 minutes. Add a fresh squeeze of lemon and pretend it’s Day 1.

    sheet pan lemon honey garlic chicken on a sheet pan.

    Try These Sheet Pan Dinners Next

    sheet pan lemon honey garlic chicken on a white serving platter.

    Sheet Pan Lemon Honey Garlic Chicken

    Prep 15 minutes

    Cook 25 minutes

    Total 40 minutes

    Sweet, sticky, zesty, and ready in under 40, this sheet pan lemon honey garlic chicken is a weeknight lifesaver. Juicy chicken strips roasted with red peppers in a garlicky honey-lemon glaze, finished with a salty hit of feta. One pan, big flavor, almost no cleanup.

    Instructions 

    • Preheat the oven to 400°F (200°C) and line a baking sheet with parchment paper.

    • In a large bowl, whisk together olive oil, honey, minced garlic, lemon zest, Italian seasoning, salt, and black pepper until well combined.

    • Add the chicken breasts and peppers to the bowl and toss everything well, making sure to coat everything evenly.

    • Spread the chicken and veggies on the prepared baking sheet. Transfer the baking sheet to the oven and bake for 20-25 minutes or until the chicken is cooked through and the internal temperature reaches 165°F (75°C).

    • Once the chicken is done, remove the baking sheet from the oven and let it rest for 5 minutes.

    • Sprinkle crumbled feta cheese over the top of the chicken and red bell peppers.

    • Serve the chicken and red bell peppers with lemon wedges.

    Notes

    1. Chicken strips cook faster and stay juicier. Just make sure they’re roughly the same size so everything roasts evenly.
    2. Don’t crowd the pan. Overlapping chicken = steaming, not roasting. Give everything space to caramelize.
    3. Use fresh lemon. The zest and juice make the whole thing sing, skip the bottled stuff.
    4. Add more veggies. Mushrooms, zucchini, red onion, whatever’s in the fridge works.
    5. Feta is not optional. OK, technically it is… but I love it so much I almost put it in bold. That salty finish? It makes the dish.

    Nutrition Information

    Serving: 1servingCalories: 323kcal (16%)Carbohydrates: 17g (6%)Protein: 27g (54%)Fat: 17g (26%)Saturated Fat: 4g (25%)Polyunsaturated Fat: 2gMonounsaturated Fat: 9gTrans Fat: 0.01gCholesterol: 85mg (28%)Sodium: 586mg (25%)Potassium: 541mg (15%)Fiber: 1g (4%)Sugar: 15g (17%)Vitamin A: 1388IU (28%)Vitamin C: 57mg (69%)Calcium: 94mg (9%)Iron: 1mg (6%)

    Notice: Nutrition is auto-calculated for your convenience. Where relevant, we recommend using your own nutrition calculations.

    sheet pan lemon honey garlic chicken on a white serving platter.

    Did You Make This?

    We love seeing what you made! Tag us on Instagram at @jocooks or hashtag #jocooks so we can see your creations!

    This post was originally published in 2023 and updated in May 2025 with fresh tips, improved content, and even more flavor.


    [ad_2]
    Source link

  • Friday Faves : May 2, 2025

    Friday Faves : May 2, 2025


    Hello, hello and welcome to Friday Faves, May edition.

    Fish tacos foodiecrush.com

    This week I made a preview meal of next Monday’s Cinco de Mayo — my husband’s favorite blackened fish tacos. I pulled my wild Alaskan pollack from the freezer (I’ve really enjoyed this wild fish delivery box), dusted it with blackening spices and cooked it in mere minutes. I topped the tacos with Mexican coleslaw (I made it with broccoli slaw) and served my cilantro lime rice and refried beans on the side. Perfection on a plate — and healthy too!

    Did you know 90% of schools in England have banned cell phones? Here’s where schools in the U.S. stand on bans. What do you think?

    You’ll want this cookbook if you’re a fan of Mediterranean cooking (like me). It’s full of favorite basics with plenty of recipes with twists, too. I’m excited to start cooking from it. (and it’s 40% off.)

    Calling all ice cream lovers … Check out this soft serve ice cream maker that blends froyo, milkshakes, and more. Or, check out this less spendy ice cream maker if you’re okay with scooping yourself. (and if you’re a Costco member, it’s $20 cheaper!)

    This salad is a splurge, but what a reason to splurge! And well worth it IMO! It looks fabulous!

    Looking for a salad with ALL the flavors and colors? Here it is.

    If you love an extra, extra chewy brownie, this is a recipe you MUST try. They look so damn good!

    This cucumber salad calls for English cucumbers, but thin-skinned Persian cucumbers would work so well too. I’m def adding this one to my rolodex.

    Throw back this boozy lemonade and watch the horses circle tomorrow’s Kentucky Derby.

    Pork tenderloin is such a good choice when you’re cooking on a budget and this recipe proves it.

    There are never enough delicious bean salads like this one to try, and I will make it my mission to do so.

    I am such a fan of crispy chicken breasts and this crispy chick with dill is one I am fan-girling over.

    I’ll be sharing my favorite turkey burger soon, but until then, this flavor-bombed turkey burger will be taking up space in my brain.

    So many flavors and colors in this crunchy salad.

    Break out the sheetpan to make these ultra-easy shrimp fajitas.

    Thin lemon cookies. Say no more. Just make.

    I’m going to Hawaii in July with my college besties, and I can’t wait for them to try this iconic Hawaiian comfort food while we’re there. It’s my husband’s favorite.

    And, they HAVE to try this classic sweet and savory Hawaiian chicken dish.

    A big old skillet is all you need to make this 30-minute Mexican meal and eat it by the spoonful.

    It’s time to make a batch of my homemade pickles, but I won’t be processing them to save for later. Instead, I’ll just refrigerate them so they’ll stay good for a month or two. That’s why I’m going to make them in this giant mason jar, so it’s one big jar instead of a couple taking up room in the fridge.

    My summer uniform will be my favorite tank top (it’s cheap, lasts forever, and comes in every color) paired with skirts, and this cotton skirt with side ruching is so good. Enter FRIEND at checkout and get 30% off.

    And because I will be wearing the tanks non-stop, I’d better get on this arm workout and lose the flab! No equipment needed! Except for willpower. UGH.

    I had to send this list of Korean beauty products to my daughter because we are both obsessed with K-beauty.

    If you looked at the interior pics of this home, you’d NEVER guess it’s not on land, it’s a houseboat!!!! Whoa. I’d live here.

    10-day spring cleaning plan. Let’s go.

    I saw a review of this dustbuster, and they were right, the swivel head is a game-changer.

    If you’re moving into a new home/apartment/abode, think about following the 30-60-90 day rule to make it more manageable to create your new home.

    That’s it for this week. Have a fantastic weekend, get outside, and cook some good food!

    We send good emails. Subscribe to FoodieCrush and have each post plus exclusive content only for our subscribers delivered straight to your e-mail box.

    Follow me on InstagramFacebook, and Pinterest for more FoodieCrush inspiration.

    As always, thank you for reading and supporting companies I partner with, which allows me to create more unique content and recipes for you. There may be affiliate links in this post of which I receive a small commission. All opinions are always my own.


    Source link

  • Ground Beef Pasta Sauce – Spend With Pennies

    Ground Beef Pasta Sauce – Spend With Pennies


    Rich, hearty, and packed with flavor—this homemade pasta sauce recipe would make a Nonna proud. A beefy sauce that is slow-simmered for a rich, savory taste. Serve it over pasta or bake it into lasagna.

    Homemade Pasta Sauce on spaghetti
    • Flavor: This sauce has a savory flavor with hints of herbs and a fresh tomato taste.
    • Skill level: Making pasta sauce is a great beginner recipe, with simple steps but it has so much flavor that it’s perfect for anyone to make!
    • Technique: I include a spice mix that I add to the meat, which is similar to the one I use in my homemade Italian sausage. It’s easy and adds an extra layer of flavor.
    • Budget tip: Add leftover veggies in Step 3 for an extra boost of flavor and nutrients.
    • Prep ahead: Pasta sauce freezes beautifully so double or triple the recipe for future meals.
    spices , salt , parsley , beef , tomato sauce , tomatoes , sugar , basil , seasoning , bay leaves , pepper , onion and garlic with labels to make Homemade Pasta Sauce

    Ingredient Tips For Pasta Sauce

    • Meat: I use ground beef in this recipe and mix in my own seasonings. Half of the meat can be replaced with Italian sausage.
    • Tomatoes: Tomatoes are the base of this sauce, I recommend a high-quality brand, I love San Marzano style tomatoes.
    • Sugar: A pinch sugar will balance the acidity from the tomatoes. Or, instead of sugar, add half a grated carrot to the sauce.
    • Seasonings: Dried Italian seasonings are added to the sauce in addition to the meat seasoning above. If adding fresh herbs, they should be added at the end of cooking so their delicate flavor doesn’t get cooked out.

    Variations: Add sauteed mushrooms and onions in Step 3 or some shredded zucchini, chopped spinach, or kale for an extra bump in nutrition.

    The great thing about this ground beef pasta sauce is that it’s so versatile and having some on hand for last-minute meals is a weeknight timesaver.

    Besides topping a pile of spaghetti, use pasta sauce for meatball subs, lasagna, mix it with rice for stuffed peppers, or create a casserole with veggies and cheese.

    Storing Leftovers

    Leftover homemade pasta sauce can be kept in the refrigerator in a covered container for up to 4 days. Freeze portions in zippered bags for up to 3 months and thaw overnight in the refrigerator or reheat from frozen on medium heat on the stovetop.

    Did you love this Homemade Pasta Sauce? Leave us a rating and a comment below!

    image of Everyday Comfort cookbook by Holly Nilsson of Spend With Pennies plus text
    Homemade Pasta Sauce in the pot

    4.99 from 58 votes↑ Click stars to rate now!
    Or to leave a comment, click here!

    Ground Beef Pasta Sauce

    This homemade pasta sauce is a rich, savory blend of ground meat, tomatoes, fresh herbs, and spices, simmered to perfection for a hearty meal.

    Prep Time 20 minutes

    Cook Time 1 hour 15 minutes

    Total Time 1 hour 35 minutes

    buy hollys book

    Prevent your screen from going dark

    • In a medium bowl, combine ground beef with sage, fennel seeds, thyme, pepper, and allspice until well mixed.

    • Heat a large pot or Dutch oven over medium-high heat. Add the ground beef mixture, onion, and garlic, breaking up the meat with a spoon. Cook until browned, drain excess fat if needed.

    • Add the canned tomatoes with the liquid, tomato sauce, green bell pepper, water, Italian seasoning, bay leaves, sugar, and salt to the pot. Stir well to combine.

    • Bring the mixture to a boil. Reduce the heat and simmer uncovered for 1 hour or until the sauce has reached your desired consistency. Stir occasionally.

    • Once the sauce has thickened, stir in the chopped parsley and basil.

    • Remove bay leaves, taste and season with additional salt and pepper. Serve over hot pasta.

    Meat seasoning: I add a seasoning similar to sausage seasoning into the meat. If preferred, half of the beef and be replaced with Italian sausage and you can skip the meat seasoning mixture.
    Tomatoes: While any type of canned tomatoes works well in this recipe, I love San Marzano tomatoes for their bright flavor. If using whole tomatoes, break them up with your hands as you add them to the sauce.  
    Leftover pasta sauce can be stored in a covered container in the fridge for up to 4 days. Freeze cooled portions in zippered bags for up to 3 months. Thaw in the fridge or reheat from frozen on the stovetop over medium heat. 
     

    Calories: 130 | Carbohydrates: 8g | Protein: 21g | Fat: 1g | Cholesterol: 46mg | Sodium: 340mg | Potassium: 521mg | Fiber: 2g | Sugar: 3g | Vitamin A: 415IU | Vitamin C: 26mg | Calcium: 61mg | Iron: 2.3mg

    Nutrition information provided is an estimate and will vary based on cooking methods and brands of ingredients used.

    Course Main Course, Pasta, Sauce
    Cuisine American, Italian
    plated Homemade Pasta Sauce on spaghetti with a title
    fresh and flavorful Homemade Pasta Sauce in the pot with writing
    Homemade Pasta Sauce on pasta with writing
    Homemade Pasta Sauce in the pot and plated on pasta with writing


    Source link

  • How Long Can You Keep Fresh and Cooked Fish in the Fridge? • Steamy Kitchen Recipes Giveaways

    How Long Can You Keep Fresh and Cooked Fish in the Fridge? • Steamy Kitchen Recipes Giveaways


    This post may contain affiliate links. Please read our
    disclosure policy
    for more information.

    When it comes to storing fish, whether it’s fresh off the hook or leftover from last night’s dinner, knowing how long it can safely stay in your refrigerator or freezer is crucial to avoid the unpleasant consequences of spoiled seafood. 

    From raw to cooked, from fridge to freezer, we’ll cover the key timeframes for optimal storage and share our Steamy Kitchen knowledge on how to extend the shelf life of your seafood.

    Today, we are tackling the factors that influence how long fish can remain fresh, signs to look out for when it might be time to say goodbye to your fish, and innovative ways to maximize its shelf life. Let’s dive in, shall we?

    Chinese New Year whole fish

    The Short Answer

    You need to know, and you need to know NOW. How long can fish stay fresh in the fridge? (Drumroll, please…) Raw fish and seafood can chill out in your fridge for 1 to 2 days before it’s begging to be cooked or frozen, while cooked fish can enjoy a slightly extended stay of 3 to 4 days. Commercially-canned fish, like tuna, can last up to 5 years in your pantry, while home-canned fish will only last 1 year. There are a few caveats here, which is what we’re about to get into. 

    Ziploc baggies with fish filets


    Factors that Affect the Shelf Life of Fish

    There are a world of factors that can either extend or reduce the shelf life of fish:

    • The Quality of the Fish: Did your fish make a pit stop at the grocery store before it got to you or did you procure it at a fish market? Store-bought fish may have been on ice long before you laid eyes on it, whereas fresh-caught fish from a local fishmonger is, well, as fresh as it gets. The fresher it was to begin with, the longer it will last after being cooked.
    • The Coldness of Your Fridge: Fish should be kept in the fridge at 40°F or lower, so make sure your refrigerator temperature is at the right setting.
    • Type of Fish: Non-enzymatic spoilage happens due to the oxidation of fish fat. That means fatty fish like salmon or mackerel tend to spoil faster than leaner types of fish due to their fat content. 
    • Storage: How you store your sea bounty plays a big role in its freshness. Fish that is tightly wrapped in plastic wrap and nestled in the coldest part of the fridge (usually the bottom shelf) will last longer than unwrapped fish, due to the bacteria present in the air.
    • What About Room Temperature?: Fish left out for more than 2 hours is basically an open invitation for bacteria to invade. Any temp between 41°F and 135°F is considered the danger zone, so never leave any kind of fish at room temp for longer than 2 hours.

    Signs That Your Fish Has Gone Bad

    What happens if you eat bad fish? Usually, within a hour, you will experience a multitude of symptoms from what is known as scombroid poisoning. Some of those are more obvious, like nausea, vomiting and diarrhea, but there are many symptoms you might not expect like dizziness, flushing, itching, a rash, sweating and so on. This is why fish is one of those foods you have to be VERY careful about. Because nobody wants to feel that way, here are some ways to tell if your seafood has spoiled:

    The Sniff Test: Fresh fish smells like the sea–clean and briny. If your fish smells pungent, fishy, or has an ammonia-like odor, it’s time to bid it farewell. 

    The Touch Test: Good fish should feel firm, not slimy. If touching your fish feels like a handshake with a jellyfish, it’s a no-go.

    The Sight Test: If you see any sign of mold or discoloration, your fish is definitely past its prime. 

    BUT! Not all improperly stored or expired fish present these obvious indicators, so you can’t trust these alone. Make sure you know where your fish came from, where it’s been stored, and for how long. The mantra here is simple: When in doubt, throw it out. It’s not worth the risk of food poisoning!


    Chinese New Year steamed fish

    Tips on How to Maximize the Shelf Life of Fish

    Here are some great ways to ensure your fish stays as fresh as possible:

    • Fridge Storage: The best way to store a whole fish (or fish fillets) is to wrap it tightly in plastic wrap or aluminum foil to ward off bacterial growth, and keep it at the bottom of the refrigerator (the last shelf) for no more than 48 hours. If it’s already been cooked, it should keep for about 3 – 4 days.
    • Freezer Storage: For those who revere their freezer for its time-stopping abilities, the freezing process is great for fresh seafood! According to the USDA, frozen fish and shellfish of all kinds are safe in the freezer indefinitely. However, that doesn’t mean the flavor and texture will survive forever. For the best quality, you should enjoy frozen cooked fish within 3 months, frozen raw fish within 3 to 8 months, and shellfish within 3 to 12 months. Wrapping your fish tightly is the key to avoiding freezer burn. Using a freezer bag is good, but using a vacuum sealer is even better. If neither work for you, wrap your fish tightly in plastic wrap and then in aluminum foil. When it’s time to thaw, do so in the refrigerator or in cold water, changing the water every 30 minutes to maintain a safe temperature. Cook thawed fish within 1-2 days.
    • Home-Canning: If you want to keep your fish around for about a year without using your fridge, your only option is to can it. But first, you’ll need a pressure canner. We’re not the foremost authority on canning, so if that’s something you’re interested in, we suggest checking out this canning tutorial from Sharon of Simply Canning.
    • Label it!: For the best results, label your fish with the freezing (or canned) date so you can make sure to use it within the optimal time frame.


    Make Leftover Seafood into Fish Cakes

    More Tips:

    Got leftover fish? Transform it into fish cakes, a hearty fish chowder, or flake it over a salad for a yummy protein boost.

    Also, did you know that the American Heart Association recommends eating fish at least two times per week? If you’re looking to maintain a healthy diet, consider oily fishes like salmon, tuna and mackerel, because they’re rich in omega-3 fatty acids.


    Fishy FAQs

    Can I refreeze fish that has been thawed?

    It is safe to refreeze fish that has been thawed in the refrigerator, as long as it hasn’t been left in the fridge for more than 2 days. You should note, however, that refreezing may affect the texture and quality of the fish.

    How can I tell if frozen fish is still good?

    Check for ice crystals and freezer burn. If the fish has been frozen too long, it may have lost some of its quality. If the fish smells and looks good once thawed, the flavor and texture are likely okay.

    What’s the best way to defrost fish quickly?

    The safest method is in the refrigerator, but if you need a quicker method, you can use cold water. Place the fish in a sealed bag and submerge it in cold water. Make sure you change the water every 30 minutes until it’s thawed. Never, ever defrost fish at room temperature.


    Lemon caper fish

    You’re a Fish Master!

    Now you have all it takes to go forth and enjoy fish in the safest way.

    But also, we’d love to hear from you! Do you have any fishy tales to tell? Maybe a favorite fish recipe? Let us know in the comments below!


    Want More Fridge Tips? 

    This post may contain affiliate links. Please read our
    disclosure policy
    for more information.

    Did you try this recipe? Please leave a star rating in the recipe card below and leave a review in the comment section! I always appreciate your feedback and I know other readers do, too!

    Stay in touch with me in our Facebook group, on Pinterest or follow me on Instagram! Sign up for my email list, too where we chat all things recipes, tips, giveaways, and more!


    Source link

  • Easter Basket Ideas for Every Age

    Easter Basket Ideas for Every Age


    Easter is just around the corner, and in my childhood home, that meant two things: a big family gathering and my absolute favorite part—Easter baskets! I still remember the creative spots my parents would hide them (i.e. the washing machine), which I still think is a clever hiding spot.

    But let’s be honest—between holiday decorations, food, and family plans, who has time to run from store to store searching for the perfect Easter basket gifts? That’s why we did some digging for you and found some of the best Amazon finds for every age group. Whether you’re putting together a basket for a little one, a teen, or even an adult (because why should kids have all the fun?), we’ve got you covered!

    So grab your coffee, get comfy, and start Hunting!

    Babies (0-2 years)

    For the tiniest members of the family, Easter baskets should be all about sensory play, teething relief, and cozy comfort. Here are some adorable picks:

    Easter-Affiliate-1-

    Easter-Affiliate-2

    Easter-Affiliate-3

    • Activity Crinkle Book – A baby’s first book with textures, a teething corner, and even a baby-safe mirror.

    Easter-Affiliate-4

    • Easter Silicone Teething Toys – A must-have for every diaper bag! These BPA-free, food-grade silicone teethers are soothing and easy for little hands to grip.

    Easter-Affiliate-5

    • Plush Musical Chick Toy – A cuddly, multisensory toy that encourages fine motor skills and keeps babies entertained.

    Toddlers (3-5 years)

    This age group thrives on creativity and hands-on fun. Keep their little hands and minds busy with these:

    Easter-Affiliate-6

    Easter-Affiliate-7

    • Easter Jokes Book – A lift-the-flap activity book filled with funny jokes for endless giggles.

    Easter-Affiliate-8

    • Easter Bubble Bath Bombs– Made with natural ingredients and featuring surprise toys inside, these make bath time extra fun!

    Easter-Affiliate-9

    Easter-Affiliate-10

    • Jump Rope – A timeless, fun way to encourage movement and outdoor play.

    Kids (6-9 years)

    Easter baskets for this age group should be filled with engaging, interactive gifts that inspire creativity and adventure:

    Easter-Affiliate-11    

    Easter-Affiliate-12

    • Easter Mad Libs – A hilarious, fill-in-the-blank word game perfect for solo play or family fun.

    Easter-Affiliate-13

    Easter-Affiliate-14

    Easter-Affiliate-15

    • Card Game – A compact, entertaining game that’s easy to bring on the go.

    Tweens (10-12 years)

    Tweens are all about cool, functional, and trendy items. Here are some basket-worthy ideas:

    Easter-Affiliate-16

    Easter-Affiliate-17

    • Fidget Pen – A multi-functional pen that doubles as a stress reliever and school essential.

    Easter-Affiliate-18

    Easter-Affiliate-19

    Easter-Affiliate-20

    • LED Bike Lights – Keep their rides safe and cool with these glowing wheel lights.

    Teens (13-17 years)

    Let’s face it—teens can be tricky to shop for. But these gifts? Guaranteed hits:

    Easter-Affiliate-21

    Easter-Affiliate-22

    Easter-Affiliate-23

    Easter-Affiliate-24

    • SLAMMO Game Set – A fun, active game that’s great for the beach, backyard, or park.

    Easter-Affiliate-25

    • Pimple Patches – A skincare essential that every teen will secretly (or not-so-secretly) appreciate.

    Adults (18+ years)

    Because grown-ups deserve Easter baskets too! Surprise them with these practical yet fun gifts:

    Easter-Affiliate-26

    Easter-Affiliate-27

    • Apple AirTag Pack – No more losing keys, wallets, or bags—these handy trackers are a game-changer.

    Easter-Affiliate-28

    Easter-Affiliate-29

    • Outdoor Blanket – A large, waterproof blanket for beach days, camping, or outdoor concerts.

    Easter-Affiliate-30

    • Self-Cleaning Water Bottle – Uses UV tech to keep water clean and fresh, so they never have to worry about a dirty bottle again.

    Final Thoughts

    No matter what age, Easter baskets are a fun way to make the holiday extra special. Whether you’re putting together a basket for a baby, a teen, or even yourself, the best gifts are the ones that bring a little joy. So go ahead—pick your favorites, add a personal touch, and make this Easter one to remember.

    Happy Easter!


    Source link